Create Auto-Delete Rule from the Email
First, the Rules function is only available on Outlook Windows/Mac app and Outlook Web. In this post, I will mention the steps for the Outlook web version.
Step 1: Open Outlook web and then sign in to your account.
Step 2: Select an irrelevant email and then open it.
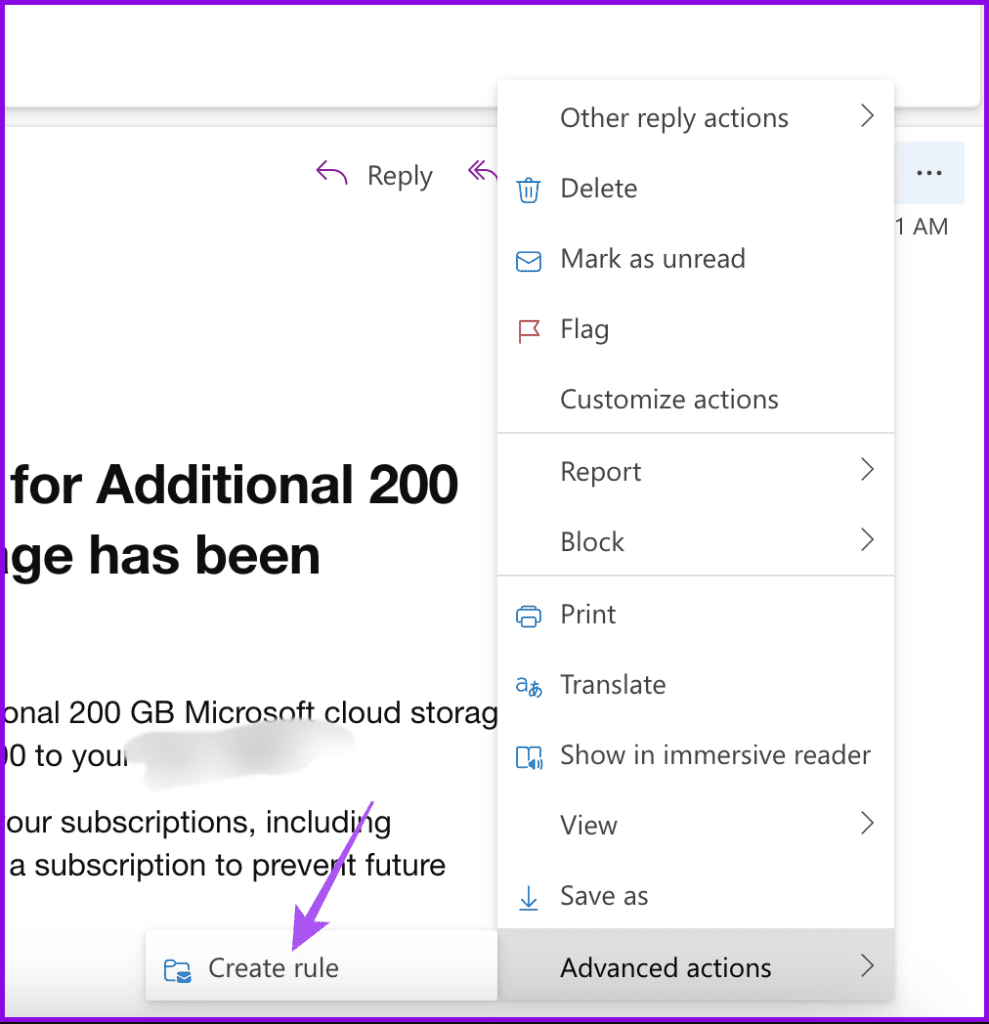
Step 3: Tap on the three-dot menu and select Create Rule.
Step 4: Create a rule to move the messages from the sender to Deleted Items.

After that, all the emails from the sender will move to the deleted inbox directly. You can still access them from the Deleted Items menu in the folders.
Create Auto-Delete Rules from Outlook Settings
The scenario above moves all the emails from the sender to deleted items, but what if someone wants to delete emails with certain subjects or certain keywords from the message body.
For example, I don’t want to receive the loan offers, Coronavirus updates, or any other marketing junk from my bank. However, I do want to receive the monthly statement and credit card bill in my mail. So, how to set up such rules? Follow the steps below.
Step 1: Open Outlook web and then head to Settings.
Step 2: View all Outlook settings, and it will pop out the dedicated settings menu.
Step 3: Select the Rules option and then select Add new rule.
Step 4: Give it a name and then add a condition.
Step 5: Add keywords that no longer are relevant to you.

Step 6: Create a rule to move all the emails to the delete folder > Click on Run rule now > Save.
Now, whenever you receive the emails with Loan, EMI, or Important keywords, they will be automatically moved to the delete folder.
Was this helpful?
Last updated on 18 July, 2024
Read Next
 How to Auto-Forward Emails in Outlook
Use Outlook Forwarding Step 1: Navigate to Outlook Web on the desktop browser and sign in using Microsoft account credentials.
How to Auto-Forward Emails in Outlook
Use Outlook Forwarding Step 1: Navigate to Outlook Web on the desktop browser and sign in using Microsoft account credentials.
 How to Fix Emails Stuck in Outbox of Microsoft Outlook
With an estimated 400 million active users, Microsoft Outlook is one of the popular email clients.
How to Fix Emails Stuck in Outbox of Microsoft Outlook
With an estimated 400 million active users, Microsoft Outlook is one of the popular email clients.
 How to Delete Multiple Emails in Outlook on Mobile and Web
How to Delete Multiple Outlook Emails on Mobile Let's first start with how you can mass delete emails from the Microsoft Outlook app on your mobile.
How to Delete Multiple Emails in Outlook on Mobile and Web
How to Delete Multiple Outlook Emails on Mobile Let's first start with how you can mass delete emails from the Microsoft Outlook app on your mobile.
 How to Auto-Delete Emails in Gmail
Method 1: Using Filters Gmail offers filters to manage incoming emails automatically.
How to Auto-Delete Emails in Gmail
Method 1: Using Filters Gmail offers filters to manage incoming emails automatically.
 3 Fixes for Microsoft Outlook Not Receiving Emails on Android
Basic Fixes Check other inboxes: If you have multiple email accounts in the Outlook app, you might have opened the wrong one in the app.
3 Fixes for Microsoft Outlook Not Receiving Emails on Android
Basic Fixes Check other inboxes: If you have multiple email accounts in the Outlook app, you might have opened the wrong one in the app.
 How to Encrypt Emails in Microsoft Outlook
How to Encrypt Email in Microsoft Outlook on Windows 11 With a Microsoft 365 subscription, you can send encrypted emails to your contacts.
How to Encrypt Emails in Microsoft Outlook
How to Encrypt Email in Microsoft Outlook on Windows 11 With a Microsoft 365 subscription, you can send encrypted emails to your contacts.
 How to Translate Emails in Microsoft Outlook
How to Translate an Email Message in Outlook for Desktop In order to translate messages manually in Outlook, you first need to set up your preferred translation language in the
How to Translate Emails in Microsoft Outlook
How to Translate an Email Message in Outlook for Desktop In order to translate messages manually in Outlook, you first need to set up your preferred translation language in the
 How to Send Recurring Emails in Microsoft Outlook
Set up Recurring Emails Using Power Automate The purpose of setting up a recurring email is to ensure the email is sent out automatically during the required period.
How to Send Recurring Emails in Microsoft Outlook
Set up Recurring Emails Using Power Automate The purpose of setting up a recurring email is to ensure the email is sent out automatically during the required period.
The article above may contain affiliate links which help support Guiding Tech. The content remains unbiased and authentic and will never affect our editorial integrity.