Method 1: Eject a USB Drive From System Tray
The easiest way to eject a USB drive on Windows 11 is via the System Tray. For that, click Show hidden icons (up arrow) on the taskbar. Then, locate and right-click on the USB icon in the tray and select Eject [Drive Name].

A notification will appear stating that it is safe to remove the hardware. After that, you can disconnect the USB drive from your PC.
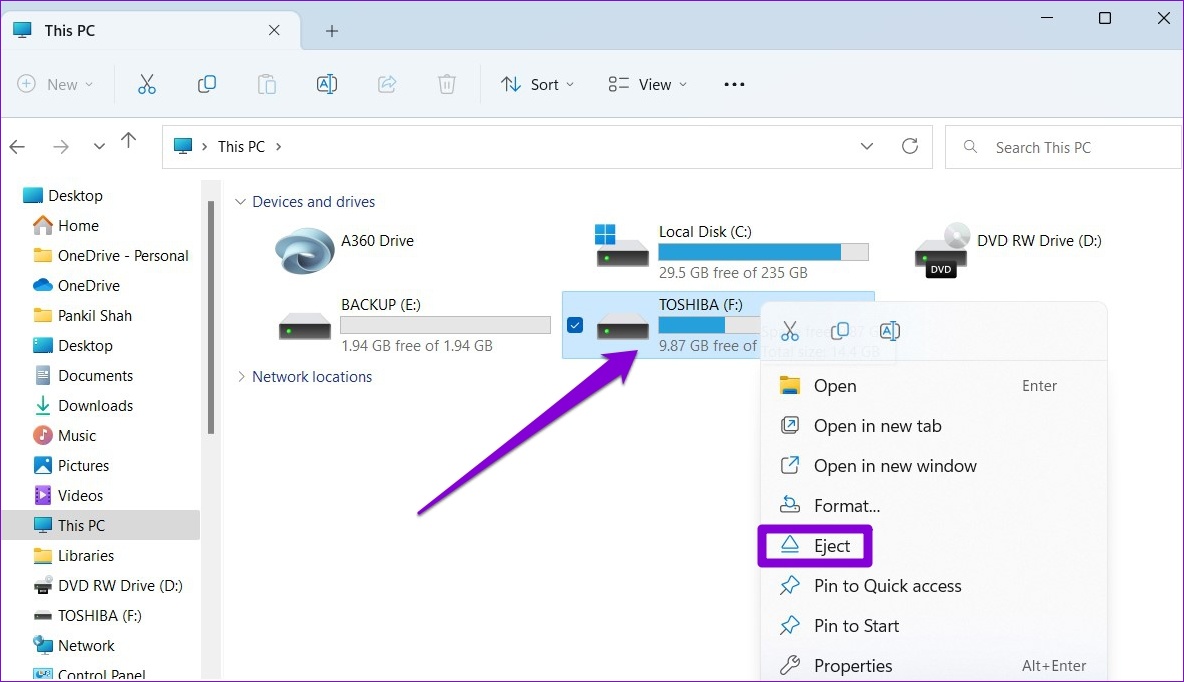
Method 2: Eject a USB Drive From File Explorer
Windows 11 File Explorer displays all the USB drives connected to your system in the Devices and drives section. You can also eject a USB drive from there if you like.
Step 1: Press the Windows key + E to open File Explorer.
Step 2: Use the left pane to navigate to This PC and locate the drive you want to remove under Devices and drives. Then, right-click on your drive and select Eject.
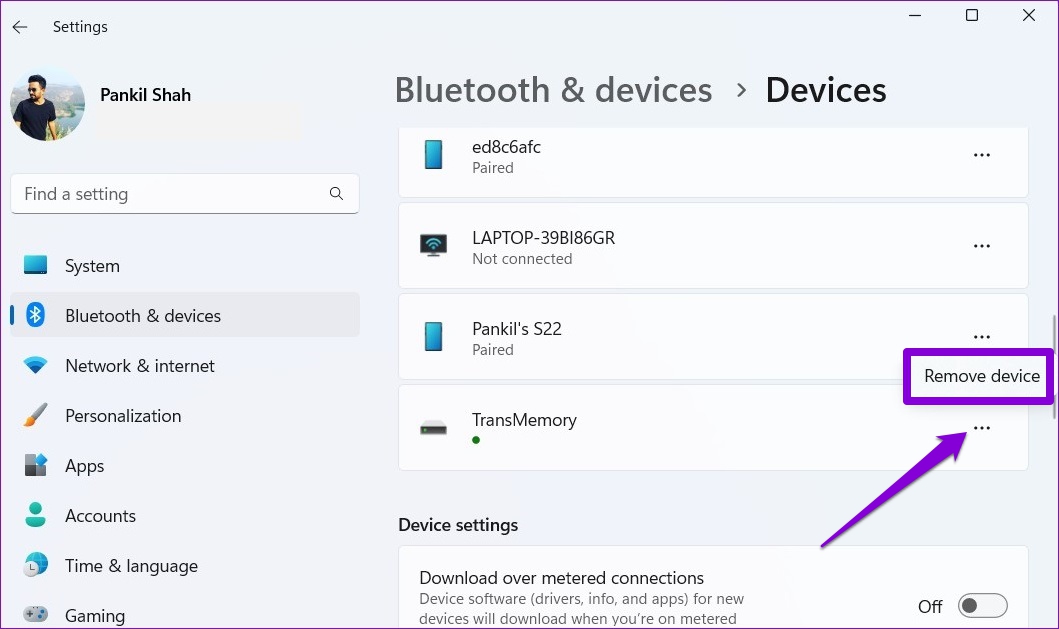
Method 3: Eject a USB Drive Using Settings
The Devices section in the Settings app allows you to view and manage all the hardware devices connected to your system. It also lets you safely eject a USB drive from your Windows 11 PC.
Step 1: Press the Windows key + I to open the Settings app and head to Bluetooth & devices > Devices.

Step 2: Locate your USB drive on the list. Click the three-dot menu icon next to it and select Remove device. Then, select Yes to confirm.
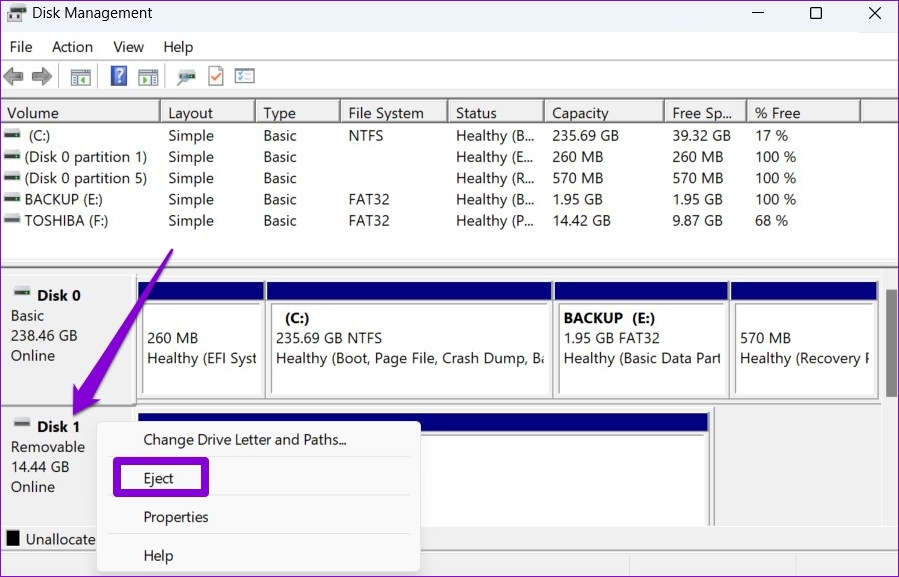
Method 4: Eject a USB Drive Using Disk Management
On Windows 11, you can use the Disk Management tool to manage partitions, format drives, assign drive letters, and more. Besides, it also lets you eject a USB drive from your PC safely.
Step 1: Press the Windows key + R to open the Run dialog box. Type diskmgmt.msc in the text field and press Enter.
Step 2: You’ll see all your drives in the bottom half of the window. Right-click on the drive you want to remove and select Eject.
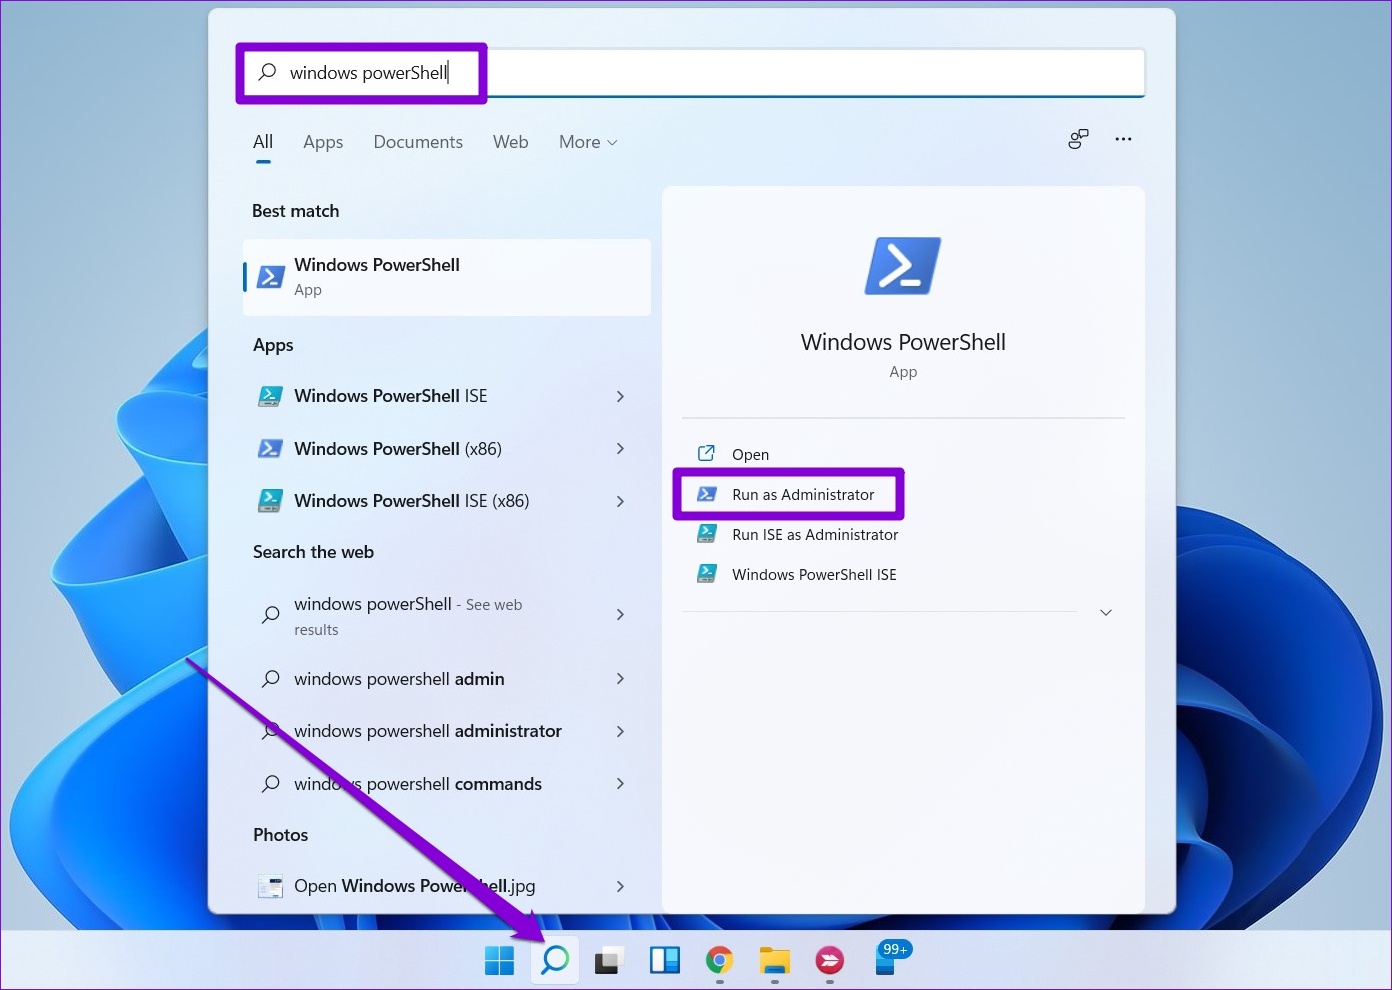
Method 5: Eject a USB Drive Using Windows PowerShell
Windows PowerShell allows you to interact with the operating system via a command-line interface. Here’s how to use it to eject a USB drive.
Step 1: Open the search menu, type Windows PowerShell, and click on Run as Administrator.
Step 2: Run the following commands to view a list of drives connected to your PC:
diskpart
list volume
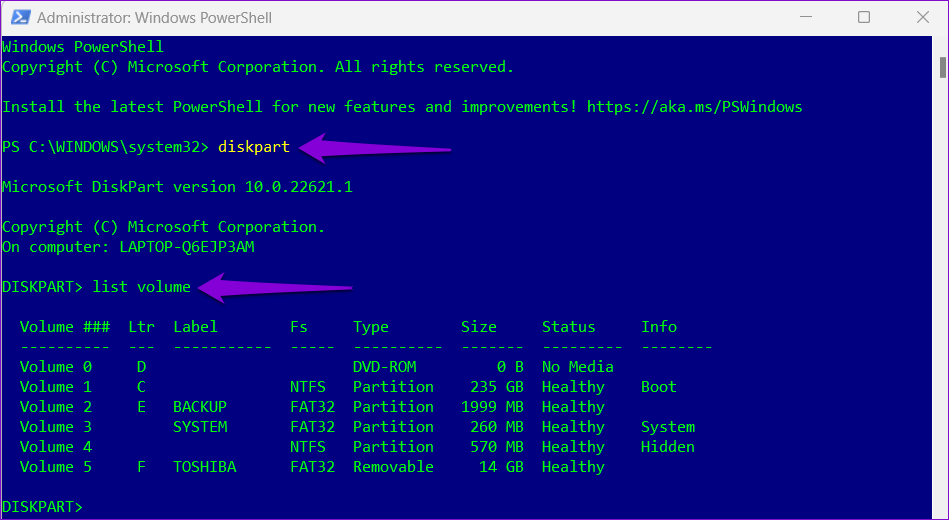
Note down the number of your drive from the first column.
Step 3: Enter the following command to select your USB drive:
select volume N
Replace N in the above command with the volume number noted in the previous step.

Step 4: Type the following command in the window and press Enter to eject your USB drive:
remove all dismount

Method 6: Use Safely Remove Hardware Utility
In addition to the above methods, Windows 11 includes a dedicated tool for safely ejecting hardware from your computer. Here’s how to access it.
Step 1: Press the Windows key + R to open the Run dialog. Type the following command in the Open field and press Enter.
RunDll32.exe shell32.dll,Control_RunDLL hotplug.dll
Step 2: Select the USB drive you want to unplug and click the Stop button.

Step 3: Hit OK to confirm.

Bonus Tip: Configure Device Removal Policy to Disconnect Drive Safely Without Ejecting
If you frequently use USB drives on your PC, ejecting them can be a hassle. Thankfully, Windows lets you configure the device removal policy for a flash drive so that you can safely unplug your drive without ejecting it first. Here’s how to set it up.
Step 1: Click the search icon on the taskbar, type device manager, and press Enter.

Step 2: Expand Disk drives, right-click on your USB drive, and select Properties.
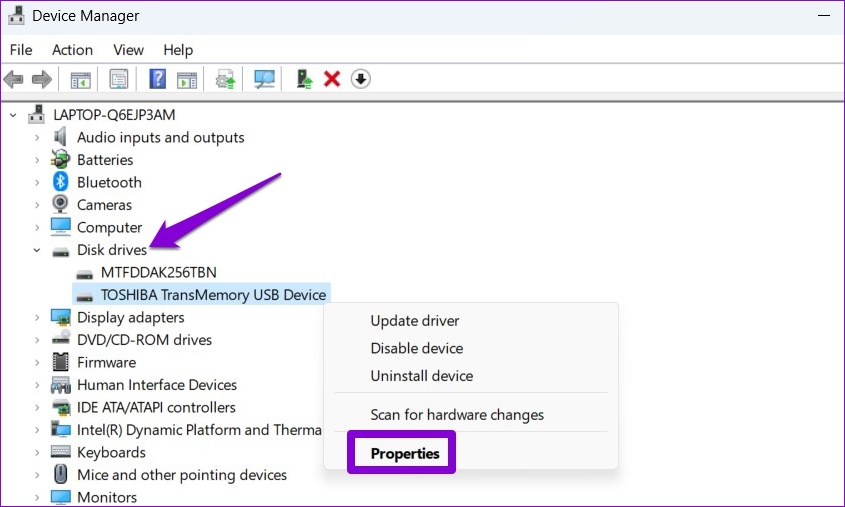
Step 3: In the Device Properties window, navigate to the Policies tab and select Quick Removal. Then, hit OK.

Note that you’ll need to configure the device removal policy for each USB drive separately. After that, you can unplug your flash drive directly whenever a write operation isn’t in progress.
Was this helpful?
Last updated on 30 April, 2024
Read Next
 5 Ways to Fix Unable to Eject a USB Drive on Windows 11
Fix 1: Eject Drive Using the Settings App Windows provides several options for removing a USB drive.
5 Ways to Fix Unable to Eject a USB Drive on Windows 11
Fix 1: Eject Drive Using the Settings App Windows provides several options for removing a USB drive.
 4 Ways to Safely Clean Registry on Windows 11/10
1.
4 Ways to Safely Clean Registry on Windows 11/10
1.
 How to Eject Water From iPhone
Method 1: Use the Water Eject Shortcut Shortcuts on iPhone are an excellent utility.
How to Eject Water From iPhone
Method 1: Use the Water Eject Shortcut Shortcuts on iPhone are an excellent utility.
 6 Best USB-C (USB 3) Cables for iPhone 15 Pro and iPhone 15 Pro Max
The iPhone 15 Pro series has received significant enhancements.
6 Best USB-C (USB 3) Cables for iPhone 15 Pro and iPhone 15 Pro Max
The iPhone 15 Pro series has received significant enhancements.
 4 Ways to Fix USB Devices Keep Disconnecting and Reconnecting in Windows 11
https://youtu.be/tUV-xdBsm5o Try Basic Fixes Reconnect the device: Unplugging your USB device and plugging it back in should help fix any issues caused by a loose connection.
4 Ways to Fix USB Devices Keep Disconnecting and Reconnecting in Windows 11
https://youtu.be/tUV-xdBsm5o Try Basic Fixes Reconnect the device: Unplugging your USB device and plugging it back in should help fix any issues caused by a loose connection.
 4 Ways to Disable USB Ports on Windows
Method 1: Disable USB Ports Using Device Manager Device Manager is a handy utility that lets you manage all the hardware devices connected to your system.
4 Ways to Disable USB Ports on Windows
Method 1: Disable USB Ports Using Device Manager Device Manager is a handy utility that lets you manage all the hardware devices connected to your system.
The article above may contain affiliate links which help support Guiding Tech. The content remains unbiased and authentic and will never affect our editorial integrity.