Method 1: Add a Partner Account
Sometimes, you may accidentally add photos to the wrong Google account or want to migrate them to another Google Photos account. Google Photos offers many ways to share images. It has a cool feature that lets you share all your backed-up photos with your partner.
You can customize the sharing and share from a selected date or of a certain person only. We will use this feature to migrate Google Photos between two accounts. Here are the steps in detail.
Send Invitation From First Phone
Step 1: Open the Google Photos app > switch to the account from which you want to transfer the files by tapping on the profile picture icon at the top.
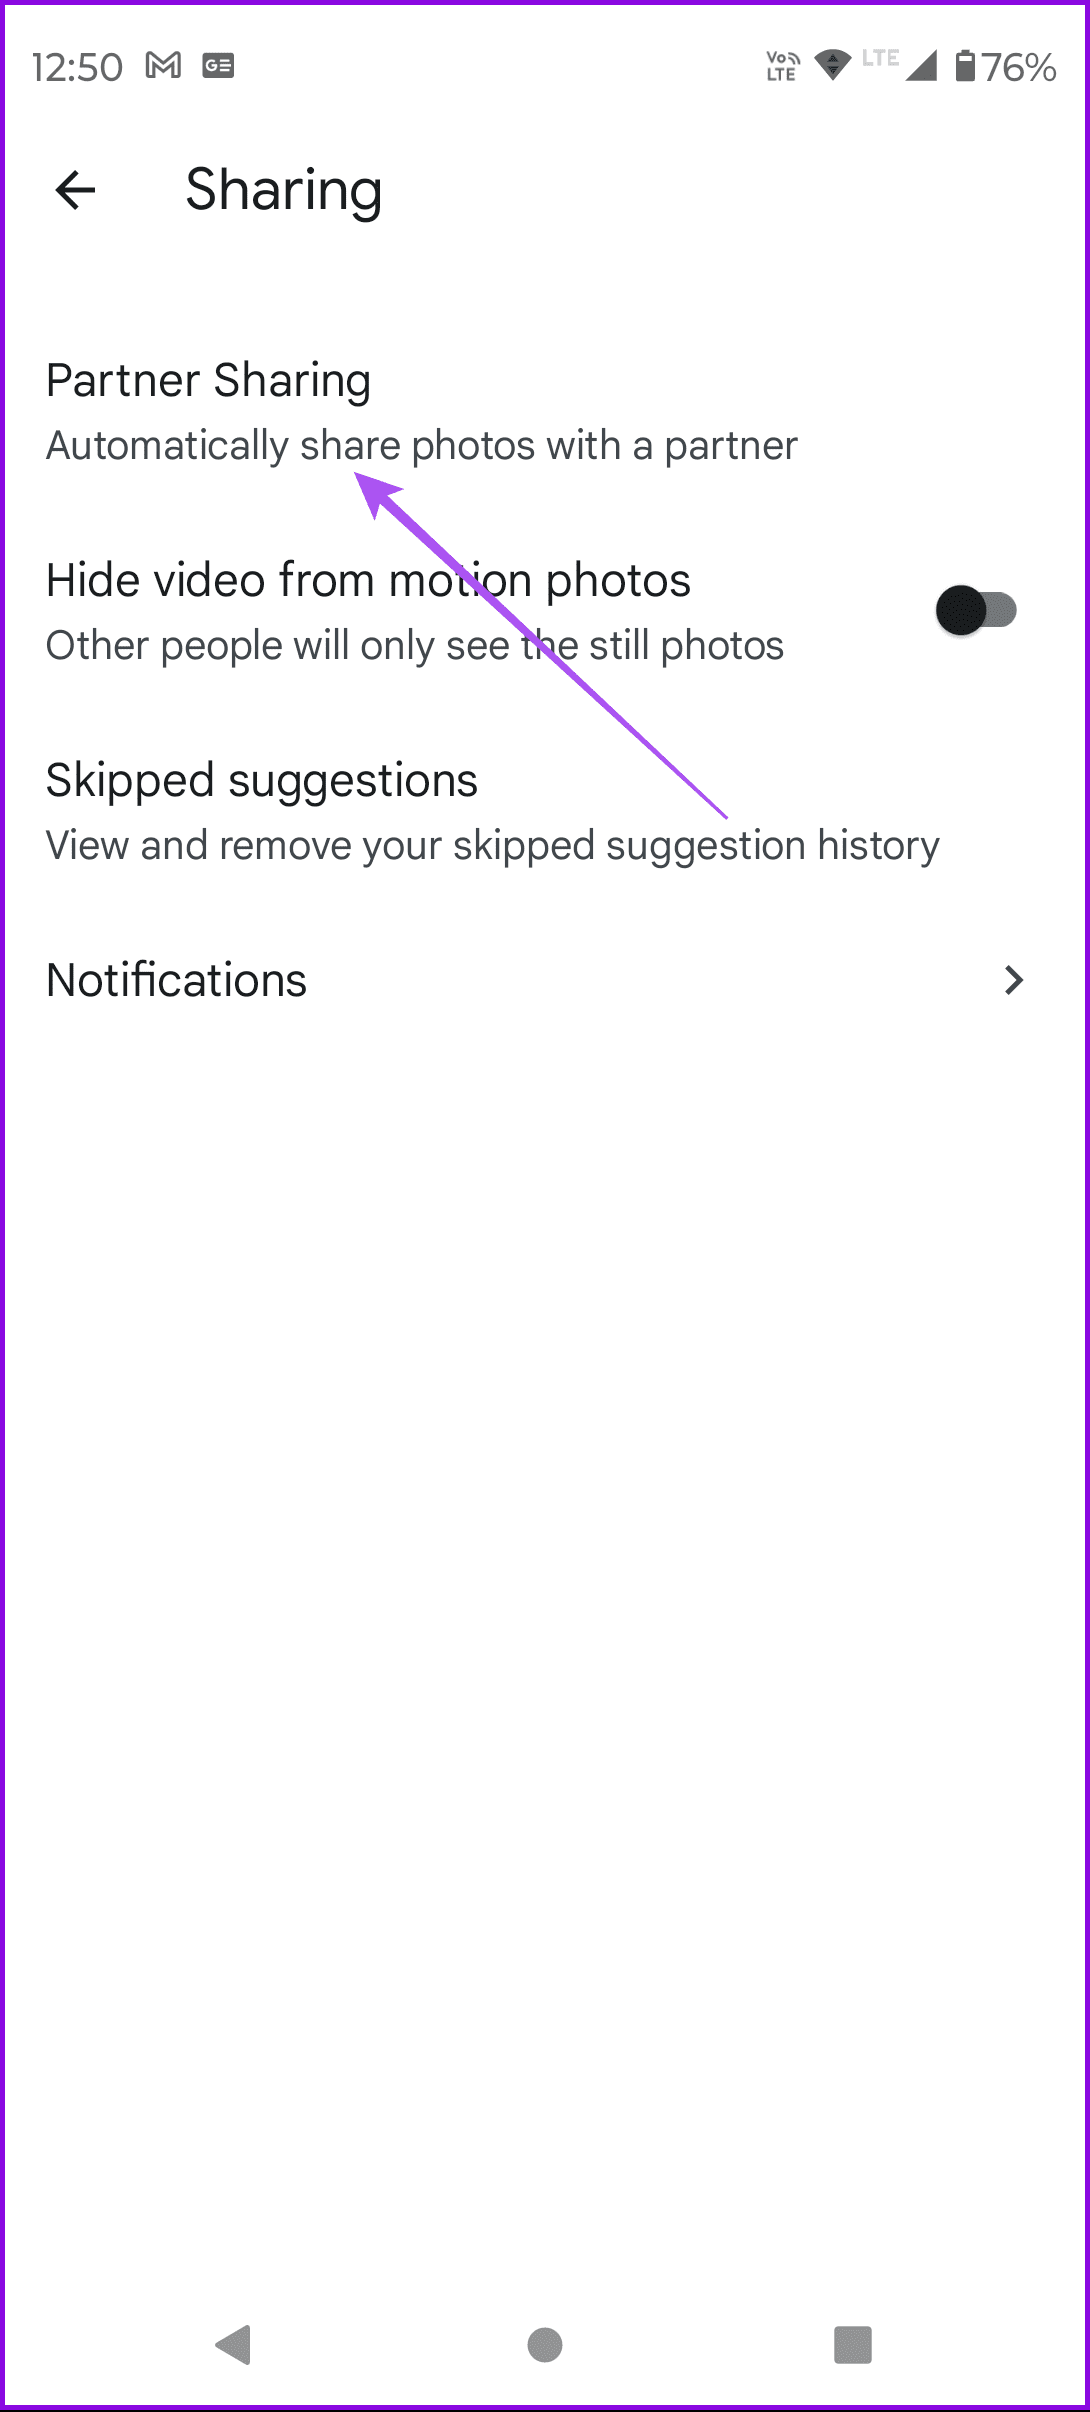
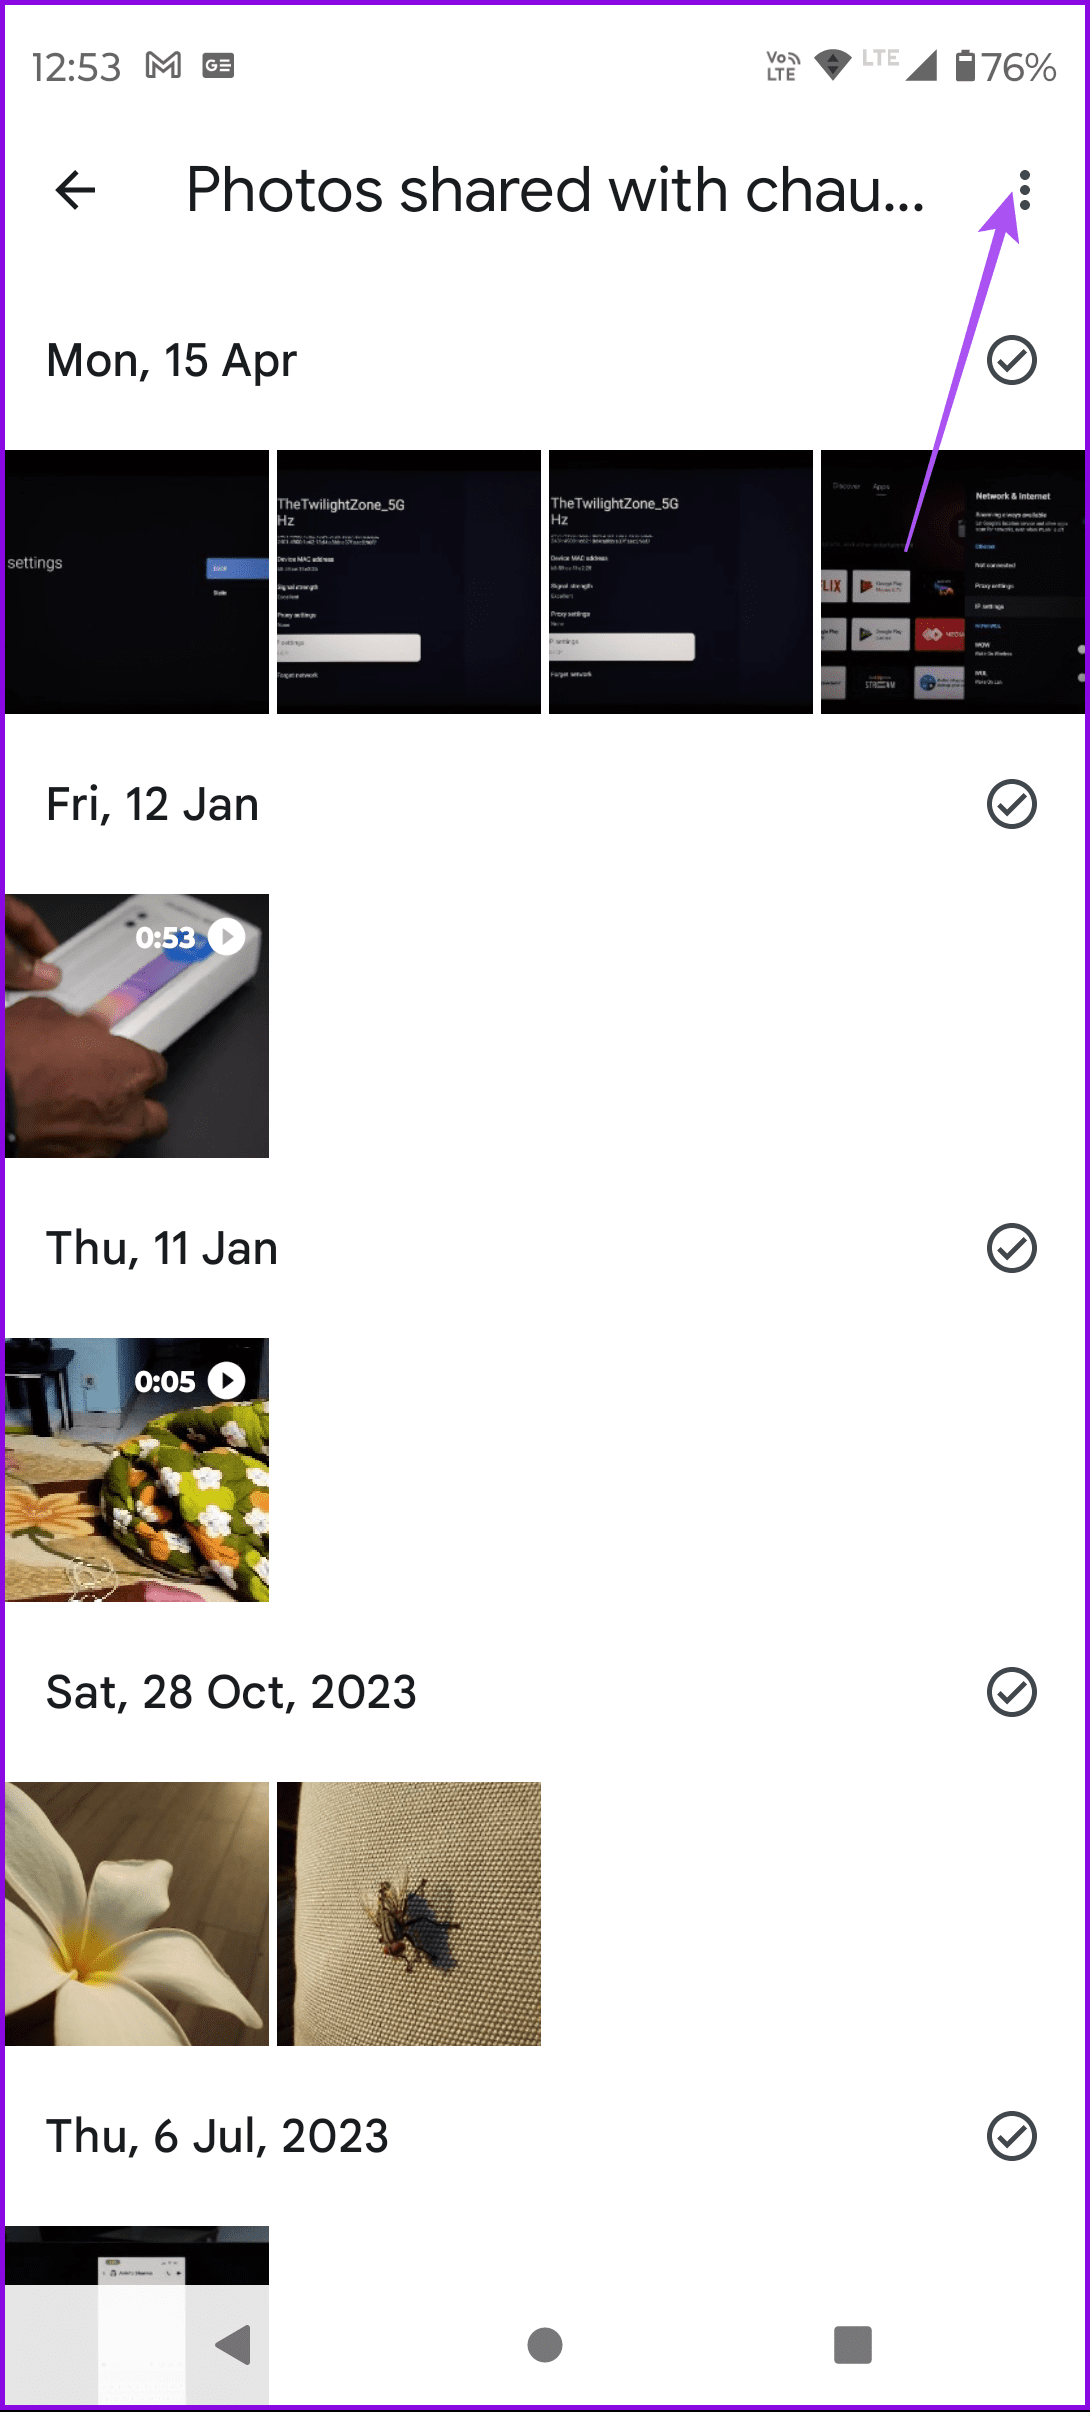
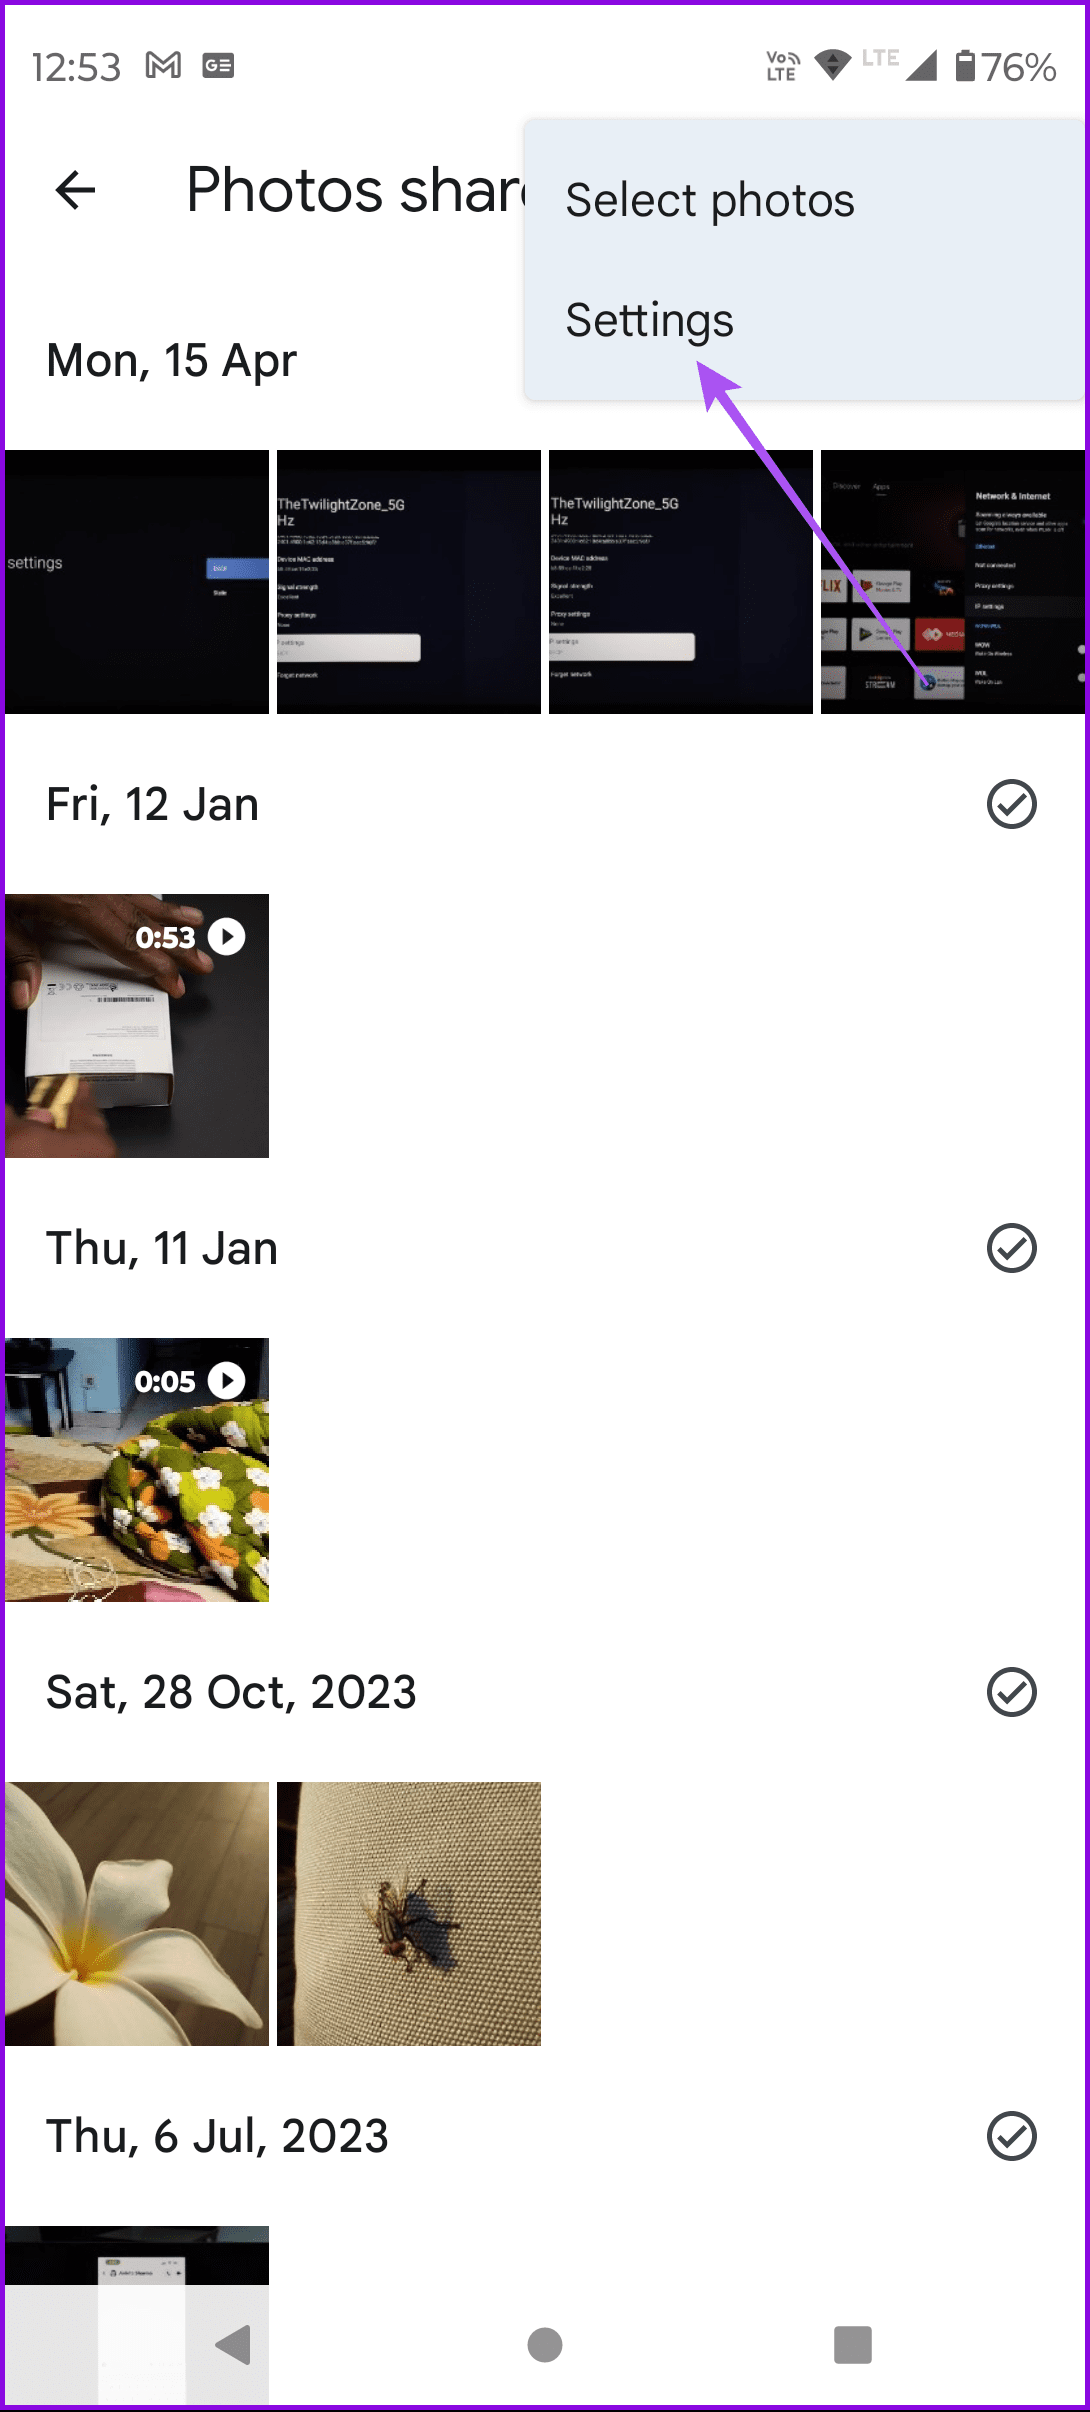
Step 2: Tap on the profile icon at the top > select Photos Settings.
Step 3: Tap on Sharing > choose Partner Sharing.

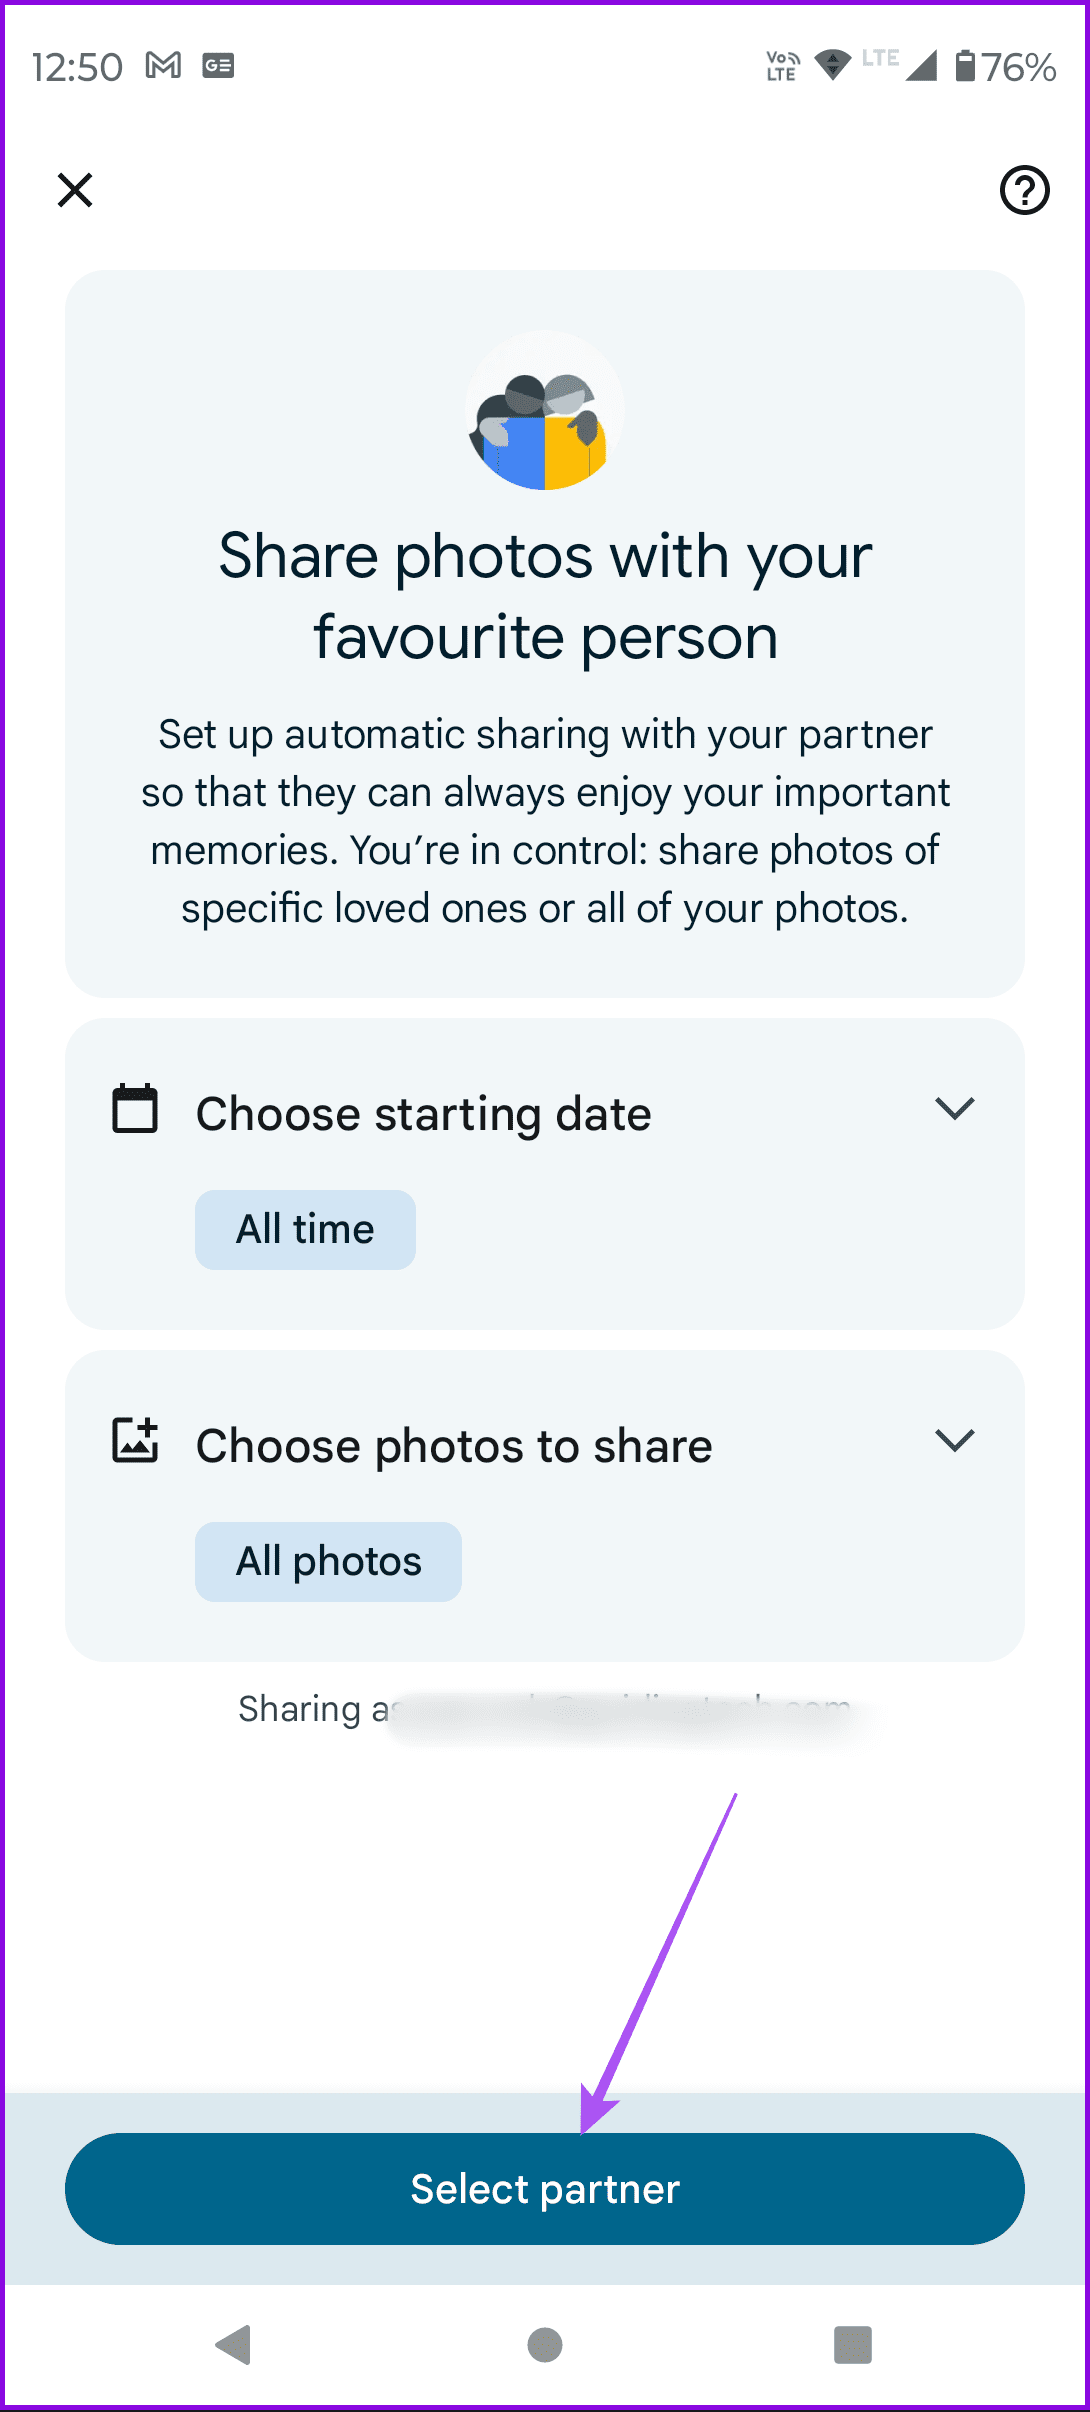
Step 4: Choose the starting date for photos and select the photos you want to share. Since you have to move all the photos, select All photos.
Step 5: Tap on Select partner > add your sharing account name > tap on Confirm.

Accept Invitation
You will receive a notification on your second account.
Open the Photos app with your second Google account. Tap the Sharing icon next to your profile icon > New Partner Sharing invitation > tap on Accept.


Save Photos From First Account to Second
Once you accept the invitation, that doesn’t mean the photos will transfer to the second account. In fact, the photos from the first account will not even show up in the Google Photos library at this point. You can only access them from the Sharing tab present at the bottom right.
So basically, you need to save photos. You don’t have to do that manually. Google Photos will do it for you. For that, follow these steps:
Step 1: Open the Photos app > tap the Sharing icon at the top right.
Step 2: Tap the three dots at the top right > choose Settings.
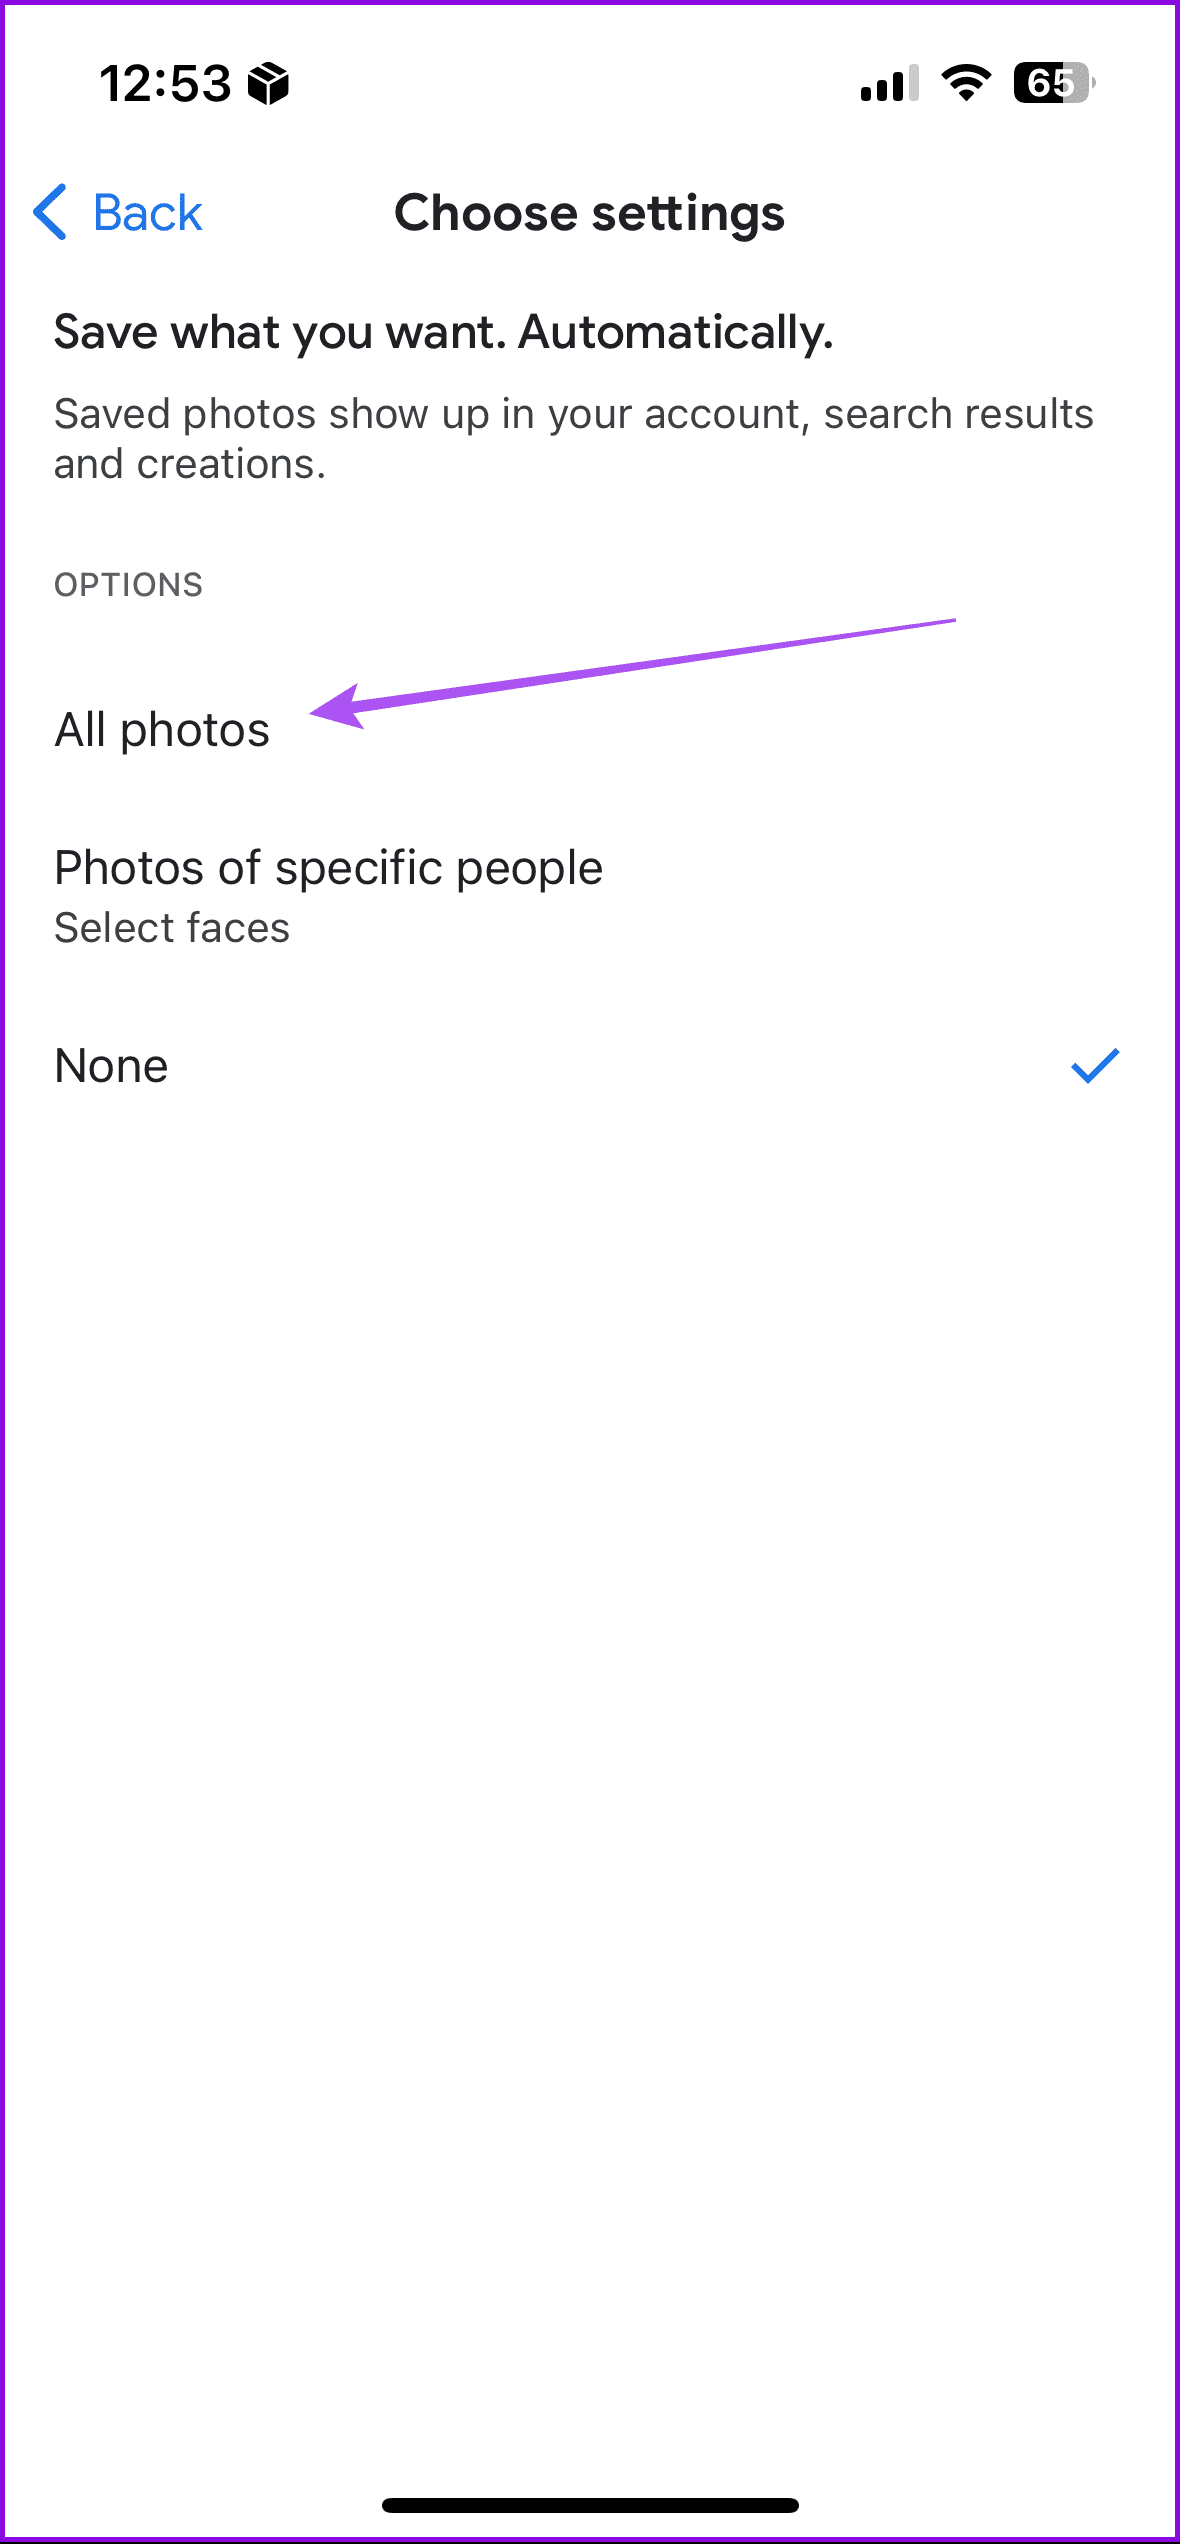
Step 3: Select Save to Your Photos > choose All Photos.

Now, the pictures will start appearing under the Photos tab. Wait for them. The photos will be saved in the same quality (original or high quality) as available in the first account. Then, remove the partner account from the first account, as shown in the next section.
Step 4: Open Google Photos with primary account > Sharing icon > Partner Sharing > three dots > Settings > Remove partner.

The photos are transferred to a different Google account successfully. They are now separately saved in the first and second accounts, acting as entirely different copies. You can do whatever you want with the photos on the first account.
2. Create a Shared Album
Even though the above method gives you certain choices to select the photos that you want to move, you cannot manually select them. For that, you can create a shared album and add the photos you want to move to another account.
After creating the shared album, choose the photos for migrating to the current account and tap the Download button.
How to Transfer Google Photos Between Two Accounts on the Web
You can use the same two methods mentioned above to transfer images between accounts on the web. The only difference is that you will find the settings and the menu on the left side of the web version of Google Photos.

Tip: Refer to our post to learn how to download photos from Google Photos.
Was this helpful?
Last updated on 16 August, 2024
Read Next
 How to Move Photos from Email to Google Photos
Earlier, when you received photos on Gmail, it was easy to move them to Google Photos.
How to Move Photos from Email to Google Photos
Earlier, when you received photos on Gmail, it was easy to move them to Google Photos.
 How to Move Photos From iPhone to Google Photos
Method 1.
How to Move Photos From iPhone to Google Photos
Method 1.
 Top 3 Ways to Move Contacts From Samsung Account to Google
Most http://Samsung smartphone users tend to save their contacts in http://Samsung Cloud.
Top 3 Ways to Move Contacts From Samsung Account to Google
Most http://Samsung smartphone users tend to save their contacts in http://Samsung Cloud.
 Google Drive: How to Copy and Move Your Files and Folders
How to Make a Copy of Your Files or Folder Google Drive has a Make a Copy feature that duplicates your document or files.
Google Drive: How to Copy and Move Your Files and Folders
How to Make a Copy of Your Files or Folder Google Drive has a Make a Copy feature that duplicates your document or files.
 Google Drive vs Google Photos: Which Is Best for Storing Photos
Google Drive vs Google Photos Comparison Key Differences Feature Google Drive Google PhotosFile Types All types Photos, Videos, GIFsOrganization Folders & Subfolders AlbumsPhoto Quality Original Original, High (compressed), Express (compressed)Storage
Google Drive vs Google Photos: Which Is Best for Storing Photos
Google Drive vs Google Photos Comparison Key Differences Feature Google Drive Google PhotosFile Types All types Photos, Videos, GIFsOrganization Folders & Subfolders AlbumsPhoto Quality Original Original, High (compressed), Express (compressed)Storage
 How to Remove Photos from Google Drive but Not Google Photos
Google Drive and Photos are two similar yet distinct products for storing photos and videos.
How to Remove Photos from Google Drive but Not Google Photos
Google Drive and Photos are two similar yet distinct products for storing photos and videos.
 How to Remove an Account from Google Photos
How to Remove a Google Account Unfortunately, you cannot remove an account from Google Photos.
How to Remove an Account from Google Photos
How to Remove a Google Account Unfortunately, you cannot remove an account from Google Photos.
 How to Move Microsoft Authenticator to Your New Phone
How to Backup Microsoft Authenticator Data on Your Old Phone To move Microsoft Authenticator to a new phone, you first need to back up all your accounts on the old
How to Move Microsoft Authenticator to Your New Phone
How to Backup Microsoft Authenticator Data on Your Old Phone To move Microsoft Authenticator to a new phone, you first need to back up all your accounts on the old
The article above may contain affiliate links which help support Guiding Tech. The content remains unbiased and authentic and will never affect our editorial integrity.