How to Use the iPhone Compass
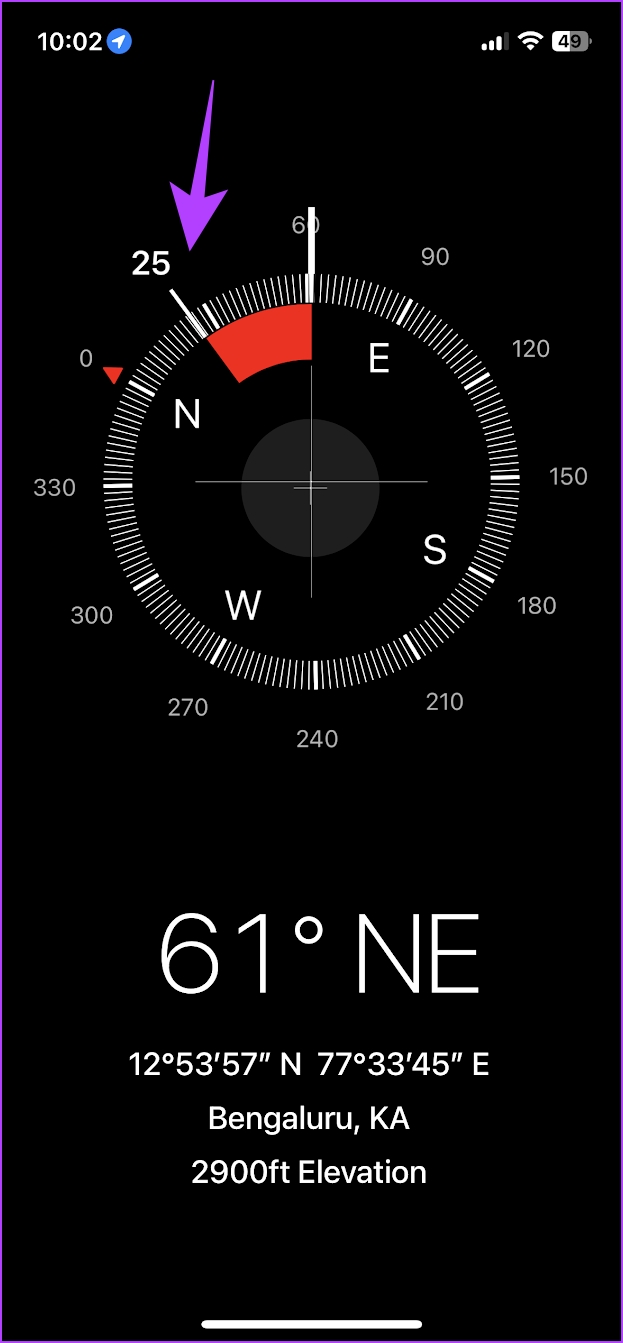
Rotate your iPhone to see the direction your iPhone is pointing towards. To lock to a direction, tap on the compass dial. You can see a red band that shows how much you are off course by.
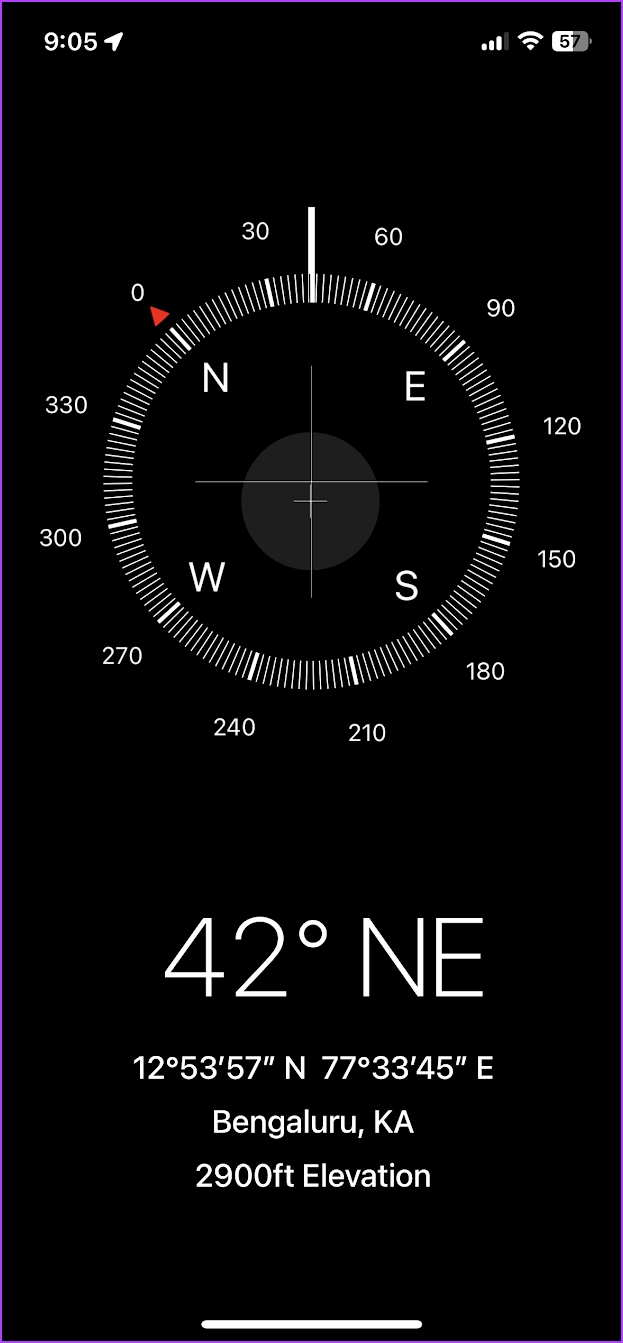
- Direction: This is the direction the dial points to, as you rotate your iPhone.
- Bearing: This is the exact direction in which you are moving. It shows the angle, which is the deviation from the reference line (vertical line in the plus-shaped lines) and the direction (northeast in our case) you are going towards. To get an accurate bearing measurement, place your phone flat and align the center point of the two plus-shaped signs.
- Coordinates: This shows the longitude and the latitude data of your position. The first set of numbers (12deg 53min 57seconds North) is the latitude numbers followed by the longitude numbers (77deg 33min 45seconds East). The latitude is a horizontal line that measures the distance north or south of the equator, and the longitude is a vertical line that measures the distance east or west of the equator.
- Geographical Location: The GPS Sensor on your iPhone determines this location.
- Elevation: The measured elevation of your current location from the sea level.
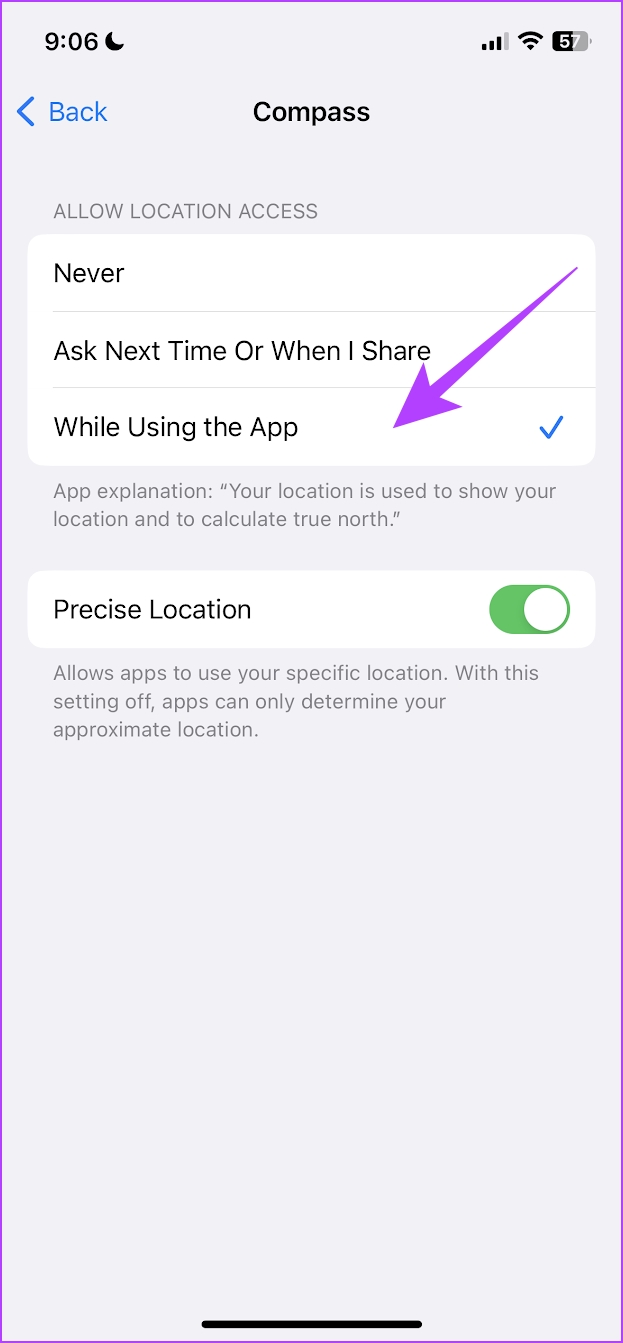
For Better Accuracy: Enable Location Services for Compass
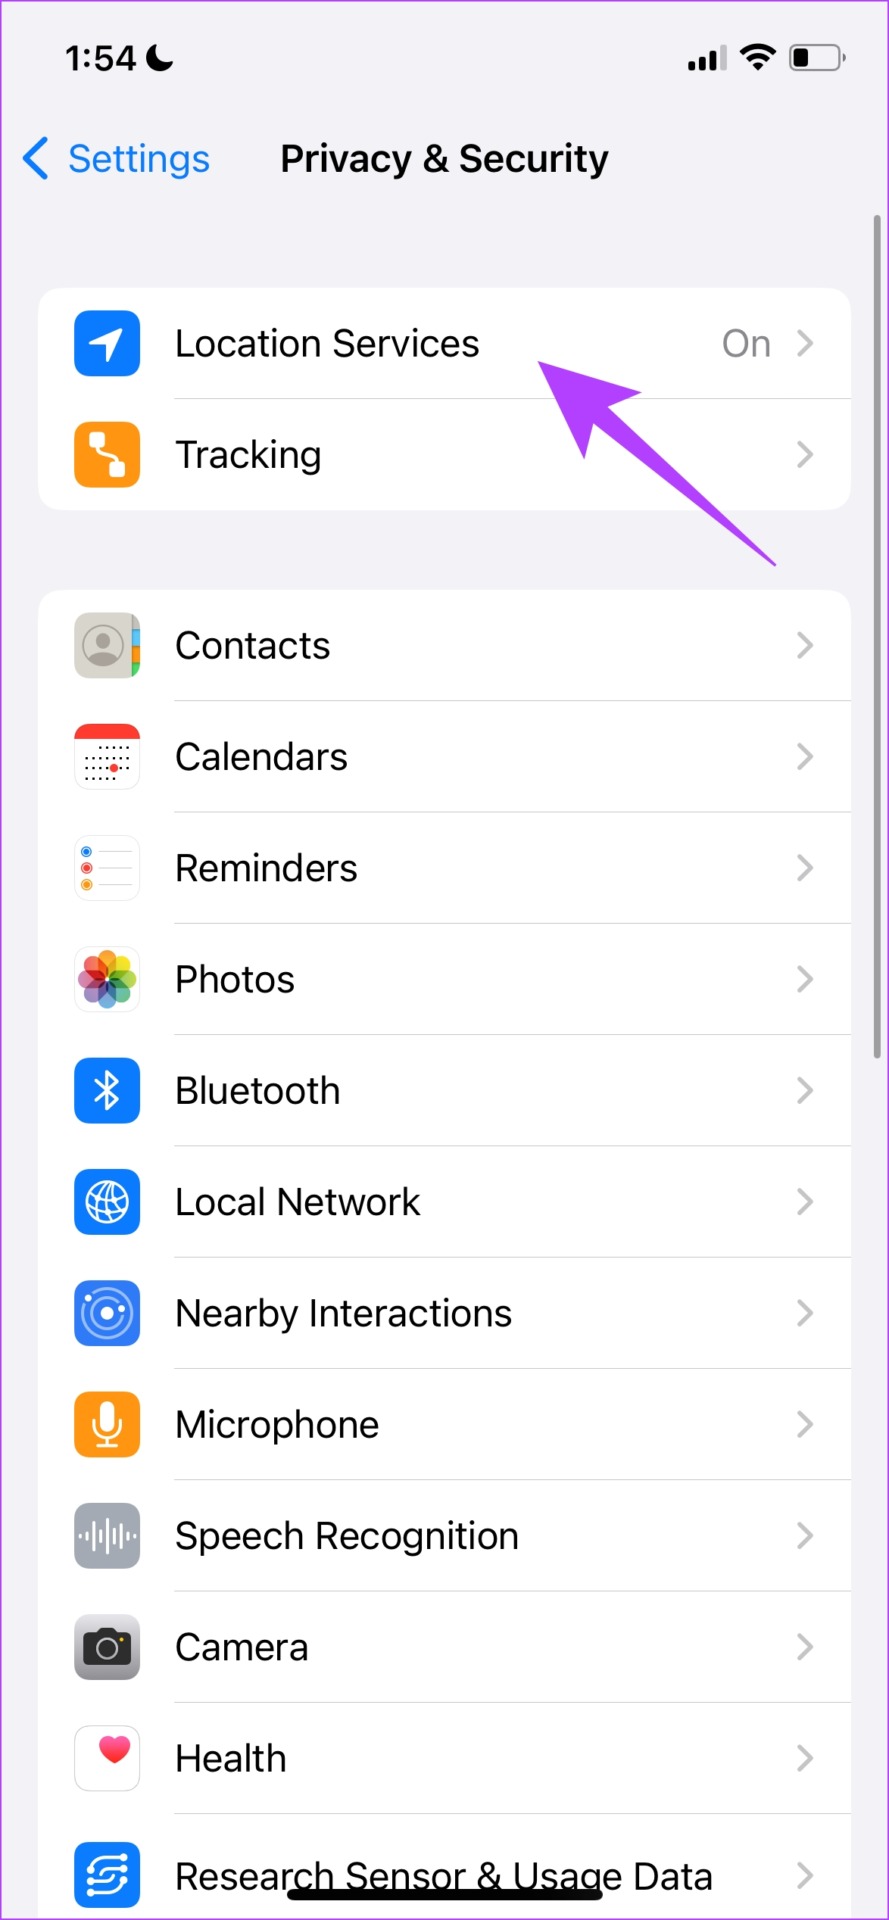
The iPhone compass app requires permission to access location to provide you with detailed information.
Step 1: Open the Settings app and tap on Privacy and Security.
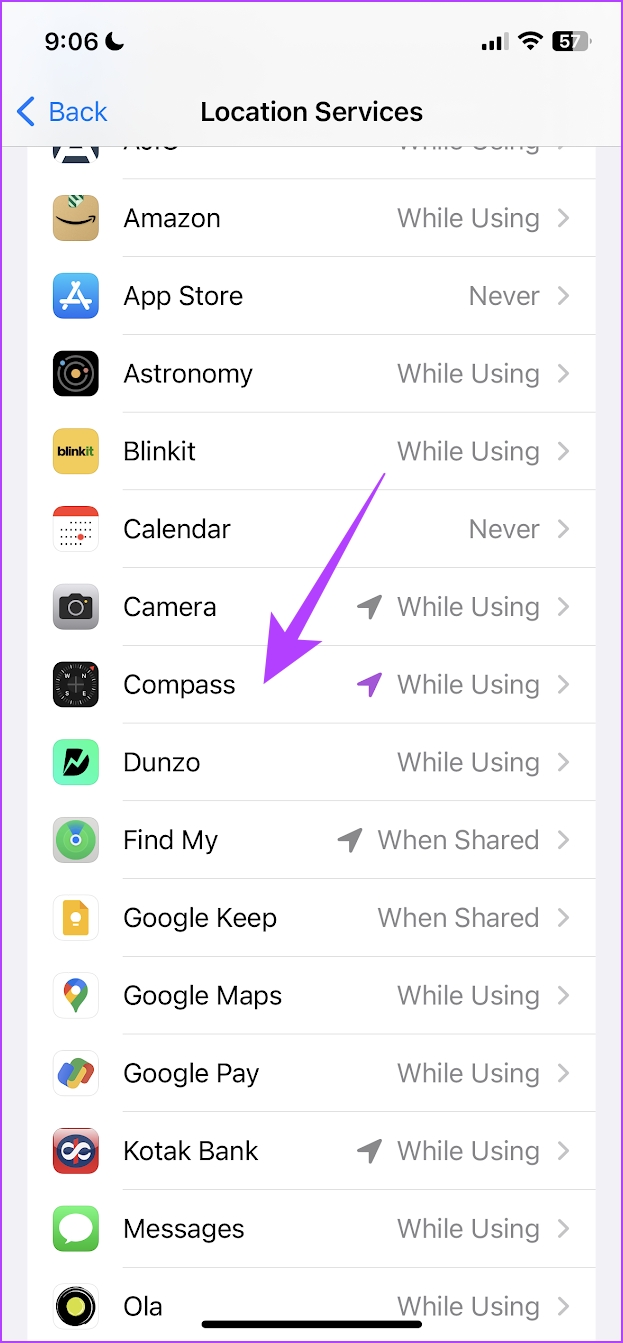
Step 2: Tap on Location Services and select Compass.
Step 3: Ensure you turn on While using the app to grant compass access to your location.
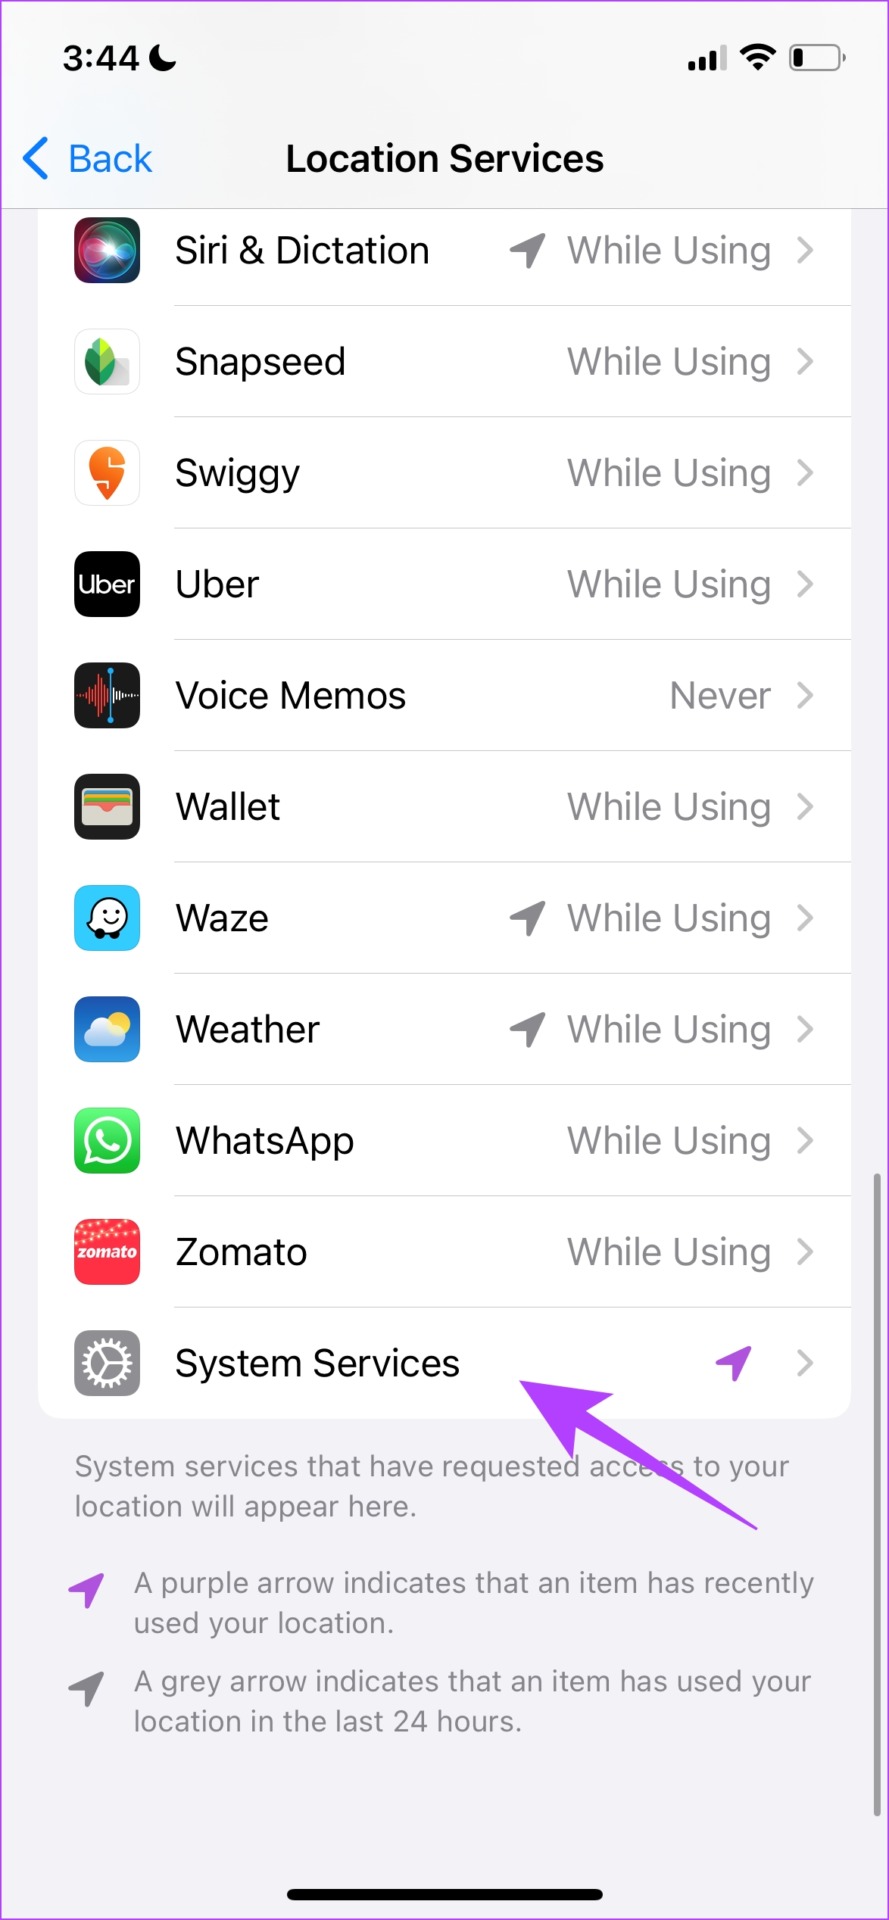
Step 4: Go back to the Location page and scroll down to find and select System Services.
Step 5: Turn on the toggle for Compass Calibration.

Also Read: How to fix iPhone Compass not working.
How to Switch to True North in the Compass App for iPhone
True north is the direction along the Earth’s surface towards the geographic North Pole. It is a constant and unchanging reference point used in navigation. By default, your iPhone shows the magnetic north – the north direction which varies based on the Earth’s magnetic field.
Enabling True North provides precise directions, and is especially useful for activities like hiking, mapping, or any situation requiring accurate bearings.
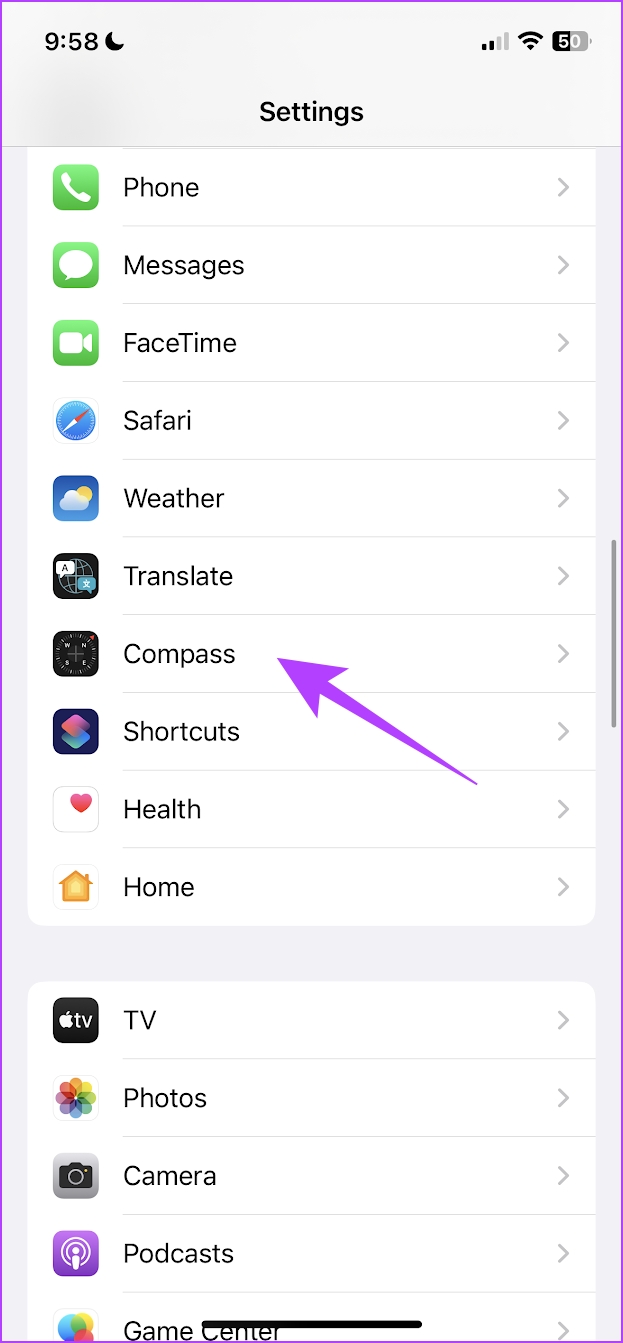
Step 1: Open the Settings app.
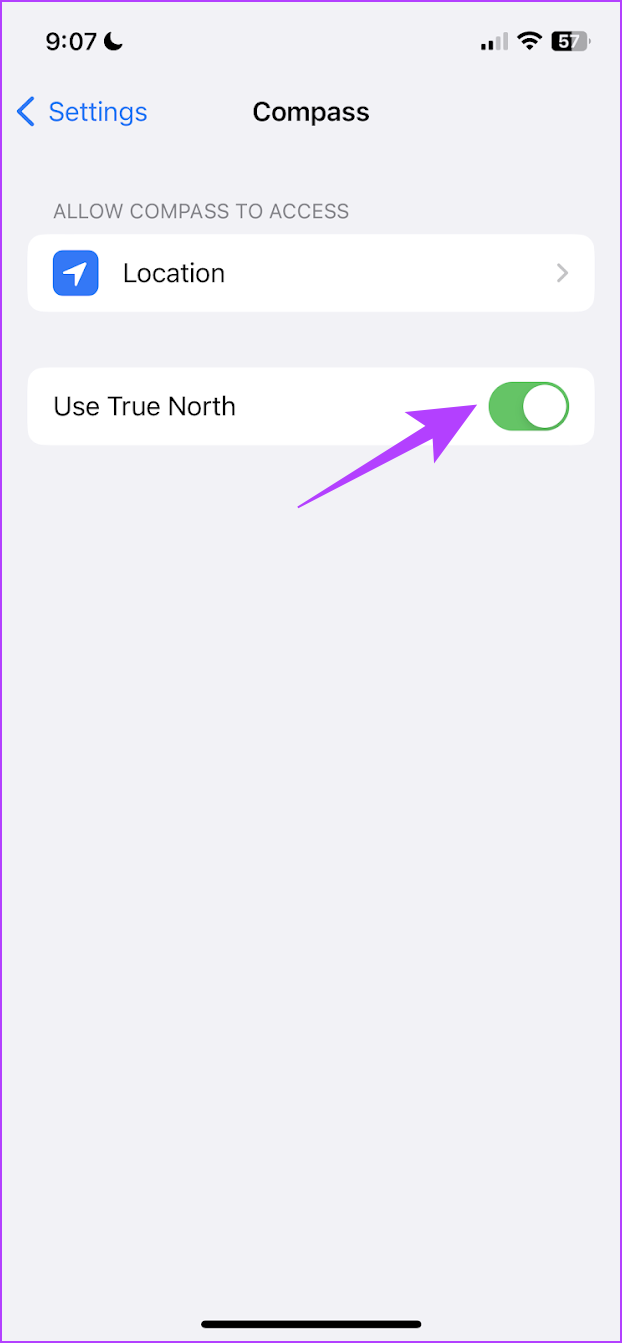
Step 2: Scroll down and tap on Compass. Turn on the toggle for Use True North.
Your compass will now point towards the true north instead of the magnetic north.
Also Read: How to use the Measure App on iPhone.
Was this helpful?
Last updated on 19 May, 2024
2 Comments
Leave a Reply
Read Next
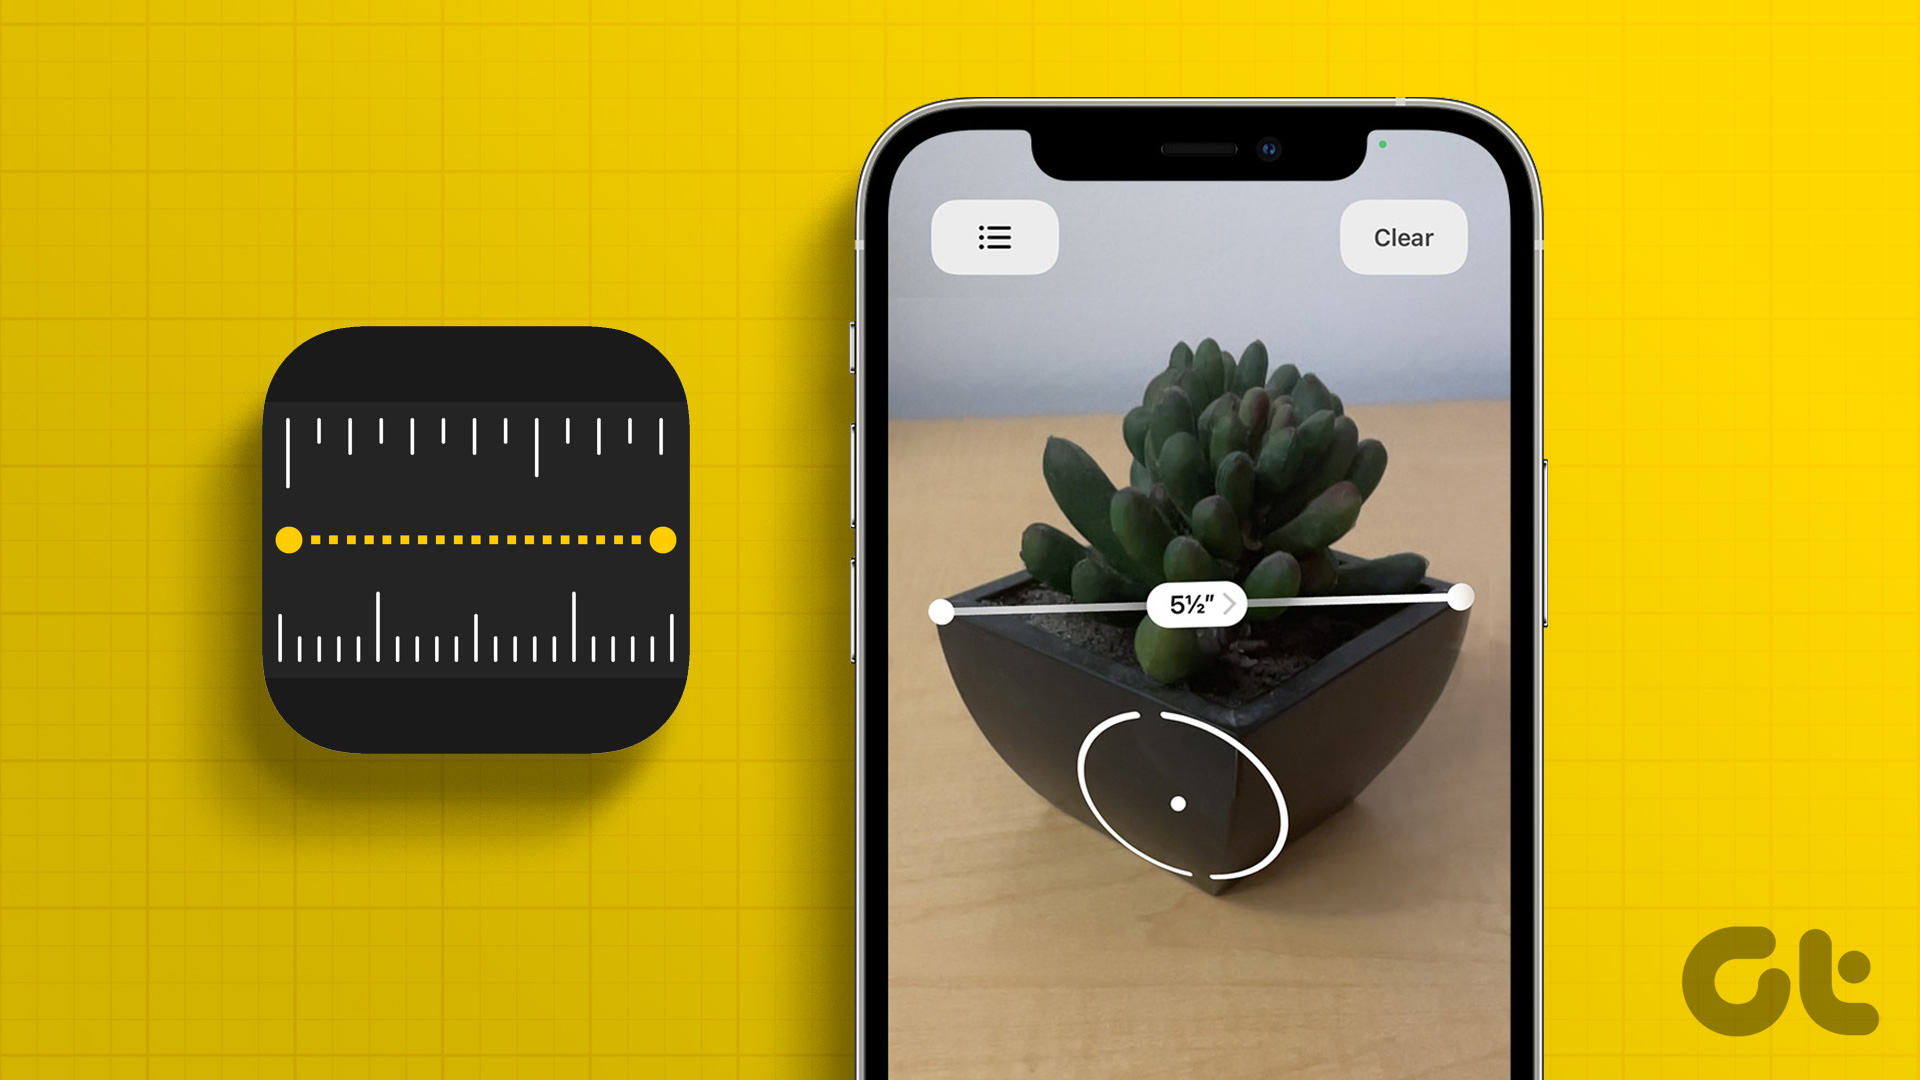 How to Use the Measure App on iPhone: A Detailed Guide
Things at home are never found when needed - this is something that all of us resonate with.
How to Use the Measure App on iPhone: A Detailed Guide
Things at home are never found when needed - this is something that all of us resonate with.
 A Detailed Guide to Fixing AirPods Not Switching to Noise Cancellation
The AirPods Pro features Active Noise Cancellation, and that's what makes them better over AirPods.
A Detailed Guide to Fixing AirPods Not Switching to Noise Cancellation
The AirPods Pro features Active Noise Cancellation, and that's what makes them better over AirPods.
 A Detailed Guide to Fixing Mac Booting With Black Screen Issues
Clicking the power button on your MacBook should light up the screen and keyboard, play a startup chime, display the Apple logo, and finally, boot into the authentication screen where
A Detailed Guide to Fixing Mac Booting With Black Screen Issues
Clicking the power button on your MacBook should light up the screen and keyboard, play a startup chime, display the Apple logo, and finally, boot into the authentication screen where
 Google Drive Sharing Permissions Explained: A Detailed Guide
Types of Sharing Permissions in Google Drive When you're not sharing the file/folder it is set to Restricted, i.e., only you can view and edit the file.
Google Drive Sharing Permissions Explained: A Detailed Guide
Types of Sharing Permissions in Google Drive When you're not sharing the file/folder it is set to Restricted, i.e., only you can view and edit the file.
 Google Photos Link Sharing Permissions and Settings Explained: A Detailed Guide
Recently, a controversial post appeared on the internet that said ‘photos in Google Photos are semi-public,’ which is both true and false.
Google Photos Link Sharing Permissions and Settings Explained: A Detailed Guide
Recently, a controversial post appeared on the internet that said ‘photos in Google Photos are semi-public,’ which is both true and false.
 12 Things to Know About Instagram Quiz Sticker: A Detailed Guide
1.
12 Things to Know About Instagram Quiz Sticker: A Detailed Guide
1.
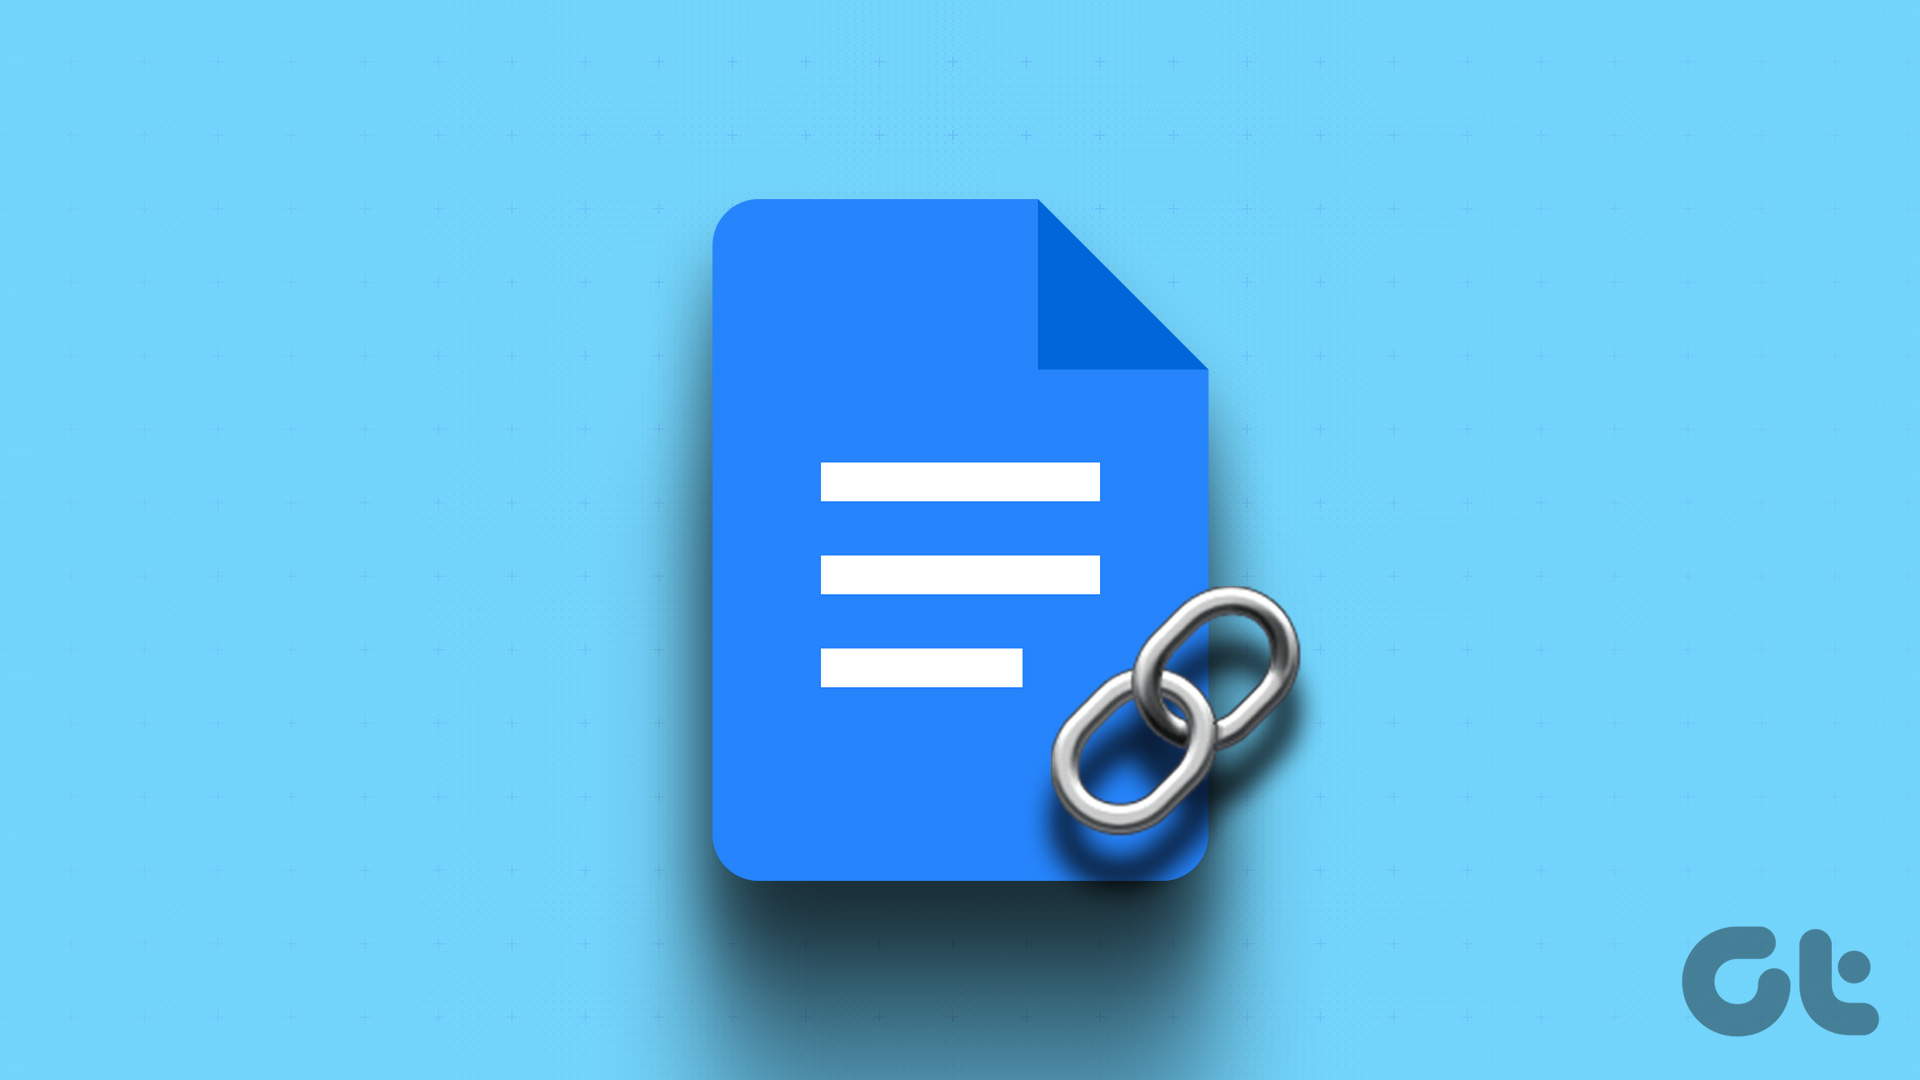 How to Hyperlink in Google Docs: A Detailed Guide
Hyperlinks help connect one document with another.
How to Hyperlink in Google Docs: A Detailed Guide
Hyperlinks help connect one document with another.
 How to Turn off Ads on Instagram: A Detailed Guide
Are you tired of annoying or irrelevant Instagram ads and want to eliminate them from your Instagram feed?
How to Turn off Ads on Instagram: A Detailed Guide
Are you tired of annoying or irrelevant Instagram ads and want to eliminate them from your Instagram feed?
The article above may contain affiliate links which help support Guiding Tech. The content remains unbiased and authentic and will never affect our editorial integrity.


Regarding the iphone compass article there is a mistake in the definition of Longitude. ” longitude is the distance east or west of the equator.”
Lines of longitude are imaginary lines that divide the Earth. They run north to south from pole to pole, but they measure the distance east or west. The prime meridian, which runs through Greenwich, England, has a longitude of 0 degrees. It divides the Earth into the eastern and western hemispheres.
Your article was great at describing how the iphone works. Thanks.
The screen shots are confusing. It is not clear what they are showing. Moreover, the definition of bearing is wrong. When the phone is pointed in the direction you are moving, it shows your heading, which is different than bearing. In marine navigation bearing is the direction toward a place that is different than your heading. It is the deviation from the heading and is the direction you should move to get to that place. It is only then that heading and bearing are the same.