

Have you ever noticed that the time on your Windows computer is always correct? That’s because, by default, the internal clock is set to update automatically, checking itself against online services.
However, if you want, you can turn off set time automatically if you want to set your PC’s date and time manually. For example, you might need to correct an inaccurate clock or temporarily use a manually configured time. You might also want to reset the automatic time sync if you’re having problems with certain apps or services that report issues with the date or time.
Read on to find out how to turn off set time automatically, turn it back on, and ensure the time zone also updates automatically.
Disable and Enable Set Time Automatically Windows 11
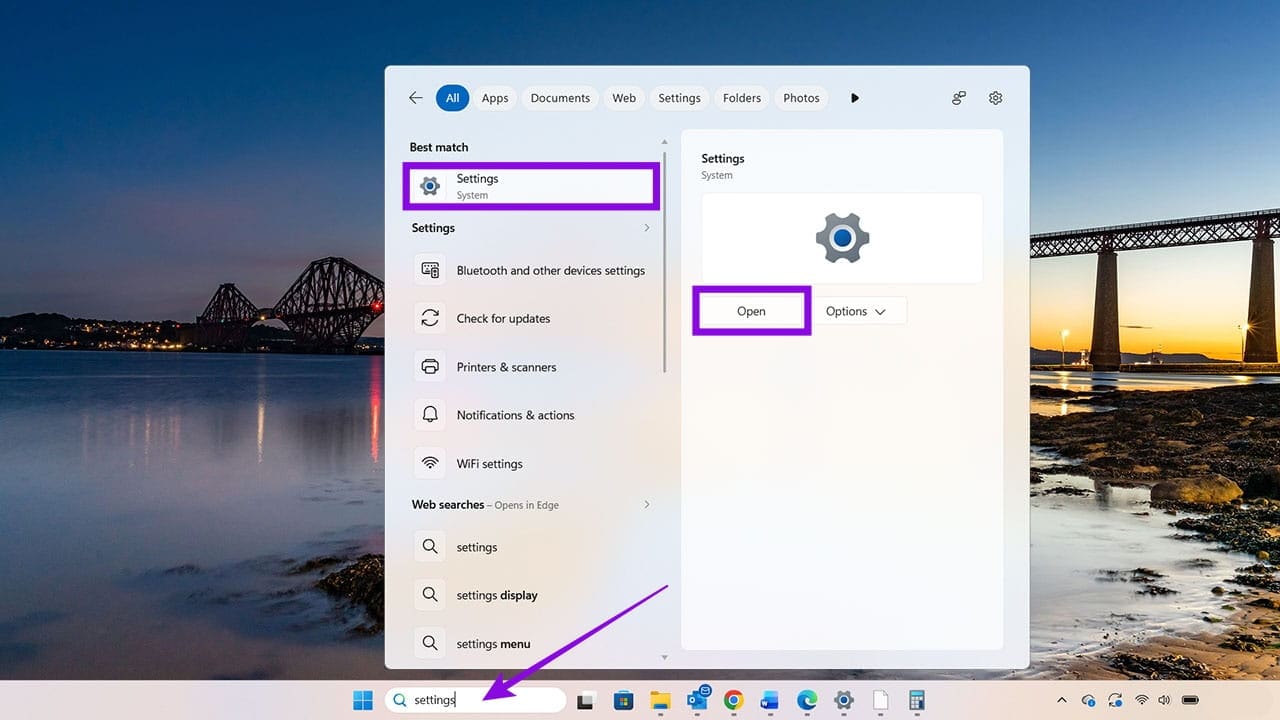
Step 1. Open “Settings.” You can find this by using the Windows search bar or by pressing the keys WIN + I.
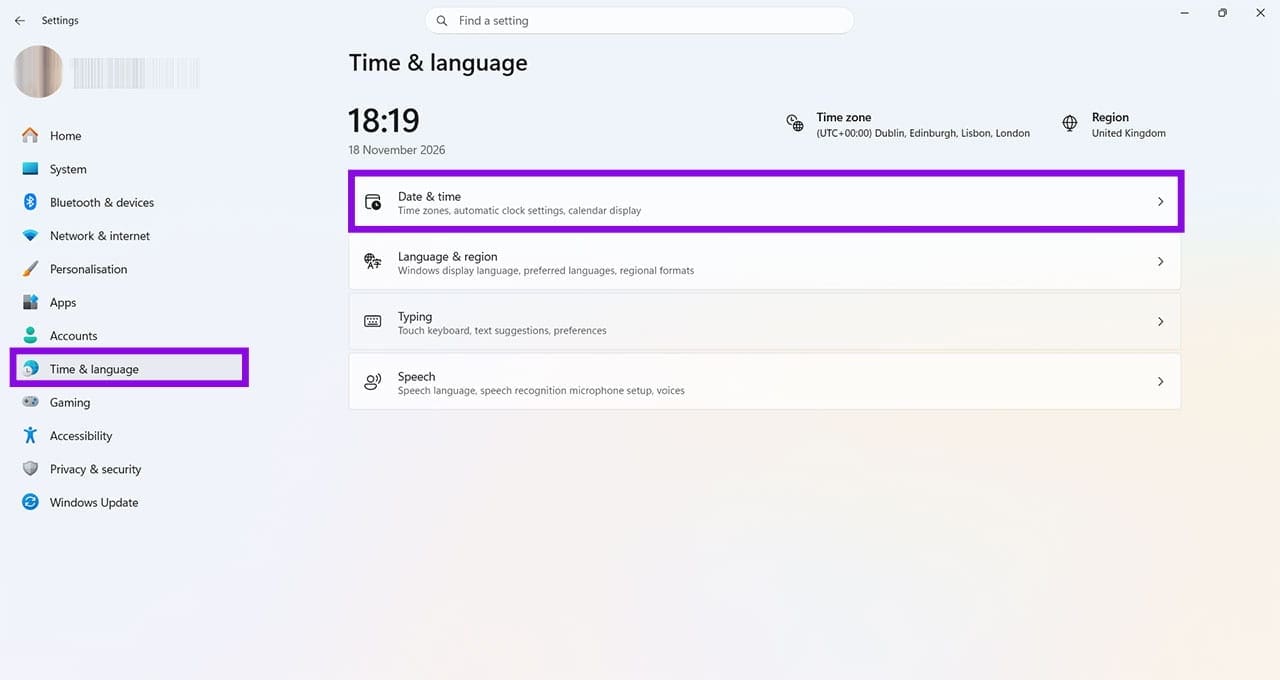
Step 2. Find “Time & language” in the left-hand menu and click it, then click on “Date & time,” which is usually the first clickable option listed.
Step 3. Under “Date & time,” find “Set the time automatically.” If the toggle is on, click it once to turn it off.
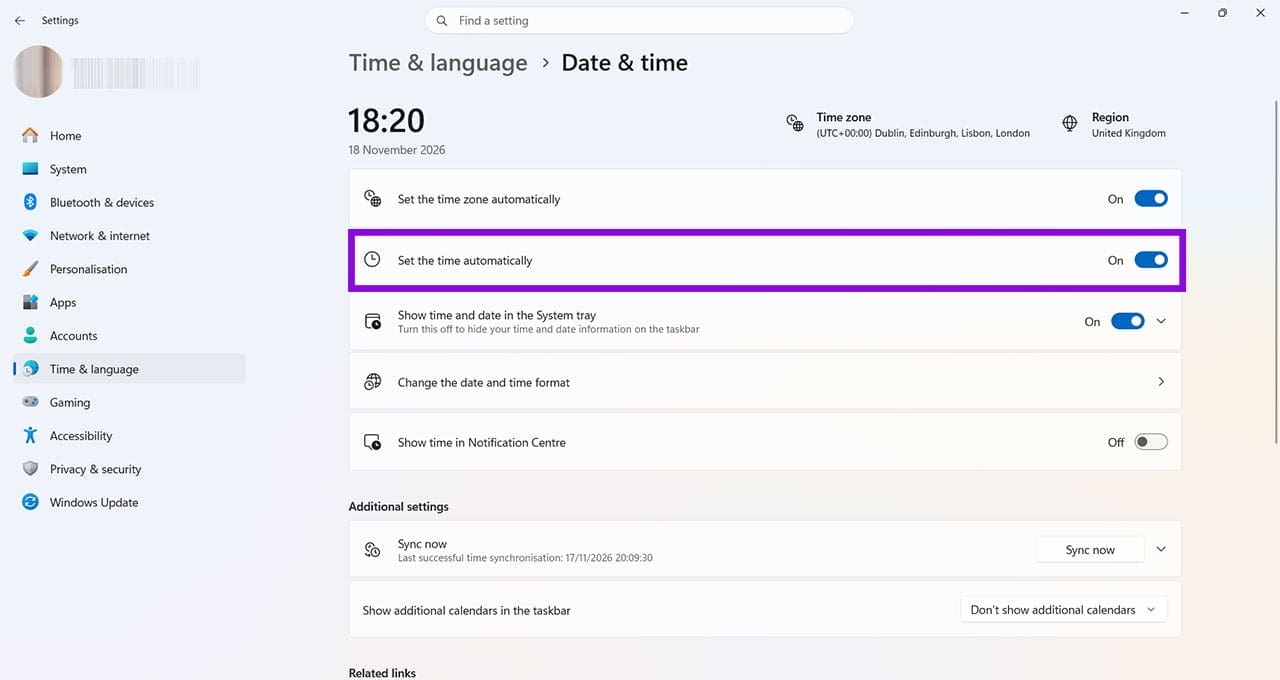
Left-click it once to switch it off.

You can also opt to set the date and time manually. Click the “Change” button next to this option, and you’ll see the current date and time settings.
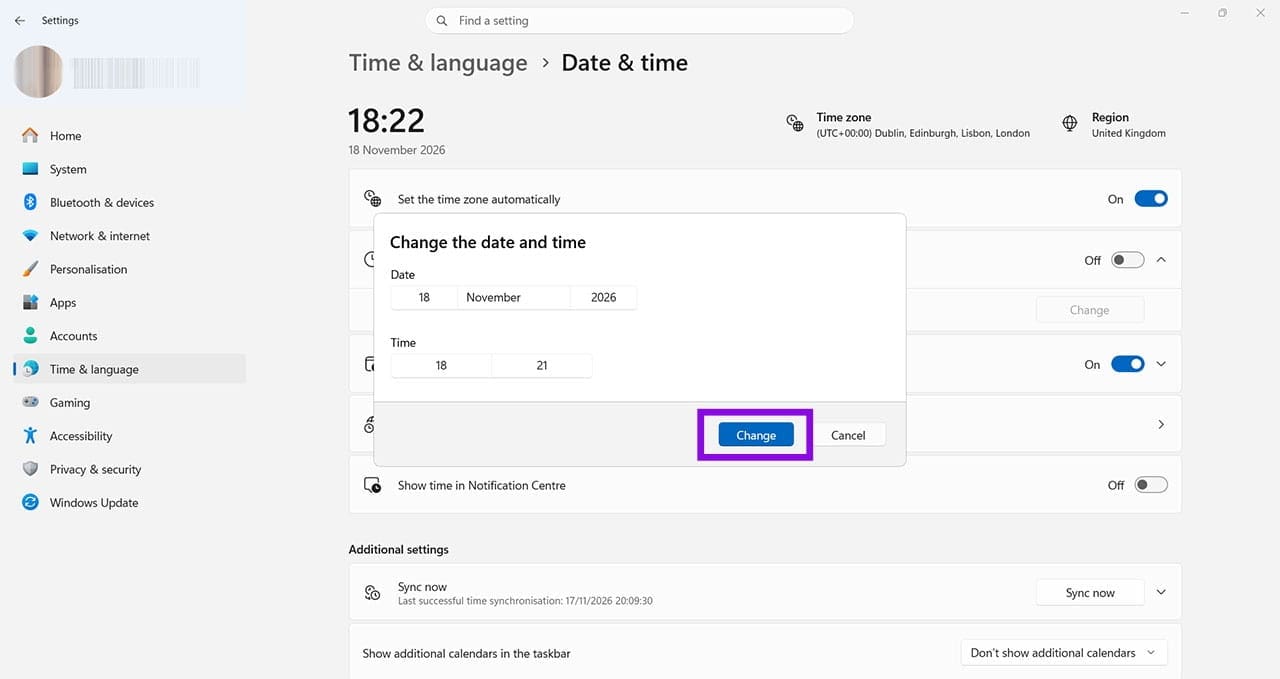
Click in the date or time fields to see options to change both of these. Make sure you click on the tick, then the blue “Change” button to apply your chosen date and/or time.

To switch “Set the time automatically” back on, follow the same process but in reverse:
Settings > Time & language > Date & time > Switch “Set the time automatically” to on.

This will remove the option to set the time manually. You should also check that the option to “Set the time zone automatically” is on, to ensure that your time is correct for your current location. Note: Automatic time synchronization requires a network connection to reach its time source. Automatic time-zone detection also depends on location services being available and enabled.
If the option to “Set the time automatically” or “Set the time zone automatically” is greyed out or not present, your PC may be subject to administrator restrictions or system policies. This can happen on work or school devices, where administrators manage date, time, and location settings. Certain apps and services won’t work properly if the time is not set automatically. For example, if you use iCloud services or the Apple Devices app, these services/apps will rarely connect to your Apple Account details if the time is not set automatically. Contact your IT administrator if you need to make changes to the time and you’re unable to.
Was this helpful?
Last updated on 20 November, 2026
Read Next
 5 Ways to Fix Android Accessibility Settings That Turn off Automatically
Fix 1: Check Accessibility Settings Ensure you haven't disabled the accessibility settings for the app you are trying to use.
 3 Ways to Fix Mouse Keeps Scrolling Automatically Windows 10 and Windows 11
https://youtu.be/1UZ3PWNr-lE Try Basic Fixes Disconnect and reconnect the mouse: Unplug your mouse cable or wireless adapter from your computer and reconnect it to a different port.
 2 Tools to Automatically Take Screenshots on Windows PC
Just think for a moment.
 Top 4 Fixes for Windows 10 PC Automatically Restarting After Shutdown
Power-related failures on Windows PC come in different forms.
 Top 3 Ways to Stop Microsoft Teams From Starting Automatically on Windows 10
Microsoft Teams app is great for team management and communication.
 3 Ways to Fix Windows 11 Screen Keeps Locking Automatically
Fix 1: Increase Lock Screen Timeout You can start by verifying the set lock screen timeout duration on your PC.
 7 Ways to Fix Windows 11 Not Connecting to Wi-Fi Automatically
Fix 1: Enable Connect to Wi-Fi Automatically Windows 11 may not connect to a known network automatically if you haven't configured it to do so.
 7 Ways to Fix Volume Level Automatically Goes Up or Down in Windows 11
Fix 1: Run the Audio Troubleshooter Microsoft offers several troubleshooters to help you identify and resolve common system-related issues on Windows.
The article above may contain affiliate links which help support Guiding Tech. The content remains unbiased and authentic and will never affect our editorial integrity.