Fix 1: Run the Audio Troubleshooter
Microsoft offers several troubleshooters to help you identify and resolve common system-related issues on Windows. Playing Audio is one such troubleshooter that can be helpful in this case. Here’s how you can run it.
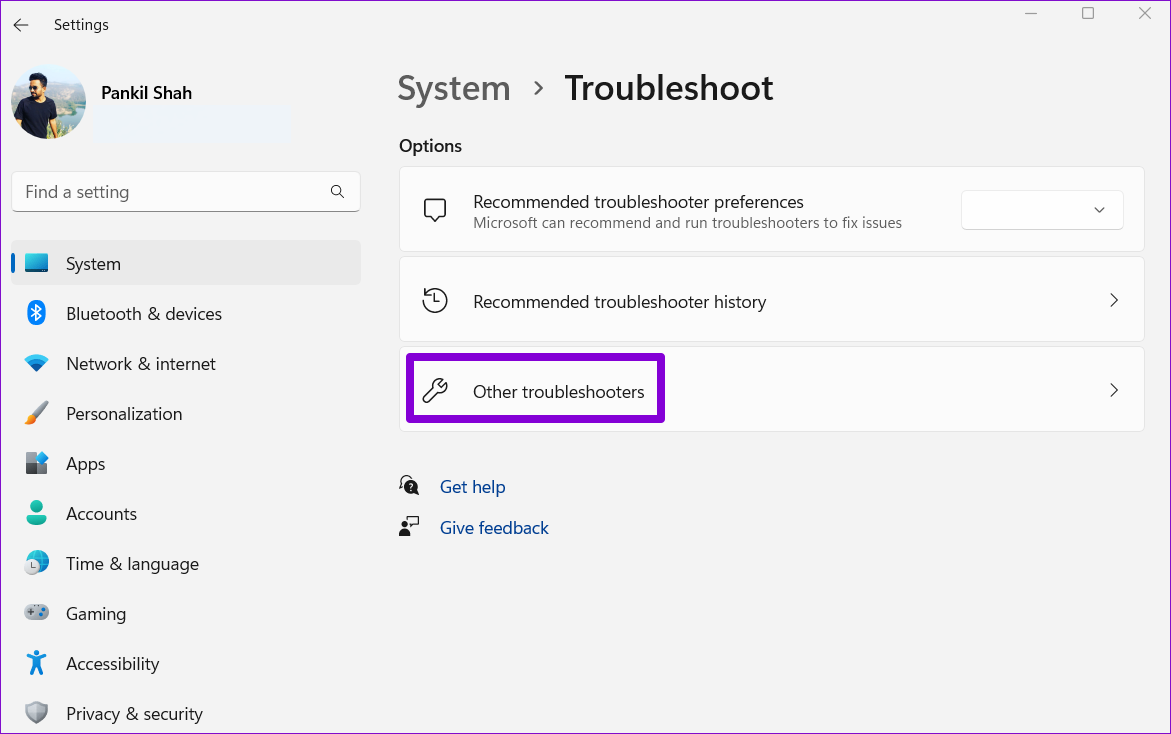
Step 1: Press the Windows key + I to open the Settings app and head to System > Troubleshoot.
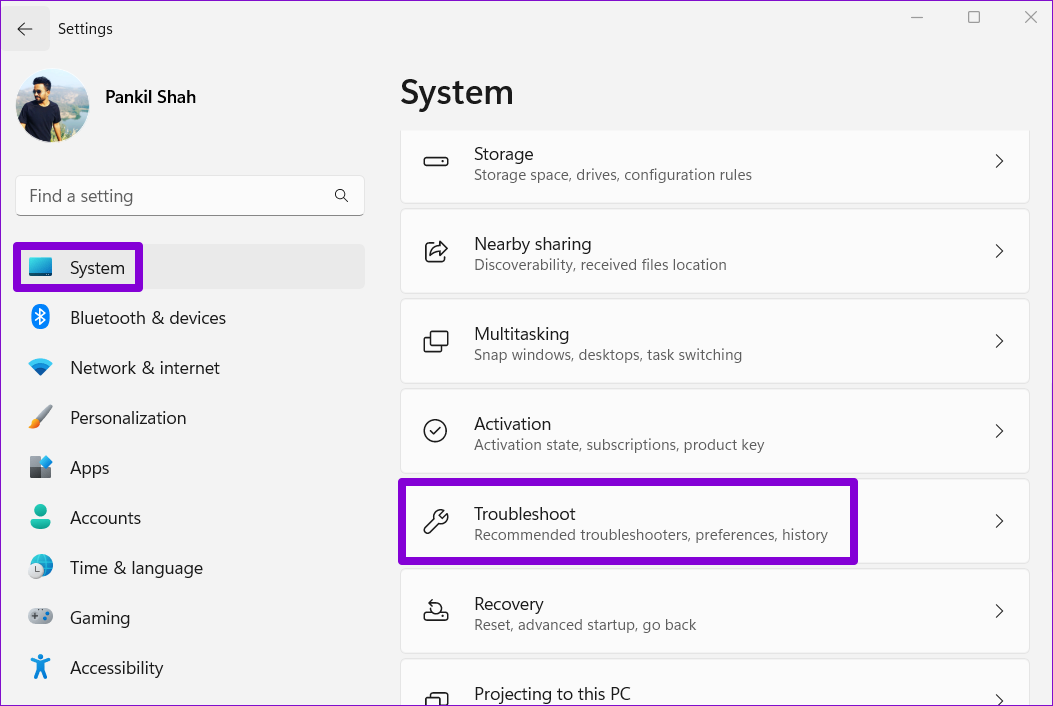
Step 2: Go to Other troubleshooters.
Step 3: Click the Run button next to the Playing Audio troubleshooter.

Follow the on-screen prompts and allow the troubleshooter to resolve any issues. After that, observe if the volume level fluctuates on Windows.
Fix 2: Enable Exclusive Mode in Sound Settings
If multiple apps on your PC are trying to use the audio output device at the same time, it can lead to conflicts and cause the volume level to fluctuate on its own. You’ll need to allow apps exclusive control over the audio output device to avoid this issue.
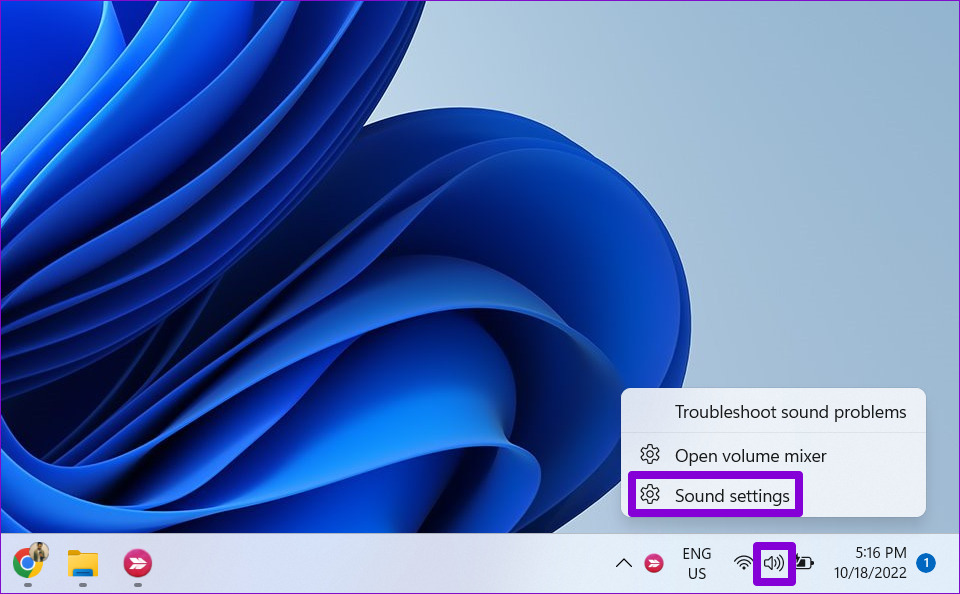
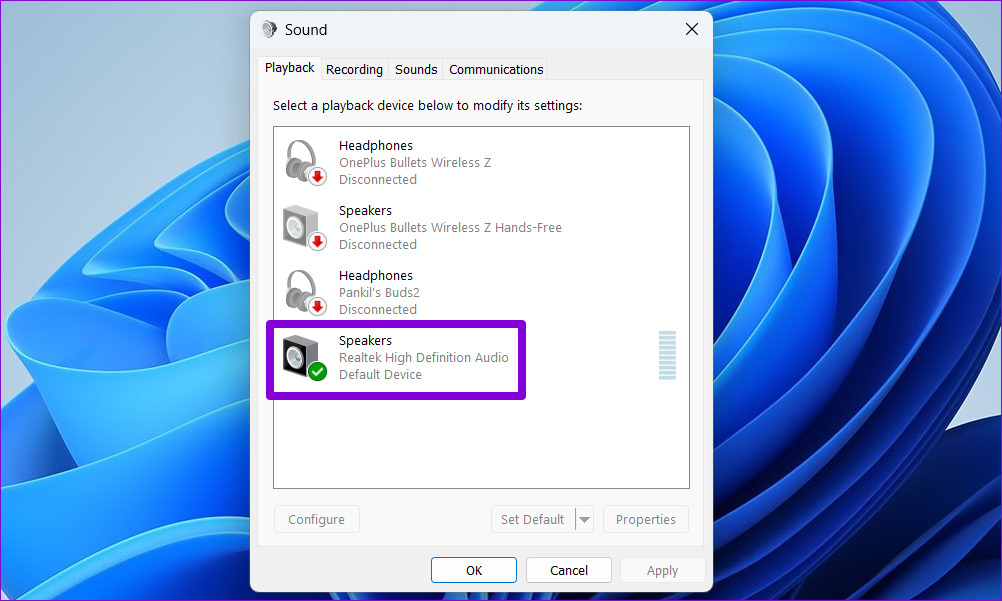
Step 1: Right-click on the speaker icon on the taskbar and select Sound settings from the resulting menu.
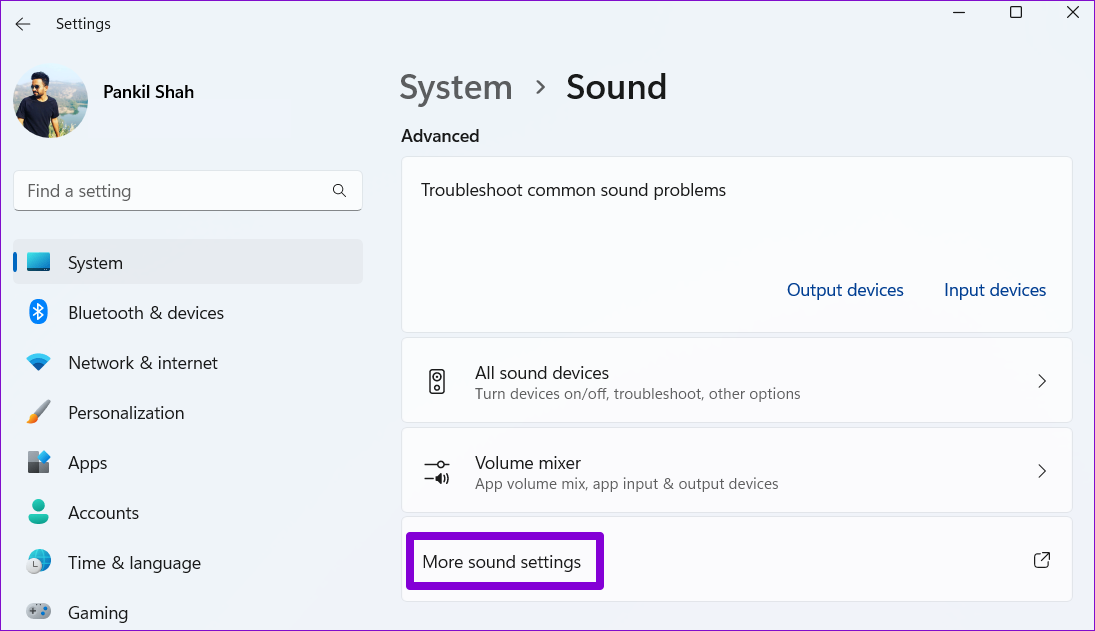
Step 2: Scroll down to the Advanced section and click on More sound settings.
Step 3: Double-click on your audio device to open its properties.
Step 4: Under the Advanced tab, tick the boxes that read Allow applications to take exclusive control of this device and Give exclusive mode applications priority.
Then, hit Apply followed by OK.

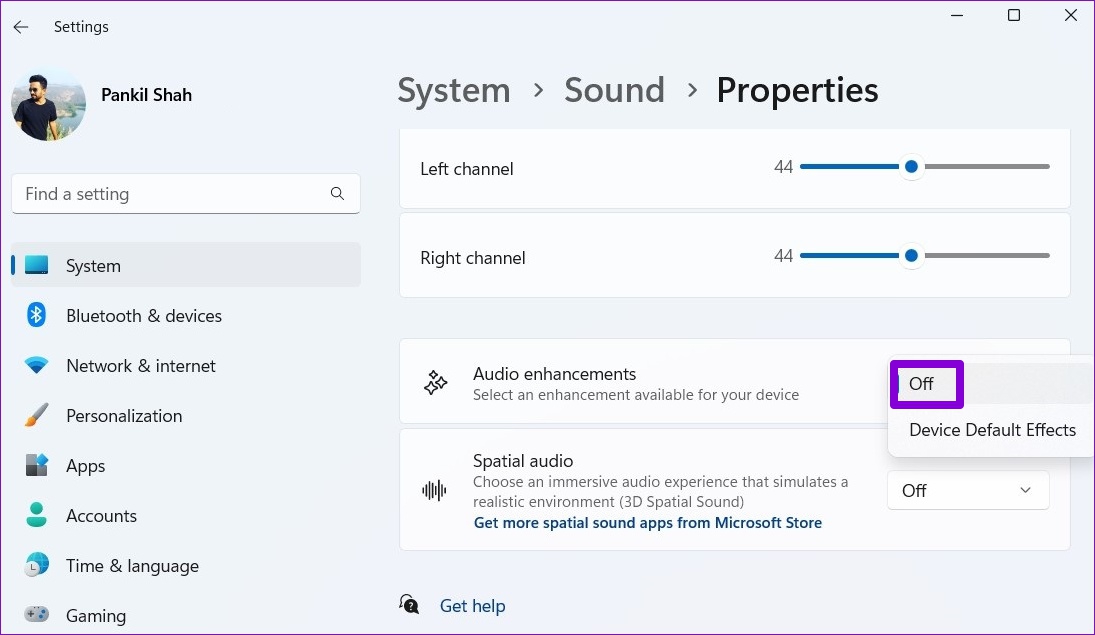
Fix 3: Disable Sound Enhancements
Windows 11 includes several audio enhancement features that can help improve your PC’s sound quality. However, these enhancements can sometimes cause the volume level to change randomly. Hence, it’s best to disable them if you’re experiencing problems.
Step 1: Press the Windows key + I to open the Settings app and head to System > Troubleshoot.
Step 2: Select your audio device.

Step 3: Click the drop-down menu next to Audio enhancements and select Off.
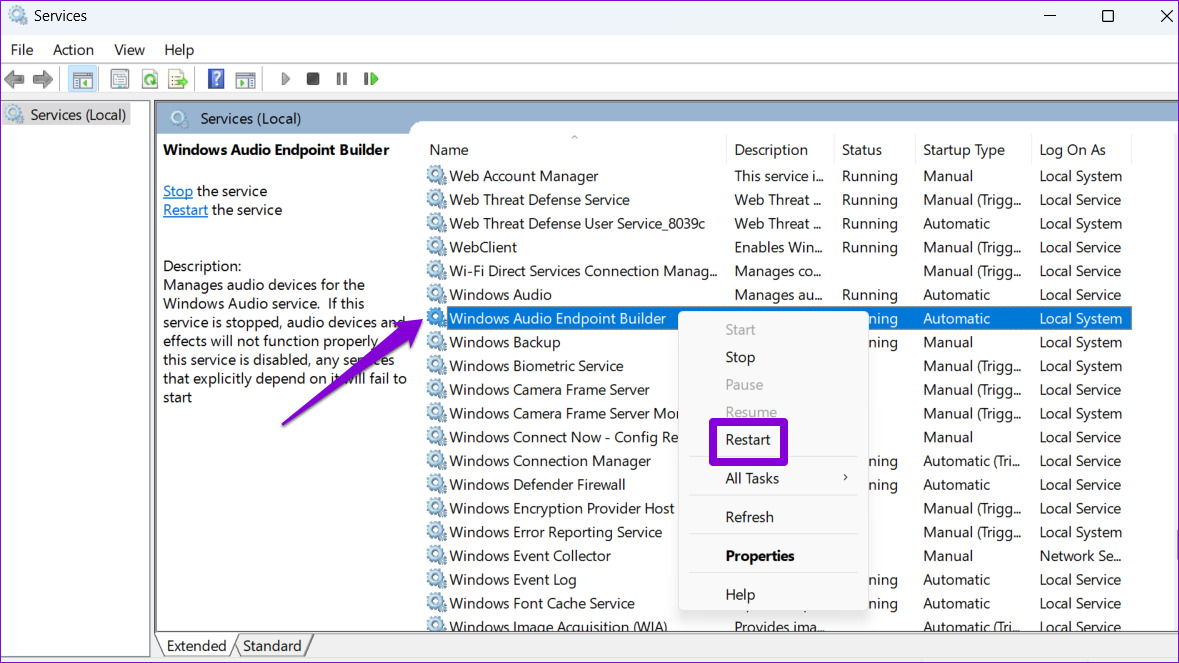
Fix 4: Restart Audio Services
Windows 11 has services for just about every function that runs when your PC boots up. If one of the audio-related services is not running correctly, the volume level may increase or decrease. You can restart audio services on Windows and see if that helps with the issue.
Step 1: Click the search icon on the taskbar, type in services, and press Enter.

Step 2: In the Services window, scroll down to locate the Windows Audio service. Right-click on it and select Restart from the list.

Step 3: Right-click on the Windows Audio Endpoint Builder service and select Restart.
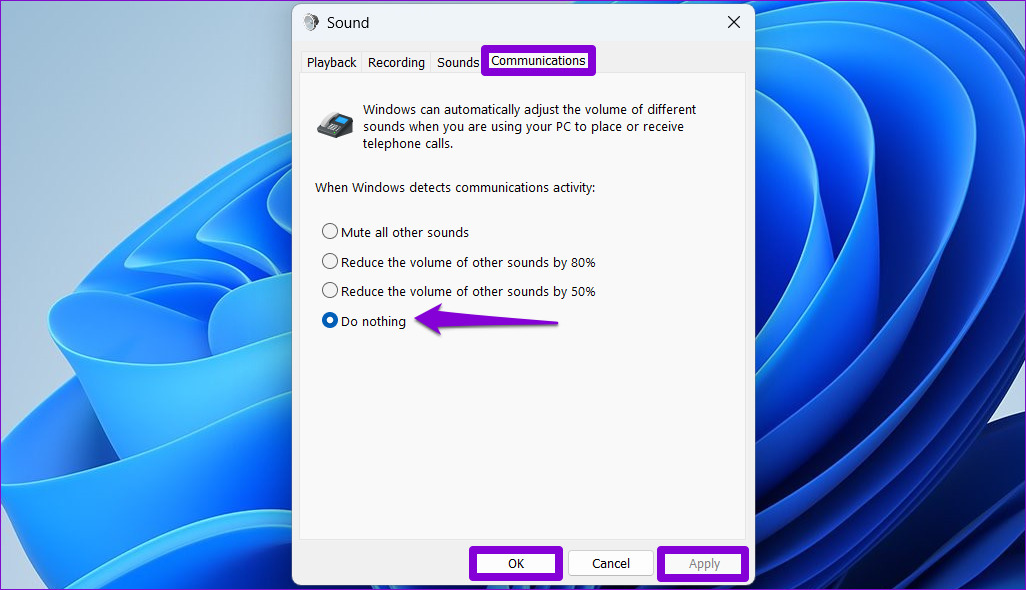
Fix 5: Disable Communication Activity Detection
Windows 11 might lower the volume of different sounds when it detects any communication activity – that happens when you use your PC to make or receive calls. This could make it seem as if the volume of your PC is decreasing by itself. To avoid this, you can disable the automatic communication detection feature on Windows.
Step 1: Right-click on the speaker icon on the taskbar and select Sound settings.
Step 2: Click on More sound settings.
Step 3: Switch to the Communications tab and select the Do nothing option. Then, hit Apply followed by OK.
Fix 6: Check Third-Party App Interference
Third-party apps and programs on your PC can also alter the volume level without input. For example, Discord has a feature called “Attenuation” that can automatically reduce the volume of other audio sources. ASUS Armoury Crate is another app known to cause such volume fluctuations on Windows.
You can avoid such interferences by closing any background apps that may be controlling the volume level. After that, check if the issue is still there.
Fix 7: Update or Reinstall Audio Drivers
The audio driver on your PC facilitates the communication between Windows and your audio device. If the current audio driver on your PC is outdated or malfunctioning, updating it should help. Here are the steps for the same.
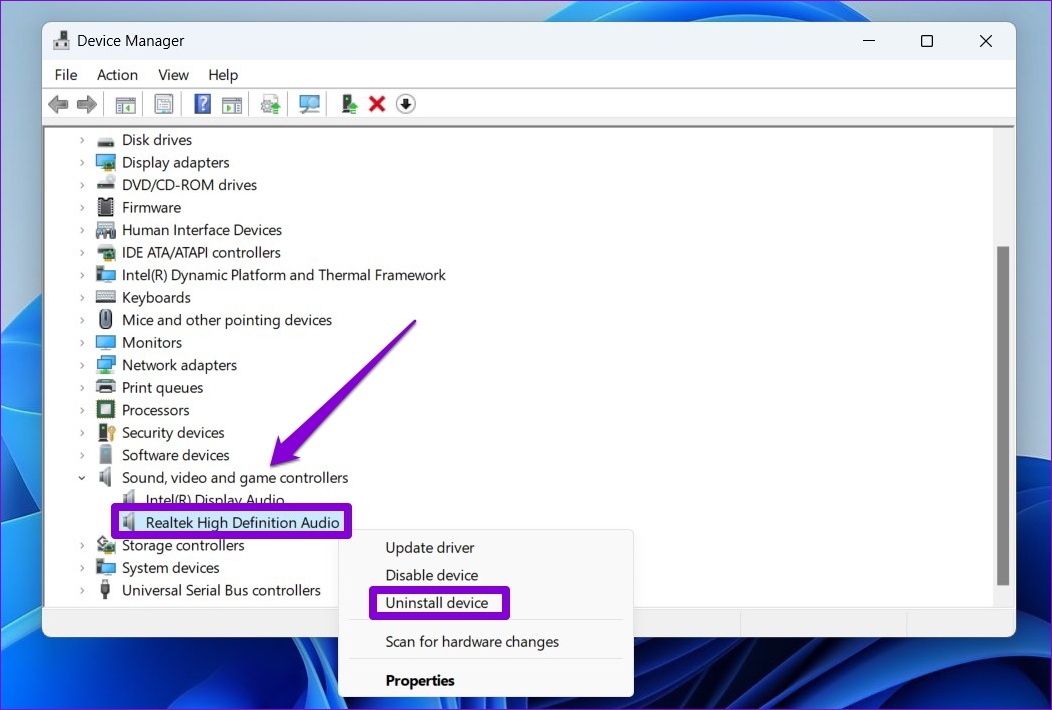
Step 1: Right-click on the Start icon and select Device Manager from the list.

Step 2: Double-click on Sound, video and game controllers to expand it. Right-click on your audio device and select Update driver.

From there, follow the on-screen prompts to finish updating the driver. If the issue remains, you can try uninstalling the audio driver. Once removed, restart your PC, and Windows will install the missing driver whenever it boots next.
Was this helpful?
Last updated on 18 July, 2024
1 Comment
Leave a Reply
Read Next
 3 Ways to Fix Volume Level Keeps Going Up or Down on iPhone
Try These Basic Fixes Remove the phone case: If your iPhone's case remains pressed against one of the volume buttons, the volume level can increase or decrease.
3 Ways to Fix Volume Level Keeps Going Up or Down on iPhone
Try These Basic Fixes Remove the phone case: If your iPhone's case remains pressed against one of the volume buttons, the volume level can increase or decrease.
 4 Ways to Fix Android Phone Automatically Goes into Silent Mode
Basic Fixes Restart device: Restart your Android device to fix temporary bugs and glitches.
4 Ways to Fix Android Phone Automatically Goes into Silent Mode
Basic Fixes Restart device: Restart your Android device to fix temporary bugs and glitches.
 6 Ways to Fix iPhone Automatically Goes to Silent Mode
Basic Fixes: Check sound settings: First, check the ringer and alert volume on your iPhone.
6 Ways to Fix iPhone Automatically Goes to Silent Mode
Basic Fixes: Check sound settings: First, check the ringer and alert volume on your iPhone.
 7 Best Ways to Fix Hibernate Goes to Lock Screen Error on Windows 10
The Hibernate mode, not to be confused with the Sleep feature, on Windows OS saves battery, but the best part is, you can close your lid to activate it.
7 Best Ways to Fix Hibernate Goes to Lock Screen Error on Windows 10
The Hibernate mode, not to be confused with the Sleep feature, on Windows OS saves battery, but the best part is, you can close your lid to activate it.
 5 Ways to Fix Monitor Goes Black Randomly on Windows 11
Basic Fixes Check the monitor connection: Ensure the monitor cable isn't loose.
5 Ways to Fix Monitor Goes Black Randomly on Windows 11
Basic Fixes Check the monitor connection: Ensure the monitor cable isn't loose.
 3 Ways to Fix Monitor Goes Black While Watching Netflix
Basic Fixes Disable G-SYNC in NVIDIA Control Panel: If your monitor is flickering or the screen goes black, disable G-SYNC in NVIDIA Control Panel.
3 Ways to Fix Monitor Goes Black While Watching Netflix
Basic Fixes Disable G-SYNC in NVIDIA Control Panel: If your monitor is flickering or the screen goes black, disable G-SYNC in NVIDIA Control Panel.
 5 Ways to Fix Android Phone Automatically Turning Down Volume
https://youtu.be/c3evW3GIp5w Basic Fixes Restart device: Restart your Android device to get rid of temporary bugs and glitches.
5 Ways to Fix Android Phone Automatically Turning Down Volume
https://youtu.be/c3evW3GIp5w Basic Fixes Restart device: Restart your Android device to get rid of temporary bugs and glitches.
 5 Ways to Fix Android Phone Screen Goes Black During a Call
Before you begin, try restarting your Android device and update it to the latest available software version.
5 Ways to Fix Android Phone Screen Goes Black During a Call
Before you begin, try restarting your Android device and update it to the latest available software version.
The article above may contain affiliate links which help support Guiding Tech. The content remains unbiased and authentic and will never affect our editorial integrity.


Sadly they did not…