
All Windows 11 computers now come with Microsoft Defender as the default. Defender is programmed to run periodic scans, but some users may find that antivirus scans affect their PC’s performance.
The bad news is that there is no standard option to disable these regular scans with the built-in settings. The good news, though, is that you can install an alternative antivirus app, and this will provide you with the power to stop Defender scanning your computer.
Follow the steps below to implement this.
Disable Microsoft Defender Scans: Step-by-Step Guide
Step 1. Download and install a trusted antivirus app. Always do your research and check independent user reviews. AVG is a highly trusted option with a free version. Other options include:
- Avast One Free
- Avira Free Security
- Bitdefender Antivirus Free
Head to the software developer’s official website and download the relevant Windows version. Follow all the on-screen instructions to install the app.
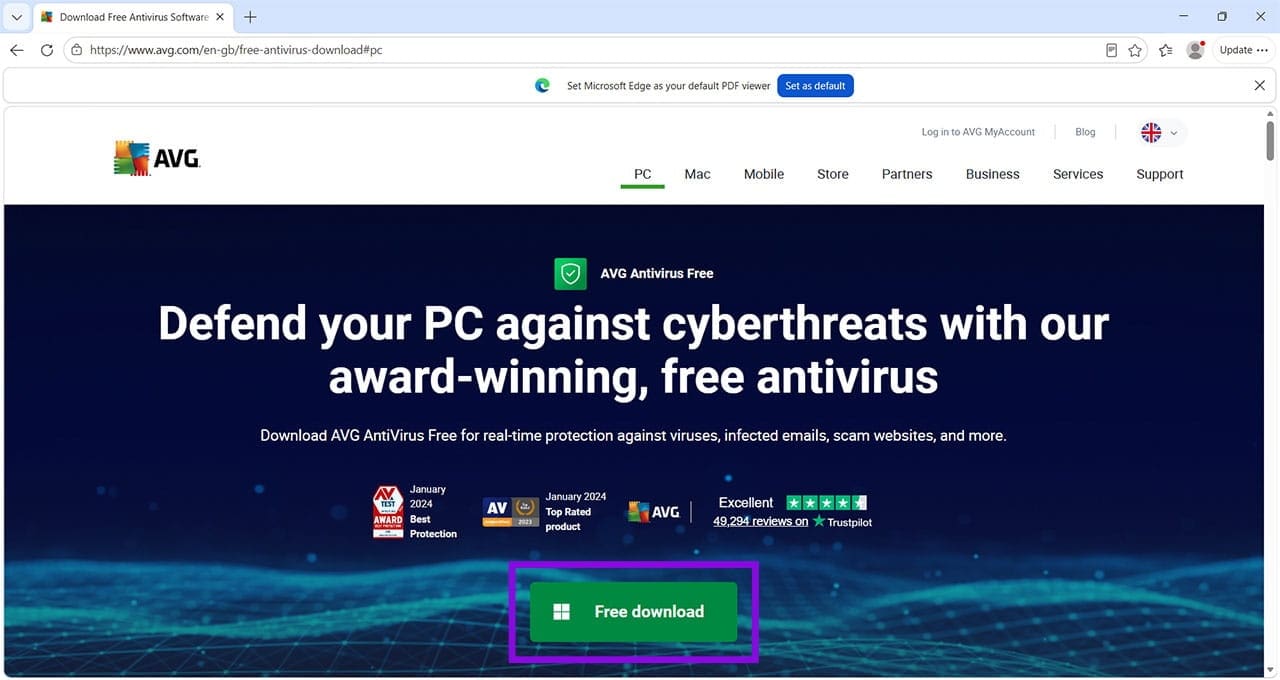
Pro tip: During the installation process, many antivirus tools will try to get you to download and install other tools such as browsers. Check for any pre-ticked boxes and untick any that aren’t relevant to your needs. For example, AVG will try to get you to install its AVG Secure Browser, and you have to manually untick this box to prevent this from happening.

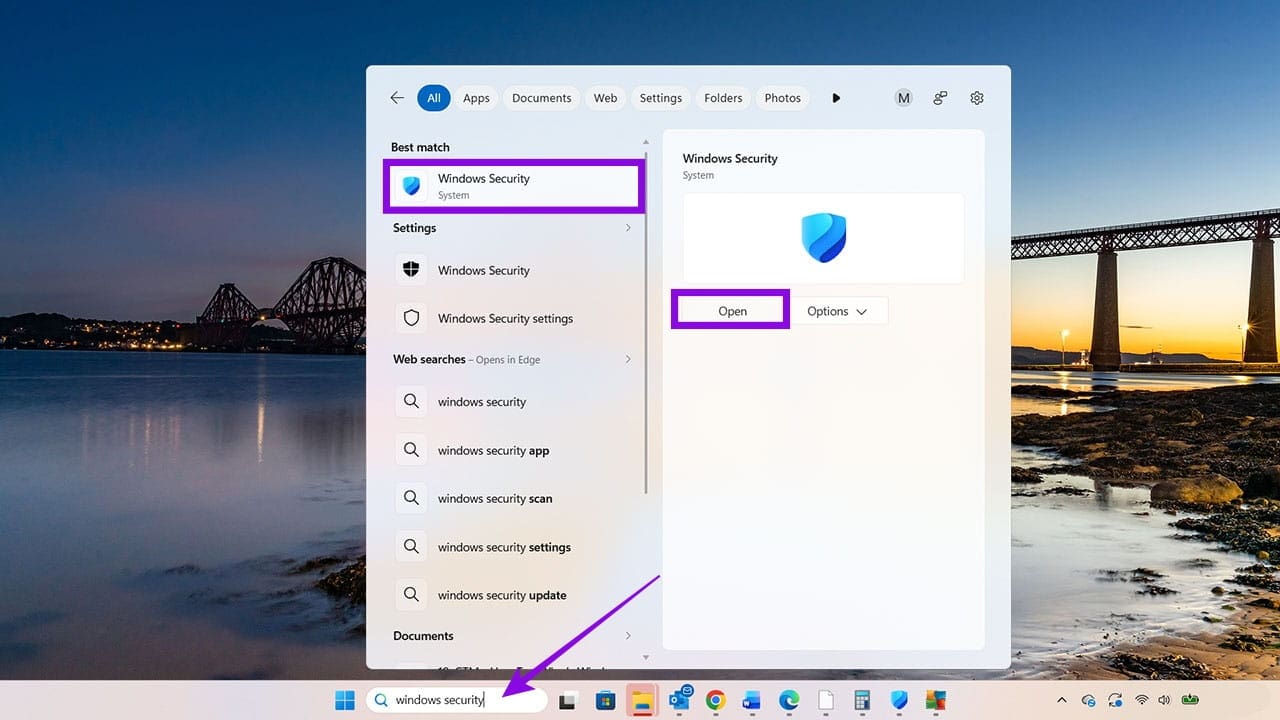
Step 2. Once the installation is complete, open Windows Security. You can simply search for this using the Windows taskbar search box.
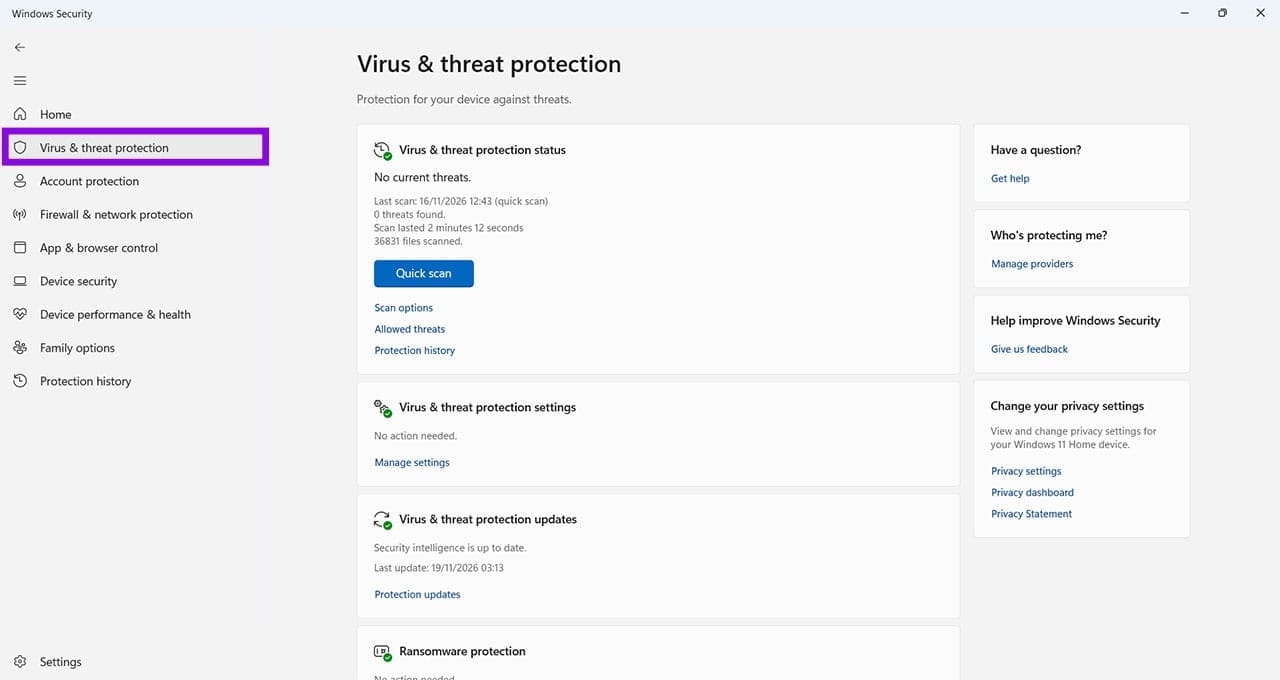
Step 3. Click on “Virus & threat protection.” If you don’t have an alternative antivirus tool, you won’t see any option to switch off your Defender scans. Instead, you will see a full range of options to change the level of scan or check for updates.
However, once you have installed an alternative app, you will see some settings for that app and the option to open it. Below this, you should see Antivirus Microsoft Defender options in blue.
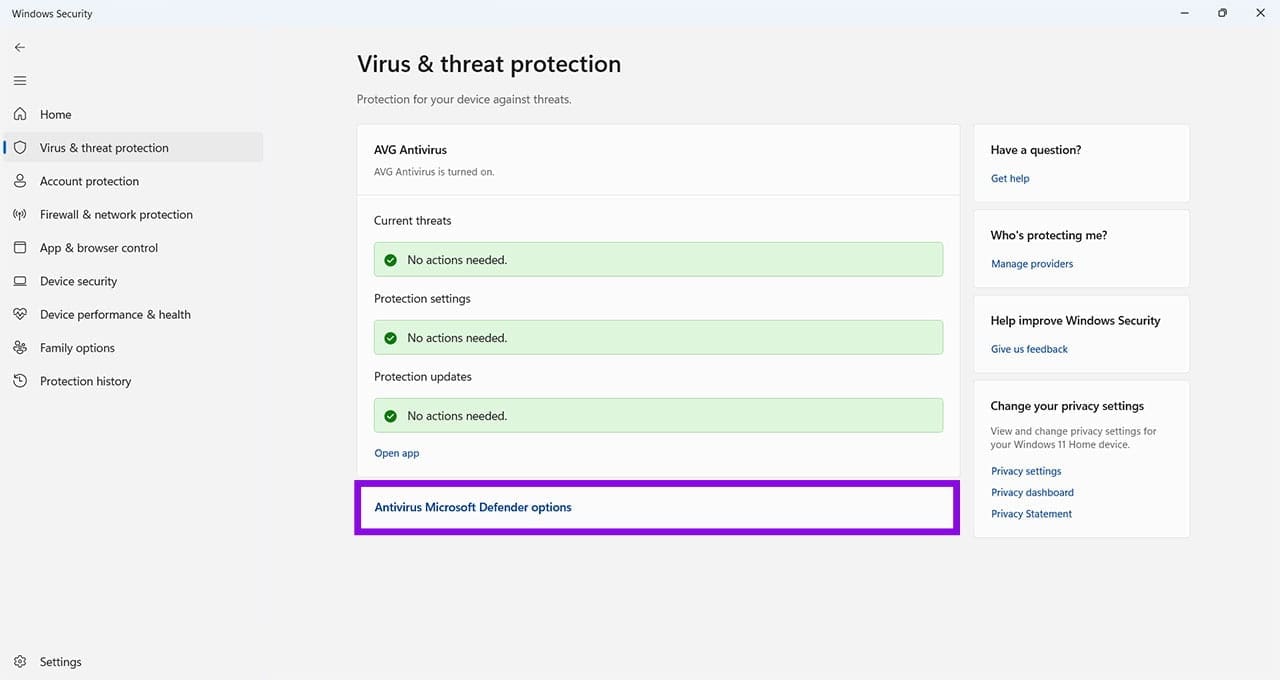
Step 4. Click the Microsoft Defender options to see the toggle button to stop Defender scanning and halt periodic scanning. Switch it off to stop Microsoft Defender from running these additional scans. If you’ve installed an alternative antivirus app, that app should remain responsible for your computer’s primary antivirus protection. You can change its scan settings through the app’s own settings.
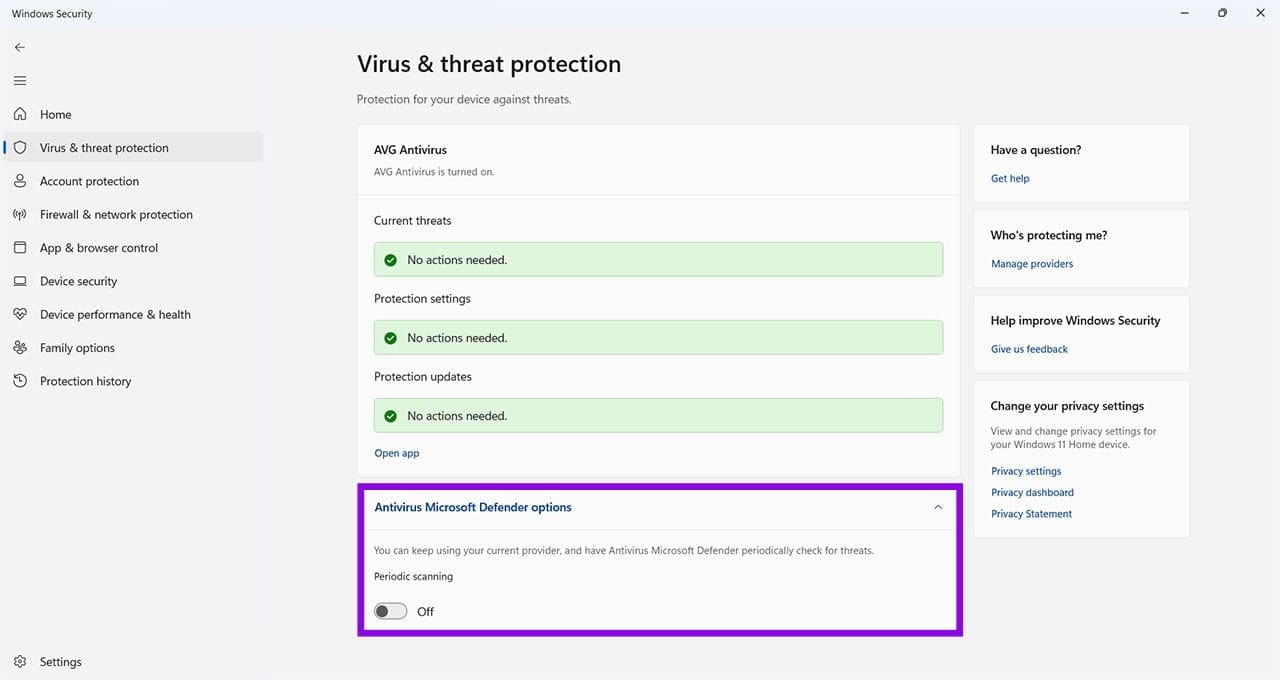
If you decide to toggle the Periodic scanning button on, you will lose the option to switch it off again. So, you must make sure that you want to do this. If you press it accidentally, follow these steps to revert:
Step 1. Uninstall the third-party antivirus app.
Step 2. Restart your Windows computer.
Step 3. Reinstall the third-party app.
Step 4. Head back to Windows Security > Virus & threat protection, and you should see that regular Defender scans are off.
Was this helpful?
Last updated on 21 November, 2026
Read Next
 5 Ways to Completely Disable Windows Defender
Method 1: Using Command Prompt Step 1: Press the Windows key on your keyboard, type Command Prompt, and click Run as administrator.
 How to Fix WhatsApp Web QR Code Not Loading or Scanning
Basic Fixes Reload WhatsApp QR code - If not scanned for long, the QR code expires.
 4 Fixes for Phone Not Scanning Telegram Web QR Code
Basic Fixes Clean your phone camera lens: A dirty or foggy camera lens cannot read the QR code from Telegram Web properly.
 3 Fixes for Notes App Not Scanning Documents on iPhone
Basic Fixes Check camera permission: Go to Settings > Notes > enable the app to use iPhone Camera.
 2 Quick Ways to Schedule Windows Defender Scan
Windows Defender has become integral to the Windows Security suite of tools.
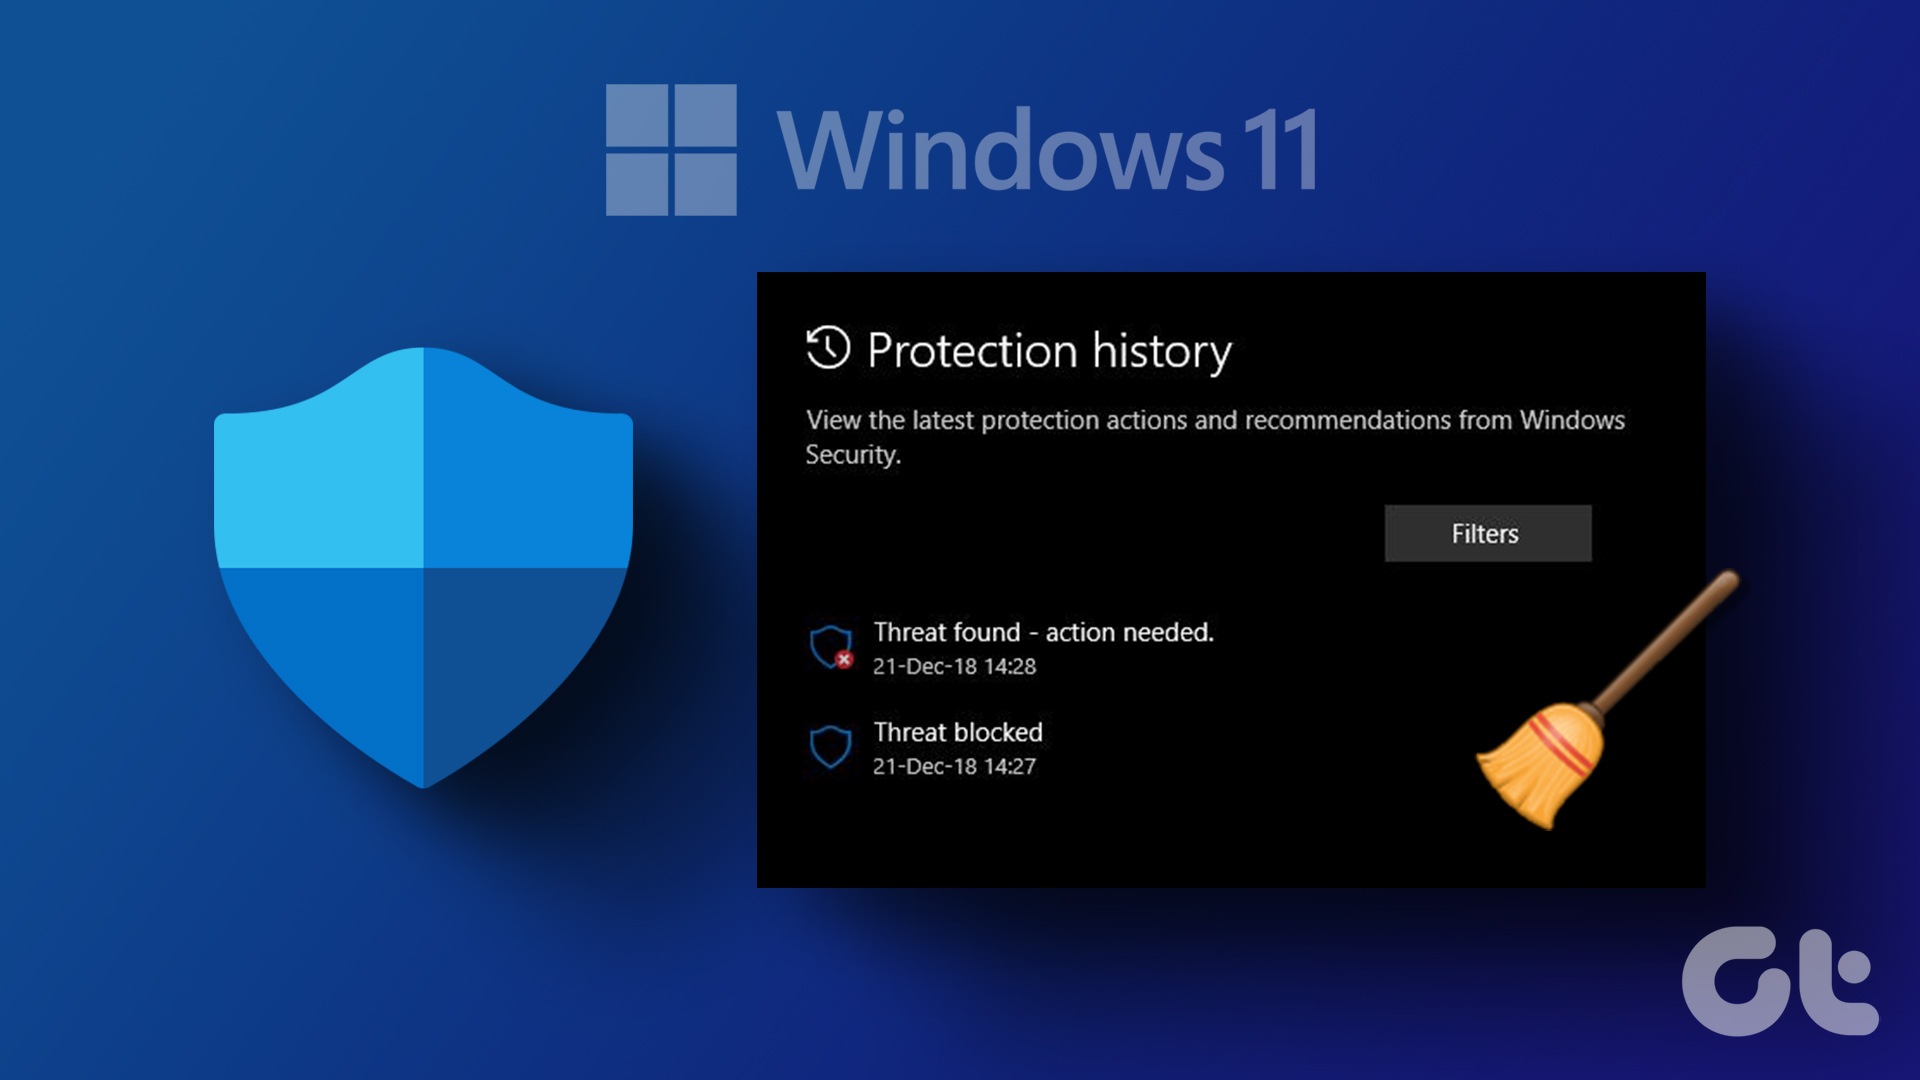 4 Ways to Clear Windows Defender Protection History
Method 1: Using File Explorer Like many applications, Windows Defender stores the Protection History log on your computer as an accessible file.
 How to Restore Files Removed by Windows Defender
Windows Defender is an invaluable tool for keeping your PC safe from harm.
 How to Fix Windows Defender Quick Scan Not Working
Microsoft Defender Antivirus is built into Windows 11 and helps protect against malware, including viruses, ransomware, and spyware.
The article above may contain affiliate links which help support Guiding Tech. The content remains unbiased and authentic and will never affect our editorial integrity.