For most people, a new day brings about a set of fresh tasks to complete. These tasks may be personal, study, or job-related. When you are dealing with just one task, you can easily rely on your memory to ensure it gets completed. However, if you have several tasks to complete, it would be best to write them down to ensure you do not miss any.

Microsoft Outlook is one productivity tool you can use to create and monitor tasks. You can easily turn an email into a task or create a non-email task using Microsoft Outlook. Here’s how to do so:
How to Create a Task from an Email in Microsoft Outlook
When you receive an email in Outlook with an activity to complete, you can create a task from the email. Here are the different ways you can do so:
By Flagging the Email
Microsoft Outlook has a flagging feature that you can use to remind yourself to take action or follow up on an email. Here’s how it works:
Step 1: Open the Microsoft Outlook app from your PC’s Start menu or Taskbar.
Step 2: From your Inbox folder, hover on the email from which you want to create a task. You should see a flag show up beside the email.
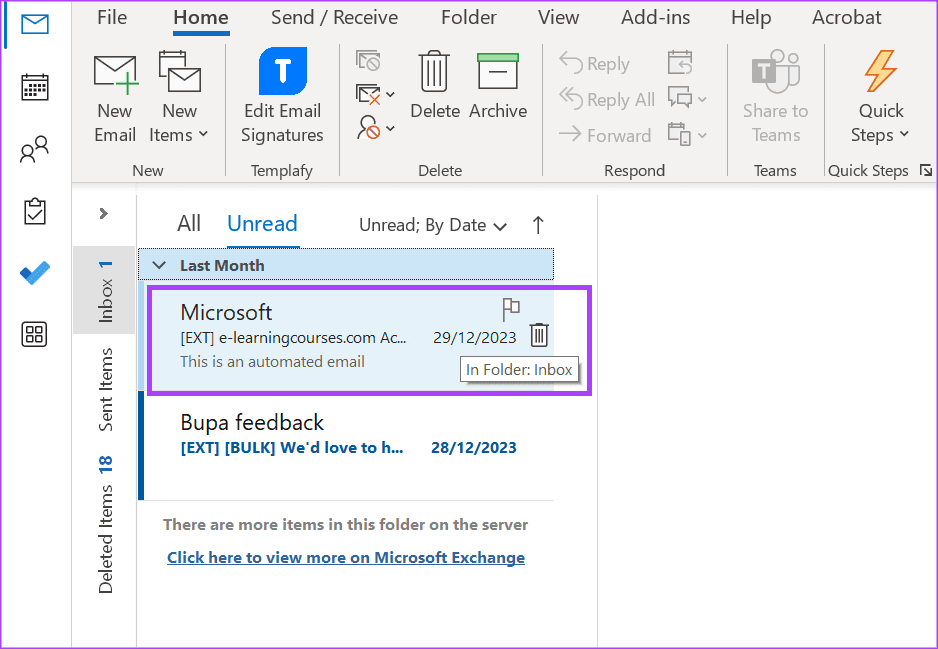
Step 3: Click the flag, and it should turn red.
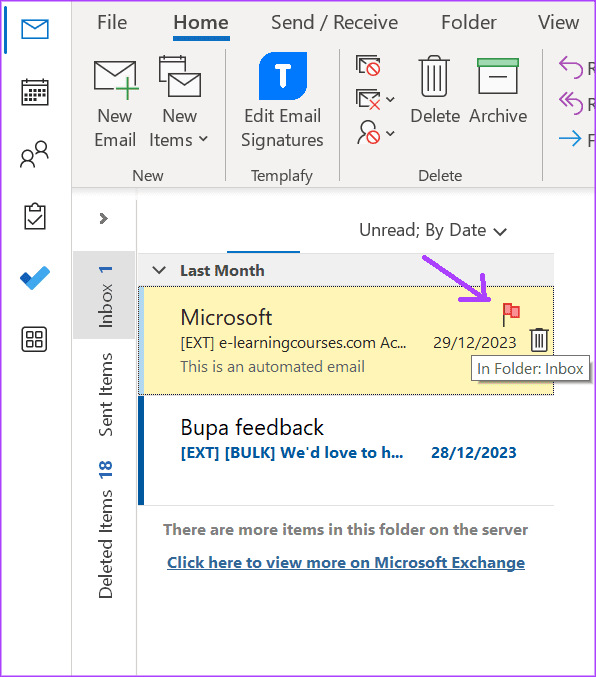
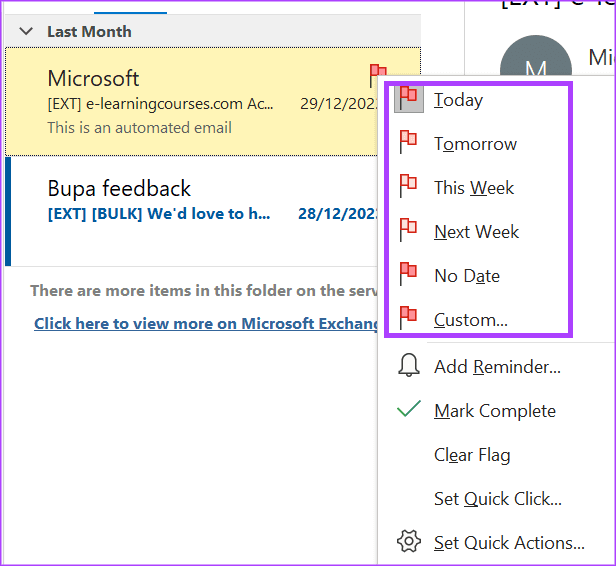
Step 4: Right-click on the red flag and select a due date for the flagged email from the following options:
- Today
- Tomorrow
- This Week
- Next Week
- No Date
- Custom
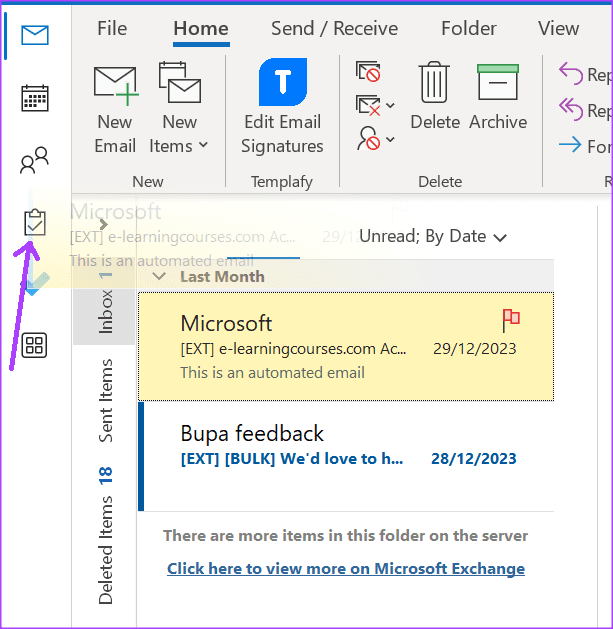
The flagged email will be added to your Task list. To know how to access your Task list in Outlook, read on.
By Dragging an Email to the Task Icon
You can drag an email to the Outlook Task Icon on the Navigation side panel of Outlook to include it in your list of tasks. Here’s how to do so:
Step 1: Open the Microsoft Outlook app from your PC’s Start menu or Taskbar.
Step 2: From your Inbox folder, hover on the email from which you want to create a task.
Step 3: Click the email and drag it to a clipboard icon on the side panel of the Outlook app. This will launch another Outlook window.
Step 4: Confirm or edit the following details of your task on the new window:
- Subject
- Start date
- Due date
- Status
- Priority
- % Complete
- Reminder
- Reminder Time
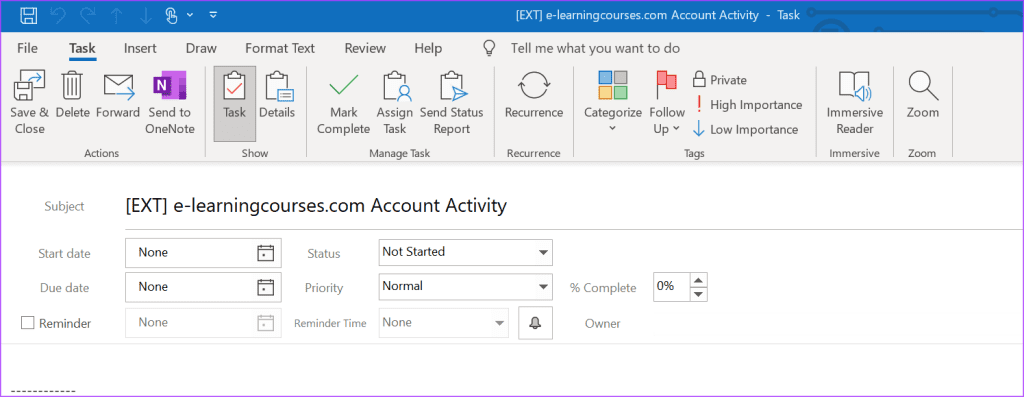
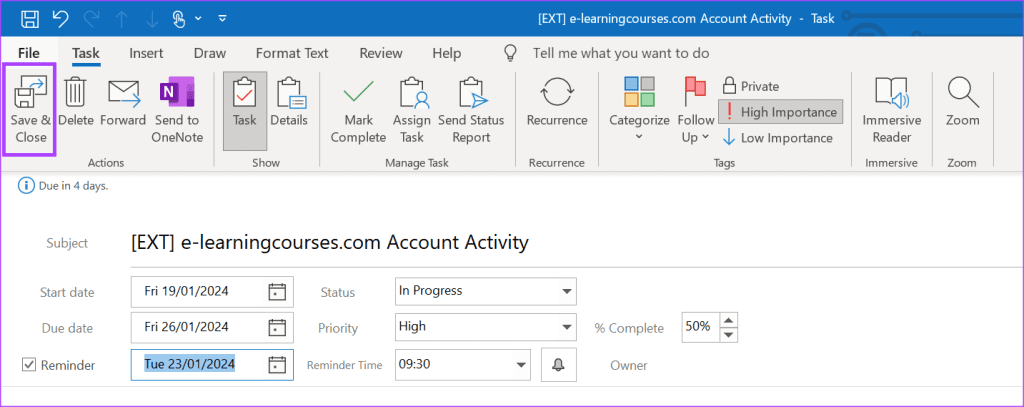
Step 5: Click Save & Close to add the new task to your Task list.
How to Create a New Task or Non-Email Task in Microsoft Outlook
You do not have to rely on emails to create tasks in Microsoft Outlook. You can create a new task in Microsoft Outlook using the following ways:
By Using Shortcut Keys
You can launch the Outlook window with shortcut keys to create a new task. Here’s how to do so:
Step 1: Open the Microsoft Outlook app from your PC’s Start menu or Taskbar.
Step 2: On your keyboard, tap the following keys: Ctrl+Shift+K. This will launch the Outlook Task window.

Step 3: Enter the following details of your task on the new window:
- Subject
- Start date
- Due date
- Status
- Priority
- % Complete
- Reminder
- Reminder Time
- Email Body
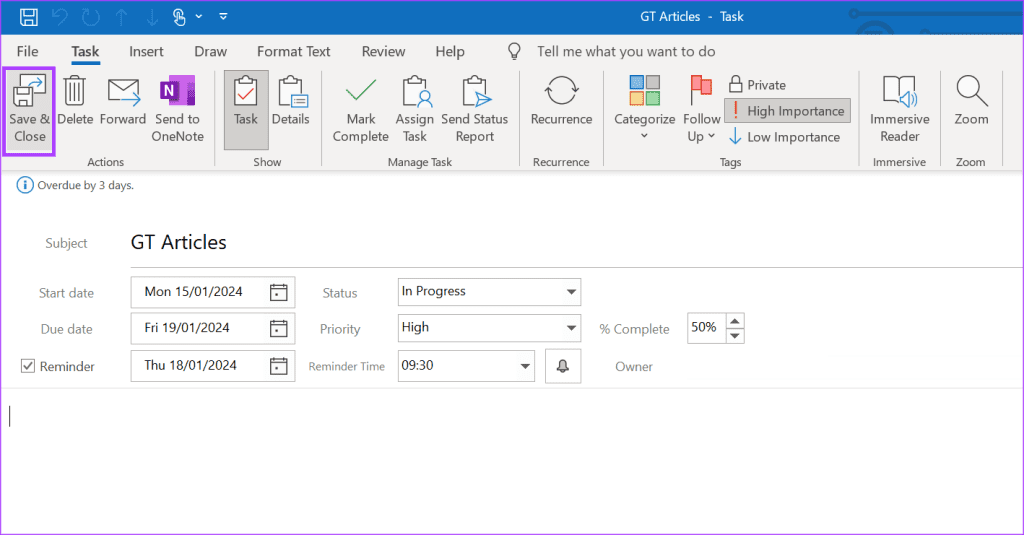
Step 4: Click Save & Close to add the new task to your Task list.
By Creating a New Item
You may be familiar with the New Items button on the Outlook Ribbon, which can be used to create new emails or meetings. Here’s how to use it to create a new task on Microsoft Outlook:
Step 1: Open the Microsoft Outlook app from your PC’s Start menu or Taskbar.
Step 2: On the Microsoft Outlook Ribbon, click the New Items button in the Home tab.

Step 3: Select Task from the dropdown. This will launch another Outlook window.

Step 4: Enter the following details of your task on the new window:
- Subject
- Start date
- Due date
- Status
- Priority
- % Complete
- Reminder
- Reminder Time
- Email Body
Step 5: Click Save & Close to add the new task to your Task list.
By Using the To-Do Bar
The Microsoft To-Do app is also a feature on Microsoft Outlook. You can create To-Do’s on Outlook using this feature. Here’s how to do so:
Step 1: Open the Microsoft Outlook app from your PC’s Start menu or Taskbar.
Step 2: On the Microsoft Outlook side panel, click the To-Do icon which is a blue checkmark. This will open the To-Do page on Outlook.

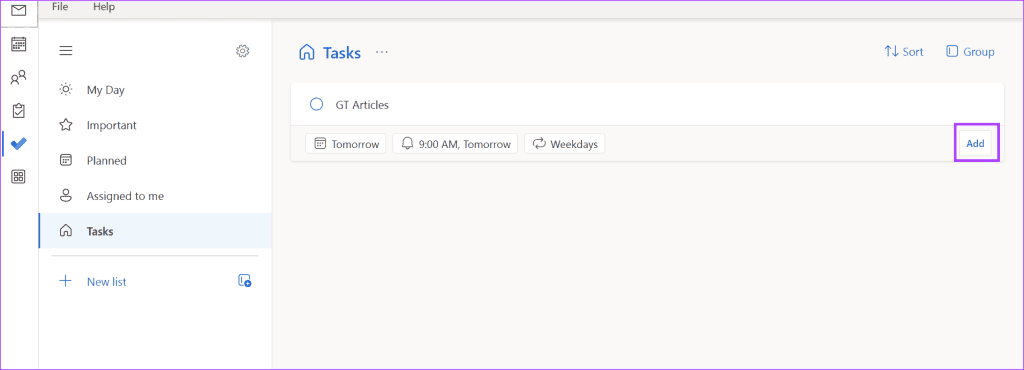
Step 3: Select the Add a task box and enter the task description.
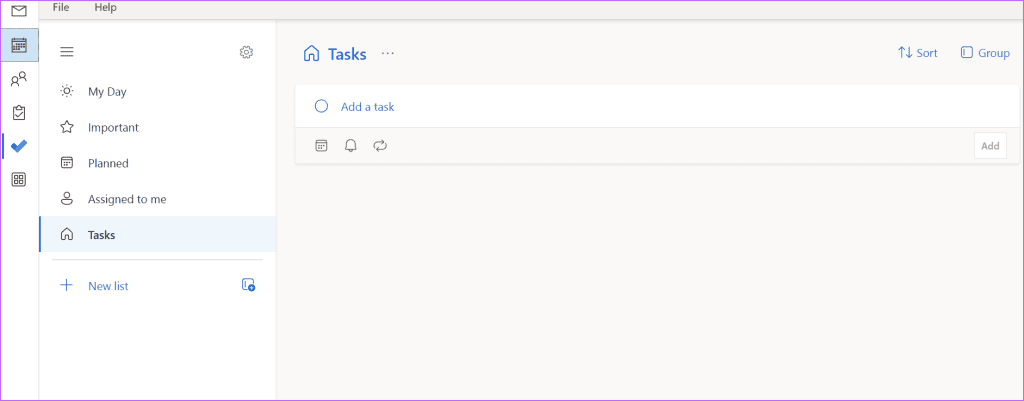
Step 4: Click the icons beneath the task box to:
- Add due date
- Add a reminder
- Set recurrence
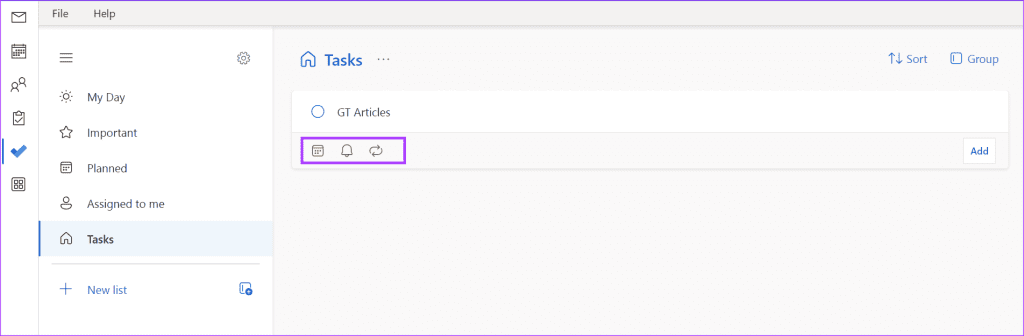
Step 5: Press enter or click Add to save the task.
Recovering Deleted Items in Microsoft Outlook
If in the process of creating a new task or flagging an email, you accidentally delete it, don’t panic. You can easily recover accidentally deleted items in Microsoft Outlook. All you have to do is visit the Deleted Items folder in Outlook to move the email back to your Inbox. Having said that, let us know if you were able to successfully create tasks in Outlook by using the tips mentioned in the article.
Was this helpful?
Last updated on 24 January, 2024
Read Next
 How to Create a Custom Form in Microsoft Outlook
Microsoft Outlook leats you create a Form.
How to Create a Custom Form in Microsoft Outlook
Microsoft Outlook leats you create a Form.
 How to Create and Use Business Cards in Microsoft Outlook
Microsoft Outlook provides a lot of features that make email management easy.
How to Create and Use Business Cards in Microsoft Outlook
Microsoft Outlook provides a lot of features that make email management easy.
 How to Create and Manage Rules in Outlook 365 Webmail
Managing emails is an arduous task.
How to Create and Manage Rules in Outlook 365 Webmail
Managing emails is an arduous task.
 Top 4 Ways to Change New Outlook Back to Old (Classic View) Outlook on Windows and Mac
The new Outlook app for desktop boasts a modern and simplified design, aligning it more closely with the web version of Microsoft Outlook.
Top 4 Ways to Change New Outlook Back to Old (Classic View) Outlook on Windows and Mac
The new Outlook app for desktop boasts a modern and simplified design, aligning it more closely with the web version of Microsoft Outlook.
 Top 3 Ways to Insert Screenshots in Microsoft Outlook
Screenshots can be very helpful when passing certain information over messages or social media.
Top 3 Ways to Insert Screenshots in Microsoft Outlook
Screenshots can be very helpful when passing certain information over messages or social media.
 4 Ways to Fix Microsoft Outlook Web Not Working
Try Basic Fixes Check if Outlook is down: If Outlook servers are having an off day, you can't use Outlook in your web browser.
4 Ways to Fix Microsoft Outlook Web Not Working
Try Basic Fixes Check if Outlook is down: If Outlook servers are having an off day, you can't use Outlook in your web browser.
 3 Ways to Add a Contact in Microsoft Outlook
Method 1: Add a Contact From a Received Email The easiest way to add someone to your Outlook address book is to open one of their emails and add the
3 Ways to Add a Contact in Microsoft Outlook
Method 1: Add a Contact From a Received Email The easiest way to add someone to your Outlook address book is to open one of their emails and add the
 3 Ways to Fix Microsoft Outlook Not Sending Emails on Android and iPhone
Basic Fixes Double-check the email address and attachment size: Outlook may fail to send an email if you have accidentally misspelled the recipient's email address.
3 Ways to Fix Microsoft Outlook Not Sending Emails on Android and iPhone
Basic Fixes Double-check the email address and attachment size: Outlook may fail to send an email if you have accidentally misspelled the recipient's email address.
The article above may contain affiliate links which help support Guiding Tech. The content remains unbiased and authentic and will never affect our editorial integrity.

