Note: We are running a OnePlus 7T (Android 12) and an iPhone 12 (iOS 16.1) for the steps in this article. So, the steps may slightly differ if you are on a different Android device or iOS version.
How to Clear Discord Cache on Android
Step 1: On your Android device, go to your phone Settings.
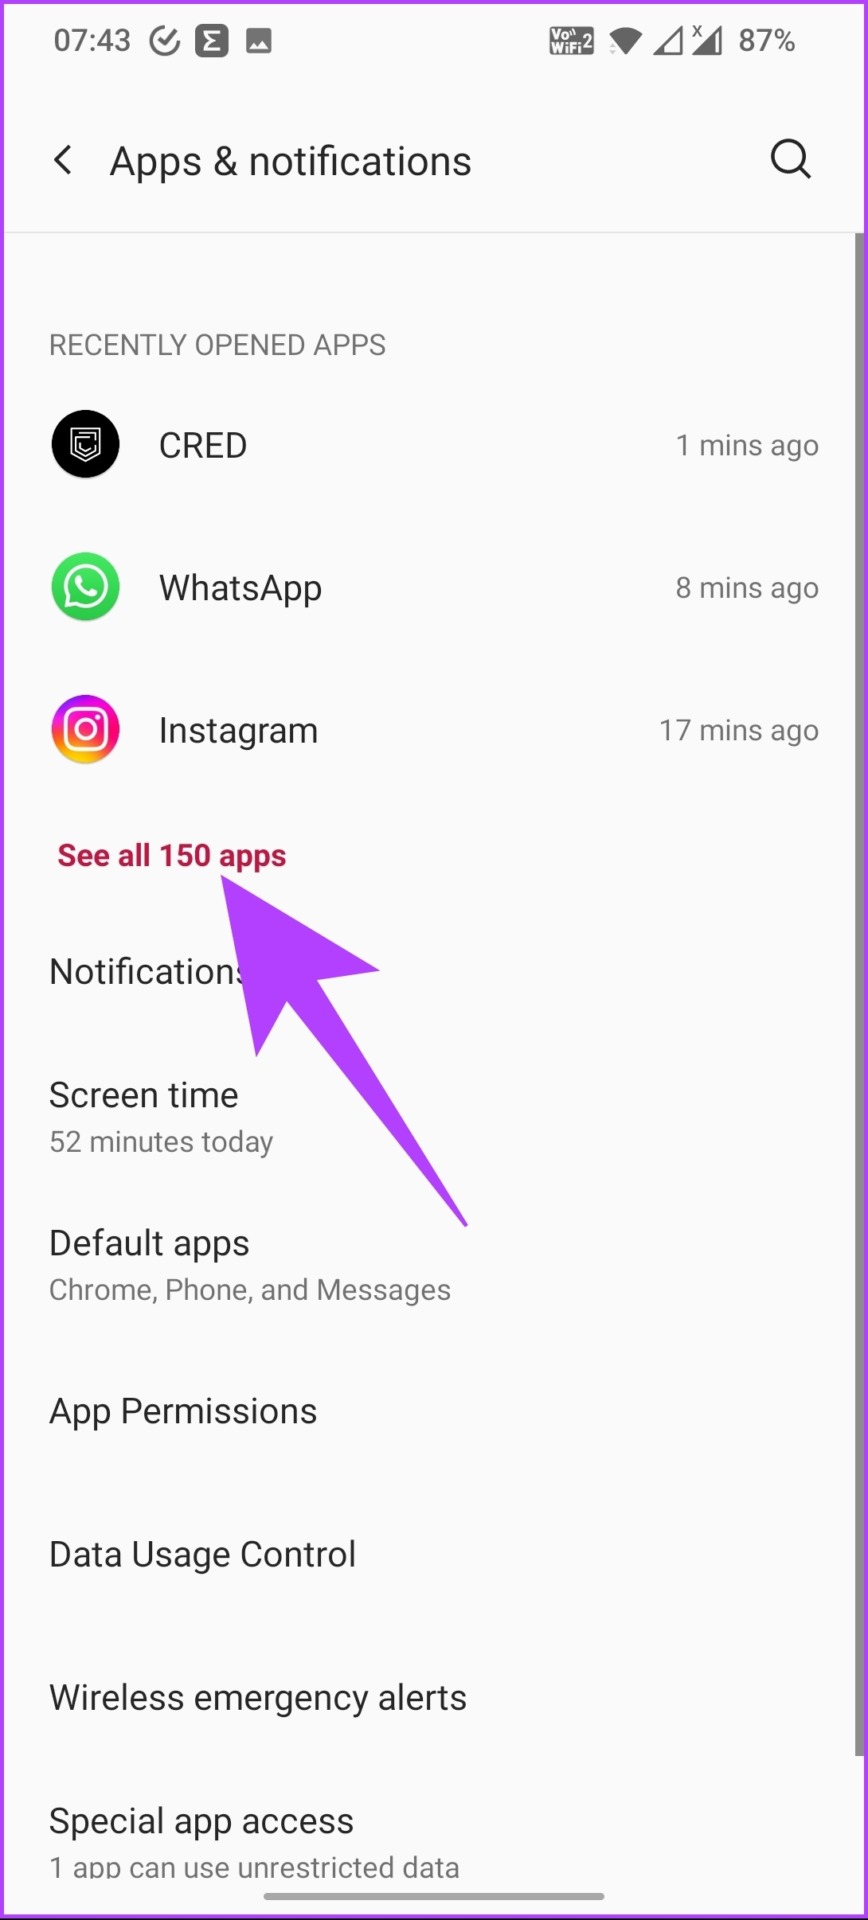
Step 2: Scroll down to find and tap on Apps & notifications.
Step 3: Under Recently Opened Apps, tap on See all apps.
Step 4: Scroll down to find and tap on Discord.

Step 5: Go to Storage & cache > tap on Clear cache.

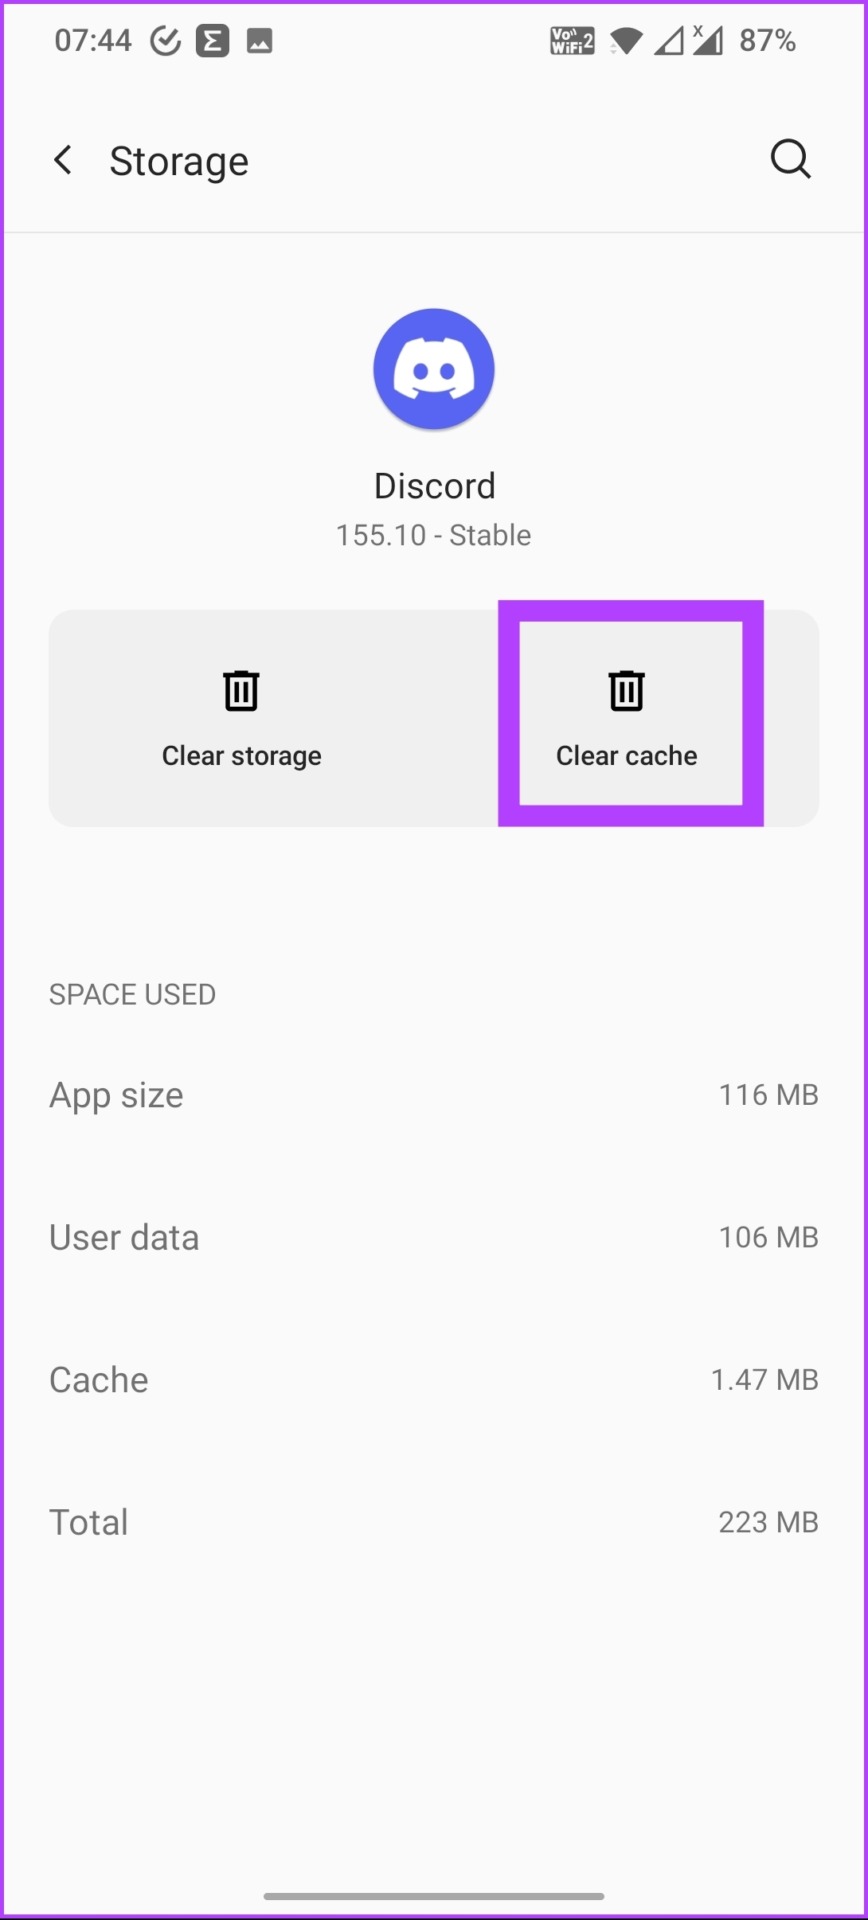
That’s it. You have cleared the cache on Discord. If you are not an Android but an iPhone user, move on to the next section.
How to Clear Cache on Discord Using iPhone
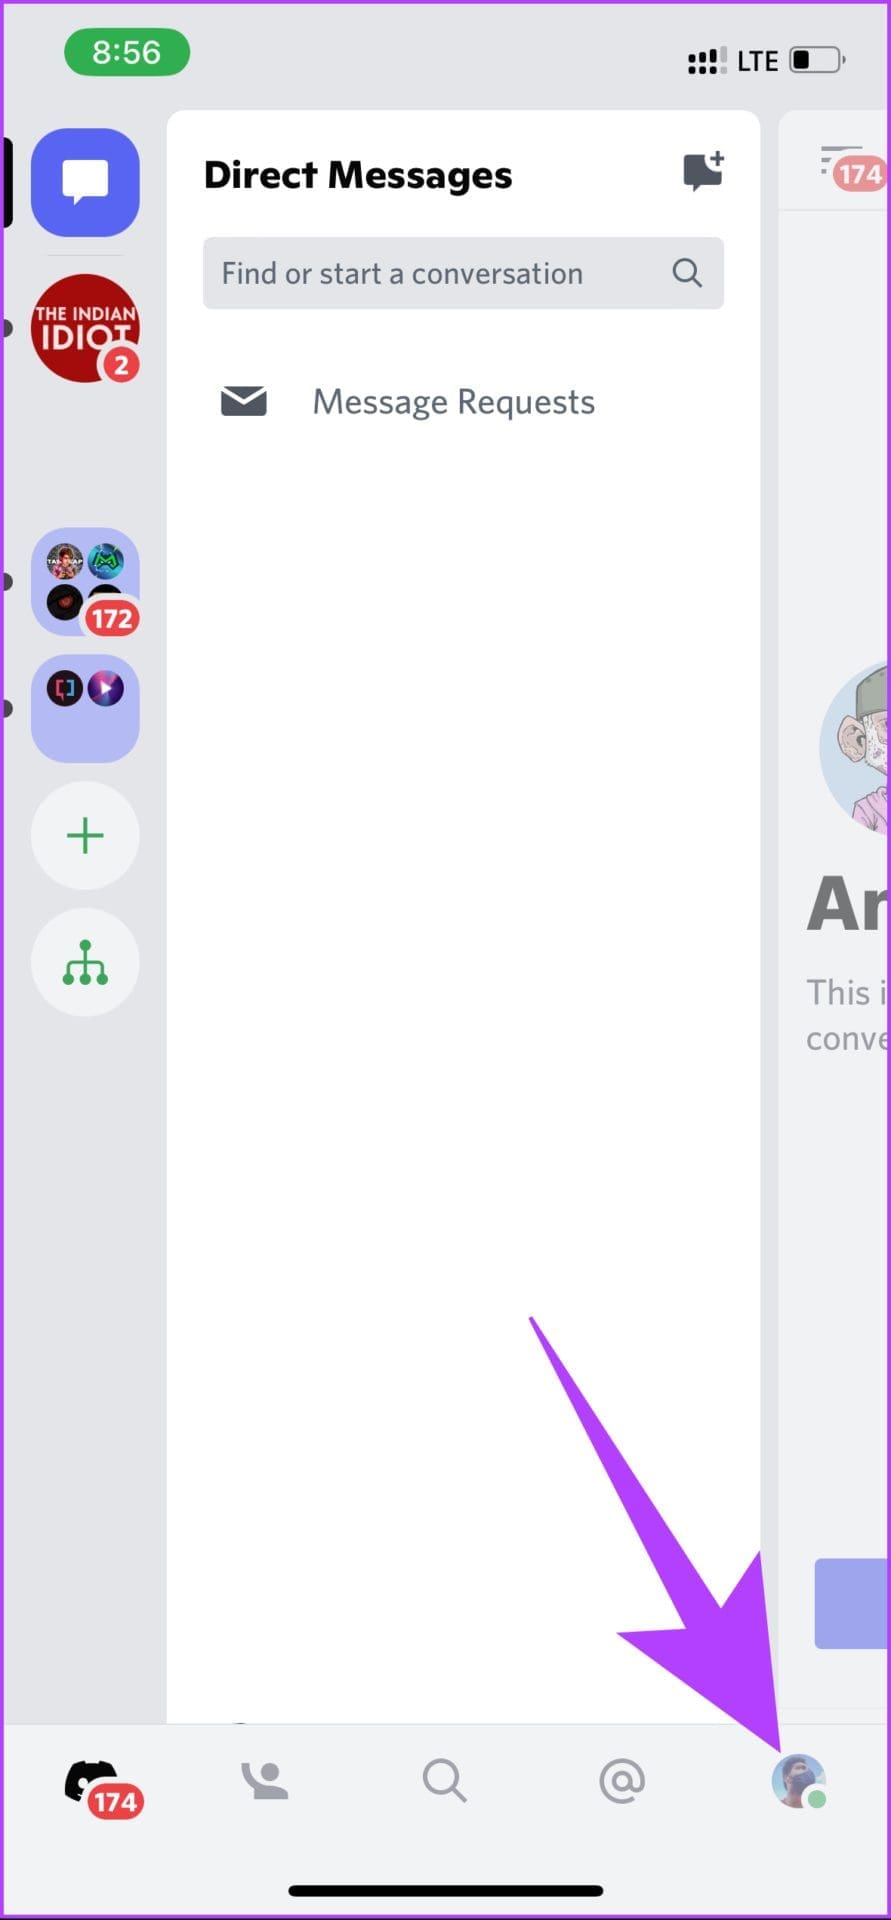
The process of clearing the cache on the iPhone differs slightly. We will be using Discord’s in-app option.
Step 1: Open Discord and click on your profile icon.
Step 2: Now, scroll to the bottom to find and tap on Clear Caches.
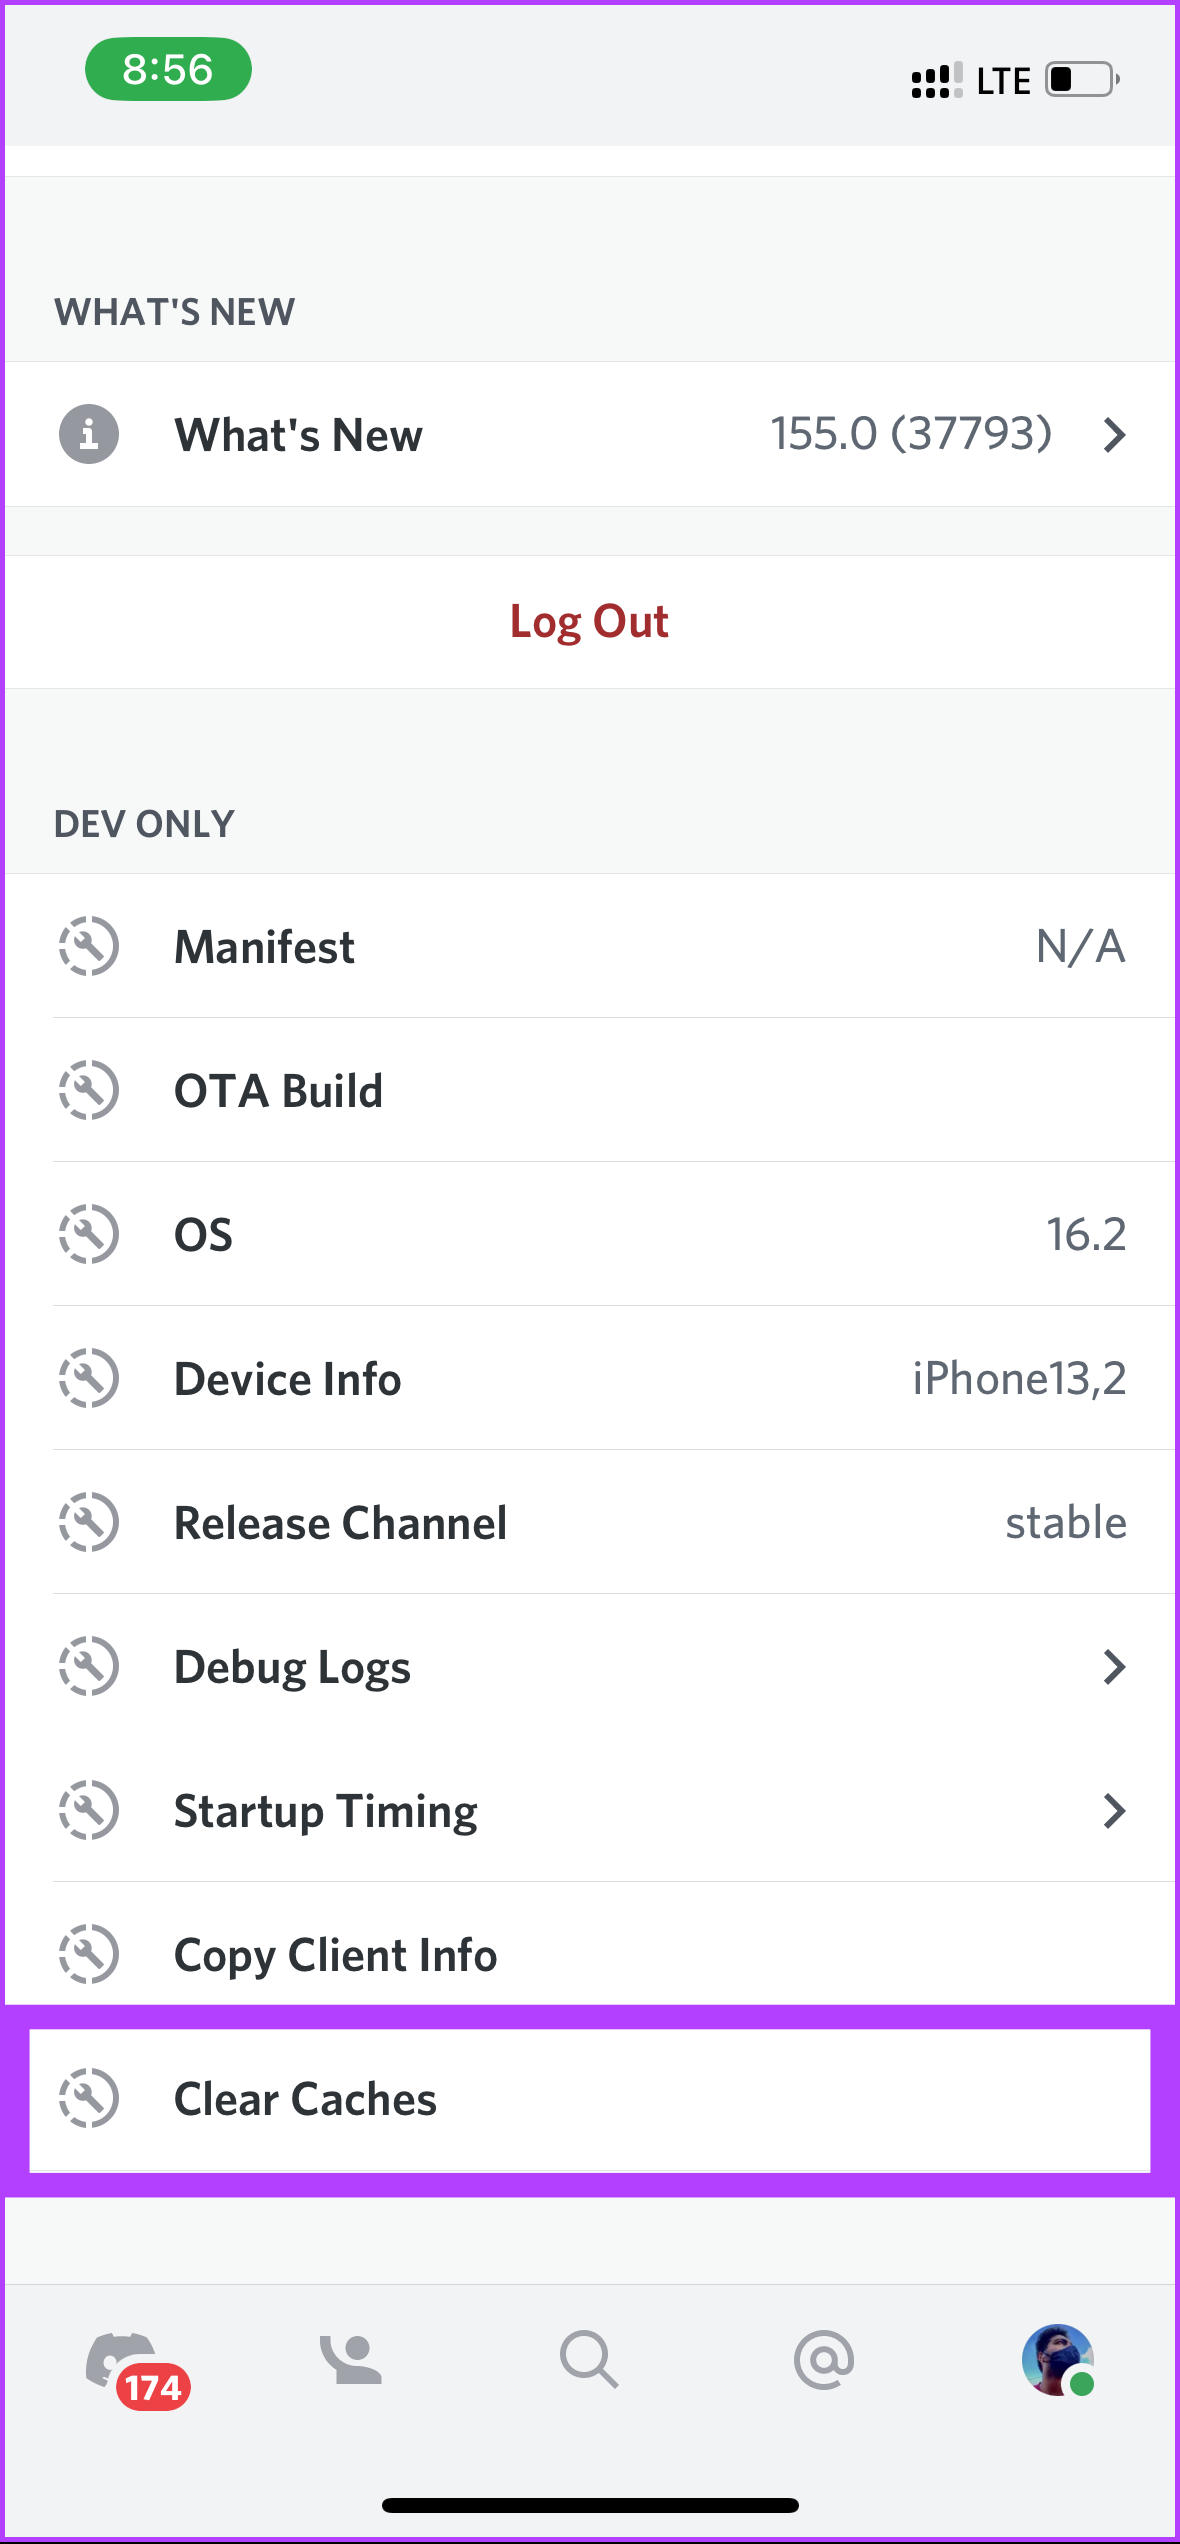
There you go. You have cleared the Discord cache without deleting and reinstalling the app again.
How to Clear Discord Cache on Windows
Step 1: Press the Windows key, type File Explorer, and click Open.
Step 2: In the address bar, type the below address.
C:\Users\Username\AppData\Roaming
Note: Replace the Username with your PC’s username.

Step 3: In the AppData window, open the Discord folder.

Step 4: Under the Discord folder, you will find folders named Cache, Code Cache, and GPUCache. Use the Command key to select all three folders and click Shift + Delete on your keyboard.

There you go. You have successfully cleared the Discord cache from your Windows PC. Note that you must delete the files permanently (i.e., also from the Recycle Bin) to free up the space.
How to Clear Discord Cache on Mac
Step 1: Open Finder and click on Go.
Step 2: Select the Go to Folder option from the drop-down.

Step 3: Type the below-mentioned address in the textbox and click Go.
~/Library/Application Support/discord/

Step 4: In the Discord folder, select folders named Cache, Code Cache, and GPUCache, and press Command + Delete on your keyboard.

FAQs
Yes, it is okay to delete cache data now and then. Clearing up cache files helps keep things clean and smooth.
When the cache is full, the efficiency of the system or the software goes down drastically. It is recommended to clean up the cache for optimum performance.
Yes and no. If you are using Discord’s web, the cache will be cleaned as part of the browser’s cache. However, if you are using Discord’s native application, you must manually delete the cache.
Now that you know how to clear the cache on Discord, it will be easy for you to remove junk cache files and free up storage space for more productive things.
Was this helpful?
Last updated on 19 August, 2024
Read Next
 How to Clear Cache on TikTok on Android, iOS, or Web
TikTok has quickly become one of the most popular social media platforms with millions of users worldwide.
How to Clear Cache on TikTok on Android, iOS, or Web
TikTok has quickly become one of the most popular social media platforms with millions of users worldwide.
 How to Clear Twitter Cache from Android, iOS, or Web
If you are a Twitter user, you may have occasionally noticed the Twitter app freezing, slow loading, repeated content recommendations, or some features not working properly.
How to Clear Twitter Cache from Android, iOS, or Web
If you are a Twitter user, you may have occasionally noticed the Twitter app freezing, slow loading, repeated content recommendations, or some features not working properly.
 How to Clear the Cache in Google Drive and Docs
How to Clear Google Drive Cache If you run into certain Drive problems, you may want to delete the Google Drive cache.
How to Clear the Cache in Google Drive and Docs
How to Clear Google Drive Cache If you run into certain Drive problems, you may want to delete the Google Drive cache.
 How to Clear Cookies and Cache in Chrome for One Site
How to Clear Chrome Cookies and Cache for One Site Only on a Desktop Method 1: Delete Chrome Cache and Cookie From the Website Step 1: Load the site from
How to Clear Cookies and Cache in Chrome for One Site
How to Clear Chrome Cookies and Cache for One Site Only on a Desktop Method 1: Delete Chrome Cache and Cookie From the Website Step 1: Load the site from
 How to Clear Cache for Messenger on Any Device
Once you install and use an app like Messenger, it collects and stores some data on your device's local storage.
How to Clear Cache for Messenger on Any Device
Once you install and use an app like Messenger, it collects and stores some data on your device's local storage.
The article above may contain affiliate links which help support Guiding Tech. The content remains unbiased and authentic and will never affect our editorial integrity.