Change Default Download Location for Apps, Documents, and Media
By default, Windows 11 stores all downloads—apps, documents, media, and other important files—on the primary drive. However, you can choose to save these files on a different drive if you prefer.
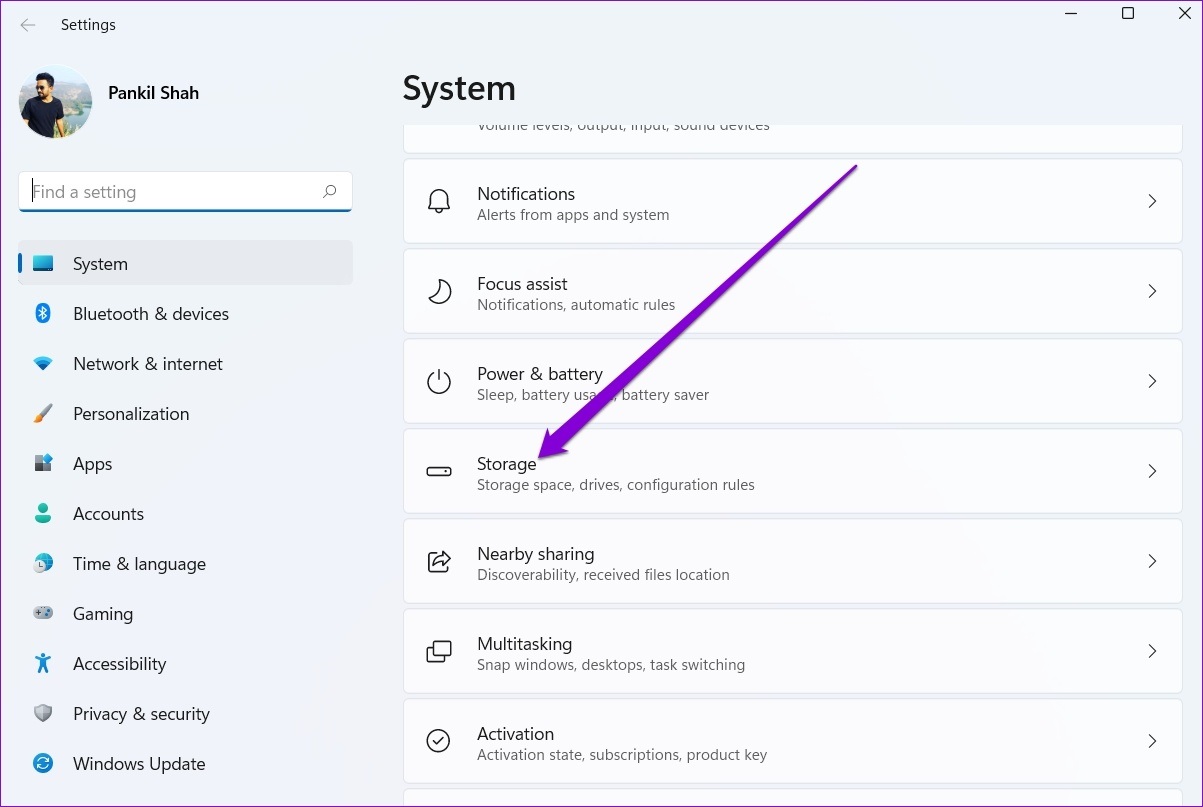
Step 1: Press the Windows key + I to open the Settings app and head to System > Storage.
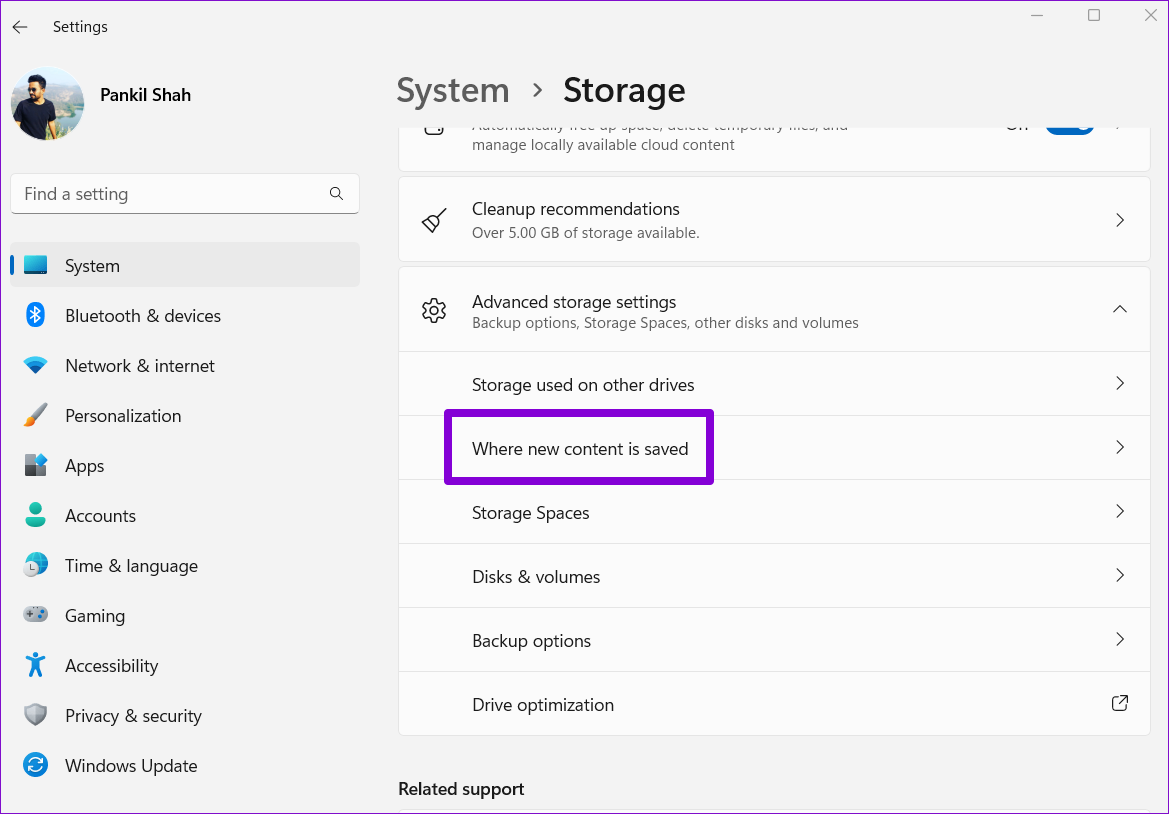
Step 2: Under the Storage management section, click the downward arrow next to Advanced storage settings to expand it. Then, select Where new content is saved.
Step 3: You’ll find current download locations for your apps, documents, music, pictures, videos, and offline maps. To change the default download location for a file type, use the drop-down menu and select a different drive.
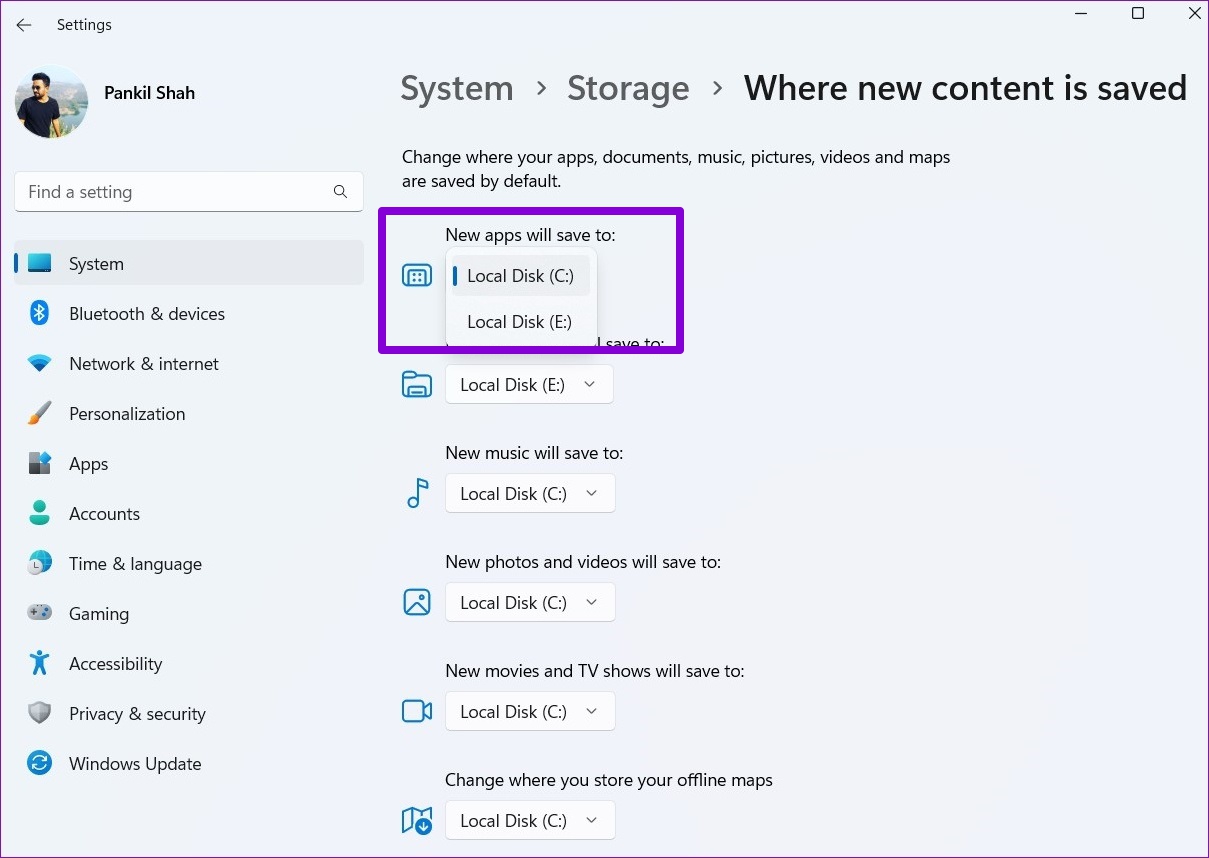
Step 4: Hit Apply to save changes.

Similarly, you can repeat the above steps to change the default download location for specific file types. Windows will automatically create new folders inside the selected drive as you make the changes. While you can assign different drives for various file types, you cannot define a specific folder for them.
How to Move Downloads Folder to a Different Drive
By default, Windows saves files you download from the internet in the “Downloads” folder, which is typically located in the drive where Windows is installed. You can easily relocate the Downloads folder to a different drive. Here’s how:
Step 1: Press the Windows key + E to launch the File Explorer.
Step 2: Navigate to the drive or preferred folder location where you’d like to save your downloads.
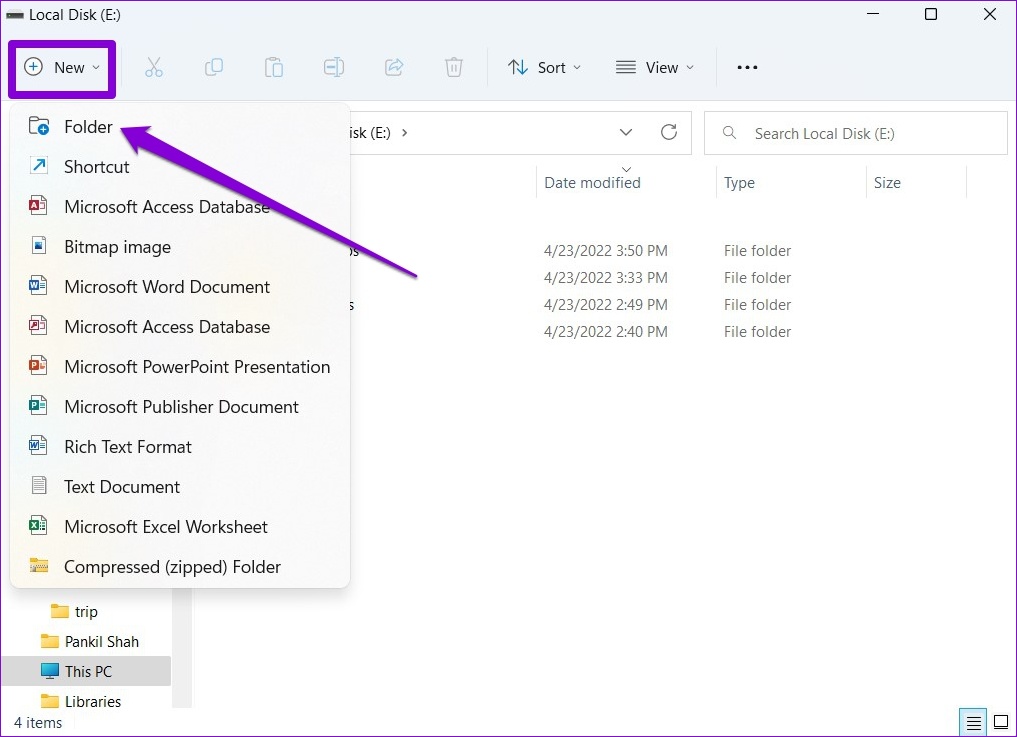
Step 3: Click New in the top left corner and select Folder from the list. Give your folder a suitable name.
Step 4: Use the left pane to navigate to This PC. Right-click on the Downloads folder and select Properties.
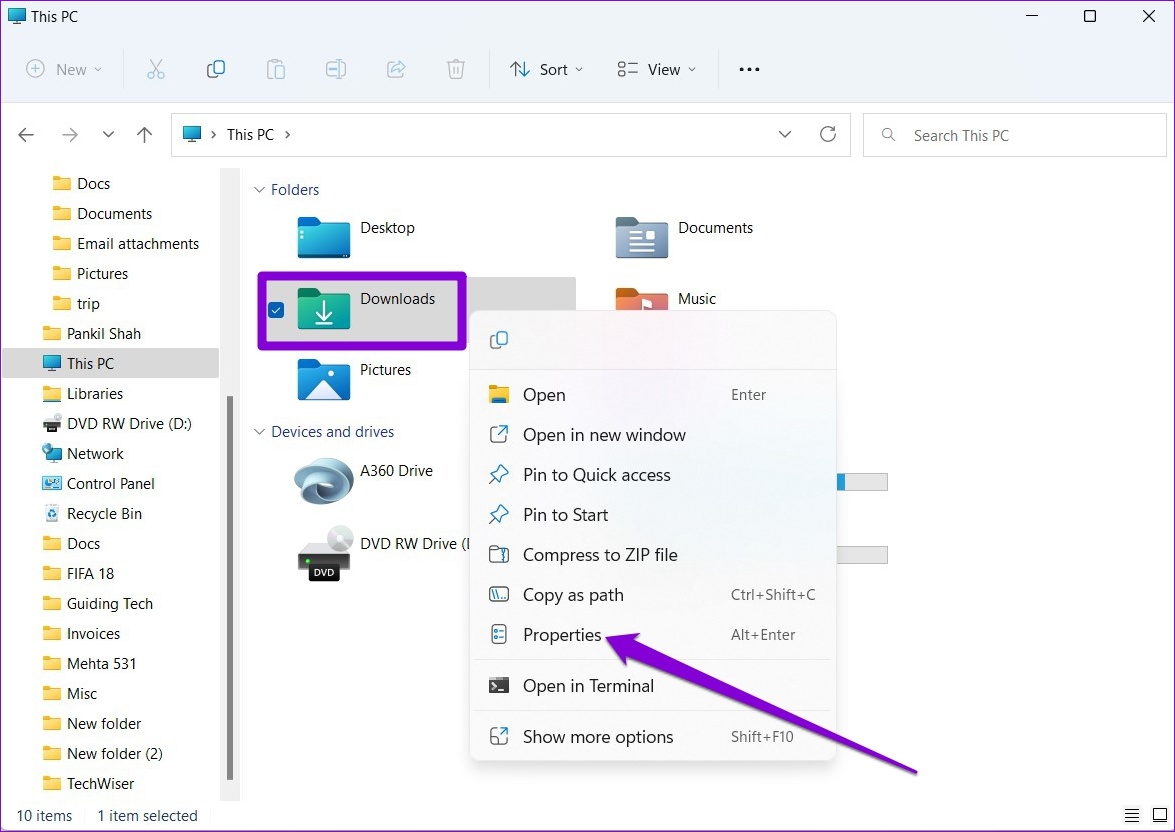
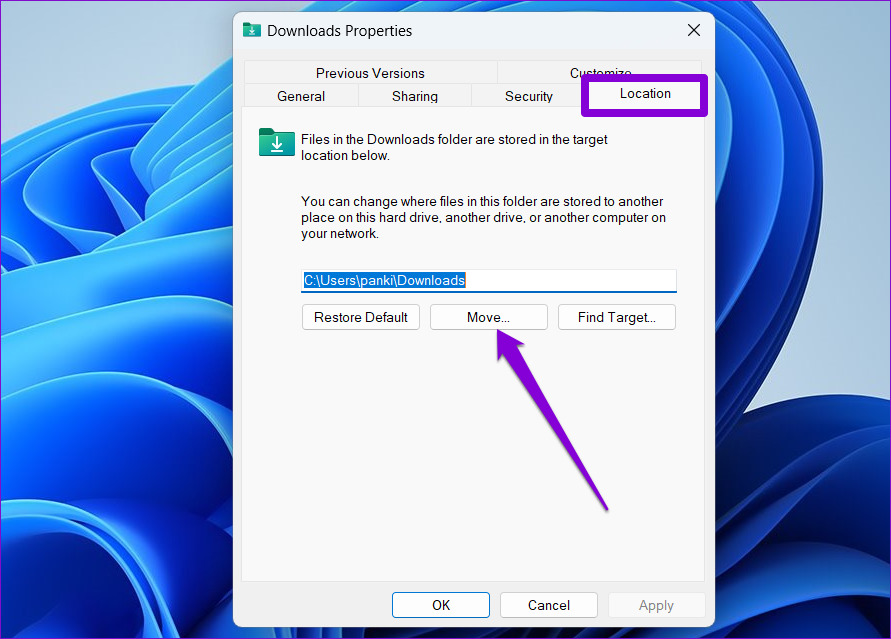
Step 5: In the Downloads Properties window, head over to the Location tab and click Move.
Step 6: Navigate to the newly created folder. Hit Select Folder.

Step 7: Click on Apply to save changes.
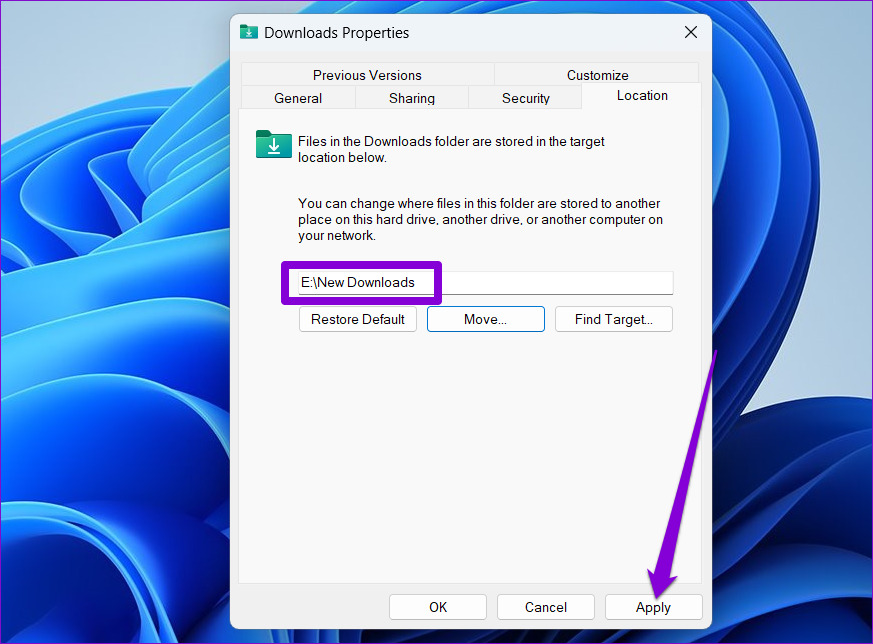
Windows will ask whether you’d like to move your existing files in the Downloads folder to the new location. When you select Yes, the transfer will commence.

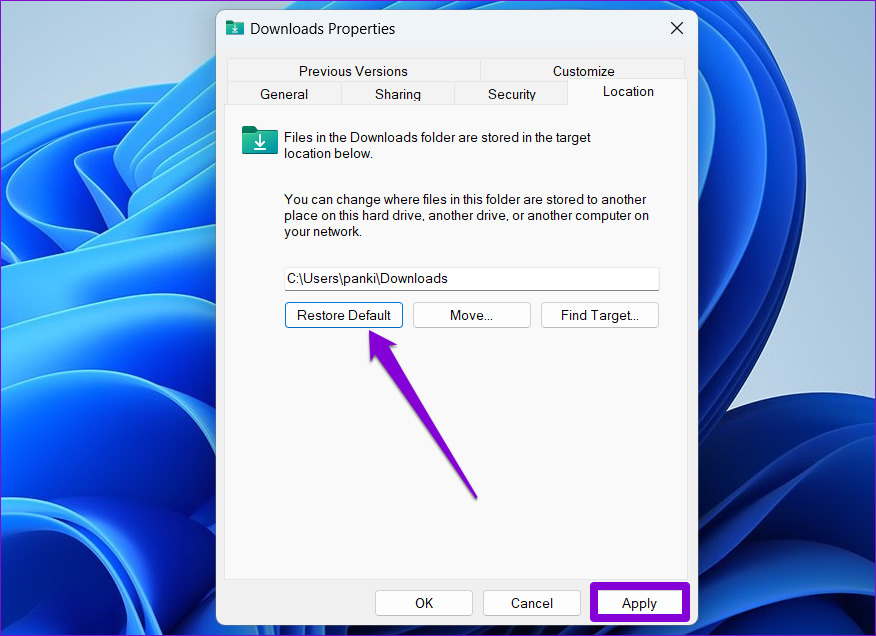
You can always move the Downloads folder to its original location later. To do so, open the properties of the Downloads folder, and click Restore Default under the Location tab before hitting Apply.
Although we only discussed Windows 11, you can use the same steps on older versions of Windows to move the location of the Downloads folder. Alternatively, you can change the default download location for Chrome, Microsoft Edge, or any other browser you might be using by accessing its settings menu.
Was this helpful?
Last updated on 02 August, 2024
Read Next
 How to Change Netflix Download Location on Windows PC
How to Change Netflix Download Location on Windows Step 1: On your Windows PC, press the Windows + I keys together to open Settings.
How to Change Netflix Download Location on Windows PC
How to Change Netflix Download Location on Windows Step 1: On your Windows PC, press the Windows + I keys together to open Settings.
 Top 9 Ways to Fix Unable to Change Default Programs in Windows 10
The apps offered by Microsoft are great.
Top 9 Ways to Fix Unable to Change Default Programs in Windows 10
The apps offered by Microsoft are great.
 How to Change the Default Language in Windows 11
How to Change the Display Language in Windows 11 Windows 11 supports various languages.
How to Change the Default Language in Windows 11
How to Change the Display Language in Windows 11 Windows 11 supports various languages.
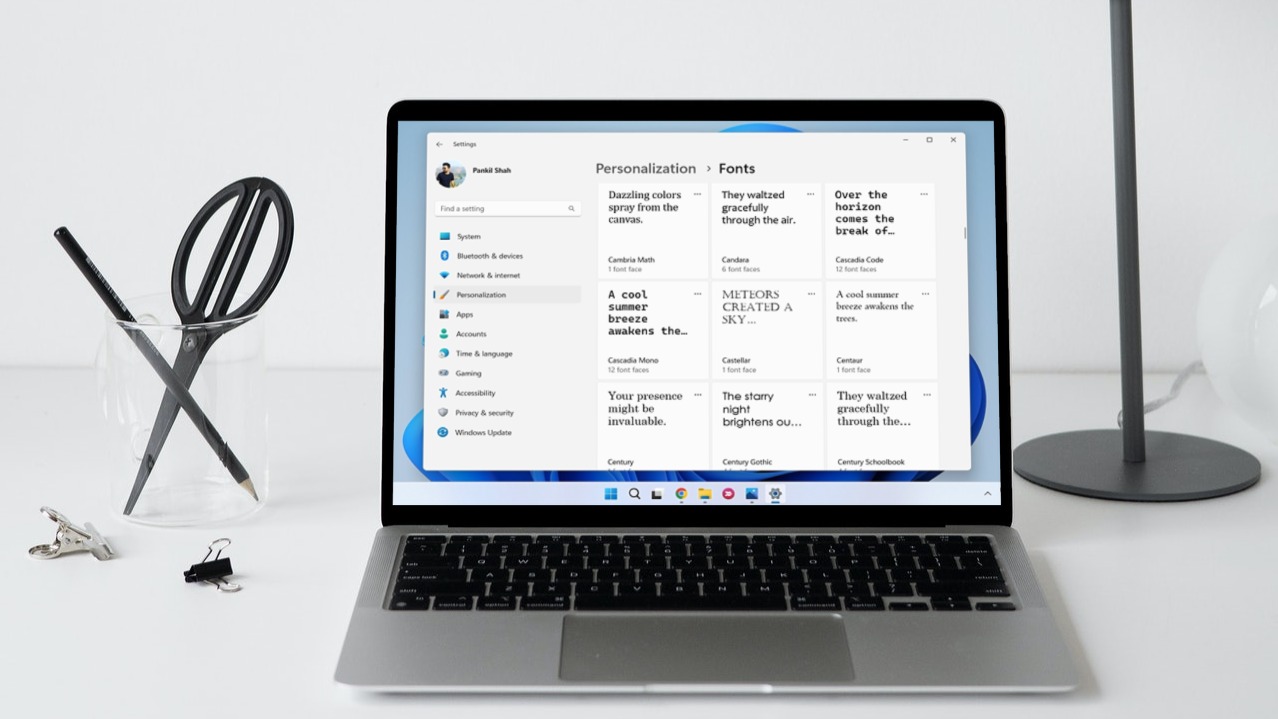 How to Change Default System Font on Windows 11
How to Change the Default Font on Windows 11 Windows 11 comes pre-installed with a wide range of fonts.
How to Change Default System Font on Windows 11
How to Change the Default Font on Windows 11 Windows 11 comes pre-installed with a wide range of fonts.
 3 Ways to Change the Default PDF Viewer on Windows 11
Method 1: Use Windows Settings to Change the Default PDF Viewer Windows 11 offers a dedicated menu in its Settings app to check your default programs.
3 Ways to Change the Default PDF Viewer on Windows 11
Method 1: Use Windows Settings to Change the Default PDF Viewer Windows 11 offers a dedicated menu in its Settings app to check your default programs.
 5 Ways to Change the Default Page Layout in Microsoft Word
Method 1: Change Page Size Microsoft Word uses the document size and layout as A4 by default.
5 Ways to Change the Default Page Layout in Microsoft Word
Method 1: Change Page Size Microsoft Word uses the document size and layout as A4 by default.
 How to Change the iCloud Drive Folder Location on Windows
Changing the iCloud Drive folder location on your Windows PC can help you manage storage more efficiently, especially if your primary drive is running out of space.
How to Change the iCloud Drive Folder Location on Windows
Changing the iCloud Drive folder location on your Windows PC can help you manage storage more efficiently, especially if your primary drive is running out of space.
 How to Change Epic Games Install Location on Windows
Where Are Epic Games Installed on Your System?
How to Change Epic Games Install Location on Windows
Where Are Epic Games Installed on Your System?
The article above may contain affiliate links which help support Guiding Tech. The content remains unbiased and authentic and will never affect our editorial integrity.