Fix 1: Set IP Address Settings to Automatic
Such errors can occur if you have recently modified your PC’s wireless network adapter with a custom IP address. To resolve this issue, configure Windows to acquire an IP address automatically by following the steps below.
Step 1: Press the Windows key + R to open the Run dialog box. Type control in the box and press Enter.
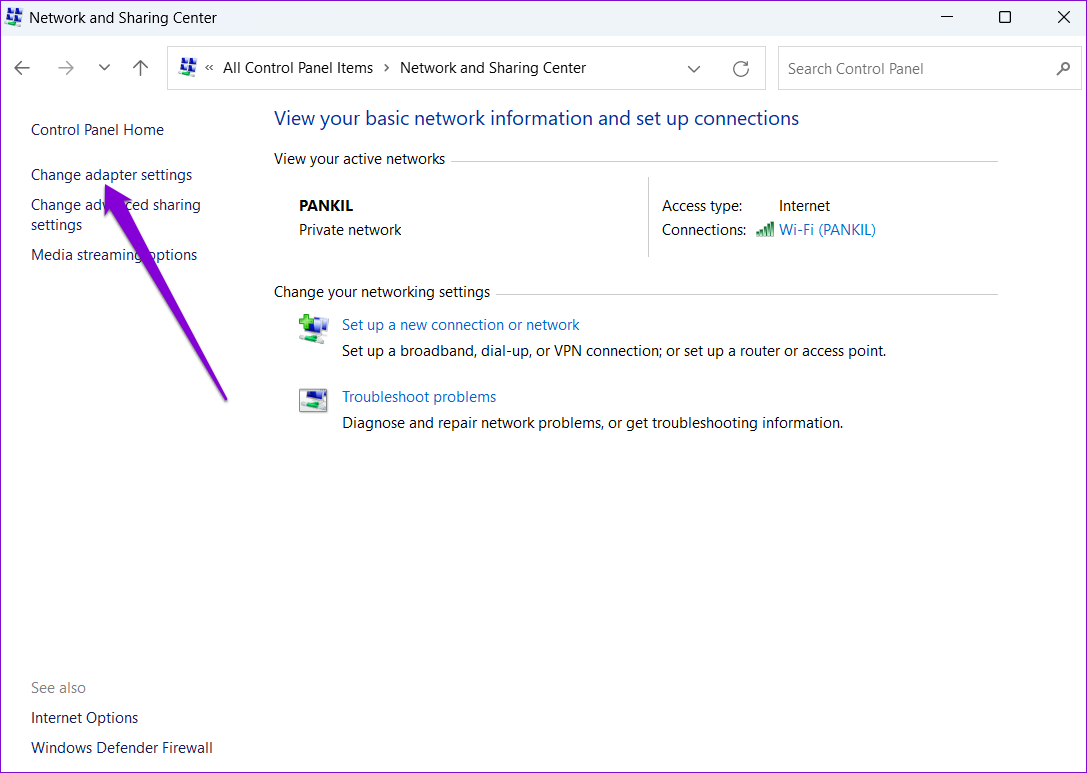
Step 2: Use the drop-down menu at the top right corner to change the view type to large icons and go to Network and Sharing Center.

Step 3: Click on Change adapter settings in the left column.
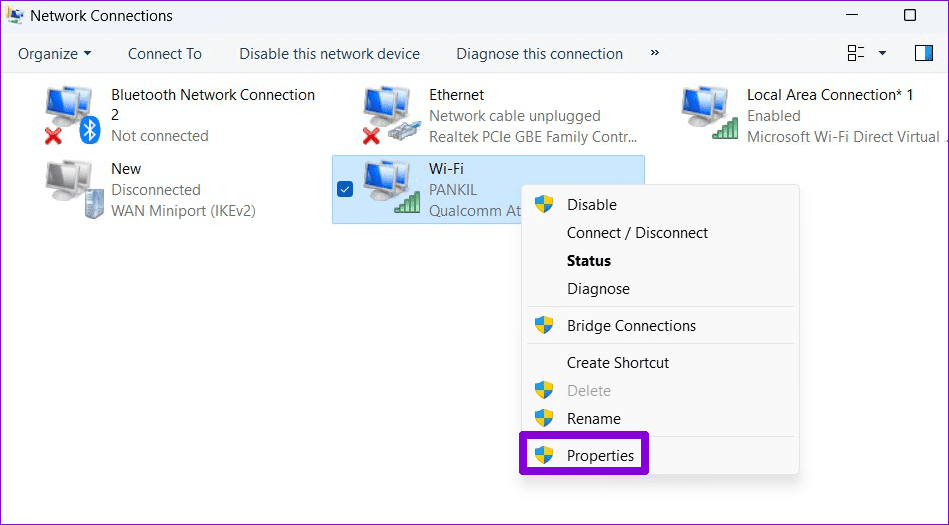
Step 4: Right-click on your Wi-Fi network adapter > select Properties.
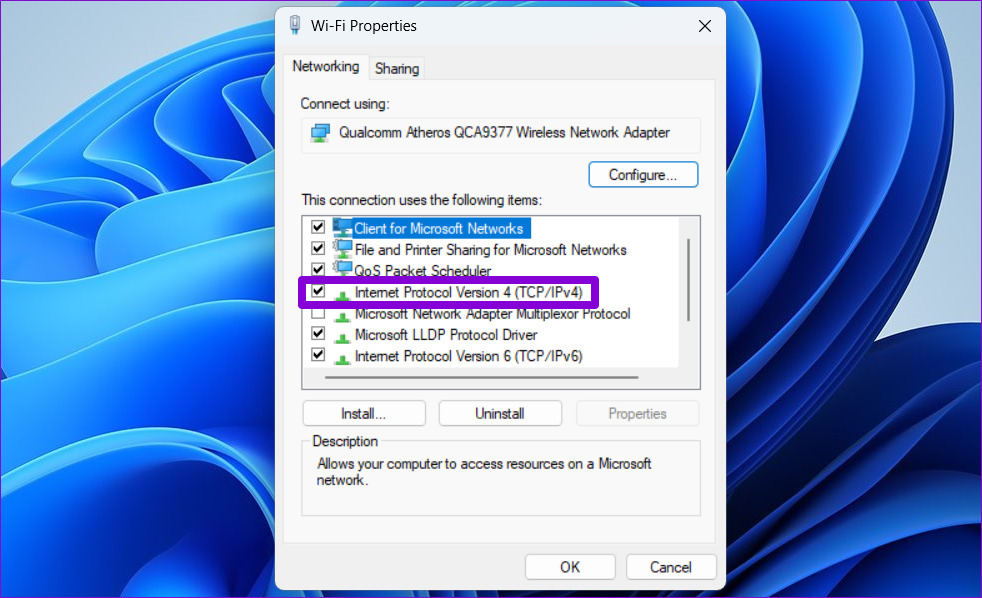
Step 5: Double-click on Internet Protocol Version 4 (TCP/IPv4).
Step 6: Select Obtain an IP address automatically and click OK.
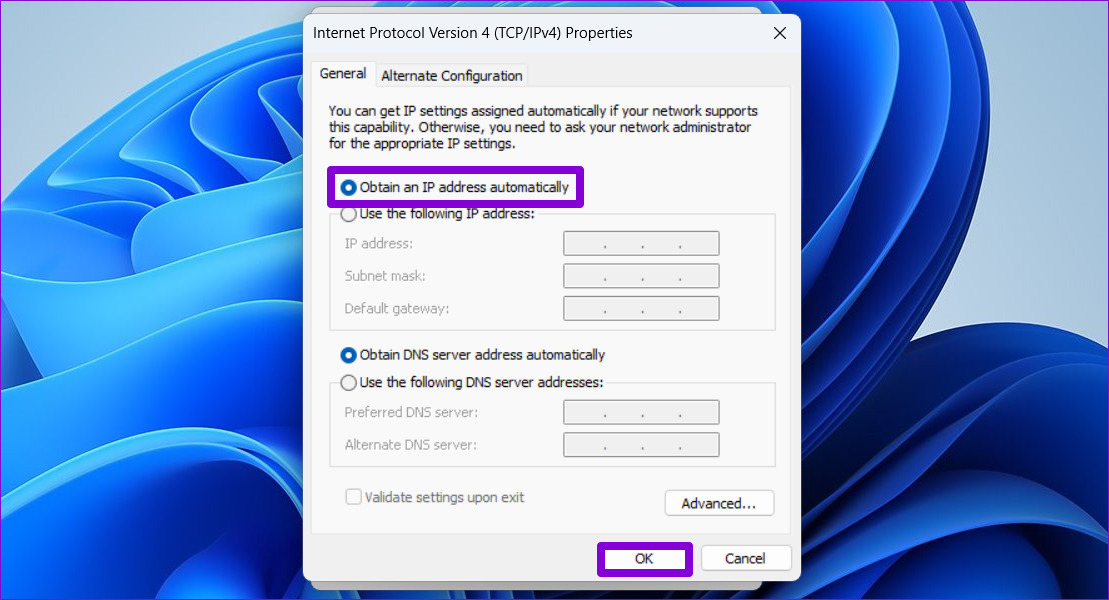
Step 7: Similarly, select Obtain an IPv6 address automatically for Internet Protocol Version 6 (TCP/IPv6).

Fix 2: Restart WLAN AutoConfig Service
Windows uses the WLAN AutoConfig service to facilitate the connection with your Wi-Fi network. If this service encounters a problem, Windows may display the “Wi-Fi doesn’t have a valid IP configuration” error. Here’s how to fix it.
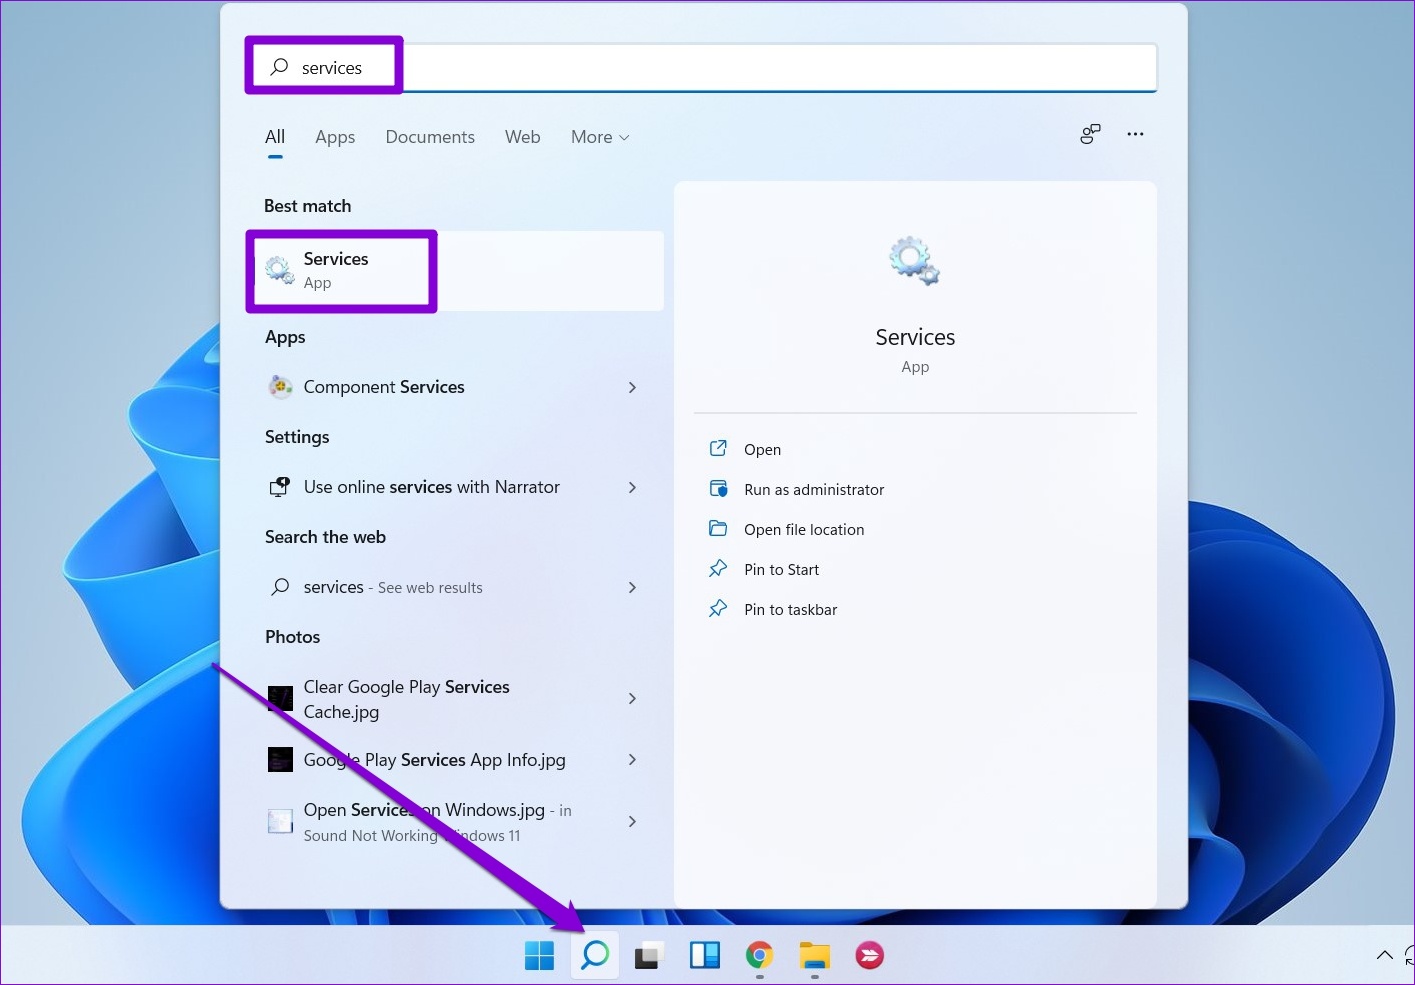
Step 1: Click the search icon on the taskbar, type services, and select the first result.
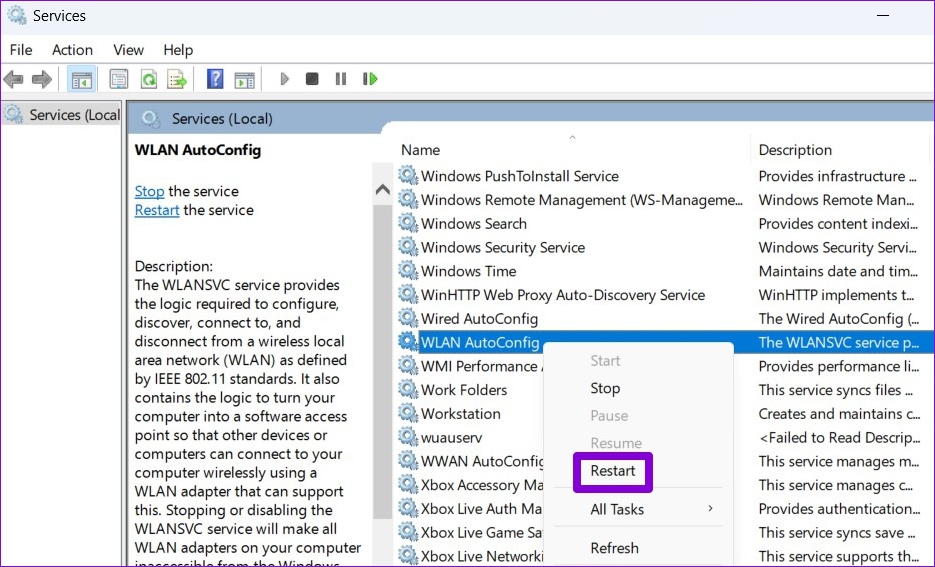
Step 2: Scroll down to locate the WLAN AutoConfig service. Right-click on it and select Restart.
Fix 3: Renew Your IP Address and Flush DNS Cache
Another way to fix the invalid IP configuration error is to assign a new IP to your computer. You can force Windows to acquire a new IP address from the router and flush the DNS cache with a few commands in Windows PowerShell.
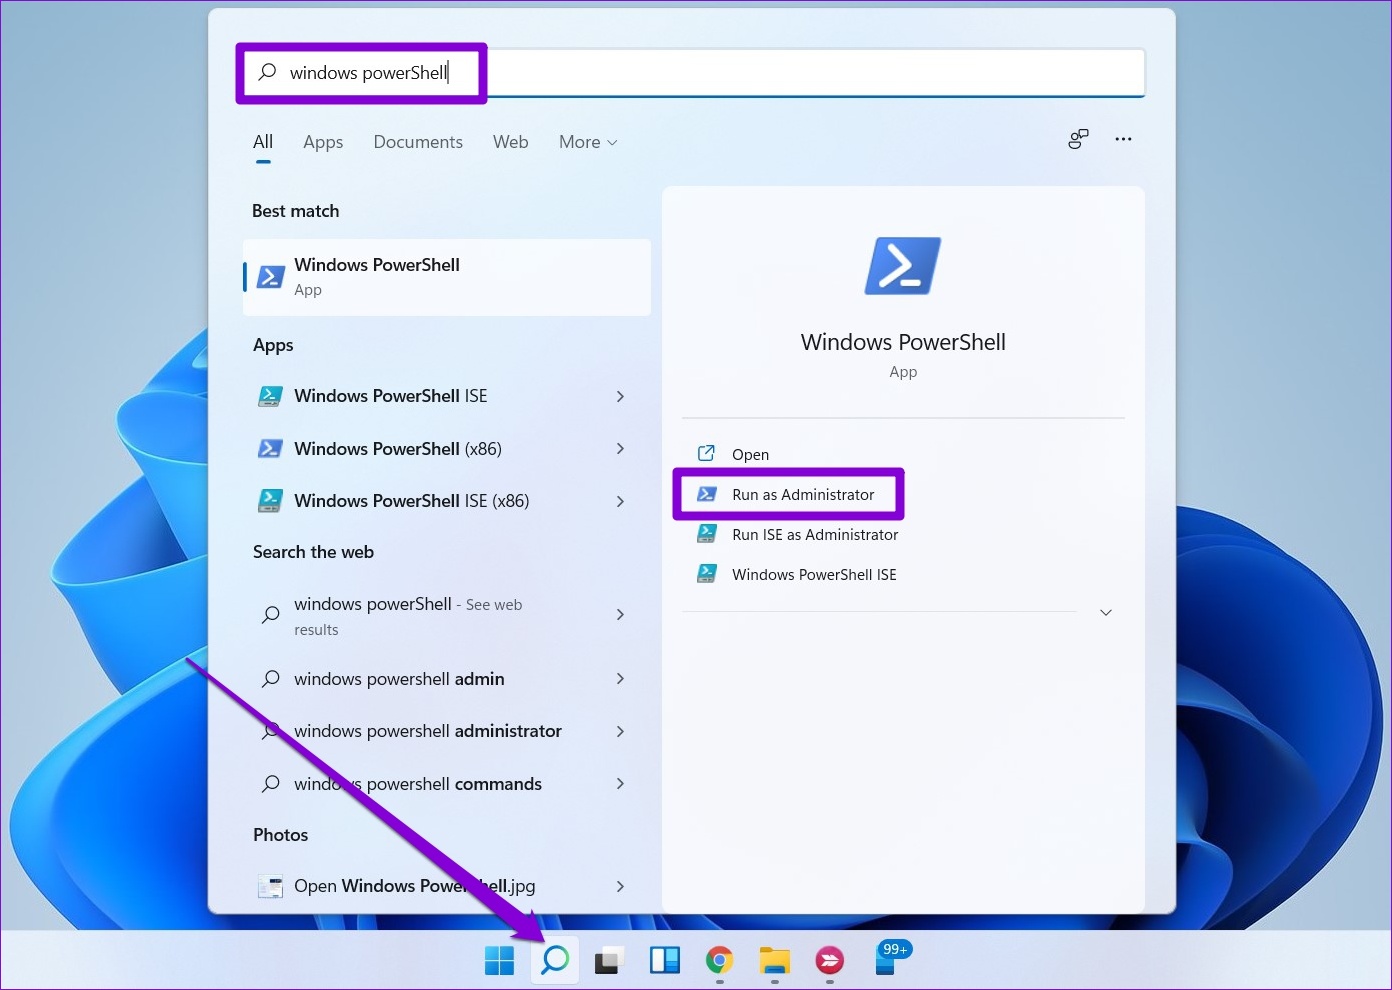
Step 1: Click the search icon on the taskbar > type Windows PowerShell > select Run as administrator.
Step 2: Run the following commands one by one.
ipconfig /release
ipconfig /flushdns
ipconfig /renew

Fix 4: Reset TCP/IP
Windows uses the Transmission Control Protocol and Internet Protocol (TCP/IP) to communicate with other machines on the network and the Internet to transmit and receive digital data. Resetting the TCP/IP stack can resolve any glitches that cause invalid IP configuration issues on Windows.
Step 1: Right-click on the Start icon and select Terminal (Admin) from the list.

Step 2: Run the following commands in the console and press Enter after each one:
netsh winsock reset
netsh int ip reset

Restart your PC and check if the “Wi-Fi doesn’t have a valid IP configuration” error occurs again.
Fix 5: Update Network Drivers
Drivers typically don’t cause many issues after installation. However, if they become outdated or are affected by other software, errors can occur. To address this, update the network drivers on your Windows 11 PC.
Step 1: Right-click on the Start icon > select Device Manager from the list.

Step 2: Double-click on Network adapters to expand it. Right-click your network adapter > select Update driver.

From there, follow the on-screen instructions to finish updating the network driver.
Fix 6: Reset Network Settings
If all else fails, reset your PC’s network settings as a last resort. Here’s how to do it.
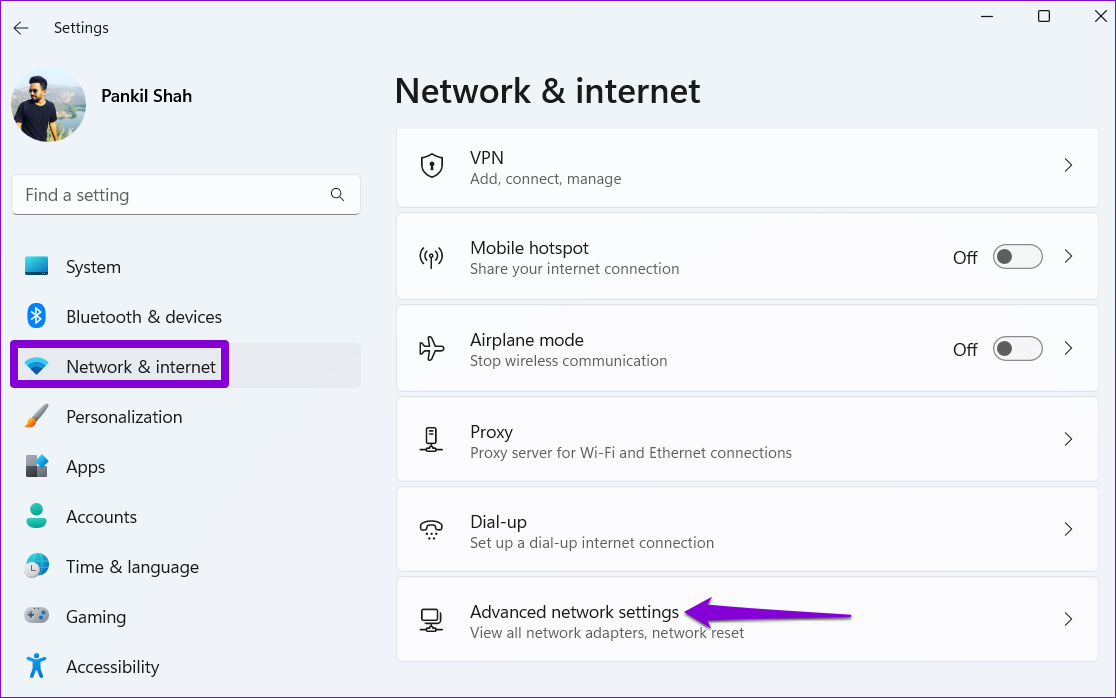
Step 1: Press the Windows key + I to launch the Settings app > navigate to Network & internet > Advanced network settings.
Step 2: Under More settings, click on Network reset.

Step 3: Click the Reset now button next to Network reset.
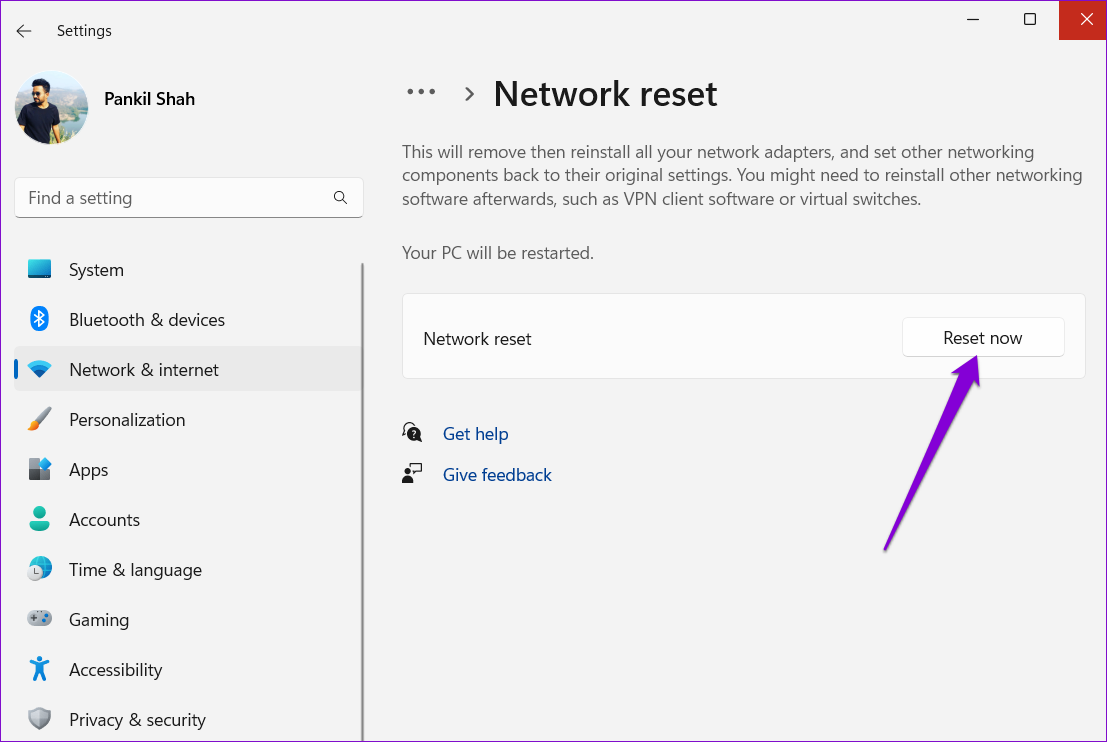
Your PC will restart and revert to the default network settings. After that, you must manually enter the IP address details or let it capture the IP address details from your network automatically.
Was this helpful?
Last updated on 16 August, 2024
1 Comment
Leave a Reply
Read Next
 4 Fixes for “Reference Isn’t Valid” Error in Microsoft Excel for Windows
Try Basic Fixes Close and reopen Excel: Microsoft Excel sometimes gets stuck with the "Reference isn’t valid" error due to temporary issues with one of its app processes.
4 Fixes for “Reference Isn’t Valid” Error in Microsoft Excel for Windows
Try Basic Fixes Close and reopen Excel: Microsoft Excel sometimes gets stuck with the "Reference isn’t valid" error due to temporary issues with one of its app processes.
 How to Fix Windows 10’s This Action Is Only Valid for Products That Are Currently Installed Error
Windows 10 users usually face the error 'This action is only valid for products that are currently installed' when working with a version of Office suite of apps.
How to Fix Windows 10’s This Action Is Only Valid for Products That Are Currently Installed Error
Windows 10 users usually face the error 'This action is only valid for products that are currently installed' when working with a version of Office suite of apps.
 Top 6 Ways to Fix Chrome Side-by-Side Configuration Is Incorrect in Windows
Fix 1: Run System File Checker Step 1: Click the Start menu, search for Command Prompt, and open it.
Top 6 Ways to Fix Chrome Side-by-Side Configuration Is Incorrect in Windows
Fix 1: Run System File Checker Step 1: Click the Start menu, search for Command Prompt, and open it.
 Optimize Windows 11 Startup Using System Configuration Tool (MSConfig)
How to Use System Configuration Tool on Windows 11 The System Configuration Tool is divided into five tabs for easy navigation, each with different functions.
Optimize Windows 11 Startup Using System Configuration Tool (MSConfig)
How to Use System Configuration Tool on Windows 11 The System Configuration Tool is divided into five tabs for easy navigation, each with different functions.
 5 Fixes for “Word Experienced an Error Trying to Open the File” Error in Windows
Fix 1: Unblock Your Word File Microsoft Word may fail to open a document if it has been altered by third-party software.
5 Fixes for “Word Experienced an Error Trying to Open the File” Error in Windows
Fix 1: Unblock Your Word File Microsoft Word may fail to open a document if it has been altered by third-party software.
 7 Best Fixes for Windows Update Error 0x800f081f in Windows 11
Microsoft regularly releases Windows updates to introduce new features and fix known issues.
7 Best Fixes for Windows Update Error 0x800f081f in Windows 11
Microsoft regularly releases Windows updates to introduce new features and fix known issues.
 5 Fixes for “User Profile Service Failed the Sign-In” Error in Windows 11
Fix 1: Configure the User Profile Service If the User Profile Service on your PC is not set to run automatically, you could encounter the "User Profile Service failed the
5 Fixes for “User Profile Service Failed the Sign-In” Error in Windows 11
Fix 1: Configure the User Profile Service If the User Profile Service on your PC is not set to run automatically, you could encounter the "User Profile Service failed the
 5 Fixes for “Unspecified Error” When Copying Files or Folders in Windows
Fix 1: Check the Destination Drive Format Are you attempting to copy a file to an external drive that uses a non-NTFS format?
5 Fixes for “Unspecified Error” When Copying Files or Folders in Windows
Fix 1: Check the Destination Drive Format Are you attempting to copy a file to an external drive that uses a non-NTFS format?
The article above may contain affiliate links which help support Guiding Tech. The content remains unbiased and authentic and will never affect our editorial integrity.


Hello,
I just wanted to say a BIG Thank you for this article. It was so easy to follow and by step 7 you helped me fix my wifi issues. I was trying to fix this for 4 days and it was driving me nuts. Not even network provider support tech didn’t know how to fix this and I tried so so so many things, even got a replacement modem. So thank you for a clear, well written and so easy to follow article. I wish all articles were as helpful as your is! Thank you Mr. Shah!!