Fix 1: Run the Windows Update Troubleshooter
Windows 11 includes a dedicated troubleshooter to automatically identify and resolve any common issues with the Windows Update process. So, it’s a good idea to run the Windows Update troubleshooter first.
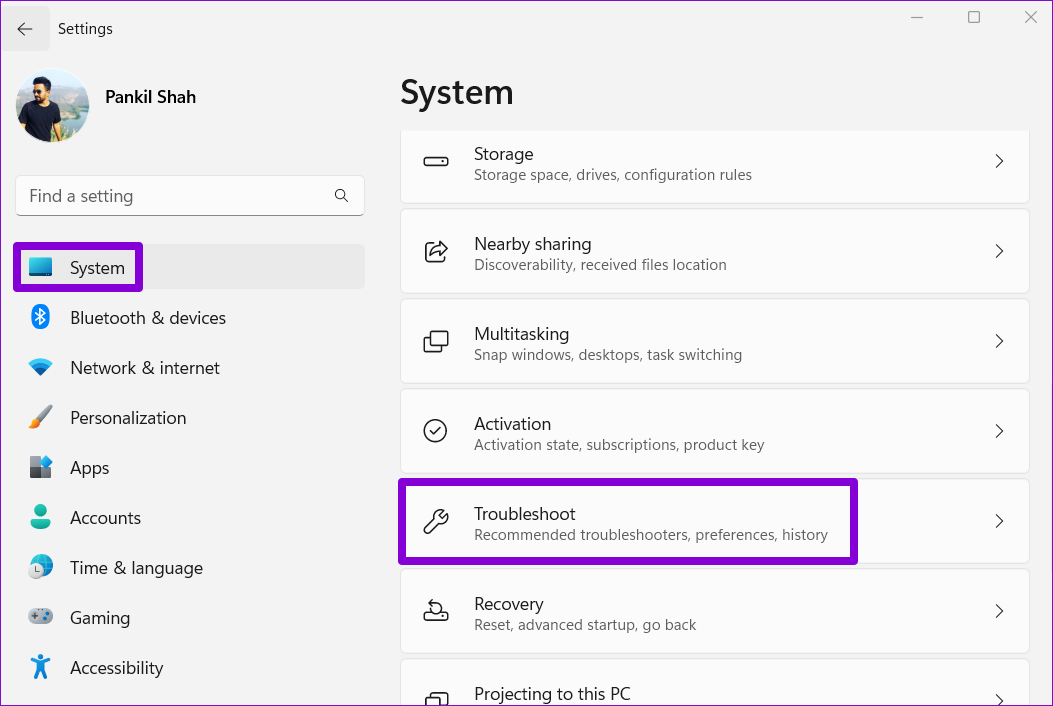
Step 1: Press the Windows key + I to launch the Settings app and head to System > Troubleshoot.
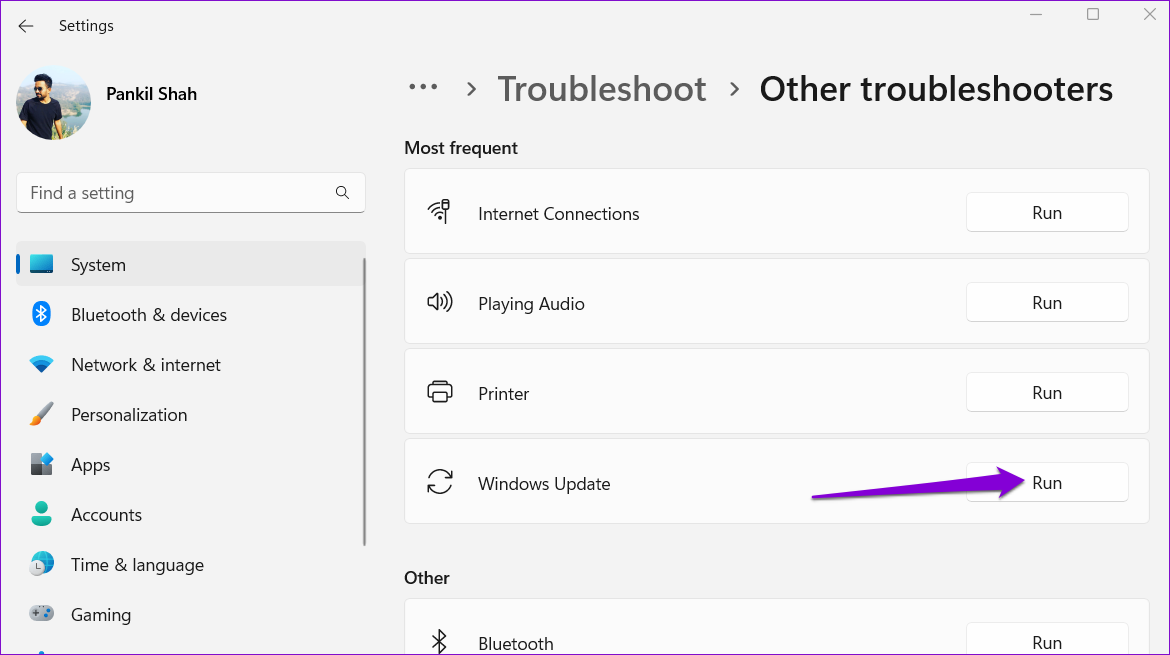
Step 2: Click on Other troubleshooters.

Step 3: Click the Run button next to Windows Update.
The tool will start scanning your system for any problems. If it finds any problems, it’ll diagnose and fix them. After that, try to install the Windows update again.
Fix 2: Delete Existing Update Files and Restart Windows Update Components
Windows stores all the update files in the SoftwareDistribution folder before installation. If some of the update files are missing, you’re likely to encounter such errors. But before you start downloading the updates again, you can delete the existing update files first.
Step 1: Click the search icon on the taskbar, type services in the box, and press Enter.

Step 2: In the Services window, locate the Windows Update service. Right-click on it and select Stop.
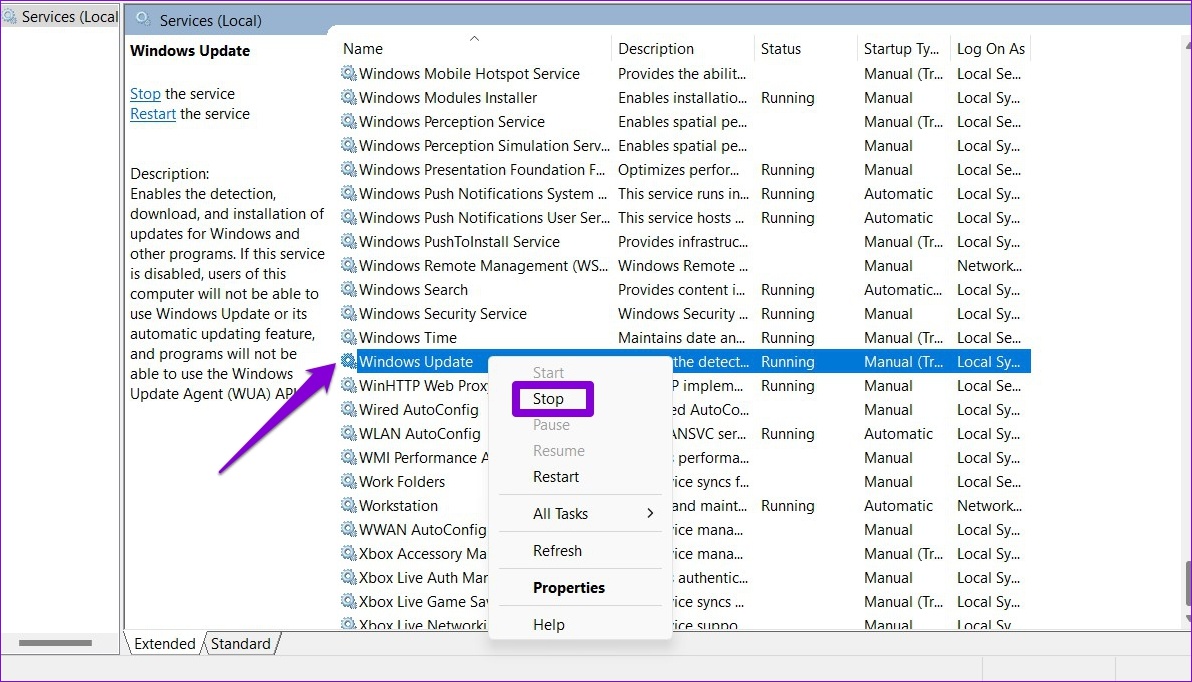
Step 3: Repeat the previous step to disable three more services—Cryptographic Services, Background Intelligent Transfer Service, and Windows Installer Service.
Step 4: Press the Windows key + R to open the Run dialog box. Paste the following path in the Open field and press Enter:
C:\Windows\SoftwareDistribution
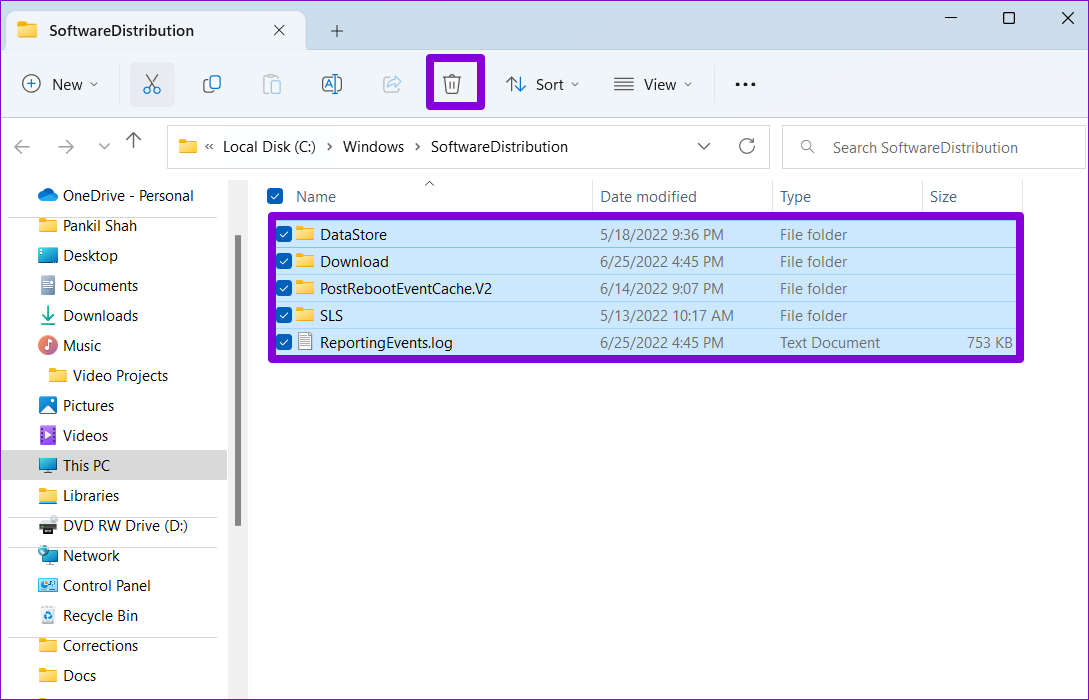
Step 5: Select all the files in the SoftwareDistribution folder and click the trash icon at the top to delete them.
Step 6: Return to the Services window. Start the Windows Update, Cryptographic Services, Background Intelligent Transfer Service, and Windows Installer Service one by one.

After this, open the Settings app and head to the Windows Update section to download and install the pending updates.
Fix 3: Scan Your Computer for Corrupt System Files
Corrupt system files on your computer can also give rise to the “Some update files are missing or have problems” error. You can run the SFC (System File Checker) and DISM (Deployment Image Servicing and Management) scans to check your computer for any damaged system files and repair them. Here’s how:
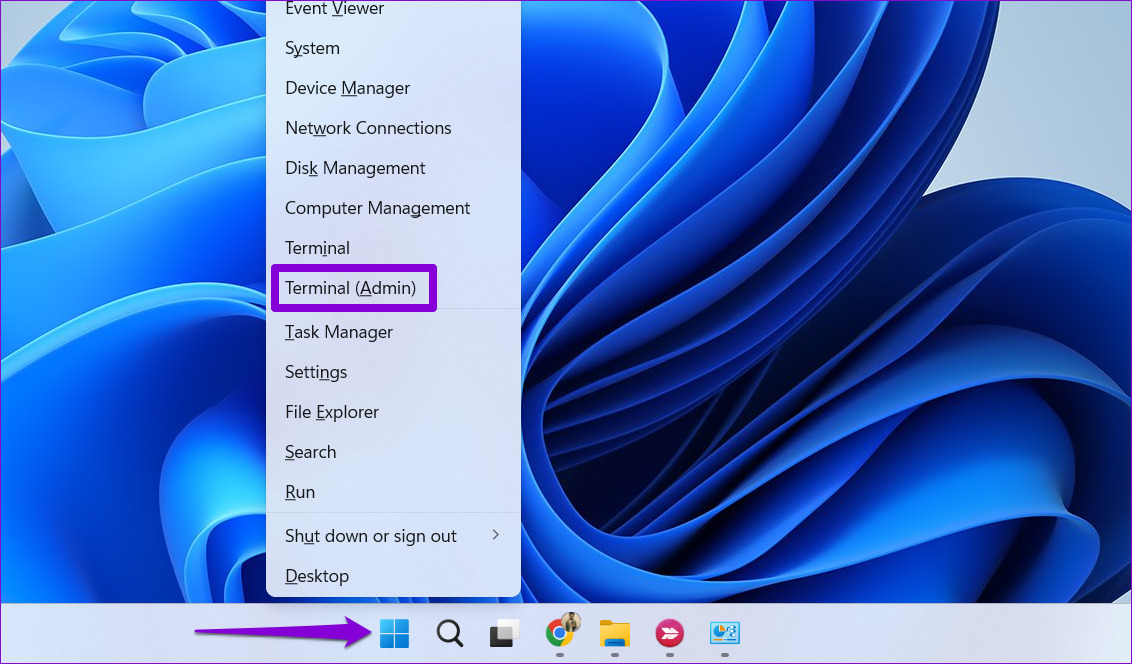
Step 1: Right-click on the Start icon and select Terminal (Admin) from the list.
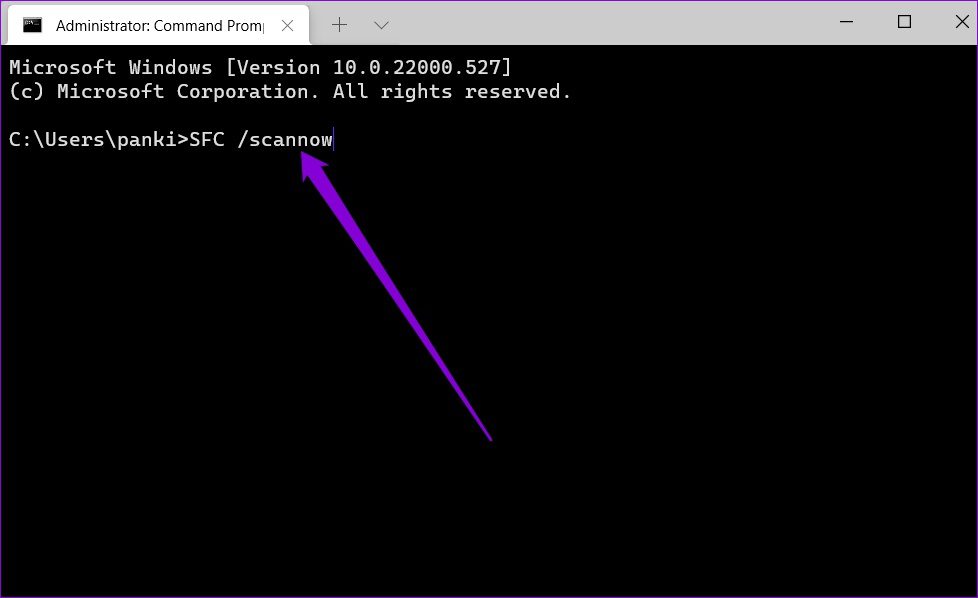
Step 2: Paste the following command in the console and press Enter.
sfc /scannow
Step 3: Run the following commands in the Terminal window and press Enter after each one:
DISM /Online /Cleanup-Image /CheckHealth
DISM /Online /Cleanup-Image /ScanHealth
DISM /Online /Cleanup-Image /RestoreHealth

After the scan is complete, restart your PC and try to install the update once again.
Fix 4: Install Windows Updates in Clean Boot Mode
Third-party programs and services can sometimes interfere with the Windows Update process and lead to such errors. To overrule this possibility, you can boot Windows in a clean boot state and then try to install the update again.
Step 1: Press the Windows key + R to open the Run dialog box, type in msconfig, and press Enter.
Step 2: Under the Services tab, mark the box that reads Hide all Microsoft services box. Then, click the Disable all button.

Step 3: Switch to the Startup tab and click on Open Task Manager.

Step 4: Select a third-party app or program and click the Disable button at the top. Repeat this step to disable all third-party apps and programs.

Restart your PC to enter the clean boot state, and then see if you can install the Windows update successfully.
Fix 5: Download and Install the Update From Microsoft Update Catalog
Windows 11 updates are also made available on the Microsoft Update Catalog online website. So, if you’re having trouble installing updates from the Settings app, you can download the relevant update file from the Microsoft Update Catalog and install it manually. Here’s how.
Step 1: Press the Windows key + I to open the Settings app and head to the Windows Update tab. Make a note of the knowledge base number of the update you want to download, such as KB5015814.

Step 2: Open the Microsoft Update Catalog website in a browser tab. Type the KB number in the search box and press Enter.

Step 3: Download the relevant update pack meant for your system.

Step 4: Double-click the downloaded MSU file and follow the on-screen prompts to complete the installation process.

Was this helpful?
Last updated on 26 July, 2024
Read Next
 How to Fix “Fire TV Stick Connected With Problems” Error
Basic Fixes: Restart the Fire TV Stick and router: Temporary connection problems can cause internet issues on your Fire TV Stick.
How to Fix “Fire TV Stick Connected With Problems” Error
Basic Fixes: Restart the Fire TV Stick and router: Temporary connection problems can cause internet issues on your Fire TV Stick.
 Top 15 Ways to Fix Amazon Echo and Alexa Setup Problems
If you've landed on this page, it means that the Amazon Echo setup process is giving you a hard time too.
Top 15 Ways to Fix Amazon Echo and Alexa Setup Problems
If you've landed on this page, it means that the Amazon Echo setup process is giving you a hard time too.
 Top 9 Ways to Fix Telegram Connecting Problems on iOS and Android
Telegram is jumping the popularity charts on both iOS and Android.
Top 9 Ways to Fix Telegram Connecting Problems on iOS and Android
Telegram is jumping the popularity charts on both iOS and Android.
 5 Ways to Fix Sync Is Currently Experiencing Problems on Android
Basic Fixes: Check Google server status: If Google is experiencing issues in the backend, it might affect sync on your Android phone.
5 Ways to Fix Sync Is Currently Experiencing Problems on Android
Basic Fixes: Check Google server status: If Google is experiencing issues in the backend, it might affect sync on your Android phone.
 12 Best Ways to Fix Wi-Fi Authentication Problems on Android
If you are an Android user, you might have occasionally encountered an authentication error when connecting to Wi-Fi.
12 Best Ways to Fix Wi-Fi Authentication Problems on Android
If you are an Android user, you might have occasionally encountered an authentication error when connecting to Wi-Fi.
 6 Ways to Fix the “Missing File Privileges” Error in Steam for Windows
Fix 1: End the igfxEM Module Process The igfxEM process is a component of the Intel Graphic Executable Main Module.
6 Ways to Fix the “Missing File Privileges” Error in Steam for Windows
Fix 1: End the igfxEM Module Process The igfxEM process is a component of the Intel Graphic Executable Main Module.
 3 Ways to Delete Old Windows Update Files From Windows 10 and 11
Method 1: Delete Old Windows Update Files via Settings The Storage section of the Settings app provides a detailed breakdown of all temporary files on your PC, including old Windows
3 Ways to Delete Old Windows Update Files From Windows 10 and 11
Method 1: Delete Old Windows Update Files via Settings The Storage section of the Settings app provides a detailed breakdown of all temporary files on your PC, including old Windows
 How to Fix Apple TV Bluetooth Problems
Basic Fixes Disconnect Bluetooth headphones from other devices: If your Bluetooth headphones are not connecting to your Apple TV, disconnect them.
How to Fix Apple TV Bluetooth Problems
Basic Fixes Disconnect Bluetooth headphones from other devices: If your Bluetooth headphones are not connecting to your Apple TV, disconnect them.
The article above may contain affiliate links which help support Guiding Tech. The content remains unbiased and authentic and will never affect our editorial integrity.