Basic Fixes
- Force quit and relaunch Messages app: This will give the app a fresh start and reload your chats.
- Update Messages app: You must install the new version of iOS to update the Messages app.
Fix 1: Check if Your Phone Number Is Selected for iMessage
Your Apple devices give you the option of sending and receiving iMessage from your phone number or email (Apple ID). So, if your email shows up when you text your contacts, check if you have selected your phone number for iMessage.
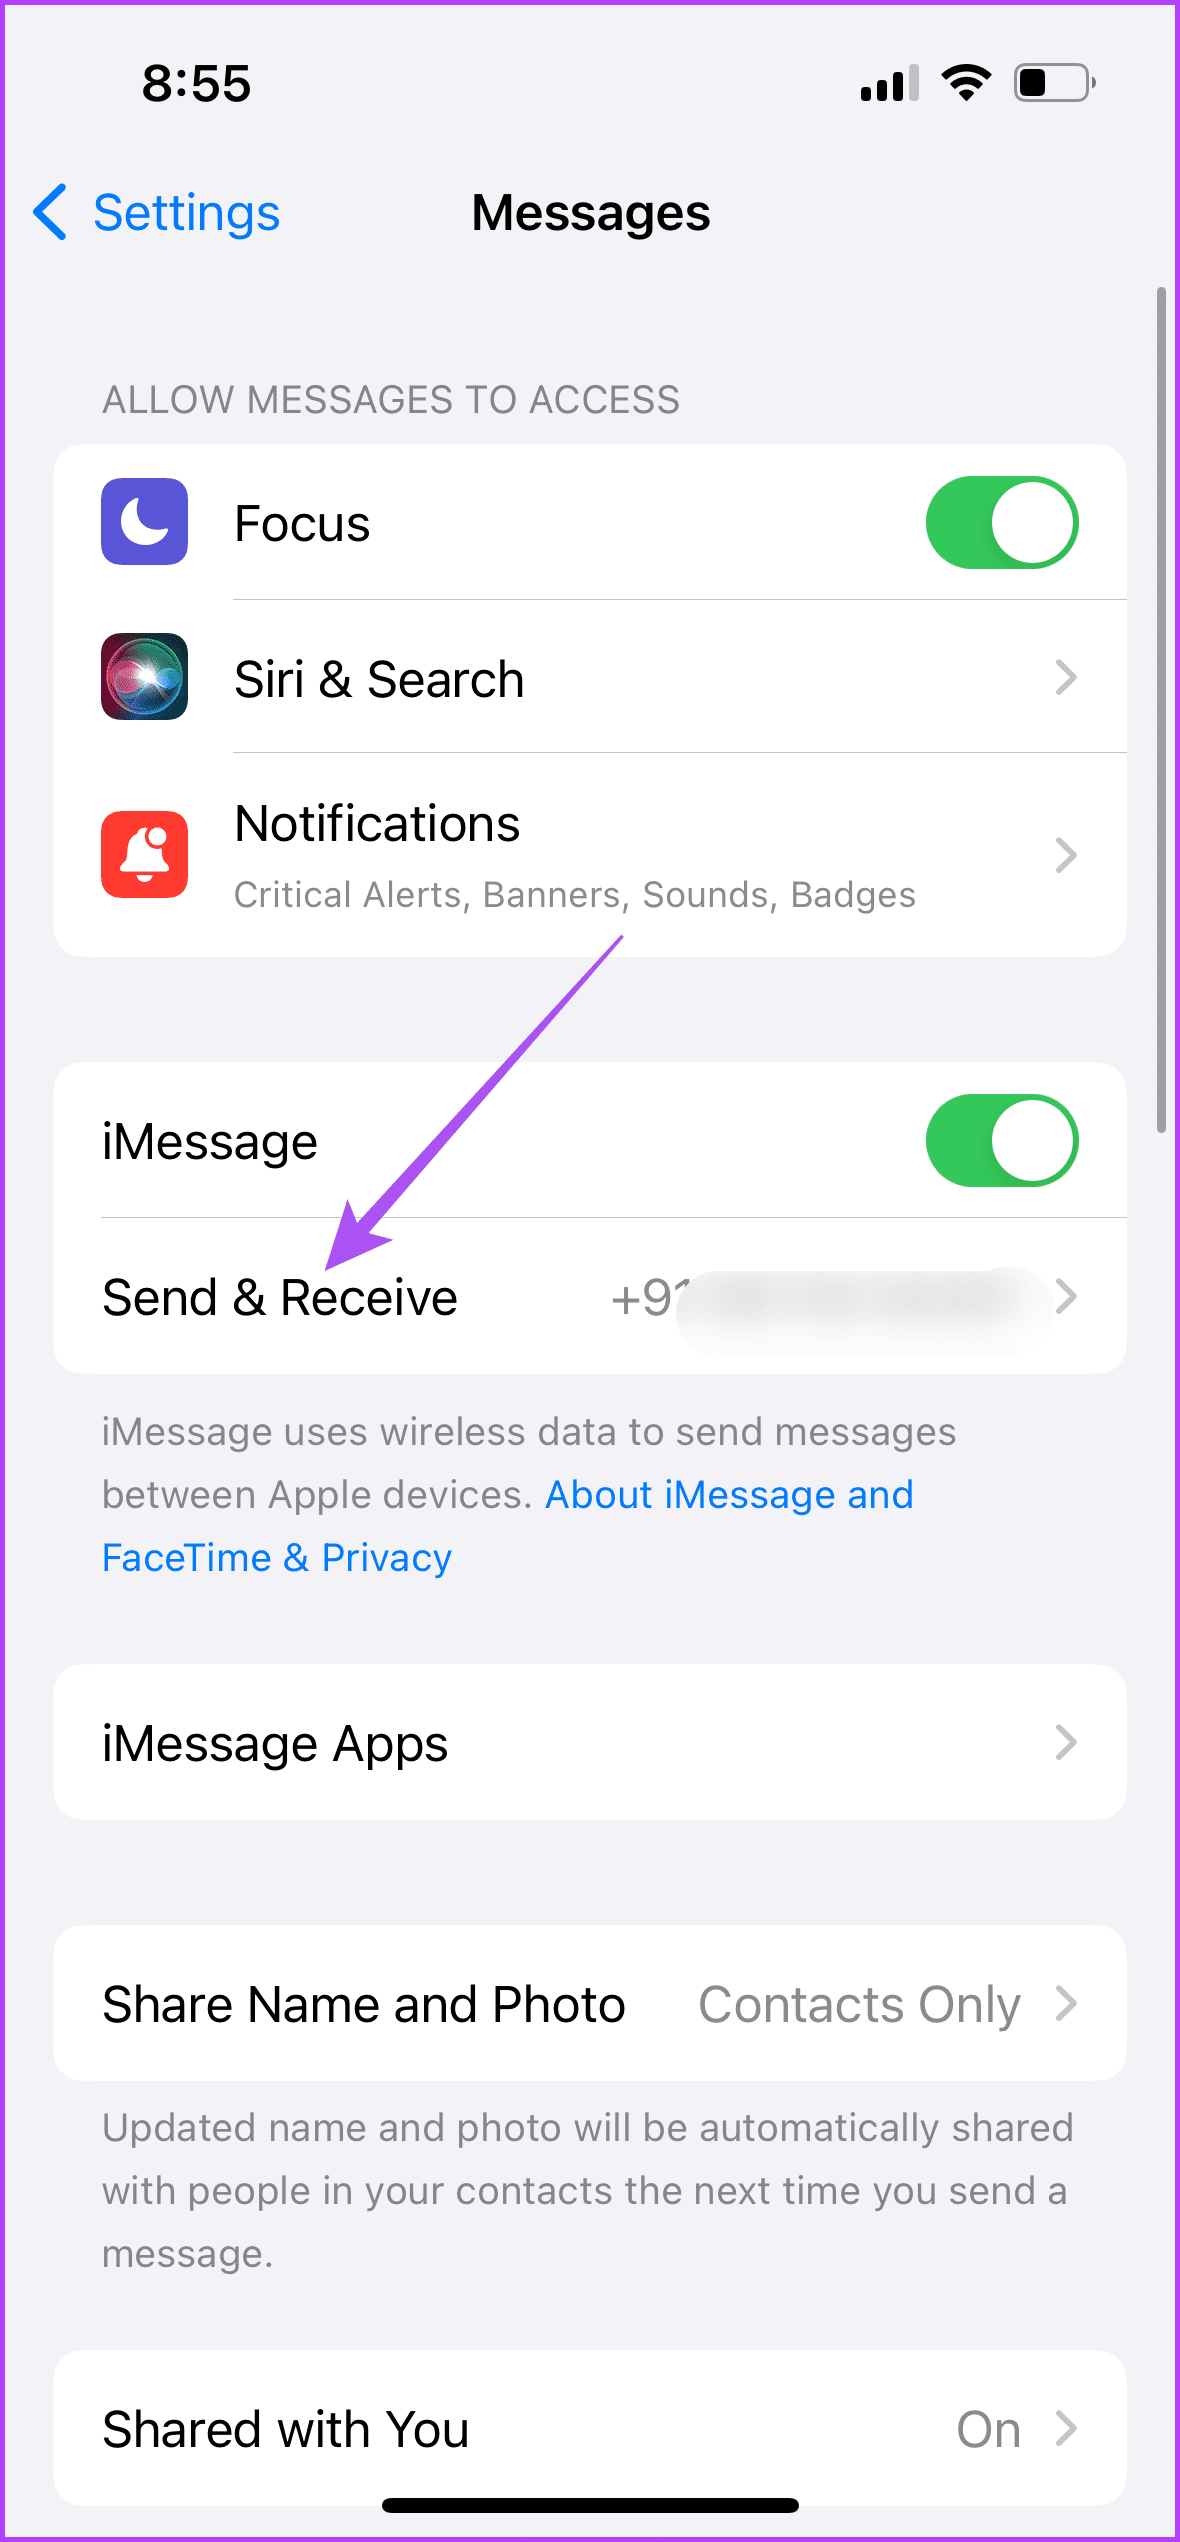
On iPhone and iPad
Open Settings > Messages > Send and Receive > check if your phone number is selected.

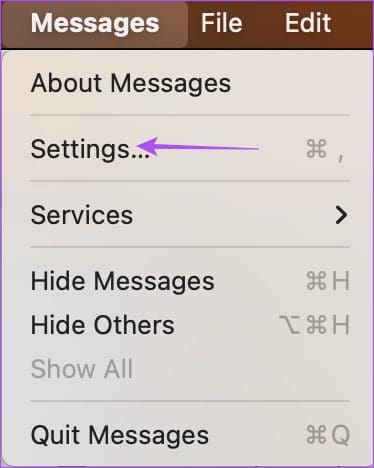
On Mac
Step 1: Open the Messages app > click on Messages > select Settings.
Step 3: Select the iMessage tab and ensure your phone number is selected for sending and receiving iMessage on your Mac.

Fix 2: Enable iMessage Again
If you still face the same issue and wondering why iMessage is sending texts from email, try enabling iMessage again on your devices. That will re-register, download, and sync your conversations across devices.
On iPhone and iPad
Step 1: Open Settings > Messages > disable iMessage.


Step 2: Wait a few seconds and tap the toggle again to enable iMessage.
On Mac
Step 1: Open Messages > click on Messages > Settings.
Step 2: Click the iMessage tab at the top and check the box for Enable Messages in iCloud to disable the service.

Step 3: Wait a few seconds and check the box again.
Fix 3: Reset Network Settings
If none of the solutions work, reset the network settings on your iPhone, iPad, and Mac. This will remove all the connected network preferences and restore settings to default. Of course, you must add Wi-Fi details again, and it’ll be a fresh start.
On iPhone and iPad
Step 1: Open the Settings app > tap on General.
Step 2: Scroll to the bottom > select Transfer or Reset iPhone/iPad.
Step 3: Tap on Reset > select Reset Network Settings.

Step 4: Tap on Reset Network Settings again to confirm.
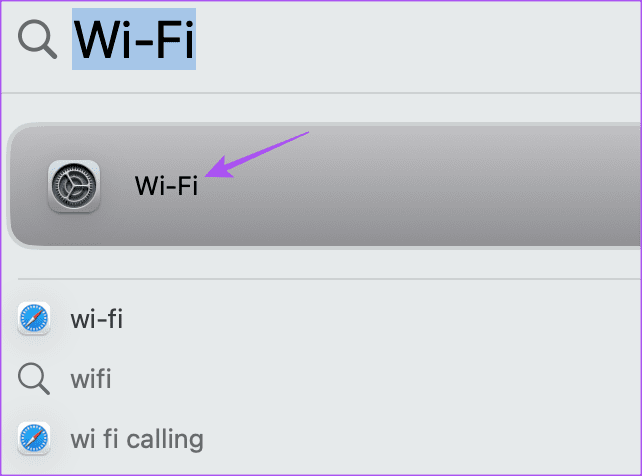
On Mac
Step 1: Press Command + Spacebar keyboard shortcut to open Spotlight Search, type Wi-Fi, and press Return.
Step 2: Click the Details button next to the connected Wi-Fi network.
Step 3: Click on Forget This Network.

Step 4: Click on Remove to confirm.
Step 5: Close the window and connect to your Wi-Fi again to check if this fixes the problem.
Tip: You can refer to our post to learn how to force send iMessage as a text message.
Was this helpful?
Last updated on 31 July, 2024
Read Next
 How to Force Send Text Message Instead of iMessage to a Contact
Let's see how to force send a text message instead of iMessage to a contact on your iPhone and iPad.
How to Force Send Text Message Instead of iMessage to a Contact
Let's see how to force send a text message instead of iMessage to a contact on your iPhone and iPad.
 3 Fixes for iMessage Not Sending to One Contact on iPhone
Basic Fixes Switch to Wi-Fi: You can try connecting to a Wi-Fi network for faster internet speeds.
3 Fixes for iMessage Not Sending to One Contact on iPhone
Basic Fixes Switch to Wi-Fi: You can try connecting to a Wi-Fi network for faster internet speeds.
 7 Fixes When Printer on Windows 11 Keeps Printing Landscape Instead of Portrait
1.
7 Fixes When Printer on Windows 11 Keeps Printing Landscape Instead of Portrait
1.
 How to Fix Windows 10 Shuts Down Instead of Going to Sleep or Hibernating
Windows operating system comes with a lot of simple features that are a real time saver.
How to Fix Windows 10 Shuts Down Instead of Going to Sleep or Hibernating
Windows operating system comes with a lot of simple features that are a real time saver.
 How to Show Profile Picture Instead of Video in Zoom Meeting
https://youtu.be/n6ihTbONm_I Keep Picture Instead of Video or Name in Zoom on PC It’s not rocket science to show your picture in Zoom.
How to Show Profile Picture Instead of Video in Zoom Meeting
https://youtu.be/n6ihTbONm_I Keep Picture Instead of Video or Name in Zoom on PC It’s not rocket science to show your picture in Zoom.
 How to Use Google Contacts Instead of Samsung Contacts
Samsung Galaxy phones carry a lot of pre-loaded apps, and some of them you'll rarely use.
How to Use Google Contacts Instead of Samsung Contacts
Samsung Galaxy phones carry a lot of pre-loaded apps, and some of them you'll rarely use.
 6 Fixes for Facebook Messenger Not Sending Messages (iPhone and Android)
Preliminary Fixes Enable and Disable Airplane Mode: Network glitches can prevent Facebook Messenger from sending messages.
6 Fixes for Facebook Messenger Not Sending Messages (iPhone and Android)
Preliminary Fixes Enable and Disable Airplane Mode: Network glitches can prevent Facebook Messenger from sending messages.
The article above may contain affiliate links which help support Guiding Tech. The content remains unbiased and authentic and will never affect our editorial integrity.