Fix 1: Check the Diagnostic Service Status
Windows troubleshooters rely on a few diagnostic services. If these services glitch, you will face troubles while launching or using a troubleshooter. So, you must check and restart them using the Services utility. Here’s how:
Step 1: Press the Windows key to open the Start menu. Type services in the search bar and press Enter to open the Services app.
Step 2: Locate and right-click on Diagnostic Policy Service > select Restart. Also, restart the Diagnostic Service Host and Diagnostic System Host services.
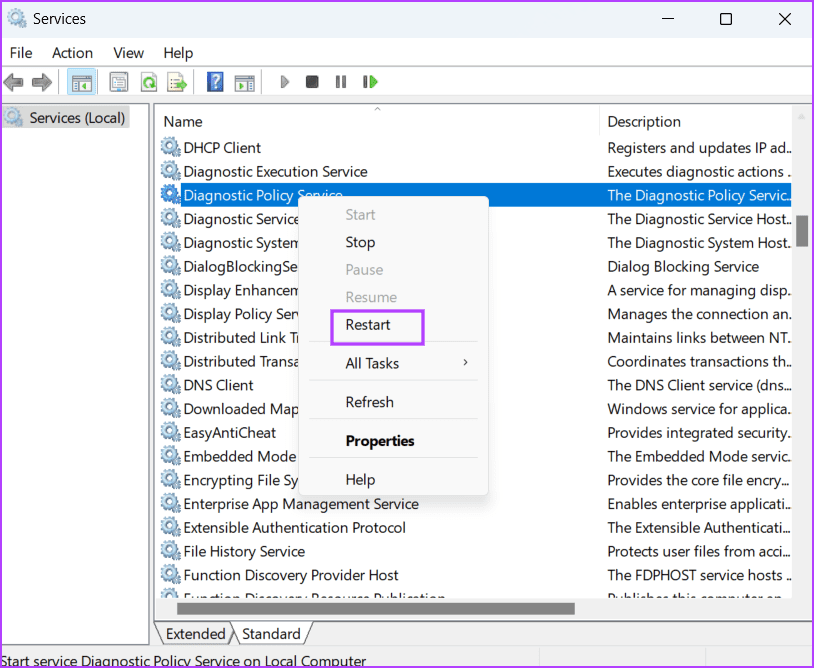
Step 3: Close the Services app.
Fix 2: Remove a Recent Windows Update
Many users complained about their inability to launch and use built-in troubleshooters after installing a recent Windows update. So, you must remove the update to check if it stops the Windows troubleshooter from working on your PC.
Also, check if an update was reported in the support forums. This will help you pinpoint the update.
Step 1: Open Settings (Win + I) and go to Windows Update.
Step 2: Click on the Update history option.
Step 3: Scroll down and click on Uninstall updates.
Step 4: Find the most recent update you installed and click the Uninstall button.
Step 5: Click on the Uninstall button again to remove the update.
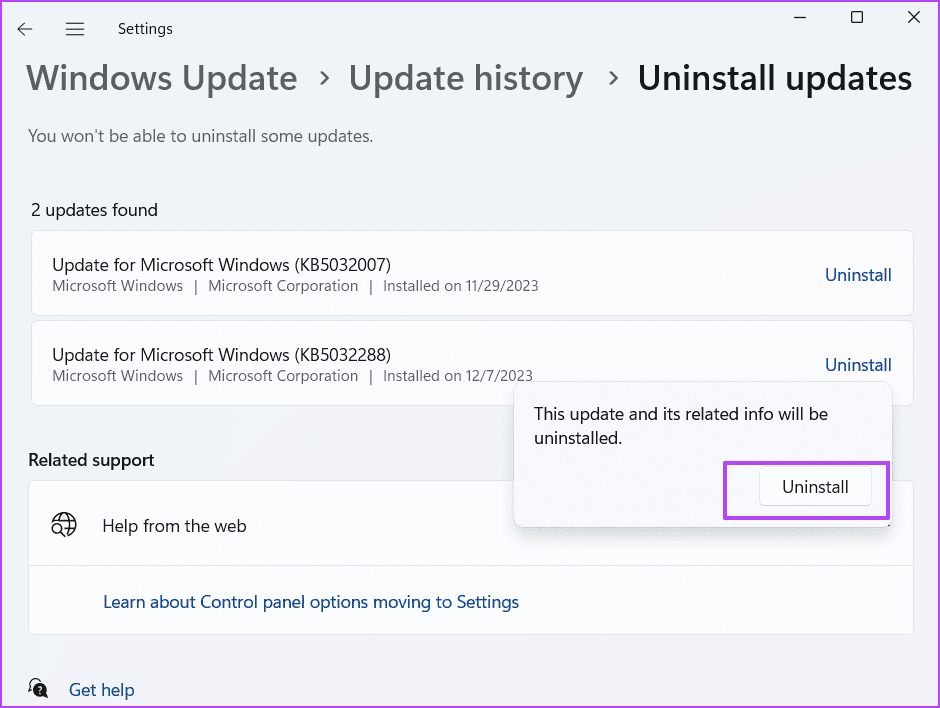
Step 6: Close the Settings app and restart your PC.
If you cannot uninstall the update, here is how to manage these problematic Windows updates.
Fix 3: Run Troubleshooter in Clean Boot State
Third-party programs and their background services can interfere with Windows components and prevent them from launching or working correctly. So, you must perform a clean boot to isolate the culprit service and remove the corresponding program from your PC. Here’s how:
Step 1: Press the Windows key to open the Start menu. Type msconfig in the search bar and press Enter to open the System Configuration app.
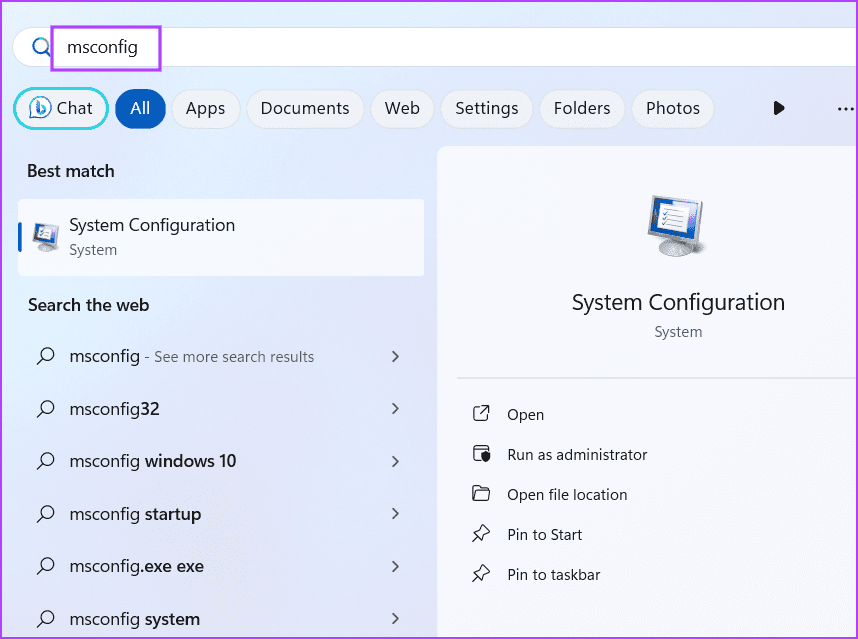
Step 2: Switch to the Services tab > click the Hide all Microsoft services checkbox > click on Disable all.

Step 3: Click on Apply, followed by OK to save the changes.

Step 4: It will then prompt you to restart the PC. Click on Restart now.
After your PC restarts, launch the troubleshooter and check if the 0x80004005 error code appears. If you don’t see any error message, it confirms the suspicion that a third-party service is interfering.
Relaunch the System Configuration tool, re-enable some services, and restart your PC. Repeat this process until you find the problematic service and remove it from your PC.
Fix 4: Run SFC and DISM Scans
You can use built-in command-line tools like SFC and DISM to repair corrupt system files and fix the damaged Windows Component store. Run both scans to identify and fix problems with your PC. Here’s how:
Step 1: Press the Windows key to open the Start menu. Type cmd in the search box and press the Ctrl + Shift + Enter to open it with admin permission.

Step 2: The User Account Control window will pop up. Click on Yes.
Step 3: Type the following command and press Enter to run an SFC scan:
SFC /scannow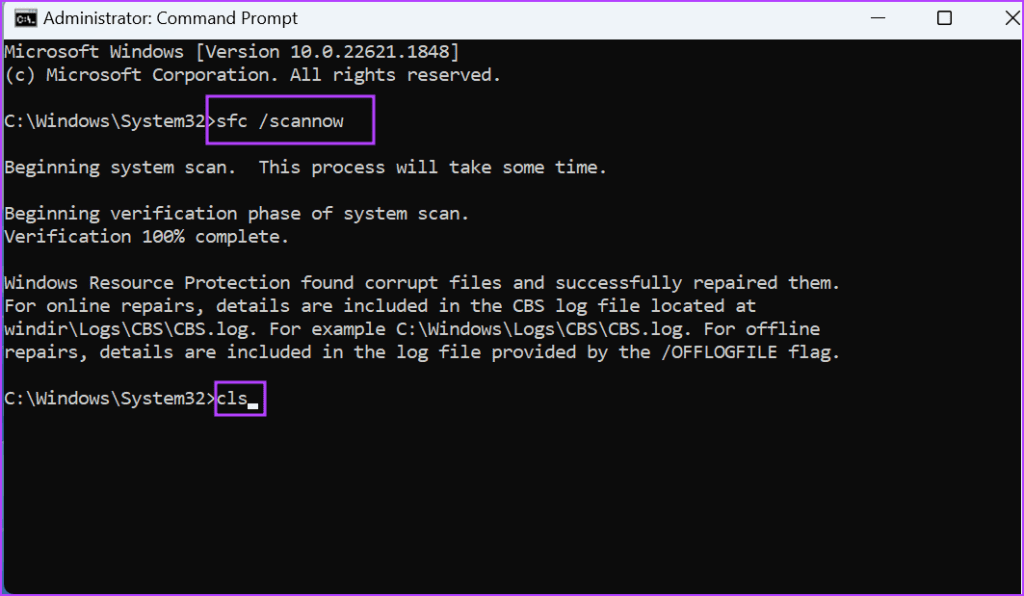
Step 4: Execute the following commands to run DISM scans:
DISM /Online /Cleanup-Image /CheckHealth
DISM /Online /Cleanup-Image /ScanHealth
DISM /Online /Cleanup-Image /RestoreHealth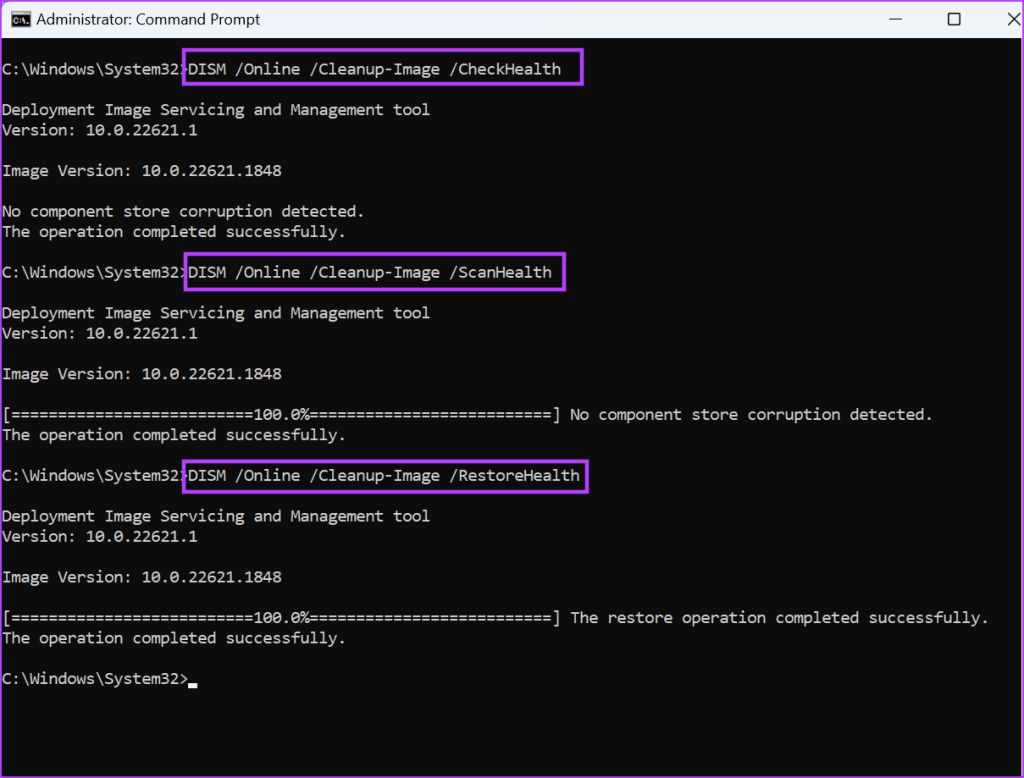
Step 5: Close the Command Prompt window afterward.
Fix 5: Try System Restore
System Restore is a lifesaver that allows you to revert your PC to an earlier time. If you have any available restore points, apply the most recent one. Usually, Windows creates a restore point when an update is installed. However, you will lose all programs installed after the restore point creation. Here’s how:
Step 1: Press the Windows key to open the Start menu. Type rstrui in the search box and press Enter to open System Restore. Click on Next.
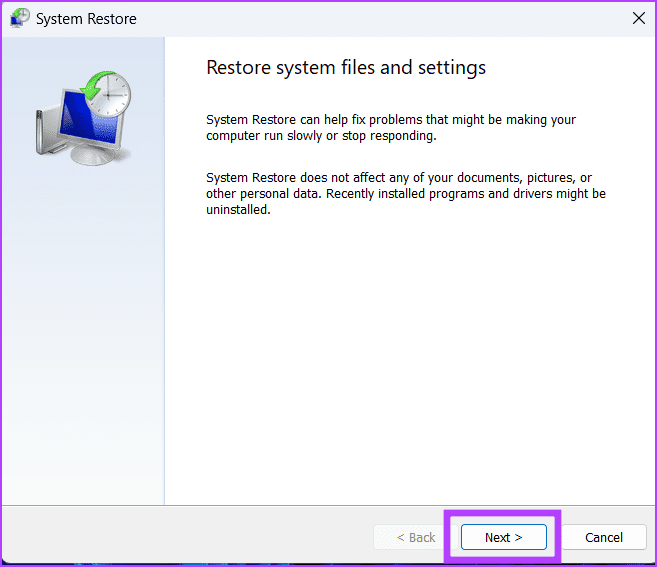
Step 2: Select a restore point from the list and click on Next.

Follow the on-screen instructions to apply it. After a few minutes, your PC will restart and boot to the desktop.
Was this helpful?
Last updated on 01 May, 2024
Read Next
 How to Solve the Unhandled Exception Has Occurred Error in Windows 10
The ‘unhandled exception has occurred’ error is not associated with a particular app, which makes it that much harder to resolve.
How to Solve the Unhandled Exception Has Occurred Error in Windows 10
The ‘unhandled exception has occurred’ error is not associated with a particular app, which makes it that much harder to resolve.
 5 Best Ways to Fix Windows 10 Troubleshooter Not Working
Windows 10 packs a Troubleshooter to help you fix most of the system-level problems easily.
5 Best Ways to Fix Windows 10 Troubleshooter Not Working
Windows 10 packs a Troubleshooter to help you fix most of the system-level problems easily.
 4 Ways to Run the Program Compatibility Troubleshooter on Windows 10 and 11
Method 1: Using the Settings App The Settings app has a dedicated Troubleshoot section that contains all types of troubleshooters. To run the Program Compatibility Troubleshooter, you must access the Settings
4 Ways to Run the Program Compatibility Troubleshooter on Windows 10 and 11
Method 1: Using the Settings App The Settings app has a dedicated Troubleshoot section that contains all types of troubleshooters. To run the Program Compatibility Troubleshooter, you must access the Settings
 3 Fixes When Microsoft Store Is Not Opening or Loading
Basic Fixes: Check your Internet connection: Microsoft Store requires a high-speed Internet connection to work correctly.
3 Fixes When Microsoft Store Is Not Opening or Loading
Basic Fixes: Check your Internet connection: Microsoft Store requires a high-speed Internet connection to work correctly.
 5 Fixes for “Word Experienced an Error Trying to Open the File” Error in Windows
Fix 1: Unblock Your Word File Microsoft Word may fail to open a document if it has been altered by third-party software.
5 Fixes for “Word Experienced an Error Trying to Open the File” Error in Windows
Fix 1: Unblock Your Word File Microsoft Word may fail to open a document if it has been altered by third-party software.
 4 Fixes for X (Twitter) Stuck on the Loading Screen
Basic Fixes Log into X (Twitter) for desktop and authenticate your account: If you have recently made any changes to your account using the X (Twitter) app, access it on
4 Fixes for X (Twitter) Stuck on the Loading Screen
Basic Fixes Log into X (Twitter) for desktop and authenticate your account: If you have recently made any changes to your account using the X (Twitter) app, access it on
 4 Fixes for Google Calendar Not Loading in Chrome
Fix 1: Ensure JavaScript Is Enabled Numerous modern-day websites rely on JavaScript to render content in your browser.
4 Fixes for Google Calendar Not Loading in Chrome
Fix 1: Ensure JavaScript Is Enabled Numerous modern-day websites rely on JavaScript to render content in your browser.
 4 Fixes for Instagram Not Loading in Browser
Try Basic Fixes Check if Instagram is down: If Instagram servers are facing an outage, it may keep showing the "There's an issue and the page could not be loaded"
4 Fixes for Instagram Not Loading in Browser
Try Basic Fixes Check if Instagram is down: If Instagram servers are facing an outage, it may keep showing the "There's an issue and the page could not be loaded"
The article above may contain affiliate links which help support Guiding Tech. The content remains unbiased and authentic and will never affect our editorial integrity.