Method 1: Using the Settings App
Besides displaying the network adapter speed, the Settings app also provides information about other connection aspects, such as the network band, MAC address, and more.
Step 1: Press the Windows + I key to open the Settings app.
Step 2: Choose the Network & Internet option from the left sidebar > click Properties in the right pane.

Step 3: You can see the network speed next to the Aggregated link speed (Receive/ Transmit) option.

Method 2: Use Control Panel
Step 1: In the Start Menu search bar, type Control Panel, and press Enter.

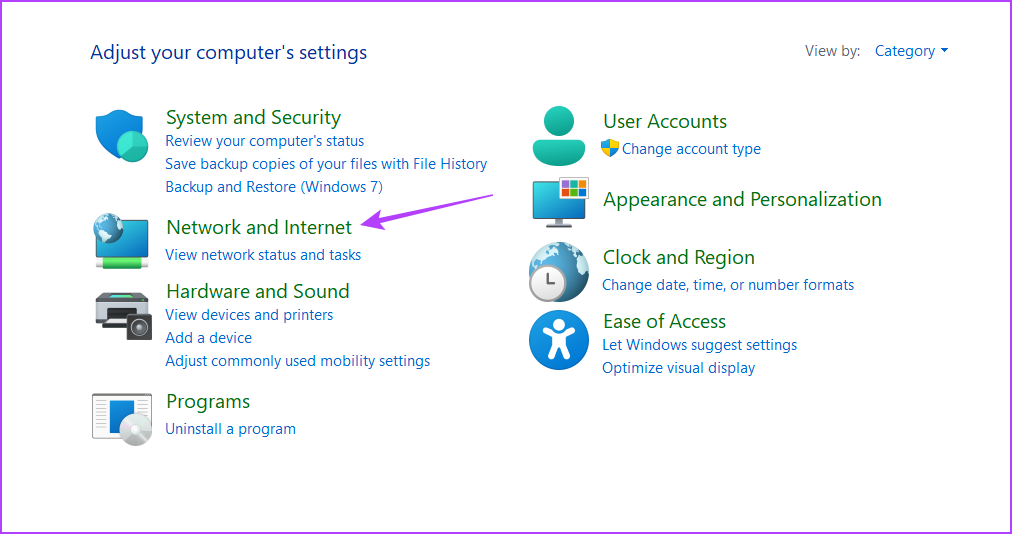
Step 2: Click on Network and Internet.
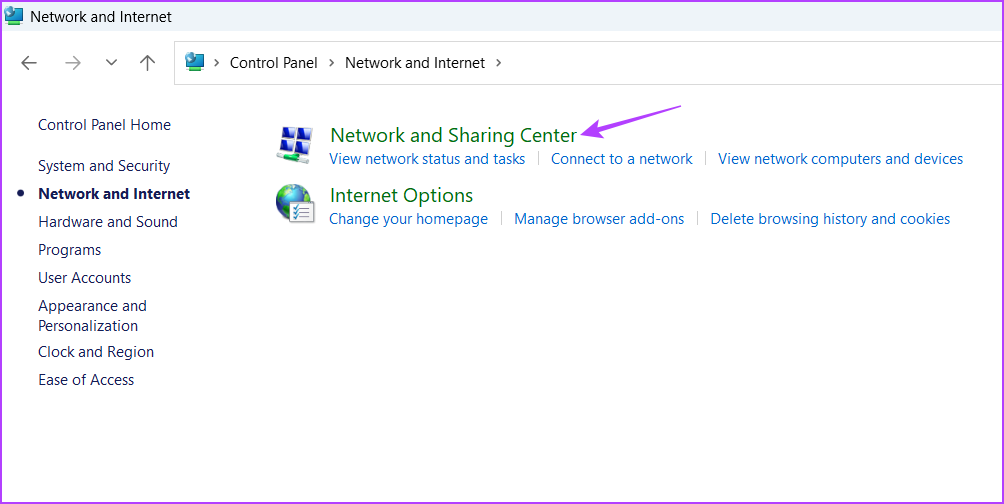
Step 3: Choose Network and Sharing Center.
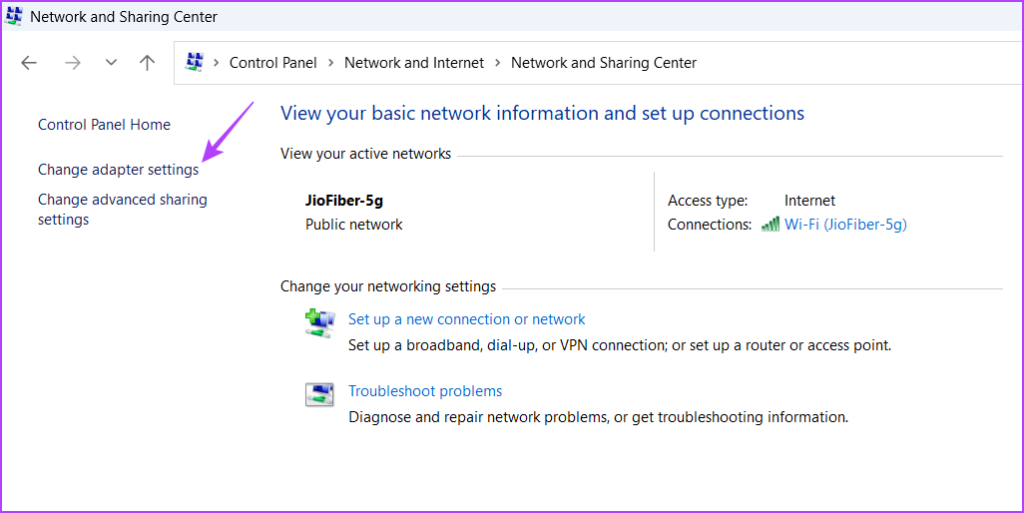
Step 4: Click the Change adapter settings in the left sidebar.
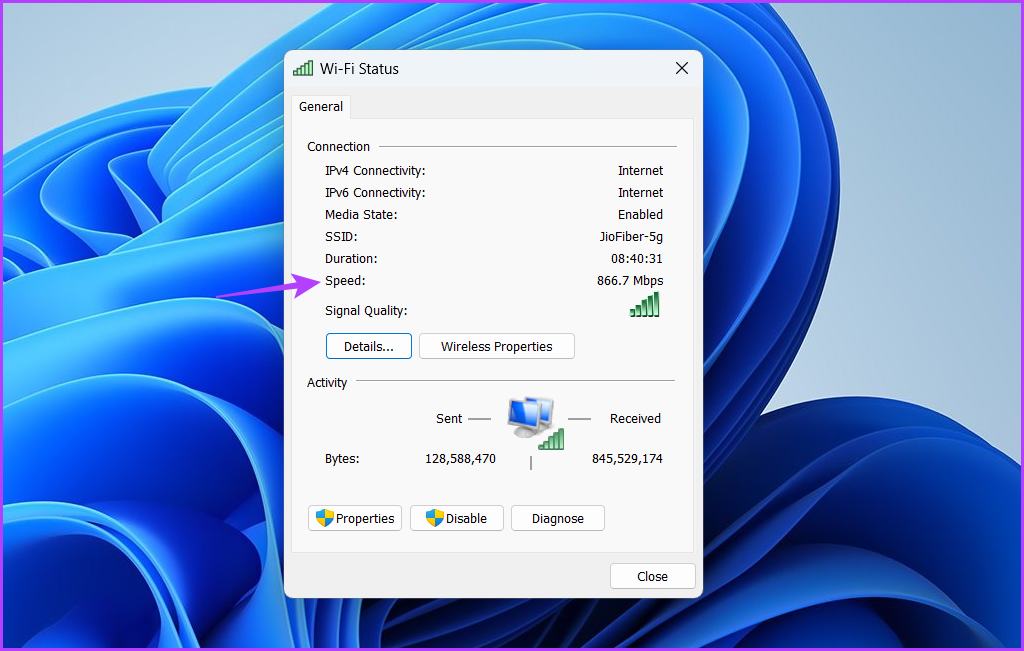
Step 5: Right-click on your Ethernet or Wi-Fi connection and choose Status from the context menu.

You can check your network adapter speed next to the Speed field.
Method 3: Using the Command-Line Tools
To check the speed of your Ethernet or Wi-Fi interface using Command Prompt, follow these instructions:
Step 1: Open the Start Menu, type Command Prompt in the search bar, and click the Run as administrator option in the right pane.

Step 2: In the elevated Command Prompt window, type the following command and press Enter.
netsh wlan show interfaces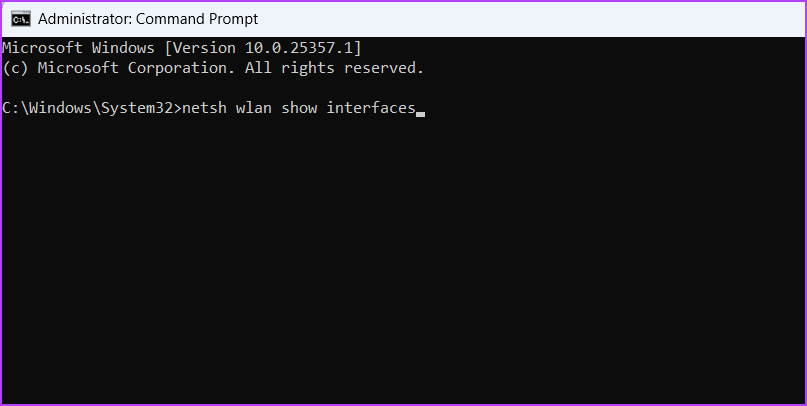
Step 3: Check the Receive rate (Mbps) and Transmit rate (Mbps) fields to know the connection speed of your network adapter.

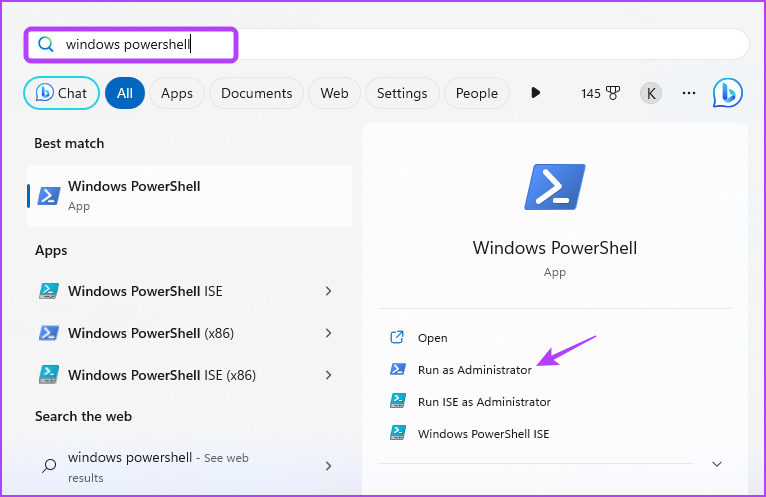
Like Command Prompt, you can use Windows PowerShell to get information about your network adapter speed. Here’s how:
Step 1: Launch the Start Menu, type Windows PowerShell in the search bar, and choose Run as administrator from the right pane.
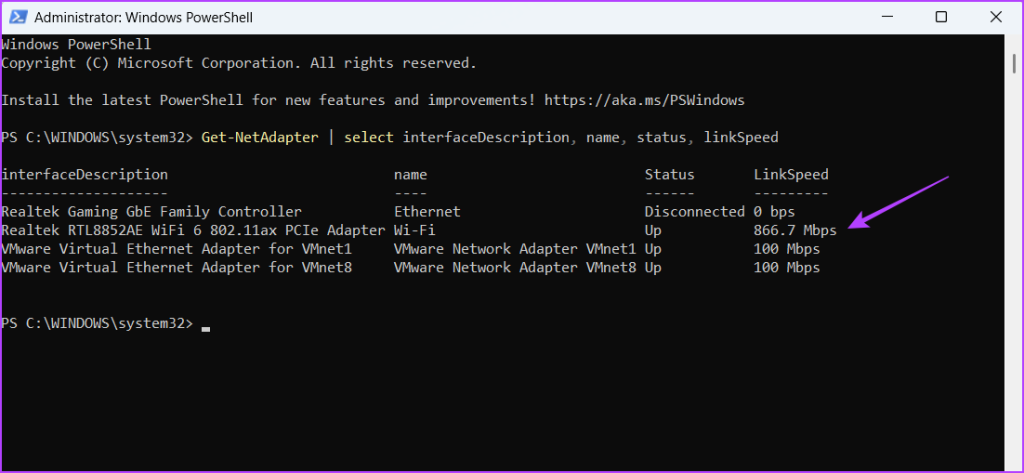
Step 2: In the elevated PowerShell window, type the following command and press Enter.
Get-NetAdapter | select interfaceDescription, name, status, linkSpeed
After the command is executed, you’ll see your computer’s Ethernet and Wi-Fi adapters. Check the connection speed of your network adapter in the LinkSpeed column.
Was this helpful?
Last updated on 17 July, 2024
Read Next
 4 Ways to Fix “Windows Could Not Find a Driver for Your Network Adapter” Error
Fix 1: Enable Network Adapter Windows may fail to communicate with the network adapter if you've previously disabled it.
4 Ways to Fix “Windows Could Not Find a Driver for Your Network Adapter” Error
Fix 1: Enable Network Adapter Windows may fail to communicate with the network adapter if you've previously disabled it.
 How to Disable Network Adapter (Ethernet) in Windows 11
Method 1: Using Settings Step 1: Press the Windows key on your keyboard, type Settings, and press Open.
How to Disable Network Adapter (Ethernet) in Windows 11
Method 1: Using Settings Step 1: Press the Windows key on your keyboard, type Settings, and press Open.
 3 Ways to Check RAM Speed on Windows 11
Method 1: Check RAM Speed From the Task Manager The Task Manager app allows you to view your computer's core hardware details, such as RAM speed, besides monitoring system processes
3 Ways to Check RAM Speed on Windows 11
Method 1: Check RAM Speed From the Task Manager The Task Manager app allows you to view your computer's core hardware details, such as RAM speed, besides monitoring system processes
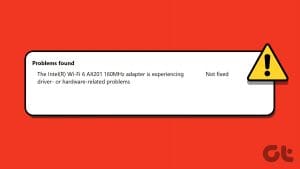 5 Ways to Fix Intel Wi-Fi 6 AX201 Adapter Driver or Hardware Issues
Fix 1: Update or Reinstall Driver The software drivers for the Intel Wi-Fi 6 AX201 on your Windows PC may be outdated and are due for an update.
5 Ways to Fix Intel Wi-Fi 6 AX201 Adapter Driver or Hardware Issues
Fix 1: Update or Reinstall Driver The software drivers for the Intel Wi-Fi 6 AX201 on your Windows PC may be outdated and are due for an update.
 8 Ways to Fix Slow Internet Speed on Windows 11
https://youtu.be/JSqfxm-5XZI Fix 1: Turn Off the Metered Connection Setting your internet connection as metered on Windows can prevent apps from using the internet proficiently, leading to slow internet speeds.
8 Ways to Fix Slow Internet Speed on Windows 11
https://youtu.be/JSqfxm-5XZI Fix 1: Turn Off the Metered Connection Setting your internet connection as metered on Windows can prevent apps from using the internet proficiently, leading to slow internet speeds.
 4 Ways to Fix Slow Download Speed in Microsoft Edge for Windows
Basic Yet Essential Fixes Check internet speed: If your internet speed is slow or bandwidth is less, all downloads will get slow.
4 Ways to Fix Slow Download Speed in Microsoft Edge for Windows
Basic Yet Essential Fixes Check internet speed: If your internet speed is slow or bandwidth is less, all downloads will get slow.
 4 Ways to Fix Slow Download Speed in Epic Games Launcher on Windows 11
https://youtu.be/w8E4d-rCMUQ Basic Fixes: Check the Epic Server Status: Epic Games Launcher also relies on multiple servers to operate, and It’s possible that a server might be out of order or
4 Ways to Fix Slow Download Speed in Epic Games Launcher on Windows 11
https://youtu.be/w8E4d-rCMUQ Basic Fixes: Check the Epic Server Status: Epic Games Launcher also relies on multiple servers to operate, and It’s possible that a server might be out of order or
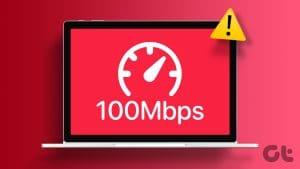 4 Ways to Fix Ethernet Speed Capped at 100Mbps on Windows 11
Basic Fixes: Ensure your router and plan support 100Mbps: Connect to your Wi-Fi network and run a speed test via Fast.
4 Ways to Fix Ethernet Speed Capped at 100Mbps on Windows 11
Basic Fixes: Ensure your router and plan support 100Mbps: Connect to your Wi-Fi network and run a speed test via Fast.
The article above may contain affiliate links which help support Guiding Tech. The content remains unbiased and authentic and will never affect our editorial integrity.

