Basic Fixes
- Check OneDrive Storage: By default, your Word files are saved in OneDrive. So you should have sufficient storage on your account.
- Remove symbols from file name: A few symbols might not be supported for file names by Microsoft Word on your Mac.
- Force quit and relaunch Word: Click on Finder at the top-right corner > Force Quit > Choose
- Update or reinstall Word on Mac: Download the latest version of the app from the Mac App Store.
Fix 1: Remove Microsoft Word Preference Files
Like other apps, Word holds the details of all the customizations that you make like keyboard shortcuts, in to a specific preference file. You can relocate this preference file temporarily and relaunch Microsoft Word if using it without any customizations or changes helps. Follow these steps.
Step 1: Open the Finder app > Go > Go to Folder.
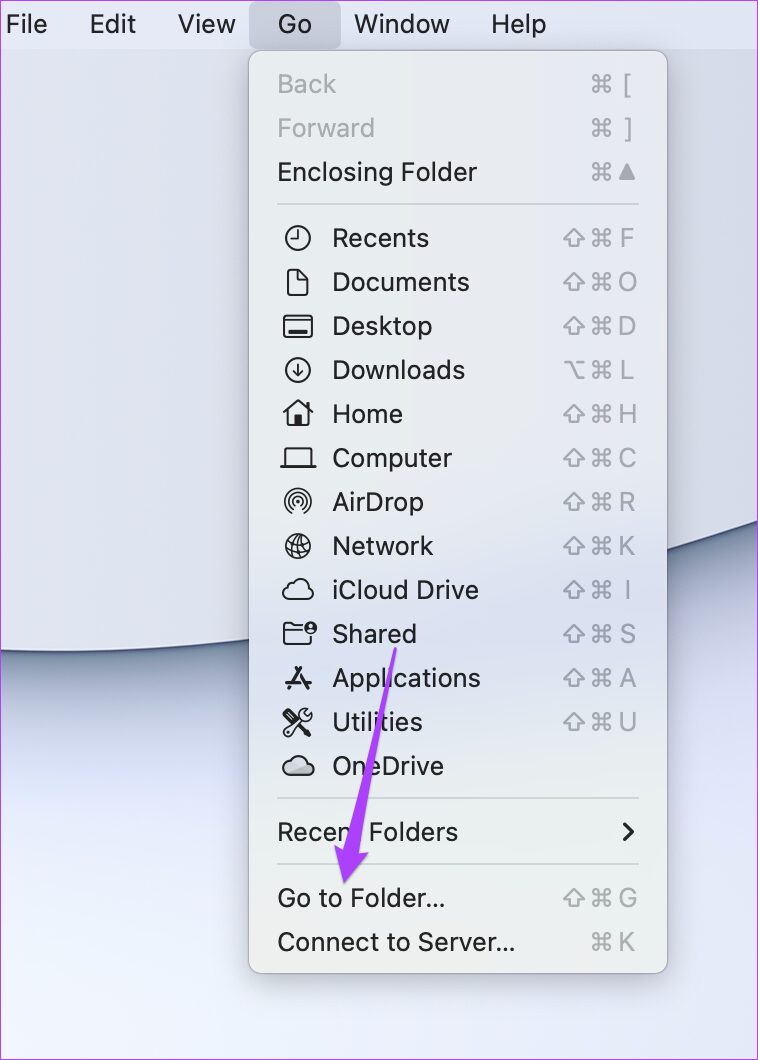
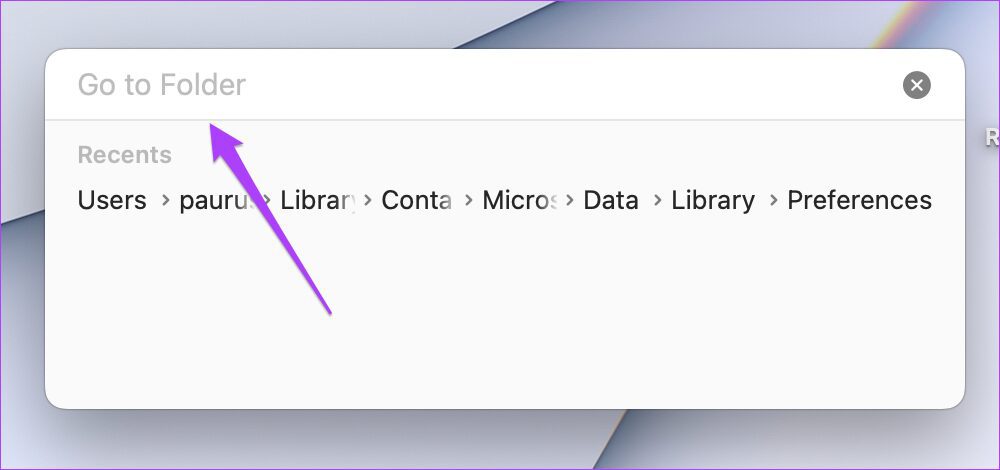
A search box will appear on your screen.
Step 2: In the search box, type ~/Library and then hit Return.
Step 3: Select the first result that appears in the search box because that’s usually the location you’d want to open.
Step 4: Click on Containers folder from the list of folders.

Step 5: When the folder opens, use the search box in the top-right corner, type in com.microsoft.Word.plist and then hit Return.

Step 6: Select the file and then drag it towards the recycle bin to delete it.

Fix 2: Run Disk Utility
Too much of random app installation or moving large files could impact the disk performance of your Mac. Especially if you are using the cache and unwanted system files cleaner apps. The best way to check for any storage related errors is to use the Disk Utility. Follow these steps to fix any storage errors leading to Microsoft Word not working on Mac.
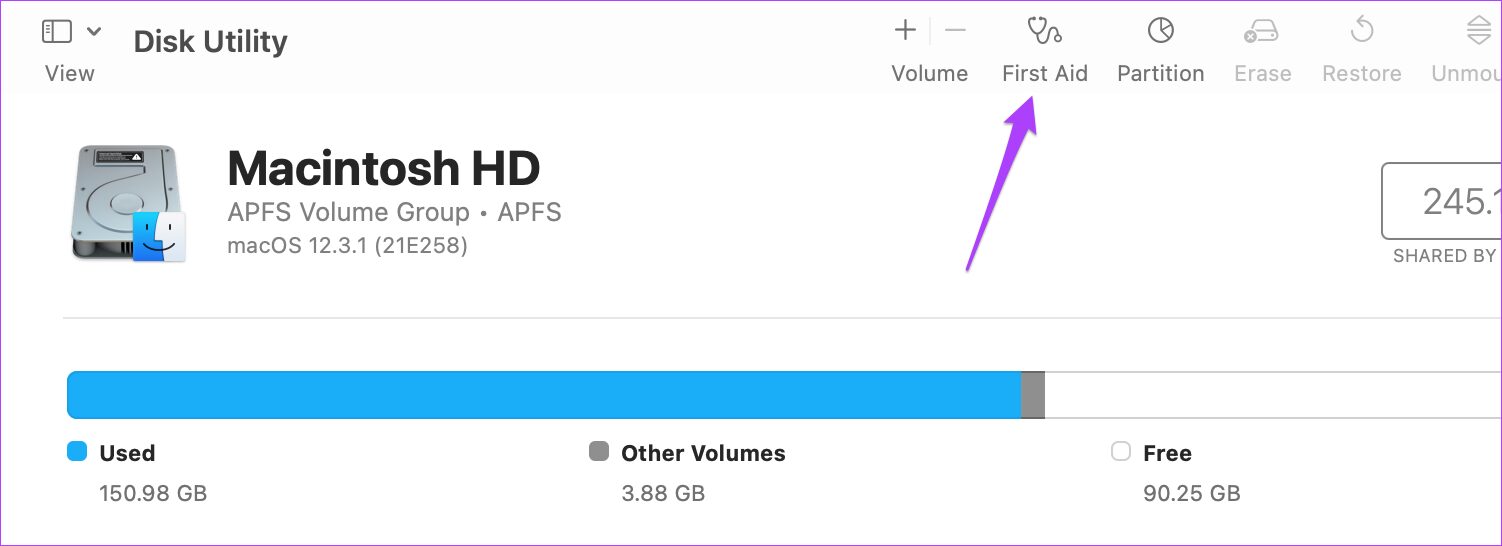
Step 1: Open Disk Utility on your Mac.
Step 2: In the Disk Utility window, click on the First Aid option.
Step 3: Click on Run to start First Aid > Click on Continue.
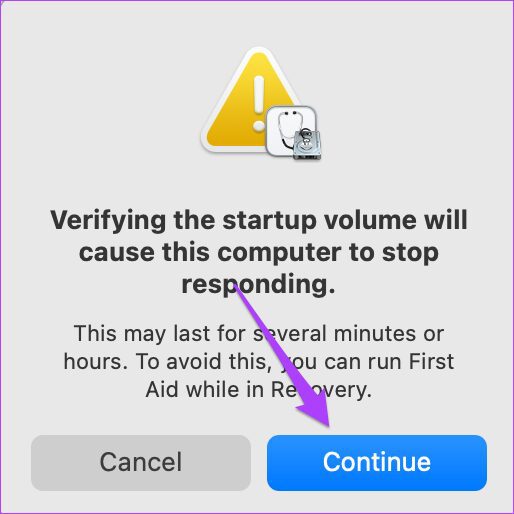
After the Disk Utility runs and repairs the disk errors, close the wind
Fix 3: Boot Your Mac in Safe Mode
You can attempt to boot your Mac in the Safe Mode to investigate if any third-party app or service is preventing Microsoft Word from working properly. The Safe Mode basically enables only system services disables any kind of third-party app or service from launching automatically. That’s a good option to investigate. Here’s how you can use it.
For M1 Mac users
If you use a MacBook model with Apple Silicon M1 chip inside, booting your Mac in the Safe Mode is pretty easy.
Step 1: Shut Down your Mac.
Step 2: After your Mac shuts down, press and then hold down the Power Button till you see startup options – Macintosh HD and Options.
Step 3: Select the Macintosh HD, hold down the Shift key and then click on Continue in Safe Mode.

Step 4: After your Mac restarts in the Safe mode, open the Microsoft Word app to check if it is working.
For Intel Mac Users
For those using Intel-chip based MacBooks, you’ll have to follow a slightly different process.
Step 1: Restart your Mac.
Step 2: Press and hold the Shift key the moment your Mac restarts.
Step 3: Release the Shift key once you see the login window on your screen.
Tip: Learn how to delete a Word document on your Mac.
Was this helpful?
Last updated on 25 July, 2024
Read Next
 Apple Pages vs Microsoft Word: Which Word Processing Software Is Better
Every major tech company out there is offering their version of the productivity suite.
Apple Pages vs Microsoft Word: Which Word Processing Software Is Better
Every major tech company out there is offering their version of the productivity suite.
 Google Docs vs. Microsoft Word Online: Which Word Processor Is Better
Google Docs vs.
Google Docs vs. Microsoft Word Online: Which Word Processor Is Better
Google Docs vs.
 6 Ways to Spell Check Is Not Working in Microsoft Word
Before you begin, try to restart Microsoft Word to fix temporary bugs and glitches.
6 Ways to Spell Check Is Not Working in Microsoft Word
Before you begin, try to restart Microsoft Word to fix temporary bugs and glitches.
 4 Fixes for Microsoft Word Dictation Tool Not Working on Windows 11 and 10
Fix 1: Check Microphone Permission Windows lets you enable or disable microphone permissions for each app and program individually.
4 Fixes for Microsoft Word Dictation Tool Not Working on Windows 11 and 10
Fix 1: Check Microphone Permission Windows lets you enable or disable microphone permissions for each app and program individually.
 5 Fixes When Read Aloud Is Not Working in Microsoft Word for Windows
Fix 1: Add the Read Aloud Option Is the Read Aloud option missing from Microsoft Word?
5 Fixes When Read Aloud Is Not Working in Microsoft Word for Windows
Fix 1: Add the Read Aloud Option Is the Read Aloud option missing from Microsoft Word?
 2 Fixes for Microsoft Word Not Opening on iPhone and iPad
Basic Fixes Check OneDrive storage: All your Word documents get saved on OneDrive.
2 Fixes for Microsoft Word Not Opening on iPhone and iPad
Basic Fixes Check OneDrive storage: All your Word documents get saved on OneDrive.
 How to Use Grammarly in Microsoft Word (Windows and Mac)
Use Grammarly in Microsoft Word on Mac Install Grammarly on Mac Step 1: Open Microsoft Word > select the Insert menu at the top.
How to Use Grammarly in Microsoft Word (Windows and Mac)
Use Grammarly in Microsoft Word on Mac Install Grammarly on Mac Step 1: Open Microsoft Word > select the Insert menu at the top.
 5 Best Fixes for Microsoft Teams Microphone Not Working on Mac
There are quite a few things the best video calling apps have in common, and one of the popular ones is the microphone-related problem.
5 Best Fixes for Microsoft Teams Microphone Not Working on Mac
There are quite a few things the best video calling apps have in common, and one of the popular ones is the microphone-related problem.
The article above may contain affiliate links which help support Guiding Tech. The content remains unbiased and authentic and will never affect our editorial integrity.