Wireless keyboards – as well as other wireless accessories – don’t always work as intended. Often, users encounter connectivity issues when trying to pair their devices with their computers or laptops, and this applies to both Bluetooth keyboards and those that use wireless USB receivers.
Fortunately, there are several ways to fix it when Windows 11 not detecting wireless keyboard.
Windows 11 Not Detecting Wireless Keyboard
Fix 1. Check the Battery Levels
If you’re having a problem with keyboard not detected Windows 11, it’s best to start with the simplest fixes before moving on to more complex ones. One of the most straightforward fixes is to check, change, or charge the batteries, as low power levels could be preventing your keyboard from pairing properly with your device.
Step 1. Check your keyboard’s battery life. Some models will have lights or indicators that show you how much power is left.
Step 2. If the battery power seems low, spend some time charging your keyboard back to full power, or replace the batteries, depending on your model.
Fix 2. Make Sure Bluetooth Is Enabled
Another possible reason behind your wireless keyboard not working is that your device’s Bluetooth is disabled or simply needs a quick reset. Note, however, that this fix only applies to Bluetooth keyboards.
Step 1. Press the “Windows” and “I” keys to open “Settings.”
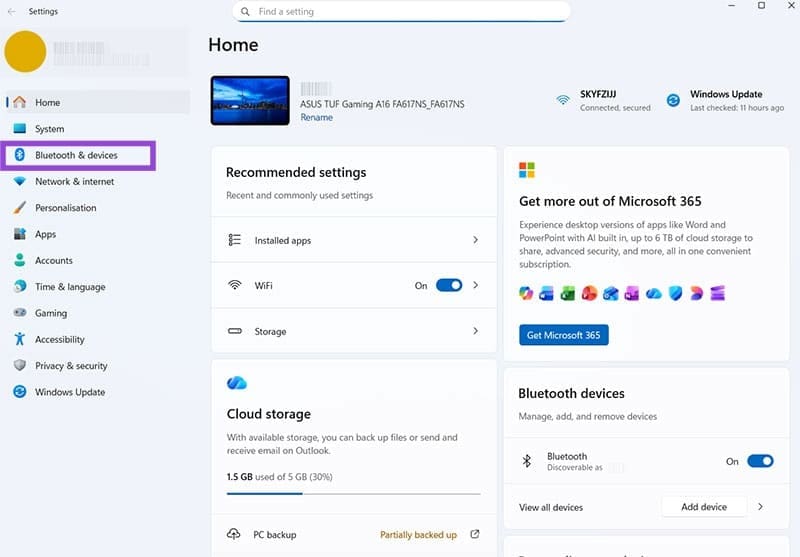
Step 2. Go to the “Bluetooth & devices” menu. Make sure the “Bluetooth” feature is toggled to the “On” position.

Step 3. Try toggling Bluetooth “Off,” then waiting 30 seconds, then turning it back on before attempting to reconnect.
Fix 3. Verify the Wireless Receiver
If your keyboard uses a USB receiver instead of a Bluetooth connection, the receiver might be damaged or not plugged in correctly. Or it could be plugged into the wrong or faulty port. Here are some possible fixes.
Step 1. Inspect the receiver for any damage and make sure it’s pushed fully into the USB port before trying to pair your device.
Step 2. If that doesn’t work, try switching to a different USB port and then connecting again.
Fix 4. Check for Updates
Sometimes, issues like these are simply due to outdated software. Updating your device may be enough to resolve any compatibility problems that might be causing Windows 11 not detecting wireless keyboard.
Step 1. Open the Settings menu by pressing the “Windows” and “I” keys at the same time.

Step 2. Go to the “Windows Update” section and click the “Check for updates” button. If any updates are available, install them and restart your machine.

Fix 5. Reset the Keyboard
Often, connectivity issues can be caused by minor technical glitches and bugs that should clear themselves if you reset or reboot your device.
Step 1. Check your keyboard for a “Reset” button and press it. Note that you may have to re-pair your keyboard after the reset, following the same steps as when you first set it up.
Step 2. If your keyboard doesn’t have a “Reset” button, simply power it down, wait a minute or so, then turn it back on.
Fix 6. Reinstall the Drivers
Drivers are the essential software components that allow devices to function, but they can get corrupted or may become outdated over time. Reinstalling the latest keyboard drivers might resolve your connectivity issues.
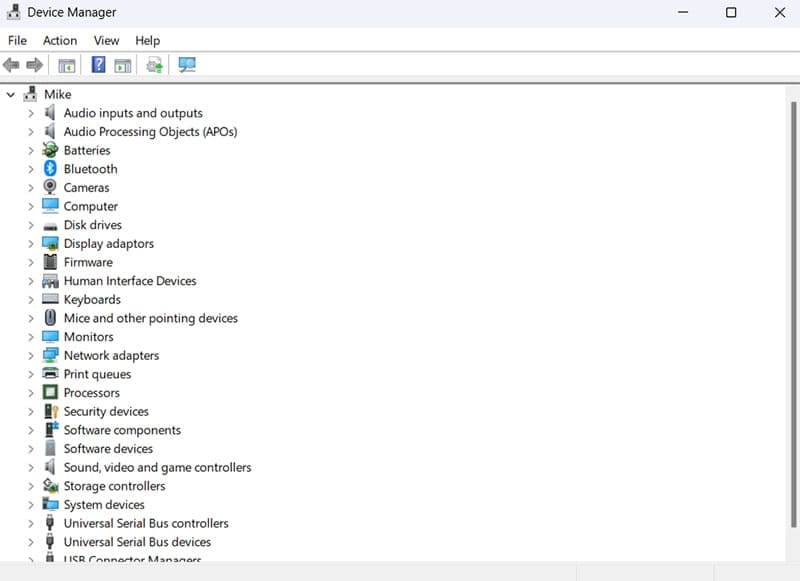
Step 1. Open the Device Manager, which you can find by typing “Device Manager” into the search bar.
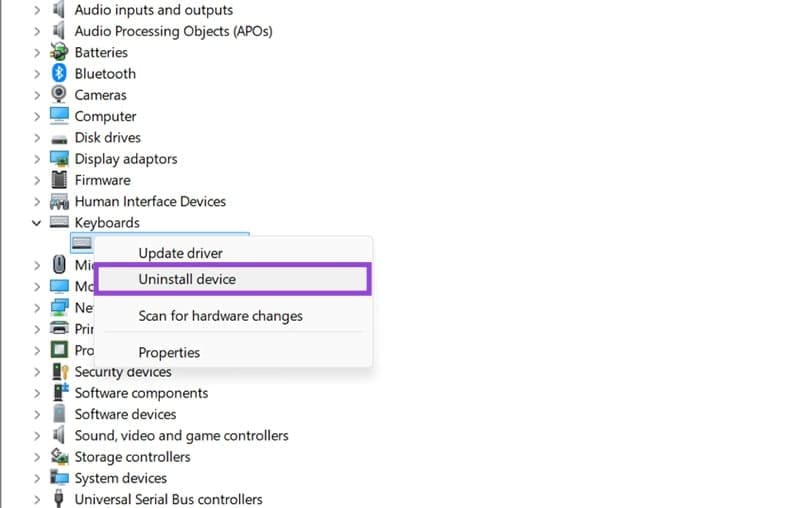
Step 2. Click the arrow next to “Keyboards” to find your wireless keyboard. Right-click it, then select “Uninstall device.”
Step 3. Restart your computer. It should then automatically reinstall the relevant drivers for your keyboard, and you can try reconnecting. If this doesn’t work, you may need to go to the keyboard manufacturer’s website and download the latest drivers, then install them manually.
Was this helpful?
Last updated on 07 February, 2026
Read Next
 4 Best Fixes for Windows 10 Not Detecting HDMI TV/Monitor
You'd find a few video connection ports on a typical Windows computer.
4 Best Fixes for Windows 10 Not Detecting HDMI TV/Monitor
You'd find a few video connection ports on a typical Windows computer.
 Top 4 Ways to Fix Windows 10 Not Detecting PS4 Controller
While Xbox reigns to work as a controller with Windows, there are plenty of PS4 owners who struggle to use their Dual Shock controller with Windows.
Top 4 Ways to Fix Windows 10 Not Detecting PS4 Controller
While Xbox reigns to work as a controller with Windows, there are plenty of PS4 owners who struggle to use their Dual Shock controller with Windows.
 5 Ways to Fix Microsoft Teams Not Detecting Camera on Windows 11
Common Fixes Check the camera hardware: Ensure your camera's view isn't blocked.
5 Ways to Fix Microsoft Teams Not Detecting Camera on Windows 11
Common Fixes Check the camera hardware: Ensure your camera's view isn't blocked.
 6 Best Fixes for Windows 11 Not Detecting HDMI TV/Monitor
An HDMI connection is the preferred versatile choice to stream content from a Windows 11 PC to a TV or monitor.
6 Best Fixes for Windows 11 Not Detecting HDMI TV/Monitor
An HDMI connection is the preferred versatile choice to stream content from a Windows 11 PC to a TV or monitor.
 6 Ways to Fix Windows Not Detecting Microphone in Headset
Basic Fixes Check cable and Bluetooth connection: Check the microphone and its wire for significant damage on either side.
6 Ways to Fix Windows Not Detecting Microphone in Headset
Basic Fixes Check cable and Bluetooth connection: Check the microphone and its wire for significant damage on either side.
 3 Ways to Fix Discord Not Detecting Games on Windows
Try Basic Fixes Restart your game: If it’s just a one-off glitch preventing Discord from detecting your game, restarting it will help.
3 Ways to Fix Discord Not Detecting Games on Windows
Try Basic Fixes Restart your game: If it’s just a one-off glitch preventing Discord from detecting your game, restarting it will help.
 Best 5 Fixes for Windows 11 Not Detecting GPU
Basic Fixes: Update Windows: While this will not work every time, there is a chance that specific components will be outdated and no longer function correctly.
Best 5 Fixes for Windows 11 Not Detecting GPU
Basic Fixes: Update Windows: While this will not work every time, there is a chance that specific components will be outdated and no longer function correctly.
 2 Fixes for iPhone Not Detecting Headphones
Try Basic Fixes Rule out issues with your headphones: Before you troubleshoot your iPhone, it’s a good idea to ensure that your wired or wireless headphones are working properly.
2 Fixes for iPhone Not Detecting Headphones
Try Basic Fixes Rule out issues with your headphones: Before you troubleshoot your iPhone, it’s a good idea to ensure that your wired or wireless headphones are working properly.
The article above may contain affiliate links which help support Guiding Tech. The content remains unbiased and authentic and will never affect our editorial integrity.