VPNs are invaluable these days of internet browsing and privacy concerns. It’s unfortunate, then, when they refuse to work well with other apps, like Outlook. If you find that your VPN won’t let you connect to the internet or disconnects you, then this article is for you. We’ll be looking at why this happens and what you can do to fix Outlook VPN connection problems.
Why Do VPNs Cause Problems With Outlook?
Let’s take a look at some major reasons Outlook may be hampered by a VPN:
- Port Blocking – Perhaps the biggest offender is the blocking of certain ports by the VPN. The IMAP, POP, or SMTP ports can be blocked or rerouted, which in turn breaks the app’s sync.
- DNS Troubles – DNS can also be overridden by a VPN, which can prevent contact with the Microsoft servers for Outlook.
- Outdated VPN – If the VPN isn’t frequently updated, it can clash with newer versions of Outlook, or vice versa.
- Antivirus and Firewall – Your antivirus software may also log VPN addresses as suspicious and block them, thereby cutting off access for Outlook.
Fixing Outlook VPN Connection Problems
Now that you know the whys of Outlook VPN issues, let’s look at some possible solutions to get Outlook working again with your VPN:
Switch Servers
It could be that the server you’ve chosen for your VPN is flagged either by Microsoft or your antivirus software for suspicious activity. To ensure this isn’t the case, you can change servers. Here’s what to do:
Step 1. Open your VPN.
Step 2. Disconnect from the current server.
Step 3. Choose another server from a different region; the closer to home, the better.
Step 4. Restart Outlook and see if this works.
Enable Split Tunneling
Split tunneling is an option VPNs have that allows certain apps and services to connect directly without the VPN, while leaving the service running. Every VPN is different, but you should be able to find this option in the Advanced Settings of your VPN. Enable it and specify Outlook.
Update Everything
Update your VPN, update Outlook, and while you’re at it, update Windows too. To ensure that everything is running at its best, you’ll need to have everything on the same page.
Check Your Ports
To ensure that the ports Outlook is using are correct, you can confirm in its Settings. Here’s how:
Step 1. Click the “File” tab and click “Account Settings.”
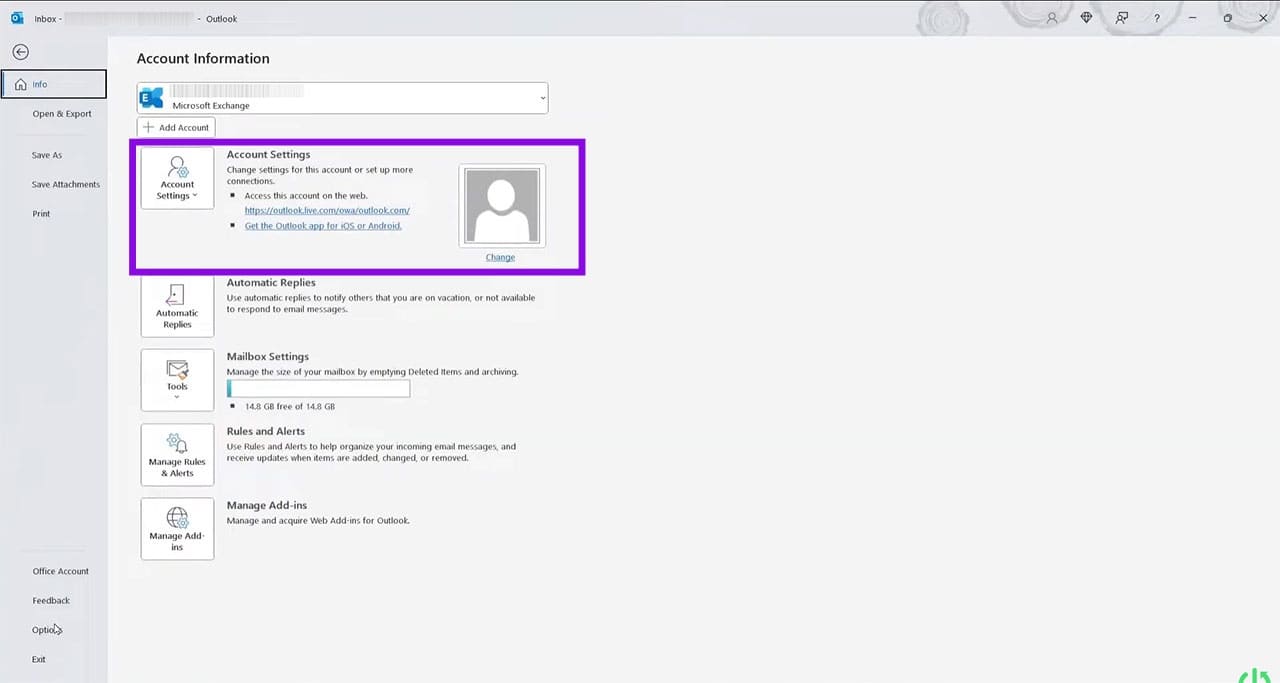
Step 2. Click “Manage Profiles” from the dropdown list.
Step 3. Choose your email from the list provided.
Step 4. Confirm in the POP and IMAP account settings that your SMTP server is correct.

Change the DNS Settings
If you think your VPN may have overridden the DNS settings, you can go and manually change them yourself. Here’s how:
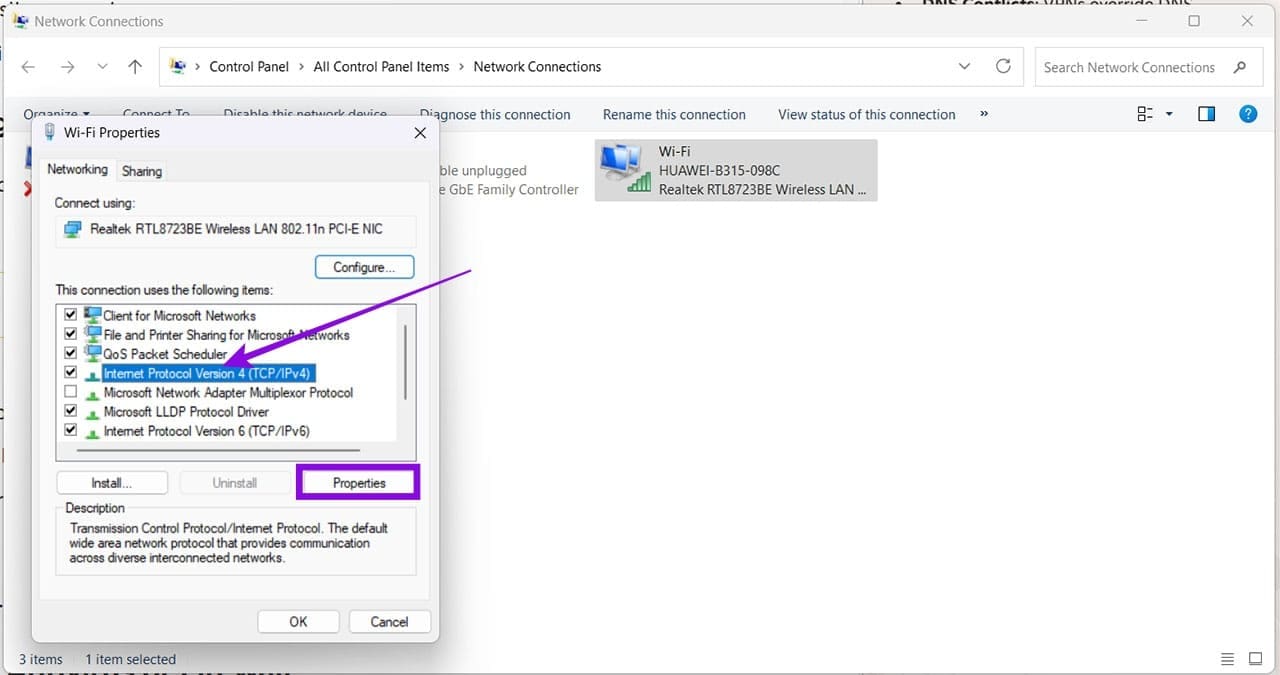
Step 1. Open the “Run Dialogue” (Win + R) and type “ncpa.cpl” and click “Enter.”
Step 2. Right-click the network you’re using and select “Properties” from the context menu. You must have Admin privileges.

Step 3. Select “Internet Protocol Version 4 (TCP/Pv4)” and click “Properties.”
Step 4. Select “Use the following DNS server addresses” and input “8.8.8.8” and “8.8.4.4” respectively.
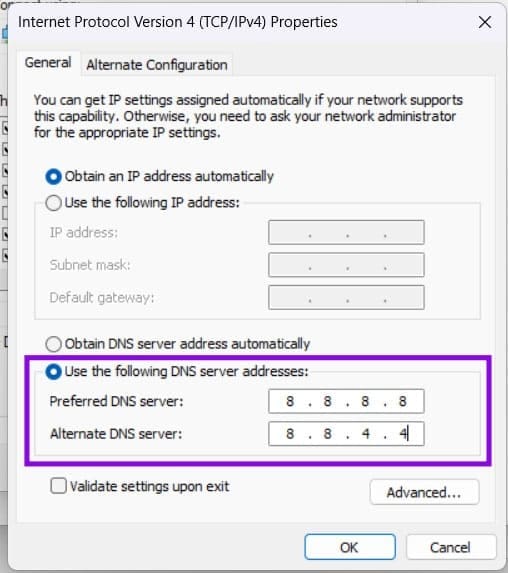
Step 5. Click “OK” to finalize and try Outlook again.
Was this helpful?
Last updated on 28 June, 2026
Read Next
 6 Best Browsers With Built-in VPN for Android
Why Should You Need a Browser With VPN VPN (Virtual Private Network) serves multiple purposes apart from the fact that it unlocks content locked away in your geolocation.
6 Best Browsers With Built-in VPN for Android
Why Should You Need a Browser With VPN VPN (Virtual Private Network) serves multiple purposes apart from the fact that it unlocks content locked away in your geolocation.
 3 Ways to Fix Google Chrome Not Working With VPN
Basic Fixes Use another VPN server: Most VPN apps have hundreds of servers.
3 Ways to Fix Google Chrome Not Working With VPN
Basic Fixes Use another VPN server: Most VPN apps have hundreds of servers.
 Five VPN Android Apps to Bypass Country Restrictions
While few VPNs offer free service, they are not safe, and it is best to use a service with free or completely paid plans.
Five VPN Android Apps to Bypass Country Restrictions
While few VPNs offer free service, they are not safe, and it is best to use a service with free or completely paid plans.
 4 Fixes for No Internet Connection After Connecting to VPN
Fix 1: Change Routing Settings The routing settings are set to use the default gateway as it is.
4 Fixes for No Internet Connection After Connecting to VPN
Fix 1: Change Routing Settings The routing settings are set to use the default gateway as it is.
 Top 8 Ways to Fix VPN Not Working in Windows 11
You can hide your location (IP address) and browsing history from an ISP (Internet Service Provider) and local government using a VPN.
Top 8 Ways to Fix VPN Not Working in Windows 11
You can hide your location (IP address) and browsing history from an ISP (Internet Service Provider) and local government using a VPN.
 4 Ways to Fix VPN Not Working on iPhone or iPad
Basic Fixes: Check app server status: When your preferred VPN provider faces an outage, you may face issues when using their services.
4 Ways to Fix VPN Not Working on iPhone or iPad
Basic Fixes: Check app server status: When your preferred VPN provider faces an outage, you may face issues when using their services.
 Top 4 Ways to Change New Outlook Back to Old (Classic View) Outlook on Windows and Mac
The new Outlook app for desktop boasts a modern and simplified design, aligning it more closely with the web version of Microsoft Outlook.
Top 4 Ways to Change New Outlook Back to Old (Classic View) Outlook on Windows and Mac
The new Outlook app for desktop boasts a modern and simplified design, aligning it more closely with the web version of Microsoft Outlook.
 Why Does Spotify Take Up So Much Storage – 3 Methods to Fix It
Why Does Spotify Use So Much Storage Ever wondered how Spotify enables you to listen to music offline?
Why Does Spotify Take Up So Much Storage – 3 Methods to Fix It
Why Does Spotify Use So Much Storage Ever wondered how Spotify enables you to listen to music offline?
The article above may contain affiliate links which help support Guiding Tech. The content remains unbiased and authentic and will never affect our editorial integrity.

