Some days it seems that Windows Updates can cause more problems than they fix. You might find your third-party tools and drivers are misbehaving after that update restart, including your graphics drivers. In this article, we’ll be looking at what to do with an AMD GPU driver disabled.
A Driver Failure
When your graphics driver is disabled after an update, nine times out of 10, the issue lies with the driver. It may be installed, sure, but Windows might do the installing of the driver automatically and saddle you with one that doesn’t cooperate with your current AMD card.
Drivers and your current version of Windows can also clash after an update. With these in mind, it’s time to look at troubleshooters.
Fixing an AMD GPU Driver Disabled
Uninstalling your AMD GPU driver might seem like the right move, but often just leads to the new installation being disabled by Windows too. Let’s look at how to take control of the process:
Enable the Card
It’s not a permanent fix, but enabling your card manually is essential for other troubleshooting. Here’s what to do:
Step 1. Open the Run dialog (Win + R) and type “devmgmt.msc” before hitting “Enter.”
Step 2. In Device Manager, search for your AMD graphics card under “Display adapters.”

Step 3. Right-click your card and choose “Enable” from the context menu.
Disable HAGS
Hardware-accelerated GPU scheduling can sometimes contribute to graphics issues. Try disabling it to see if it resolves the problem. Here’s how:
Step 1. Open “Settings” (Win + I) and choose “System” from the sidebar.
Step 2. Click “Display.”

Step 3. Scroll down to “Graphics” and click it.

Step 4. Click “Change default graphics settings.”
Step 5. Toggle “Hardware-accelerated GPU scheduling” to “Off.”
Step 6. Restart your machine and see if this resolves the issue.
Uninstall the Driver Manually
If the new update has installed a version of the graphics driver that doesn’t work, or the old driver has been corrupted by the update, then you’ll need to uninstall it manually. Here’s how:
Step 1. Download the Display Driver Uninstaller. It’s free.
Step 2. Restart your PC in “Safe Mode.” Open the Run dialog and type “msconfig.” Under the “Boot” tab, select “Safe boot” and restart.

Step 3. Once rebooted, launch DDU and choose “GPU” from the dropdown.
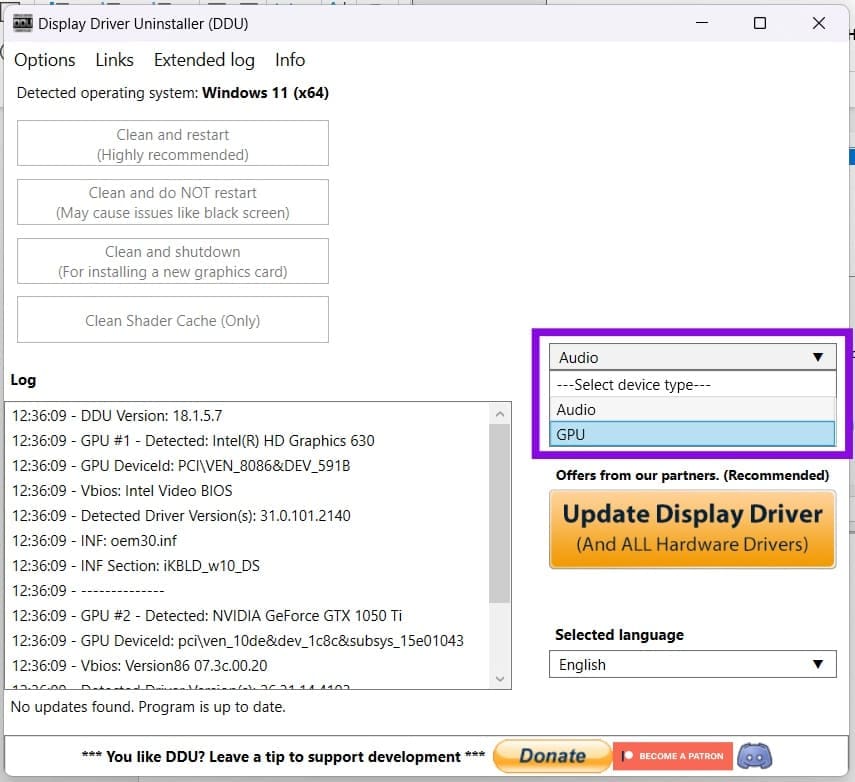
Step 4. Choose “Clean and restart.”
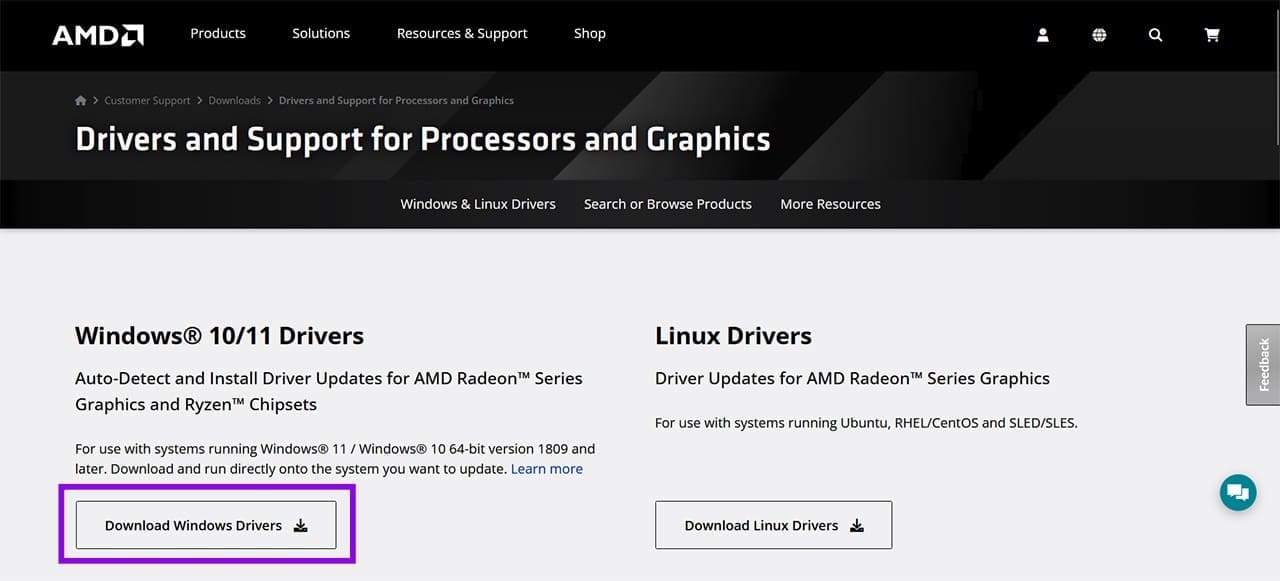
Step 5. Once you’ve restarted, head to AMD and manually download the latest driver, or the last stable one that worked for your machine. Install it.
Prevent Automatic Driver Replacement
If you find that Windows keeps changing your graphics drivers with this or every update, then you can stop it by doing the following:
Step 1. Open the Run dialog (Win + R) and type “gpedit.msc” before hitting (Ctrl + Shift + Enter) to run as Admin.
Step 2. In the Group Policy Editor, navigate to “Computer Configuration” and “Administrative Templates.”
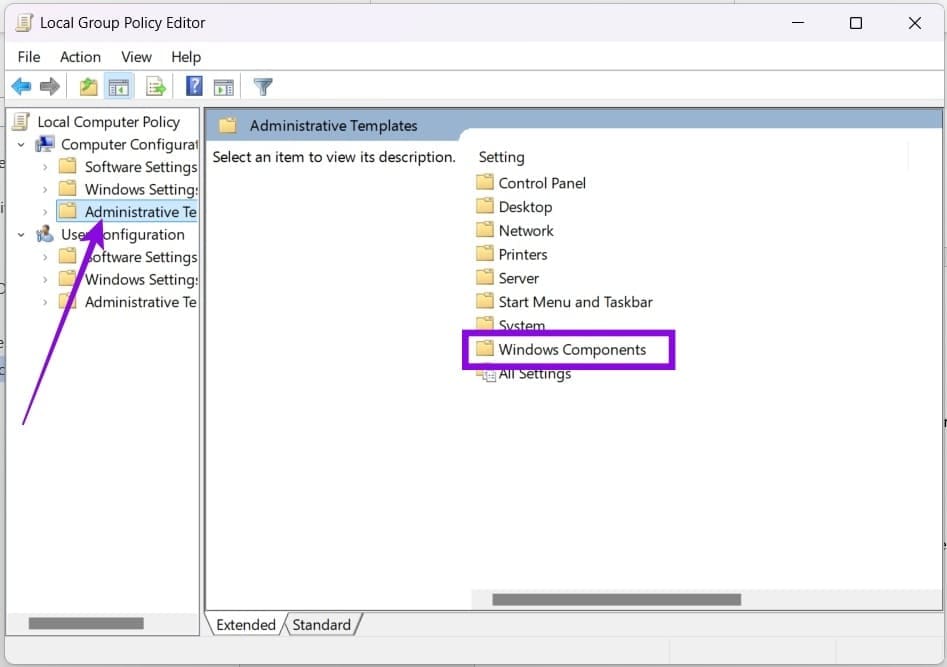
Step 3. Then choose “Windows Components” and “Windows Update.”

Step 4. Click “Manage updates offered from Windows Update.”
Step 5. Check “Enabled” and click “OK” to finalize.

Was this helpful?
Last updated on 30 August, 2026
Read Next
 How to Fix Windows Update Replaced Your AMD Graphics Driver
If you have an AMD graphics card installed in your PC, then you may have run into an error where Windows informs you that it has replaced your graphics driver,
How to Fix Windows Update Replaced Your AMD Graphics Driver
If you have an AMD graphics card installed in your PC, then you may have run into an error where Windows informs you that it has replaced your graphics driver,
 Installing AMD Graphics Driver From Scratch Step by Step
If you’re having issues with a flickering screen, or if a new update of Windows has your system doing strange things, you’re probably looking for an answer.
Installing AMD Graphics Driver From Scratch Step by Step
If you’re having issues with a flickering screen, or if a new update of Windows has your system doing strange things, you’re probably looking for an answer.
 How to Overclock a Monitor: NVIDIA, AMD, and Intel GPUs
When gaming, having a high-performance monitor can make a significant difference in your overall experience.
How to Overclock a Monitor: NVIDIA, AMD, and Intel GPUs
When gaming, having a high-performance monitor can make a significant difference in your overall experience.
 7 Fixes for AMD Adrenalin Software Not Working or Opening
Fix 1: Run AMD Radeon Software With Admin Privileges If your AMD Adrenalin software is not working or opening, one of the initial fixes to perform is to run it
7 Fixes for AMD Adrenalin Software Not Working or Opening
Fix 1: Run AMD Radeon Software With Admin Privileges If your AMD Adrenalin software is not working or opening, one of the initial fixes to perform is to run it
 How to Use AMD FSR3 on NVIDIA RTX GPUs
If you already own an NVIDIA GPU, one of the best features available is DLSS technology.
How to Use AMD FSR3 on NVIDIA RTX GPUs
If you already own an NVIDIA GPU, one of the best features available is DLSS technology.
 AMD Folder Getting Increasingly Large – What to Do
Over time, you might notice that your C drive is starting to run out of space, which can force you to stop updating apps or even Windows entirely.
AMD Folder Getting Increasingly Large – What to Do
Over time, you might notice that your C drive is starting to run out of space, which can force you to stop updating apps or even Windows entirely.
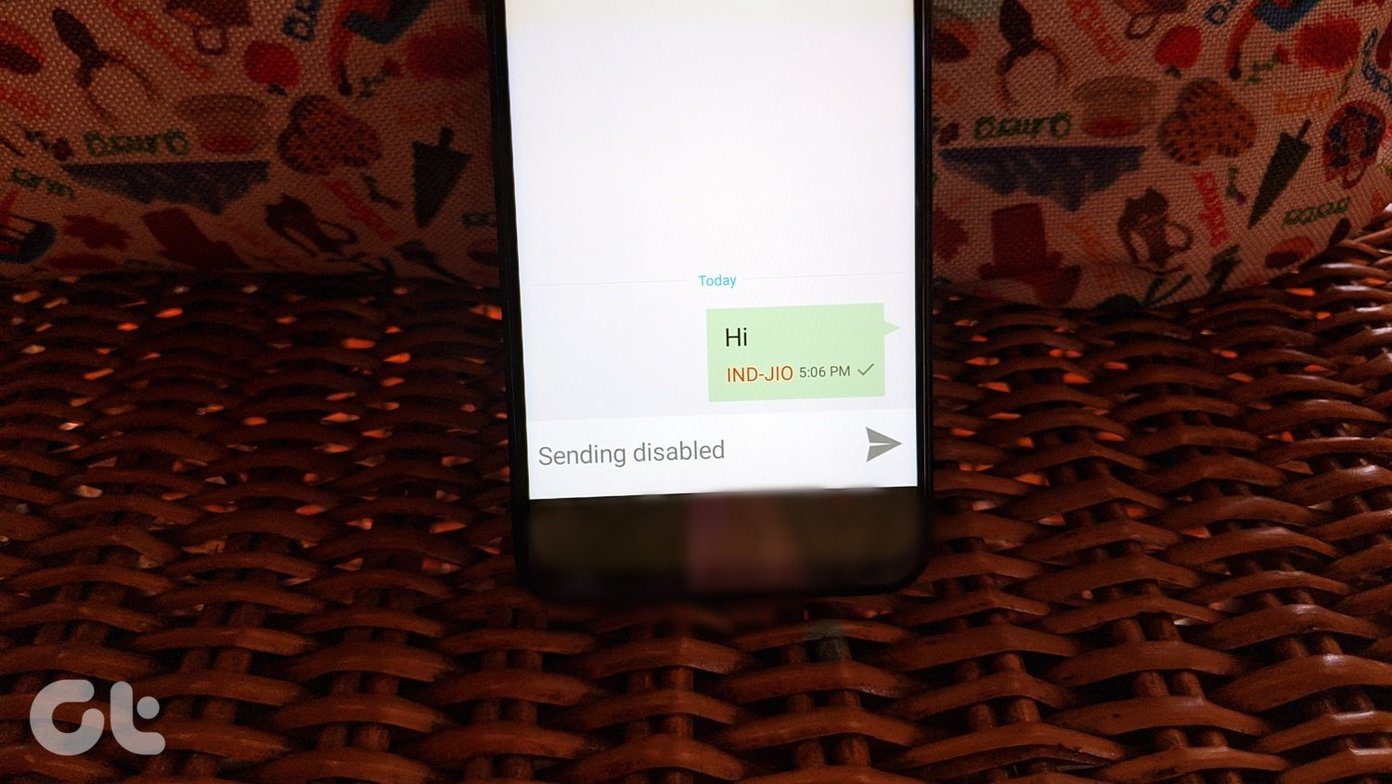 5 Fixes for Message Sending Disabled in Android
Basic Fixes Restart your phone: You should restart your Android phone.
5 Fixes for Message Sending Disabled in Android
Basic Fixes Restart your phone: You should restart your Android phone.
 7 Fixes for “Disabled Accounts Can’t Be Contacted” on Instagram
Instagram is a vibrant platform where connections are forged, creativity flourishes, and stories unfold.
7 Fixes for “Disabled Accounts Can’t Be Contacted” on Instagram
Instagram is a vibrant platform where connections are forged, creativity flourishes, and stories unfold.
The article above may contain affiliate links which help support Guiding Tech. The content remains unbiased and authentic and will never affect our editorial integrity.