While Google Docs manages to win hearts with its simplistic design and an easy-to-use interface, it also misses out on some key features here and there. One such vital yet missing feature is the ability to caption images.

While there’s no direct way, you can still caption images in Google Docs with a few workarounds. In this article, we’ll go through some of those methods. So, without further ado, let’s get right into it.
1. Use the Drawing Panel
Using the Drawing panel is probably the most effective way of captioning images in Google Docs. Here’s how to use it.
Step 1: Open your Google Docs document and use the Insert menu at the top to navigate to Drawing > + New.

Step 2: In the Drawing panel that appears, use the Image option from the toolbar to add the image of your choice.

Step 3: Once added, click on the Text box option and draw the box below the image. In the text box, write your caption and format it as you see fit. Additionally, you can also resize the text box and change its position.

Step 4: Lastly, click on Save and close button, and the image will be added to Google Docs with a caption.
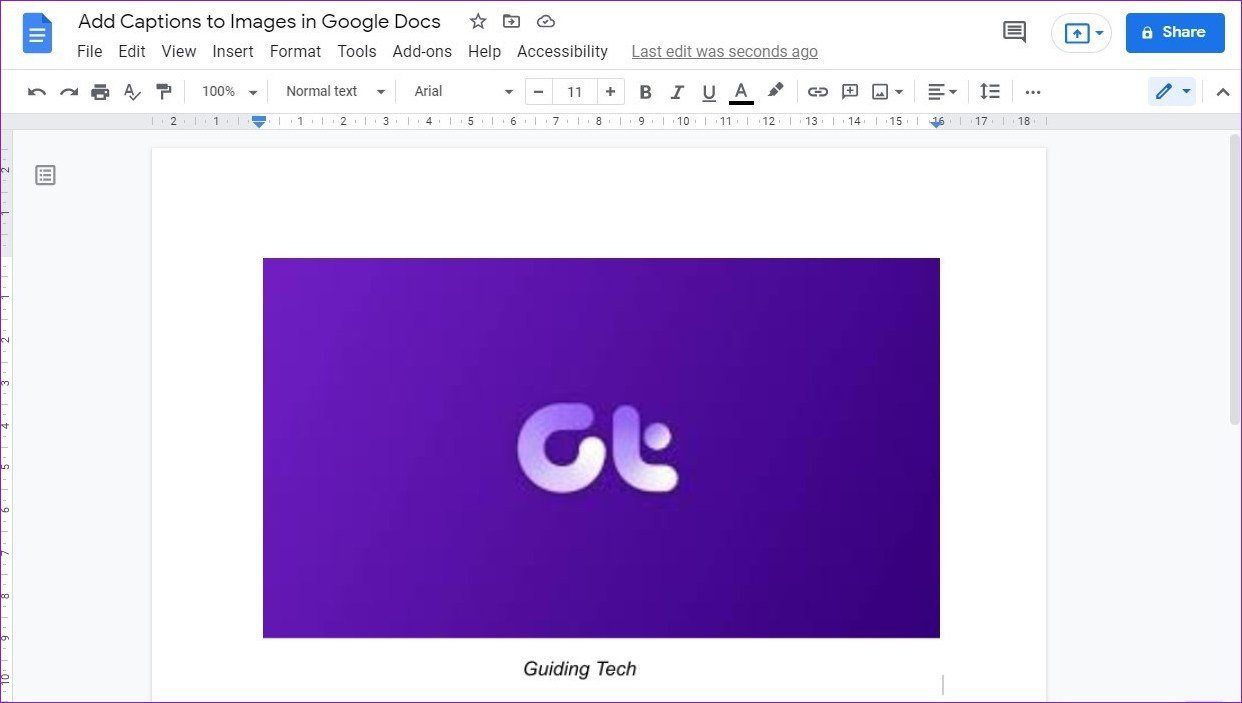
Once added, you can easily change the caption anytime by selecting the image and choosing the Edit option.
2. In-Line Text Tool
If you’re looking for a much faster way to caption images. Then you can take advantage of the In-line text tool in Google Docs. Here’s how.
Step 1: Open your Google Docs document and insert the image you want to caption.
Step 2: Select the image and choose the In-line text option from the toolbar that appears.
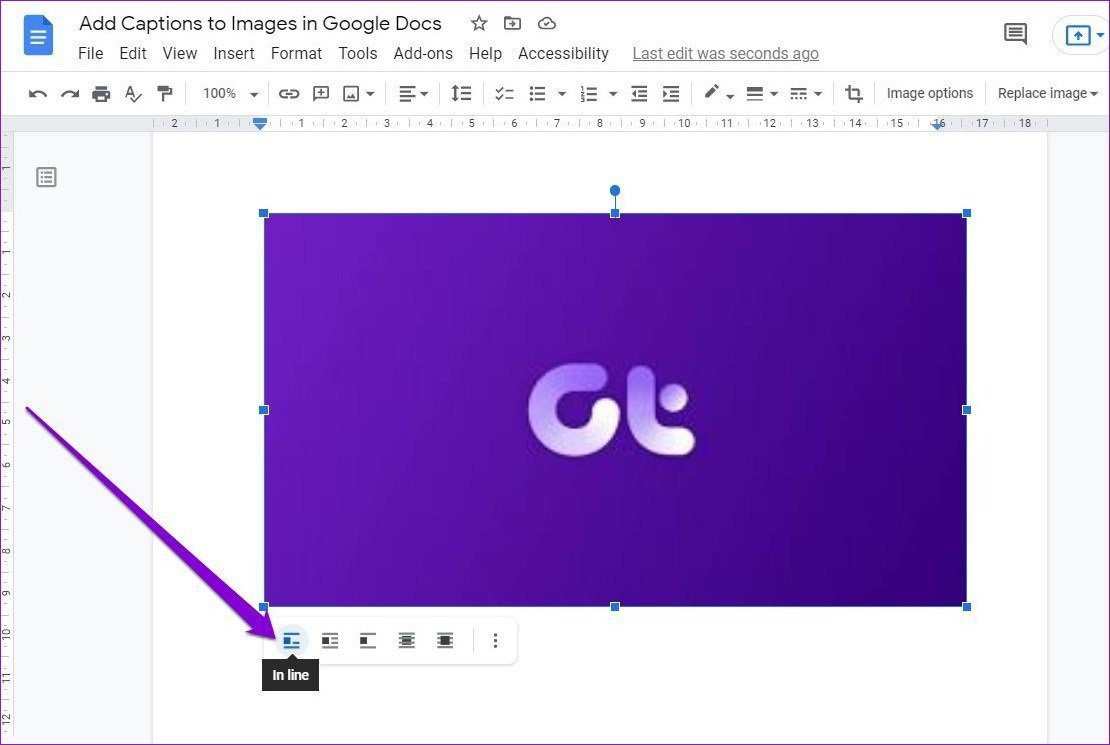
Step 3: Place your cursor right below the image and write a caption for it.

That’s it. The caption has been added to the image. Of course, you can edit and format the text just like any other text in Google Docs.
3. Insert Table
Another neat way to caption images in Google Docs is by inserting a table in Google Docs. It’s a pretty straightforward method that gives you more options than the methods above. Here’s how to do it.
Step 1: Launch your Google Docs document and insert the image that you want to caption.
Step 2: Now, open the Insert menu and go to Table. Here, select 1 x 2 as the Grid size.
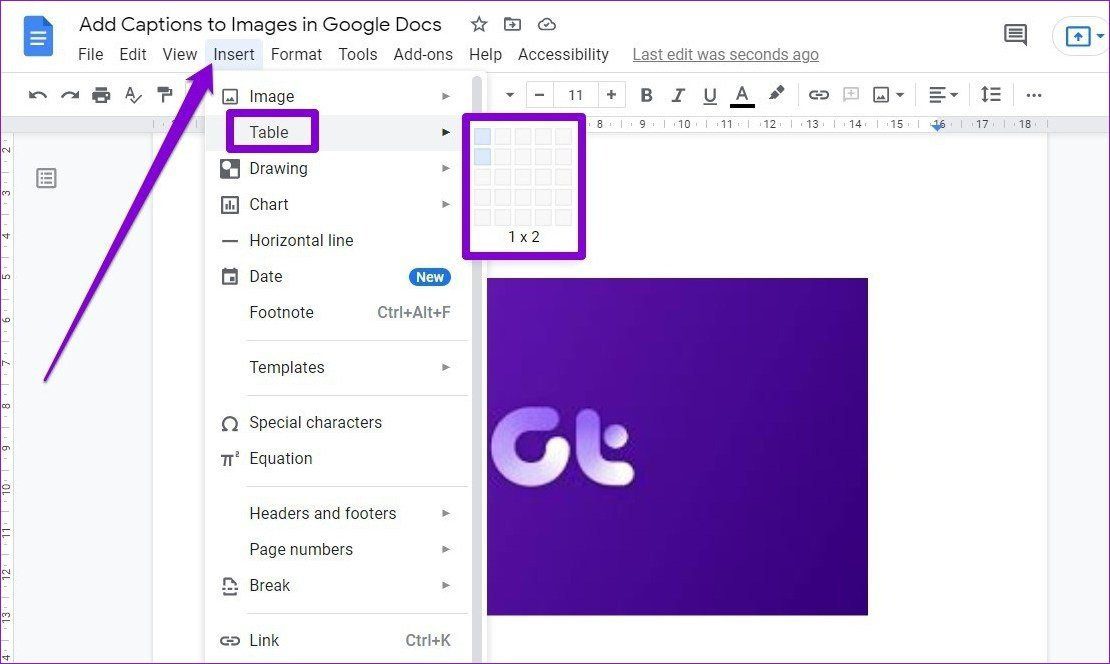
Step 3: Drag and drop the image in the first cell of the table and enter the caption in the second row.
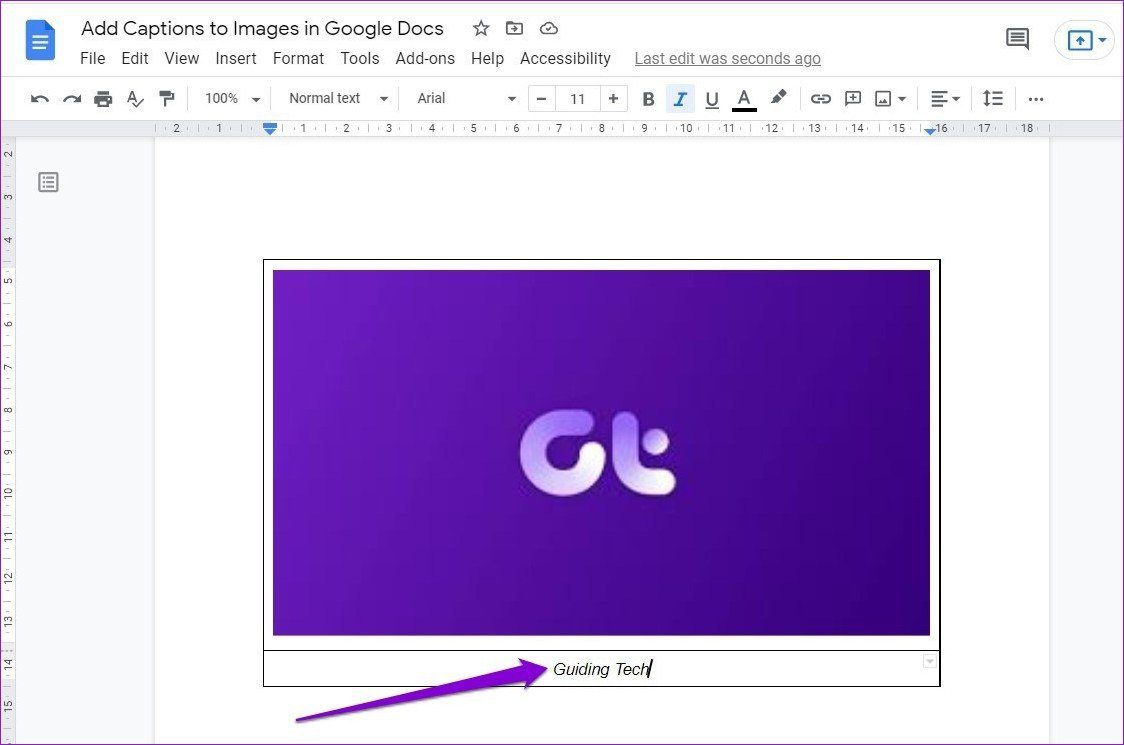
That’s it. The image has been added with a caption in Google Docs.
If you prefer, you can also make changes to the Table by right-clicking anywhere on the table and selecting Table Properties.
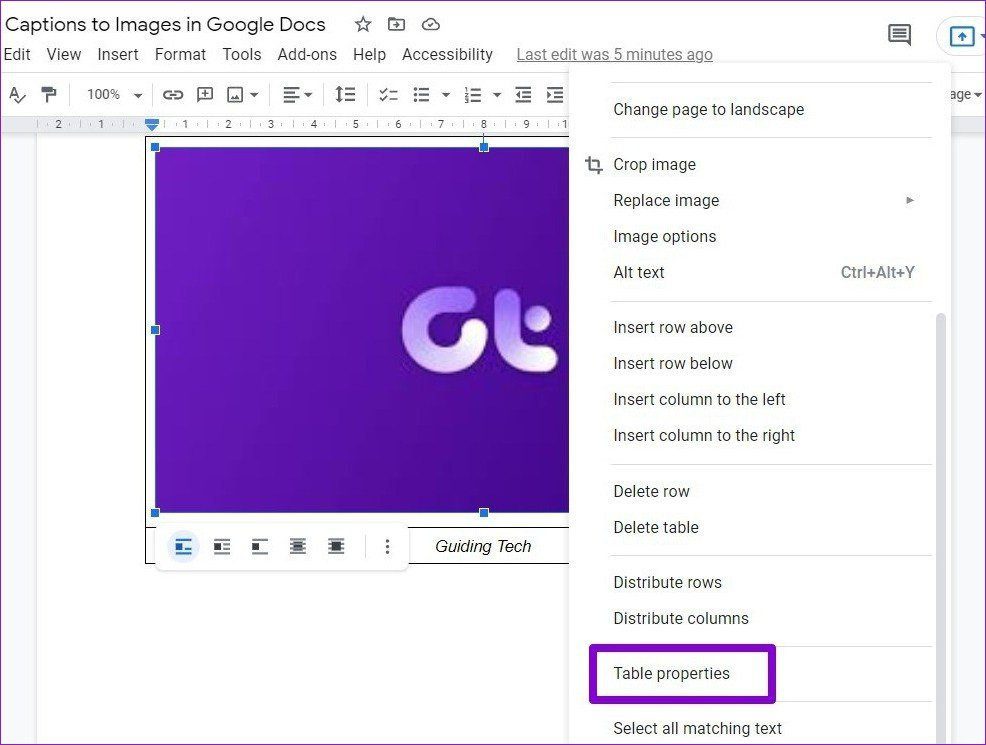
For instance, you can remove the borders by setting the Table border width to 0pt.
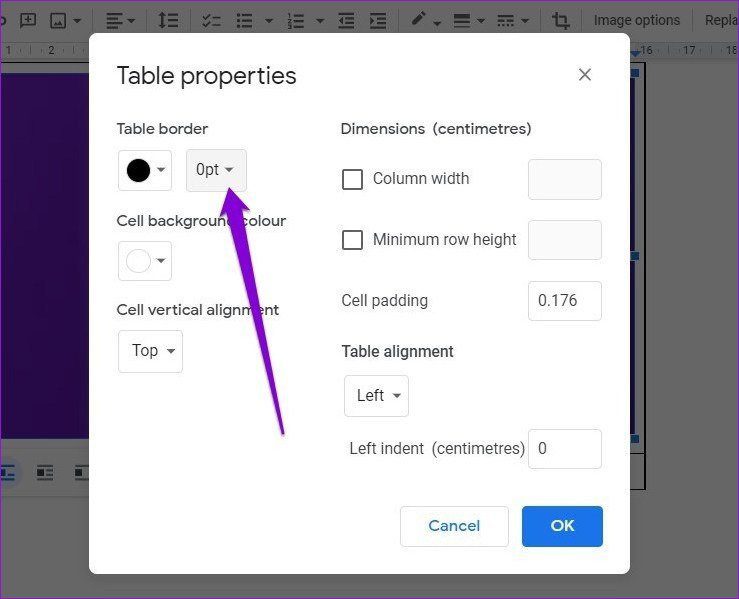
Apart from that, you can also tweak the cell’s background color, alignment, and more from the Table properties window.
4. Use an Add-on
If your work requires you to caption images often, then using a dedicated add-on might be a good idea after all. Unfortunately, there’re only a handful number of add-ons available for captioning photos on Google Docs. Out of those, Caption Maker is a popular choice. Here’s how to use it to caption images in Google Docs.
Step 1: Open up your Google Docs document and install the Caption Maker add-on.
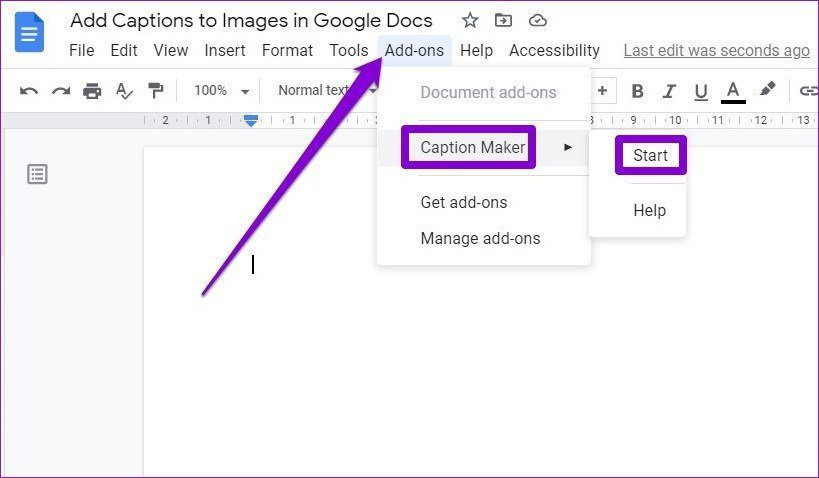
Step 2: Now insert the image in your Google Docs document. Then use the Add-ons menu at the top to go to Caption Maker > Start.
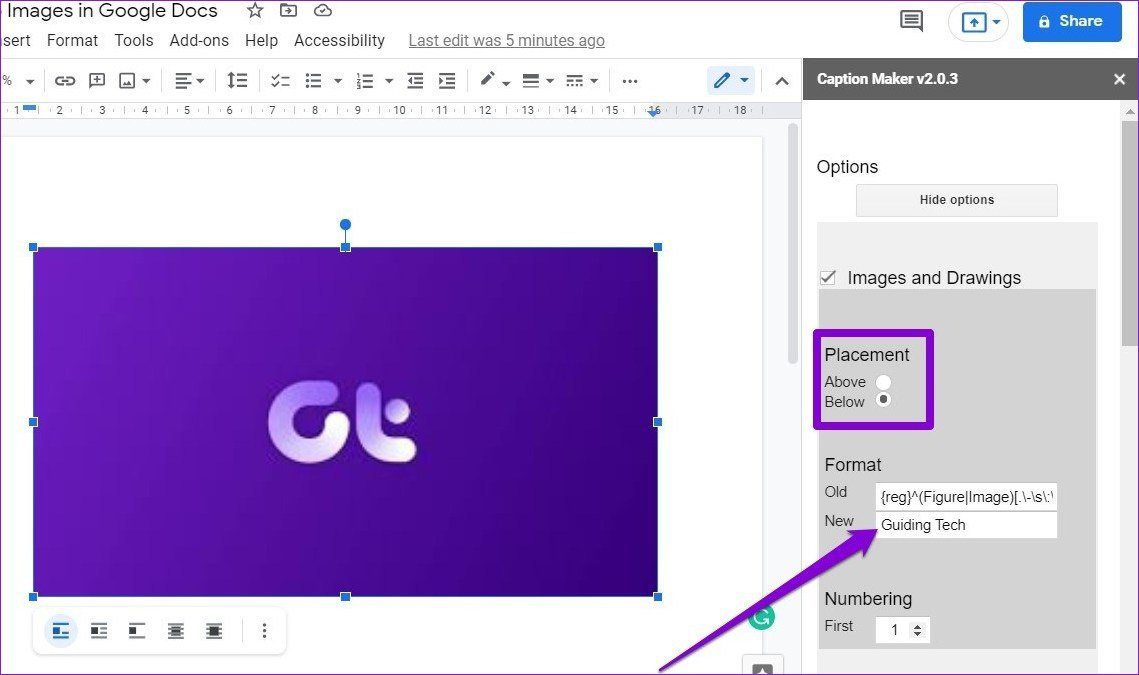
Step 3: In the Caption Maker panel, click on the Show options button. Under Format, enter the caption text in the New field.
Next, you can choose caption placements, format, and numbering.
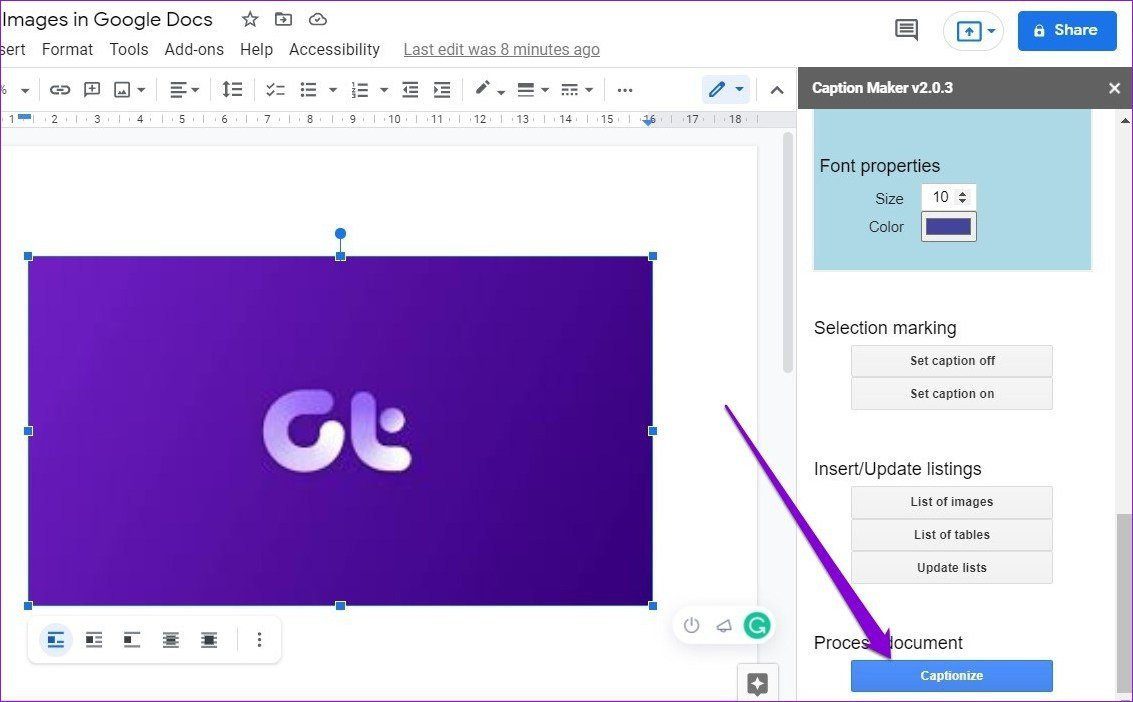
Additionally, there’re also some visual settings that you can tweak to change text’s font, size, and color.
Step 4: Lastly, click on the Captionize button at the bottom.
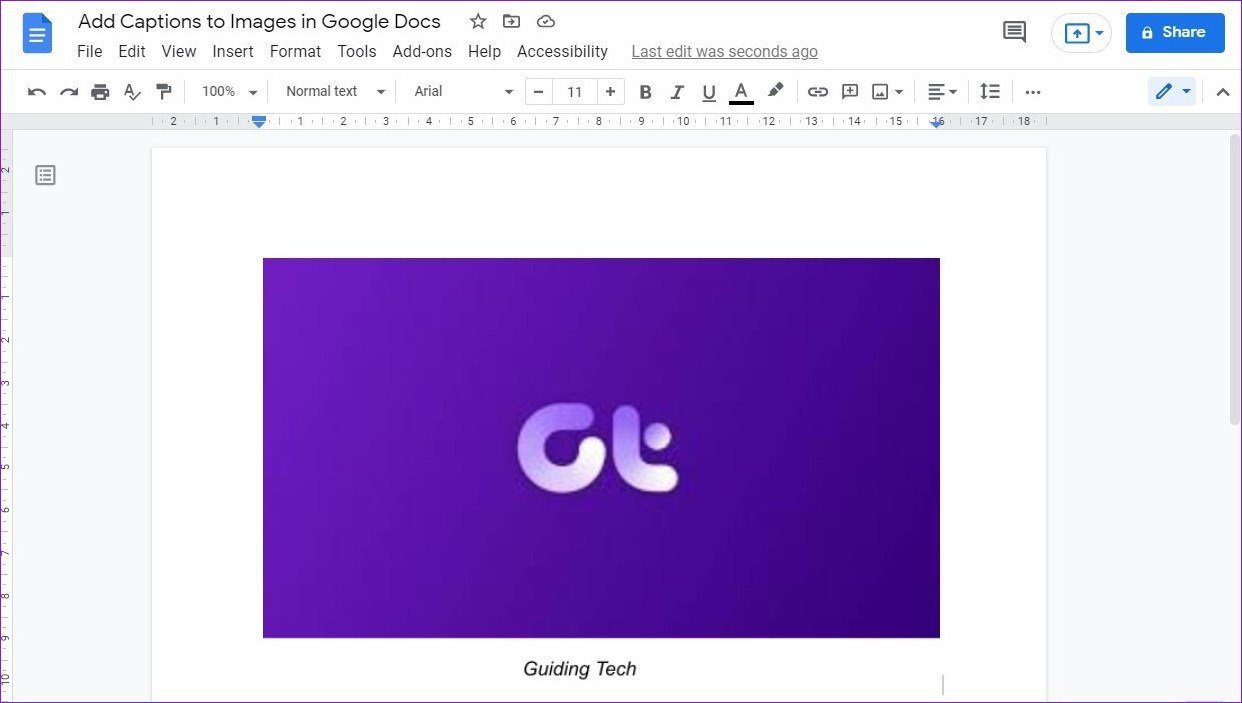
This is how the captioned image will look like.
Add-ons like Caption Maker can come in handy when you’ve too many images and tables in a document, and you want to caption them all at once.
Caption It Right
So these were some of the methods you can use to add captions to your images quickly. Depending on how frequently you caption images, you can pick any of the methods and get started.
Want to download a picture from your Google Docs document? Learn how to save pictures from a document on both mobile and PC.
Was this helpful?
Last updated on 07 February, 2022
The article above may contain affiliate links which help support Guiding Tech. The content remains unbiased and authentic and will never affect our editorial integrity.


