Try Basic Fixes
- Close unwanted apps and programs: Start by closing any unwanted apps and programs on your computer, especially the ones consuming a major chunk of your PC’s memory. You can use the Task Manager on Windows to identify such apps and programs.
- Check for malware: Malware or viruses can also trigger such low-memory errors on your PC. You can run a system scan with the Windows Security app or a third-party antivirus program to check for this possibility.
Fix 1: Run System Maintenance Troubleshooter
Running the System Maintenance troubleshooter allows Windows to clean up unused files, shortcuts and perform various maintenance tasks. You can also use this tool to fix abnormal memory usage on your PC. Here’s how.
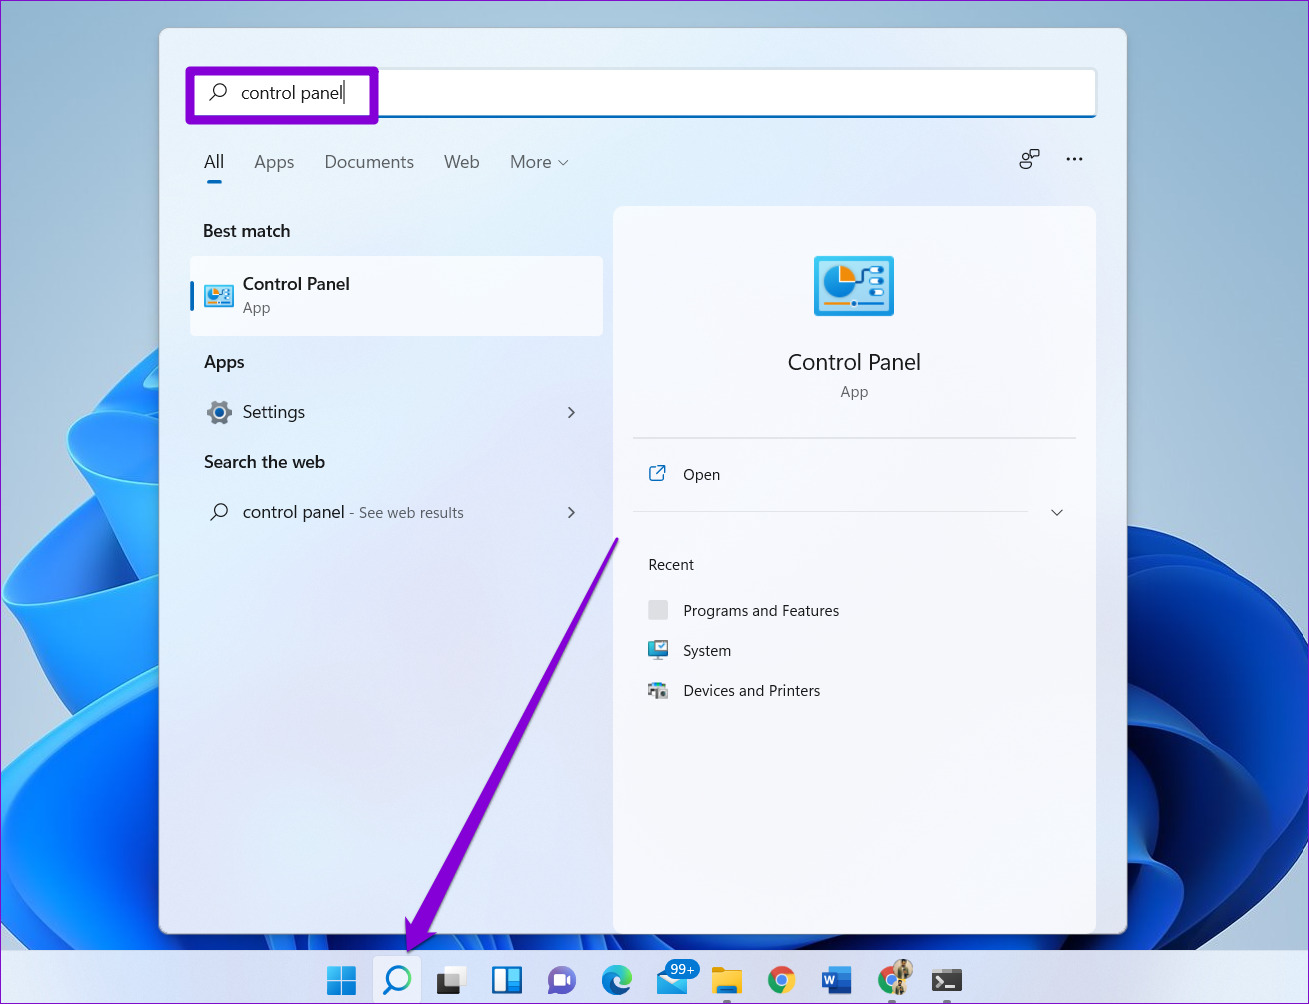
Step 1: Click the search icon on the taskbar, type in control panel, and press Enter.
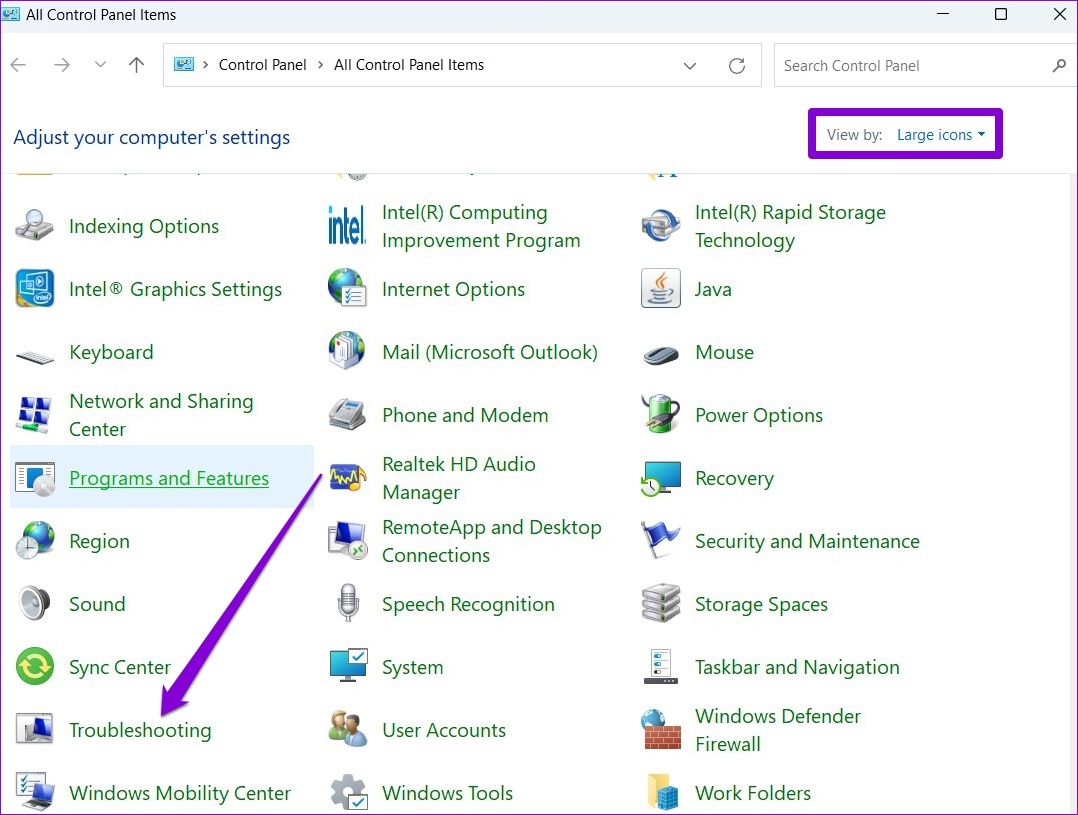
Step 2: In the Control Panel window, change the view type to Large icons and go to Troubleshooting.
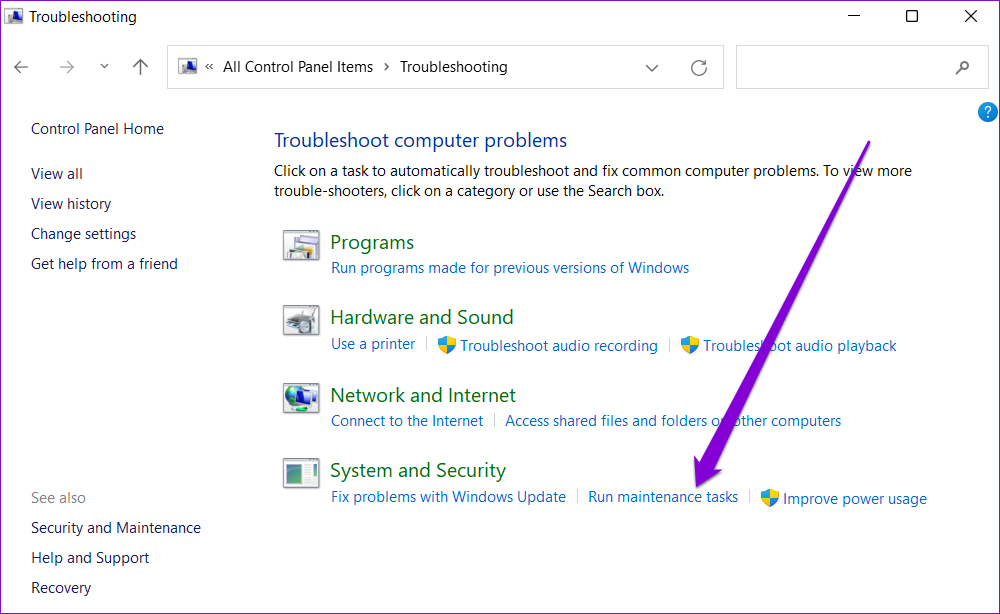
Step 3: Under System and Security, click the Run maintenance tasks option.
Follow the on-screen instructions to run the troubleshooter and restart your PC. After that, the error should no longer appear.
Fix 2: Increase Virtual Memory
Virtual memory is a nifty feature that allows Windows to temporarily store information on your hard drive that it normally stores in RAM. You can increase the virtual memory size to compensate for the physical memory shortage.
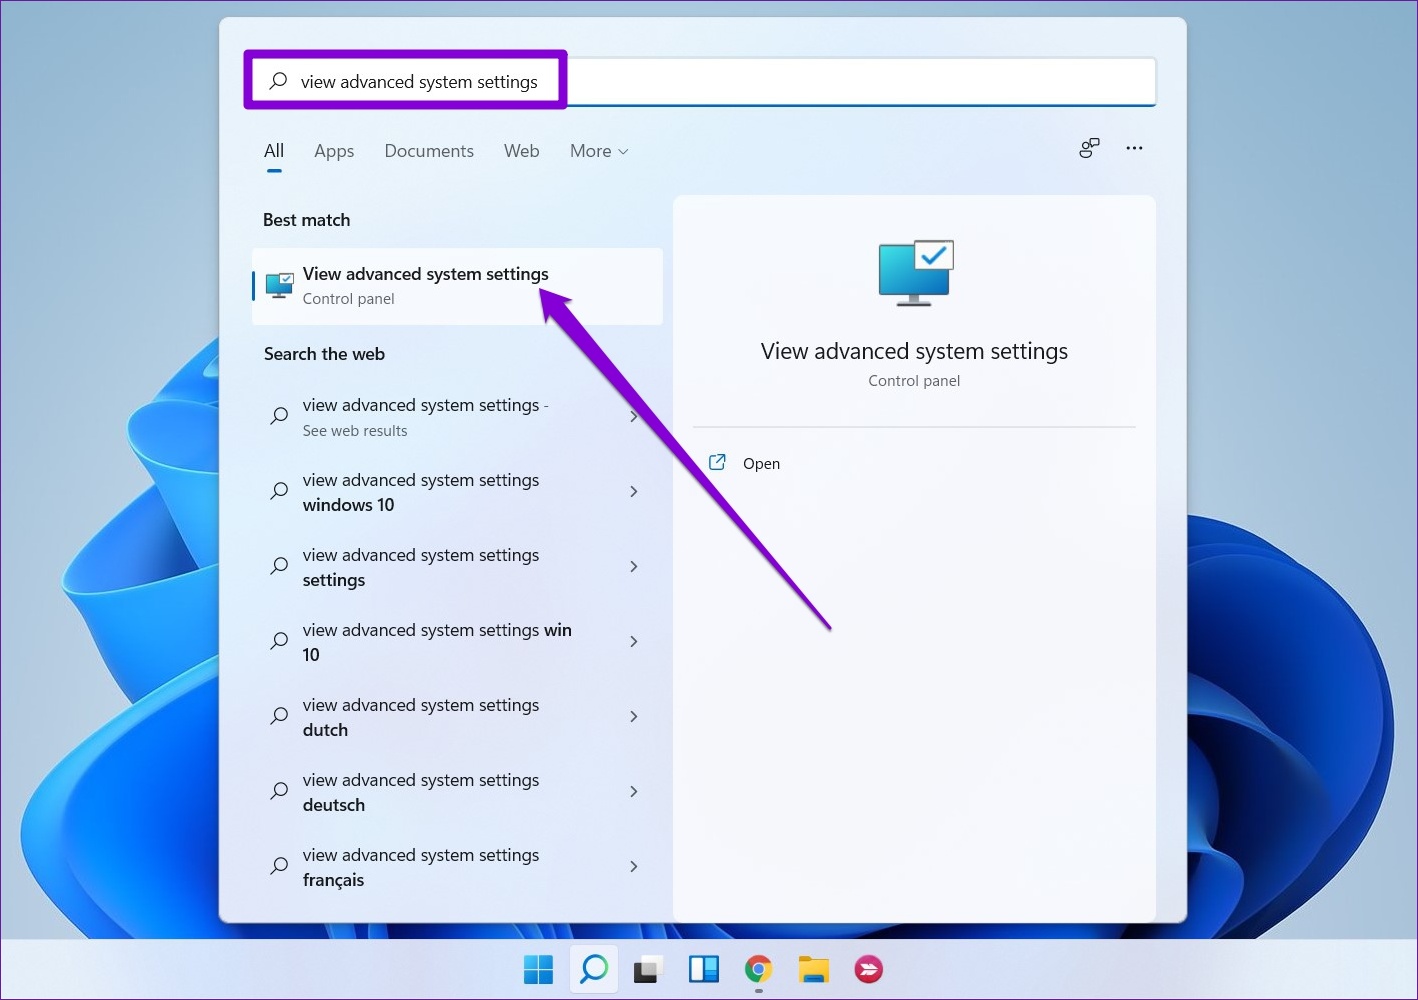
Step 1: Press the Windows key + S to open the search menu, type in view advanced system settings and press Enter.
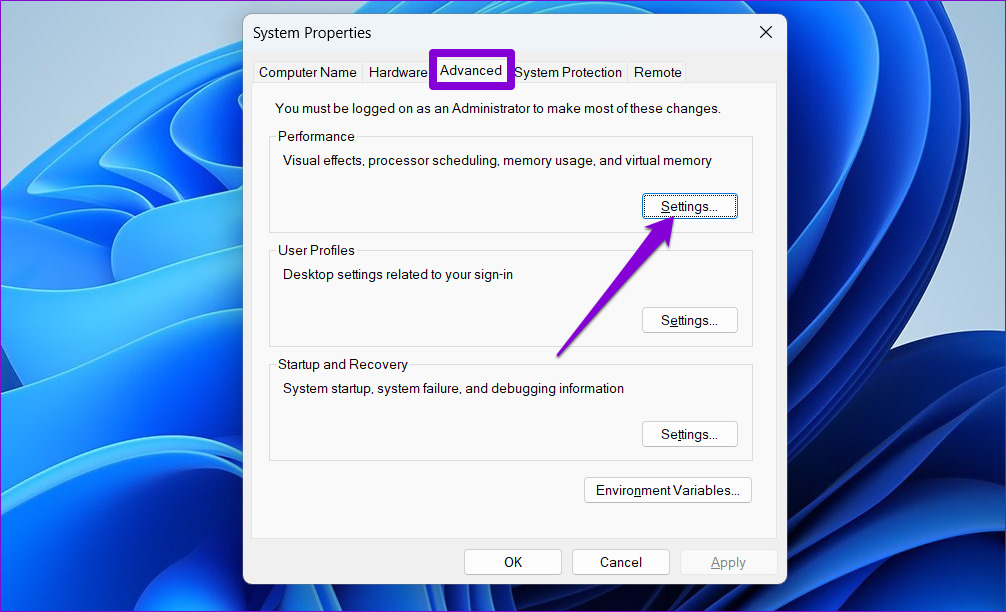
Step 2: Under the Advanced tab, click the Settings button under Performance.
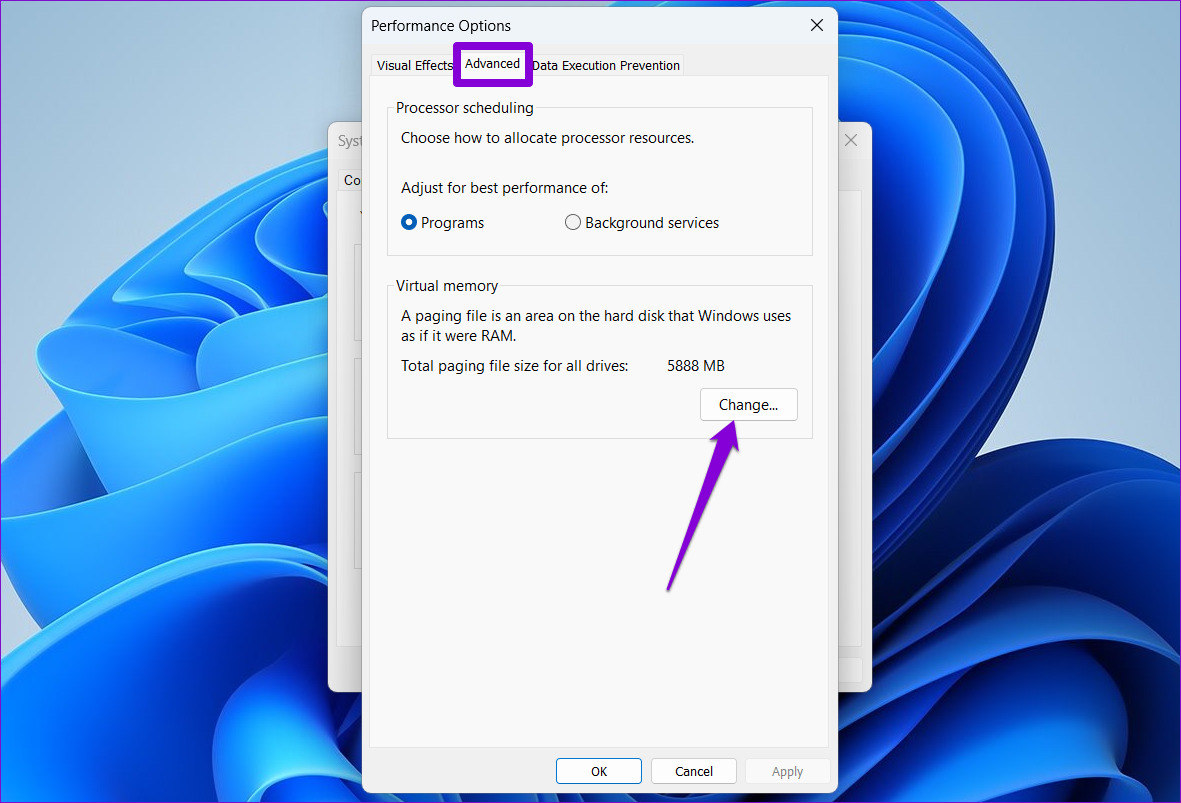
Step 3: In the Performance Options window, switch to the Advanced tab and click the Change button.
Step 4: Uncheck the Automatically manage paging files size for all drives option.
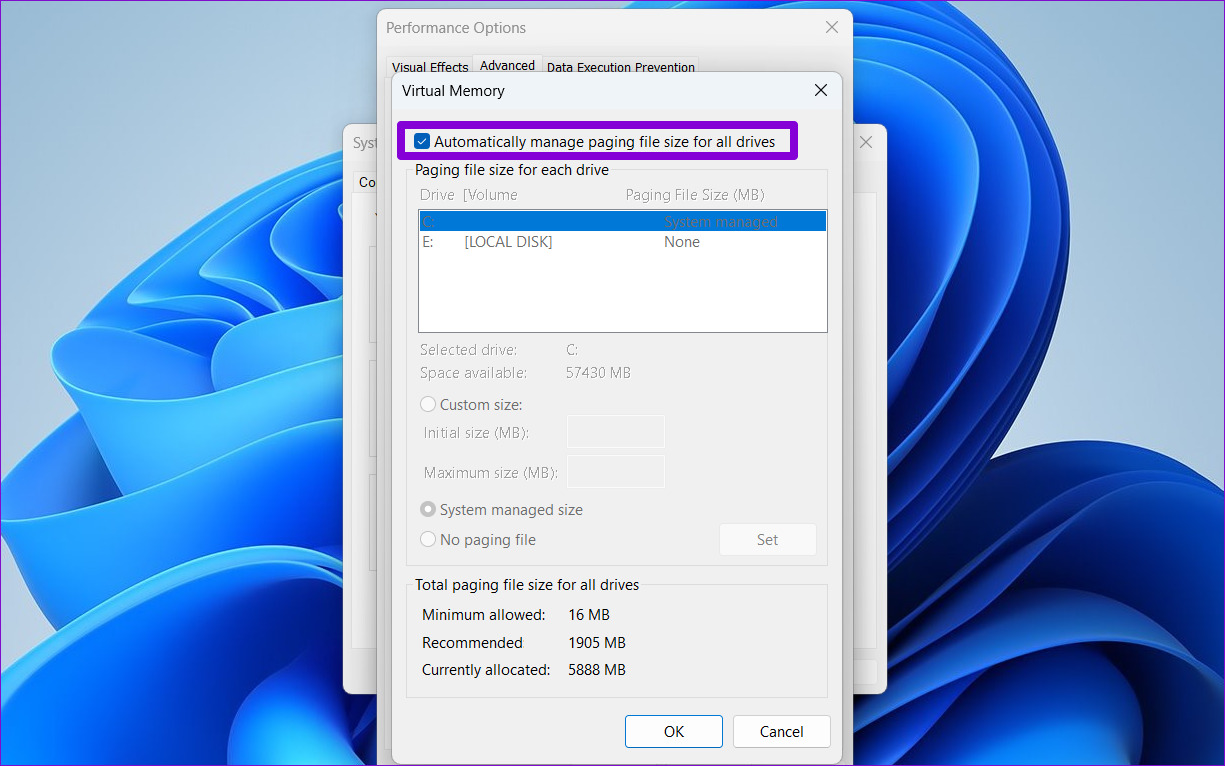
Step 5: Select Custom size and enter the initial and maximum size for the paging file in MB. The initial size should be 1.5 times the size of your RAM, and the maximum size can be up to 3 times the size of your RAM. So, if your PC has 4GB of RAM (1GB = 1024MB), the initial size should be 6,144MB, and the maximum size allowed is 12,288MB.
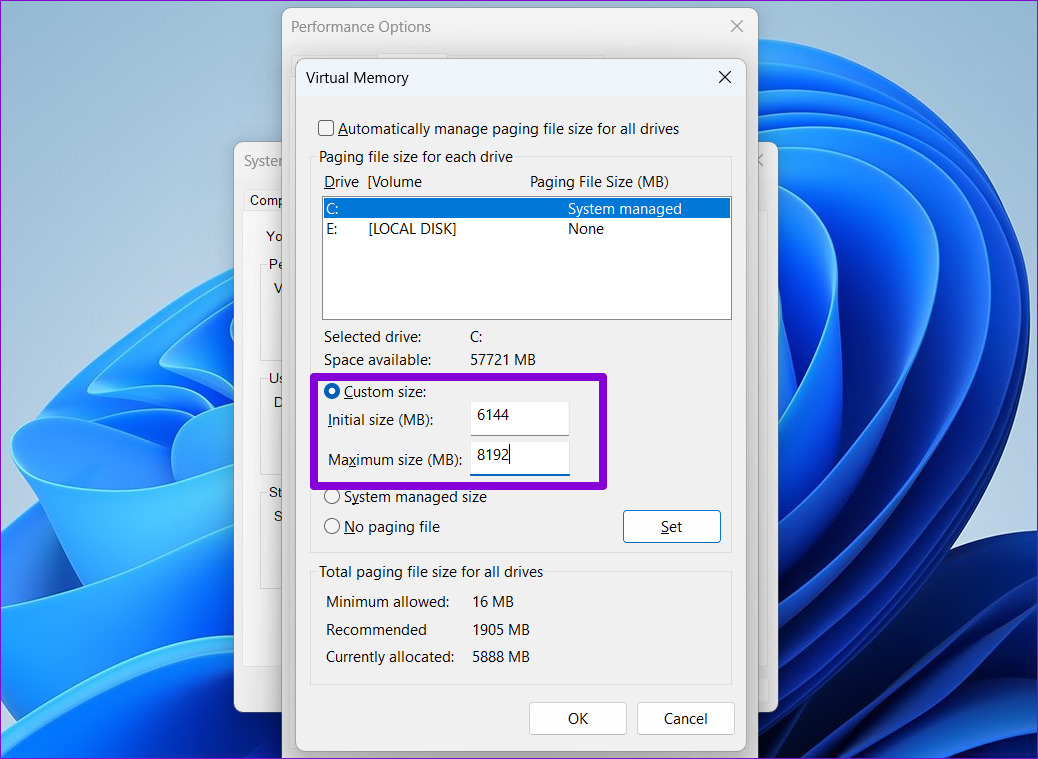
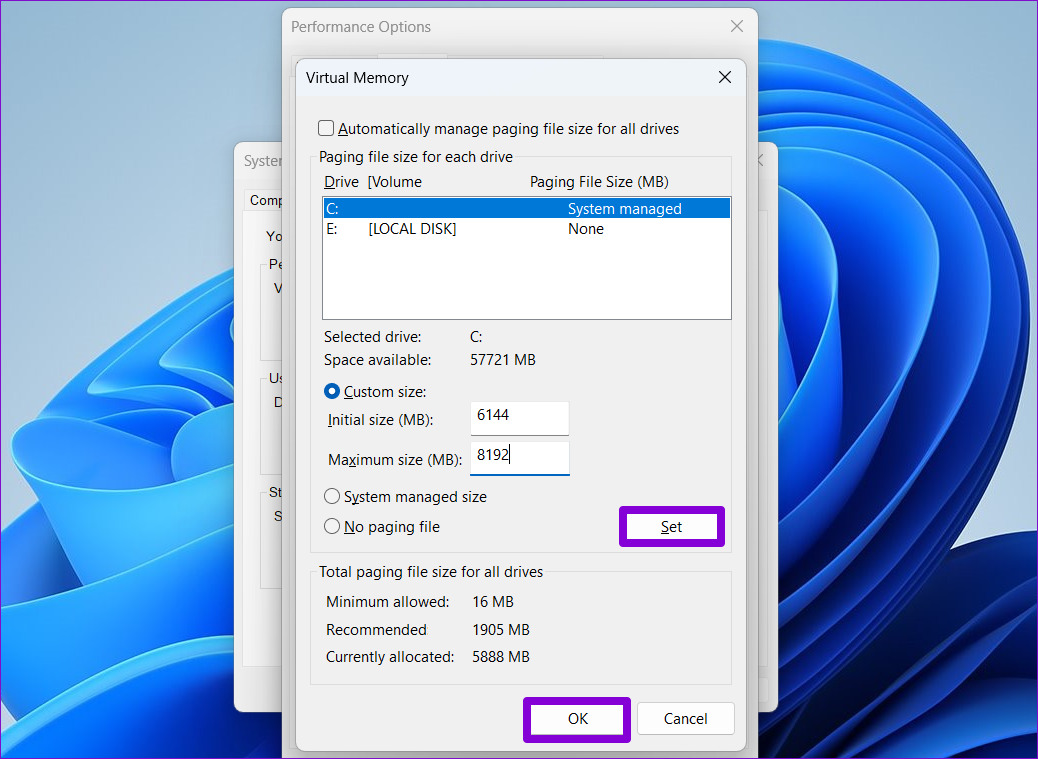
Step 6: Click Set followed by OK.
Fix 3: Run Check Disk Scan
Running the CHKDSK (short for check disk) scan allows Windows to scan and repair your drive for corrupted data and bad sectors. If the error message is caused by an issue with your hard drive, running the CHKDSK scan will help.
Step 1: Right-click the Start icon and select Terminal (Admin) from the list.

Step 2: In the console, paste the following command and press Enter.
chkdsk c: /f

After running the command, restart your PC and check if the “Your computer is low on memory” error occurs again.
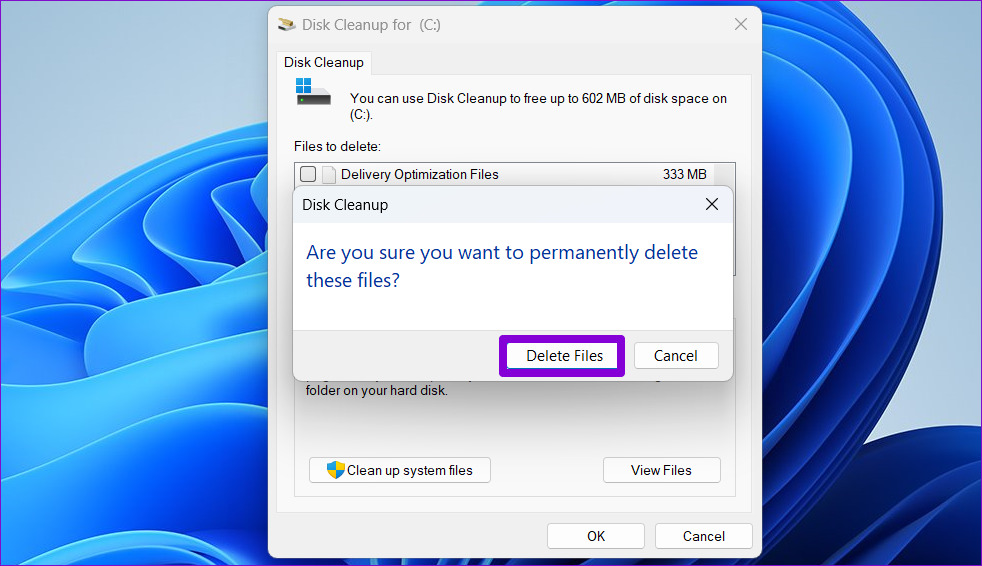
Fix 4: Delete Temporary Files
Old temporary files on your PC can also interfere with Windows processes and create problems. You can get rid of such temporary files by running the Disk Cleanup tool.
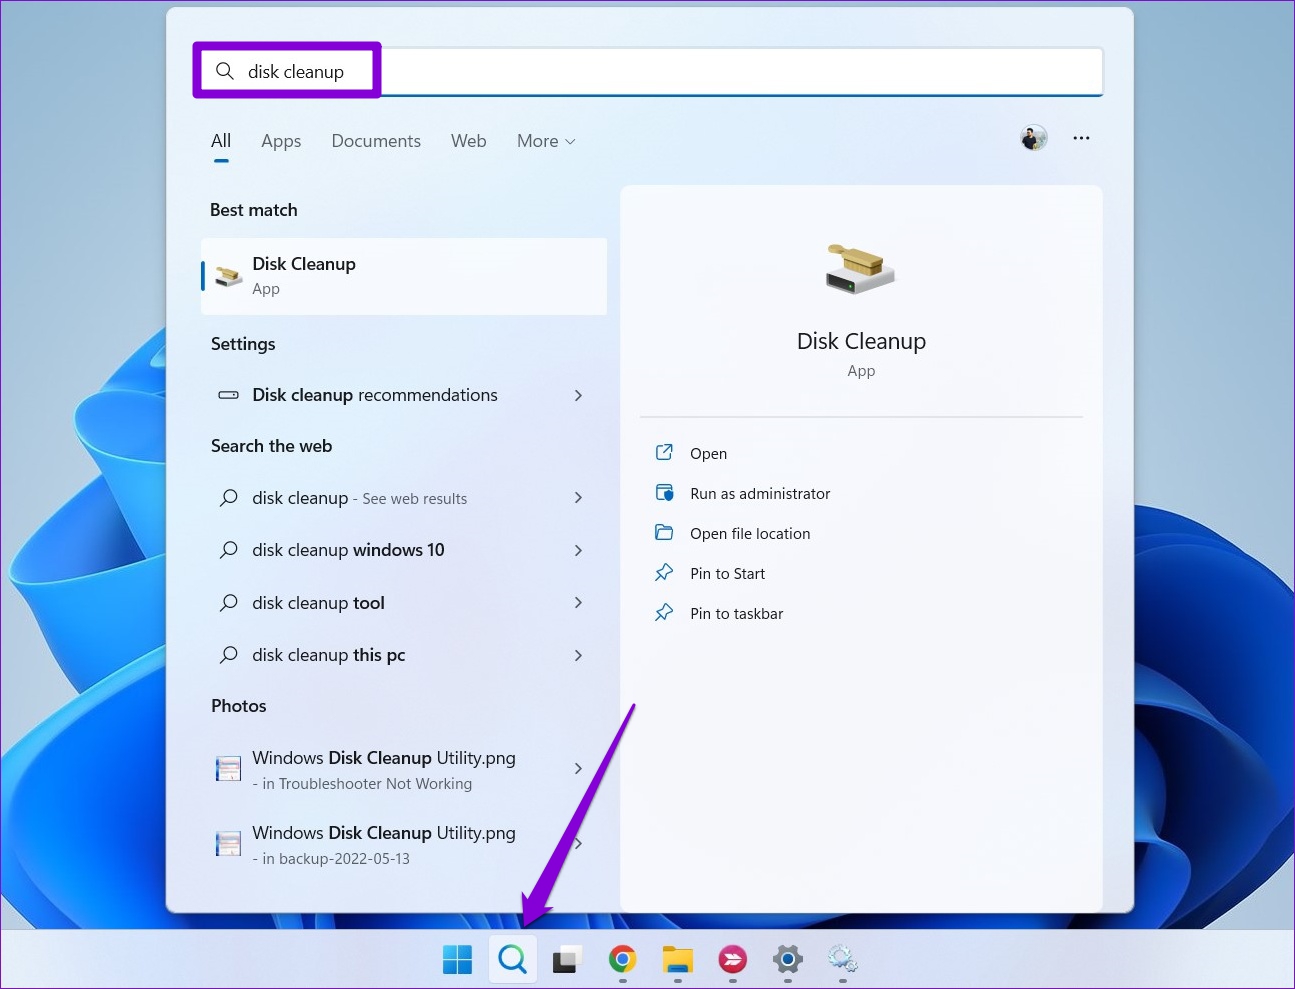
Step 1: Click on the search icon on the taskbar, type in disk cleanup, and press Enter.
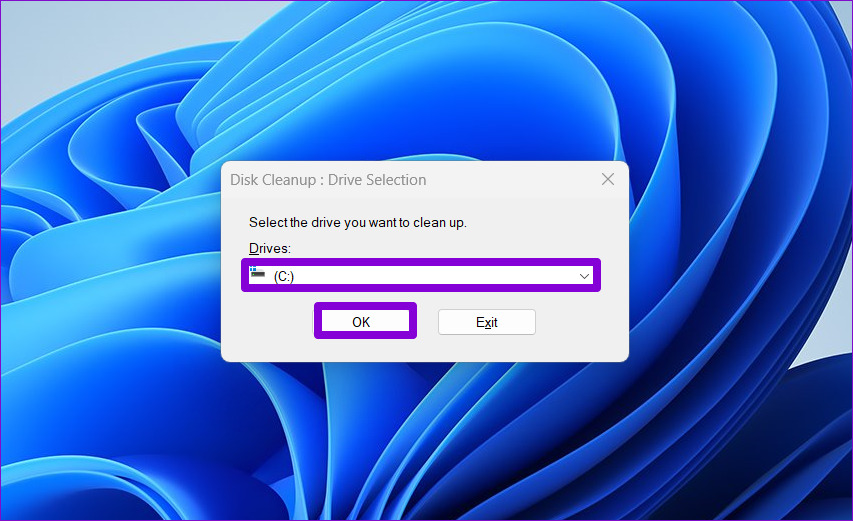
Step 2: Use the drop-down menu to select your primary drive and click OK.
Step 3: Under Files to delete, use the checkboxes to select all the temporary files. Then, click OK.

Step 4: Choose Delete Files when prompted.
Fix 5: Run Windows Memory Diagnostic
Windows Memory Diagnostic is a handy tool that can scan your PC for any memory problems and fix them. Running it requires you to restart your PC, so save all your work before that.
Step 1: Click on the search icon on the taskbar, type in windows tools and press Enter.
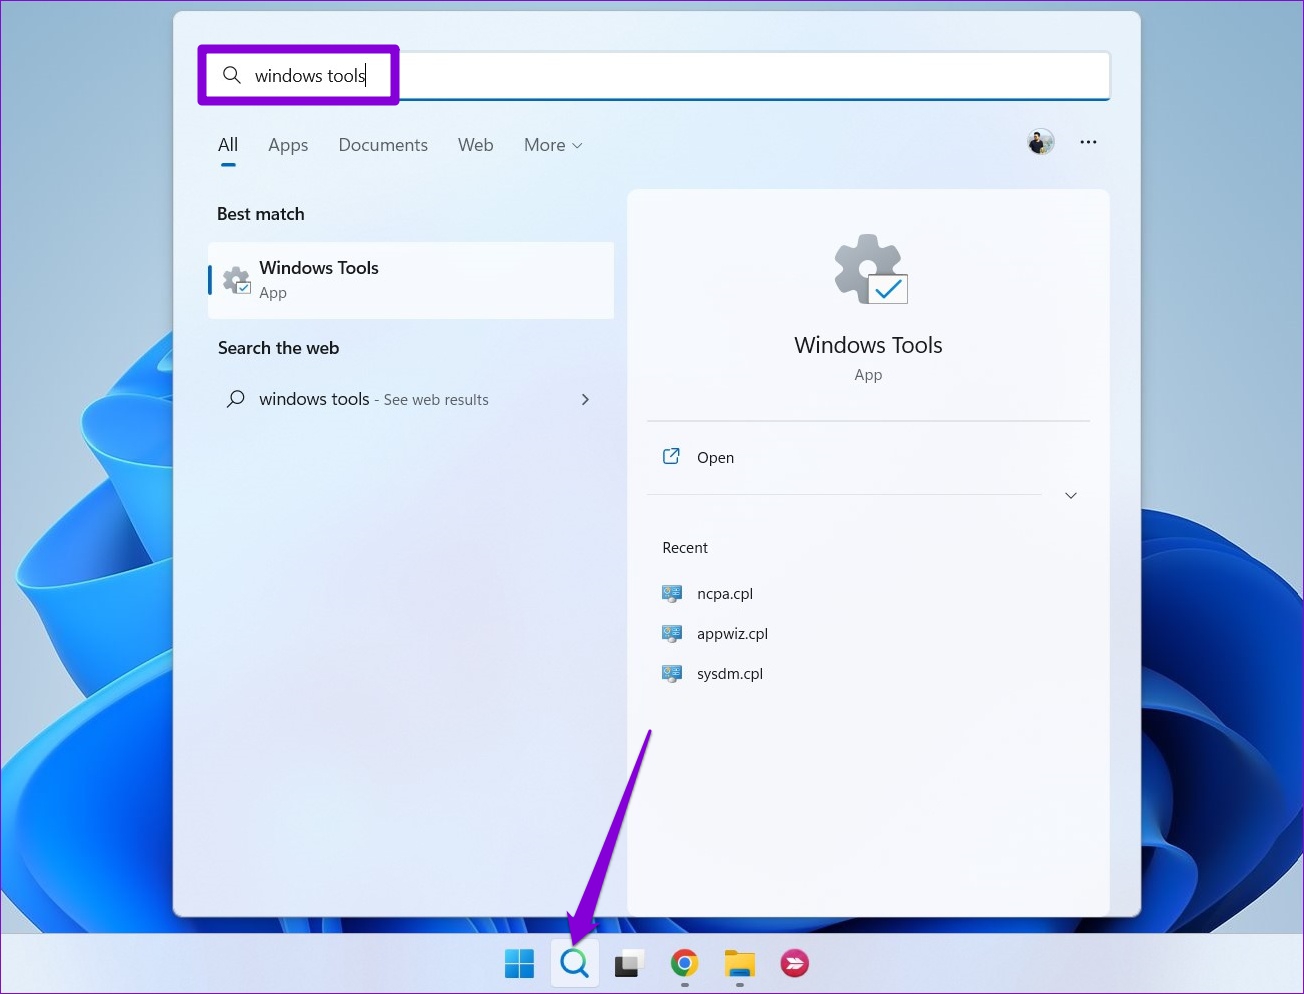
Step 2: Double-click the Windows Memory Diagnostic option.

Step 3: Select Restart now and check for problems option.
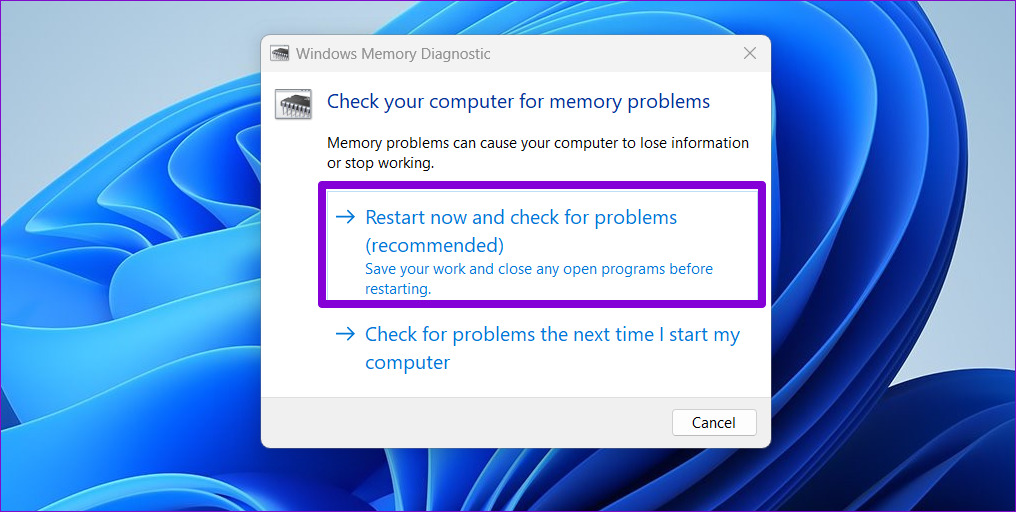
Once the PC reboots, it will run the diagnostic tool and inspect for any RAM issues on your computer.
Was this helpful?
Last updated on 04 July, 2024
Read Next
 4 Ways to Fix DirectX ‘Could Not Allocate Sufficient Memory’ Error on Windows 11
Common Fixes Launch the Windows Memory Diagnostic tool: Press the Windows key, search Windows Memory Diagnostic tool, and click to open it.
4 Ways to Fix DirectX ‘Could Not Allocate Sufficient Memory’ Error on Windows 11
Common Fixes Launch the Windows Memory Diagnostic tool: Press the Windows key, search Windows Memory Diagnostic tool, and click to open it.
 9 Ways to Fix Memory Integrity Is Off Error on Windows 11/10
Fix 1: Review Incompatible Drivers Step 1: Press the Windows key, type Windows Security, and hit Enter.
9 Ways to Fix Memory Integrity Is Off Error on Windows 11/10
Fix 1: Review Incompatible Drivers Step 1: Press the Windows key, type Windows Security, and hit Enter.
 6 Ways to Fix Google Chrome Error Code: Out of Memory on Windows
Basic Fixes Restart PC: Restart your PC to fix temporary bugs and glitches.
6 Ways to Fix Google Chrome Error Code: Out of Memory on Windows
Basic Fixes Restart PC: Restart your PC to fix temporary bugs and glitches.
 5 Fixes for Microsoft Outlook Out of Memory or System Resources Error on Windows
Fix 1: Run the Inbox Repair Tool Damaged or corrupted PST or OST files can cause Outlook to run out of memory on your Windows computer.
5 Fixes for Microsoft Outlook Out of Memory or System Resources Error on Windows
Fix 1: Run the Inbox Repair Tool Damaged or corrupted PST or OST files can cause Outlook to run out of memory on your Windows computer.
 4 Fixes for ‘Video Memory Management Internal’ Error on Windows
Basic Fixes Restart PC: Restart your PC to fix temporary bugs and glitches.
4 Fixes for ‘Video Memory Management Internal’ Error on Windows
Basic Fixes Restart PC: Restart your PC to fix temporary bugs and glitches.
 5 Ways to Fix Computer Boots to Blinking Cursor Error
What happens when you boot your computer?
5 Ways to Fix Computer Boots to Blinking Cursor Error
What happens when you boot your computer?
 7 Ways to Fix Low Volume on Windows 11
https://youtu.be/1snNqM2ZcwI Try Basic Fixes Check the volume mixer: Right-click the speaker icon on the taskbar and select the Open volume mixer option.
7 Ways to Fix Low Volume on Windows 11
https://youtu.be/1snNqM2ZcwI Try Basic Fixes Check the volume mixer: Right-click the speaker icon on the taskbar and select the Open volume mixer option.
 7 Best Fixes for Computer Name Is Invalid Error on Windows 10
Calling your computer with a nickname does sound cool, and what makes it even more fun is giving it a name officially.
7 Best Fixes for Computer Name Is Invalid Error on Windows 10
Calling your computer with a nickname does sound cool, and what makes it even more fun is giving it a name officially.
The article above may contain affiliate links which help support Guiding Tech. The content remains unbiased and authentic and will never affect our editorial integrity.