Fix 1: Disable Metered Connection
Setting your internet connection as metered on Windows limits apps to using less data, which can sometimes give the impression of a problem with the Wi-Fi. To avoid this, use the following steps to disable the metered connection option for your Wi-Fi network.
Step 1: Press the Windows key + I to open the Settings app and navigate to Network & internet > Wi-Fi.

Step 2: Click on your Wi-Fi network to open its properties.

Step 3: Turn off the Metered connection option.

Fix 2: Run the Network and Internet Troubleshooter
Your Windows 11 device includes a variety of troubleshooters that can help detect and fix various system-level problems. In this case, you can run the Network and Internet troubleshooter to resolve issues with the Wi-Fi.
Step 1: Click the search icon on the taskbar, type troubleshoot settings, and hit Enter.

Step 2: Go to Other troubleshooters.

Step 3: Click the Run button next to the Network and Internet.

Fix 3: Update or Reinstall Network Adapter Drivers
Wi-Fi drivers on Windows are responsible for connecting your PC to the internet. It’s common for these drivers to become outdated over time, especially if you’ve disabled automatic updates. To resolve Wi-Fi issues on Windows 11, you can try updating the drivers. Here’s how:
Step 1: Right-click on the Start icon and select Device Manager from the list.

Step 2: Expand Network adapters, right-click on the relevant Wireless Network Adapter from the list, and select Update driver.

From there, follow the on-screen instructions to update the Wi-Fi driver for Windows 11.
If updating the drivers doesn’t help, the Wi-Fi drivers on your PC may be corrupted. In this case, you’ll need to uninstall the problematic driver to resolve the Wi-Fi issue. After removing the driver, restart your PC, and Windows will automatically reinstall the missing driver during the boot process.
Fix 4: Configure Windows Services
Windows 11 relies on certain system services to connect and use Wi-Fi networks automatically. If these services are not running on your PC, you could experience problems. Here’s how to fix that.
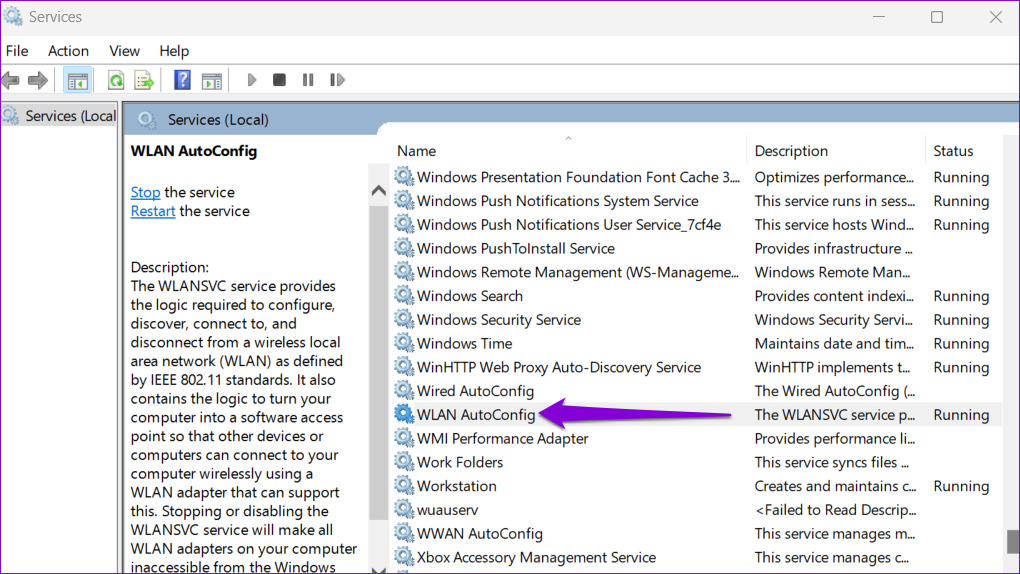
Step 1: Press the Windows key + R to open the Run dialog. Type services.msc in the box and press Enter.
Step 2: Locate and double-click the WLAN AutoConfig service to open its properties.
Step 3: Use the drop-down menu to change the Startup type to Automatic and hit Apply, followed by OK.
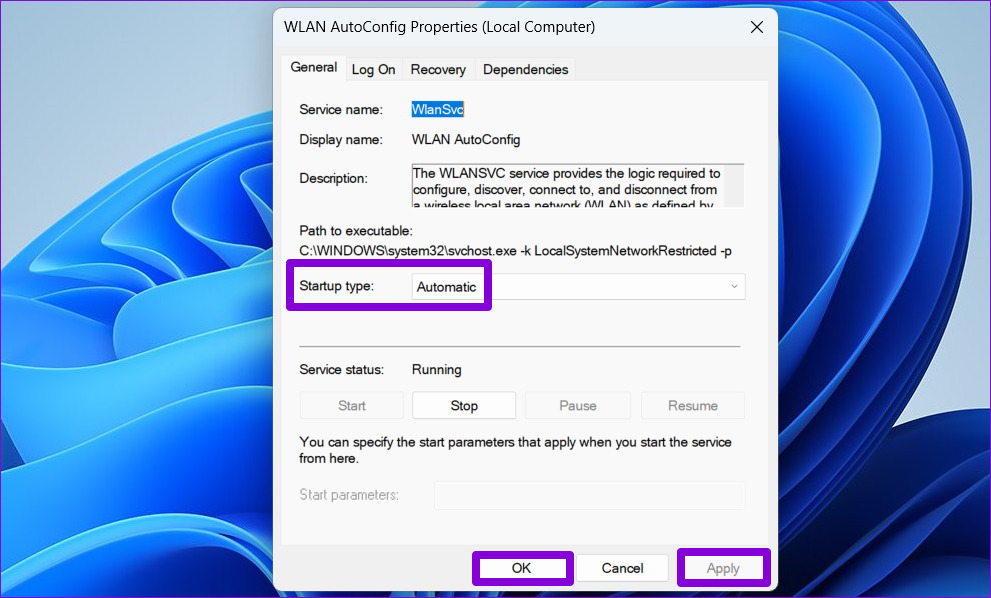
Similarly, configure the WWAN Auto Config service to start automatically on your PC. After that, check if the issue is resolved.
Fix 5: Reset Network Devices and Network Stack
Another thing you can do to restore the missing Wi-Fi option is reset all the network devices, TCP/IP, and flush the DNS cache. Here are the steps for the same.
Step 1: Right-click on the Start icon and select Terminal (Admin) from the list.
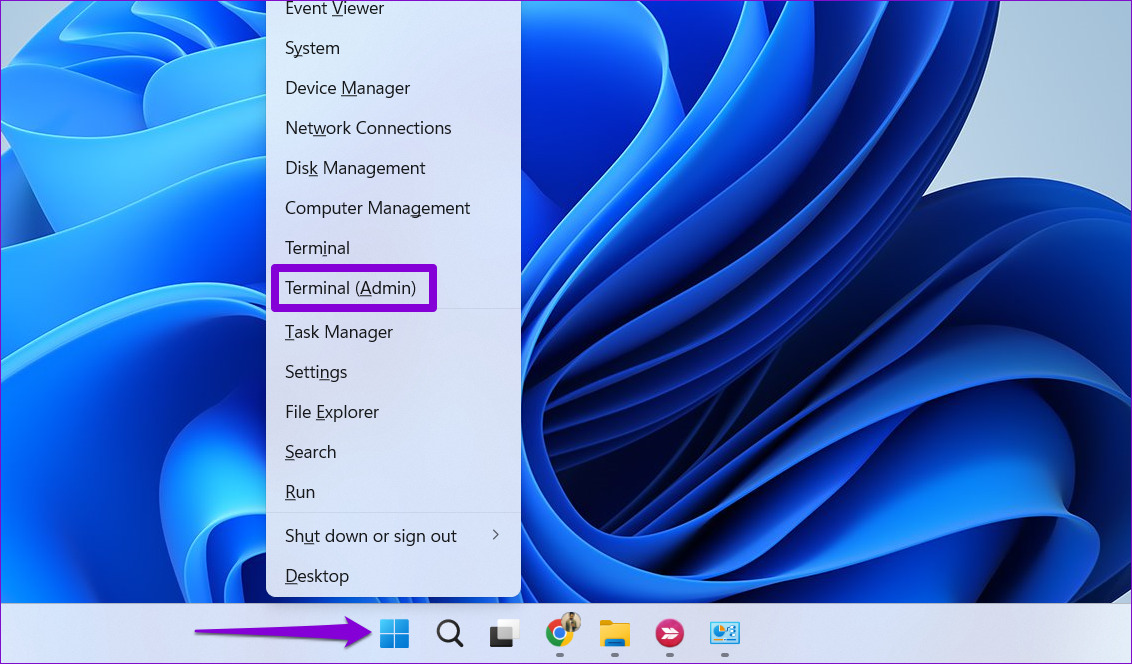
Step 2: Run the following commands in the console and press Enter after each one:
netsh int ip reset
netsh advfirewall reset
netsh winsock reset
ipconfig /flushdns
ipconfig /release
ipconfig /renew

Once all the commands are executed, restart your computer, and check if the Wi-Fi option is restored.
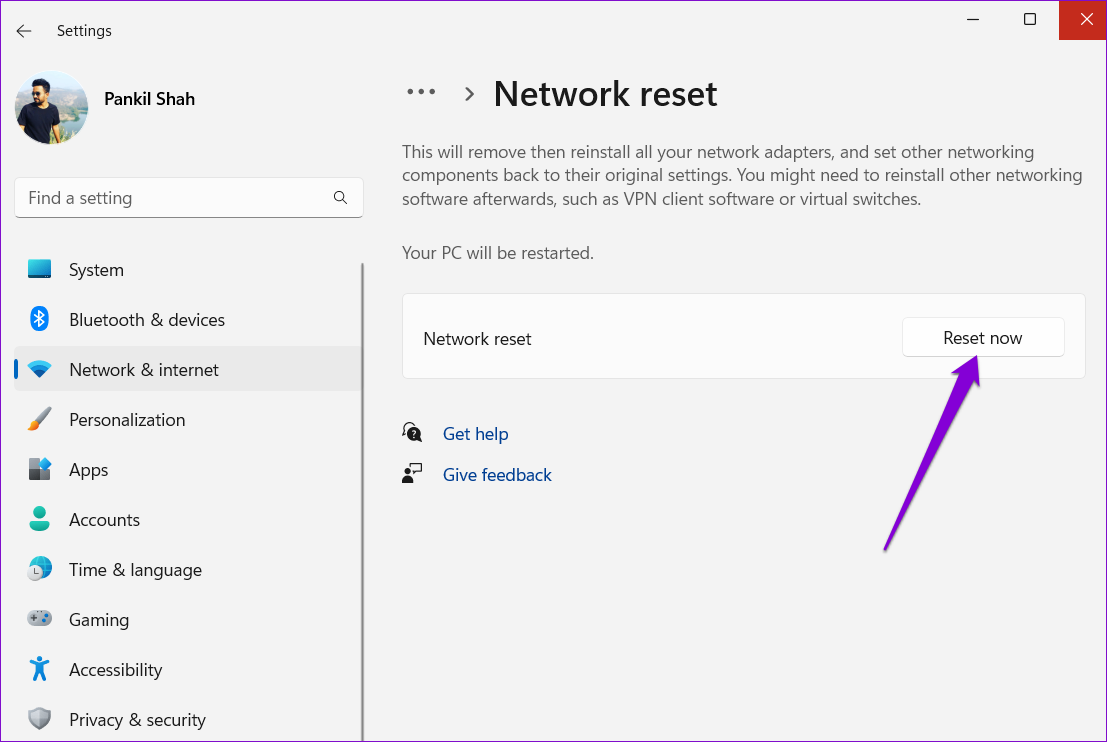
Fix 6: Reset Network Settings
If all else fails, you can consider resetting the network settings on your Windows PC. Here’s how:
Step 1: Press the Windows key + I to launch the Settings app. In the Network & internet tab, click on Advanced network settings.
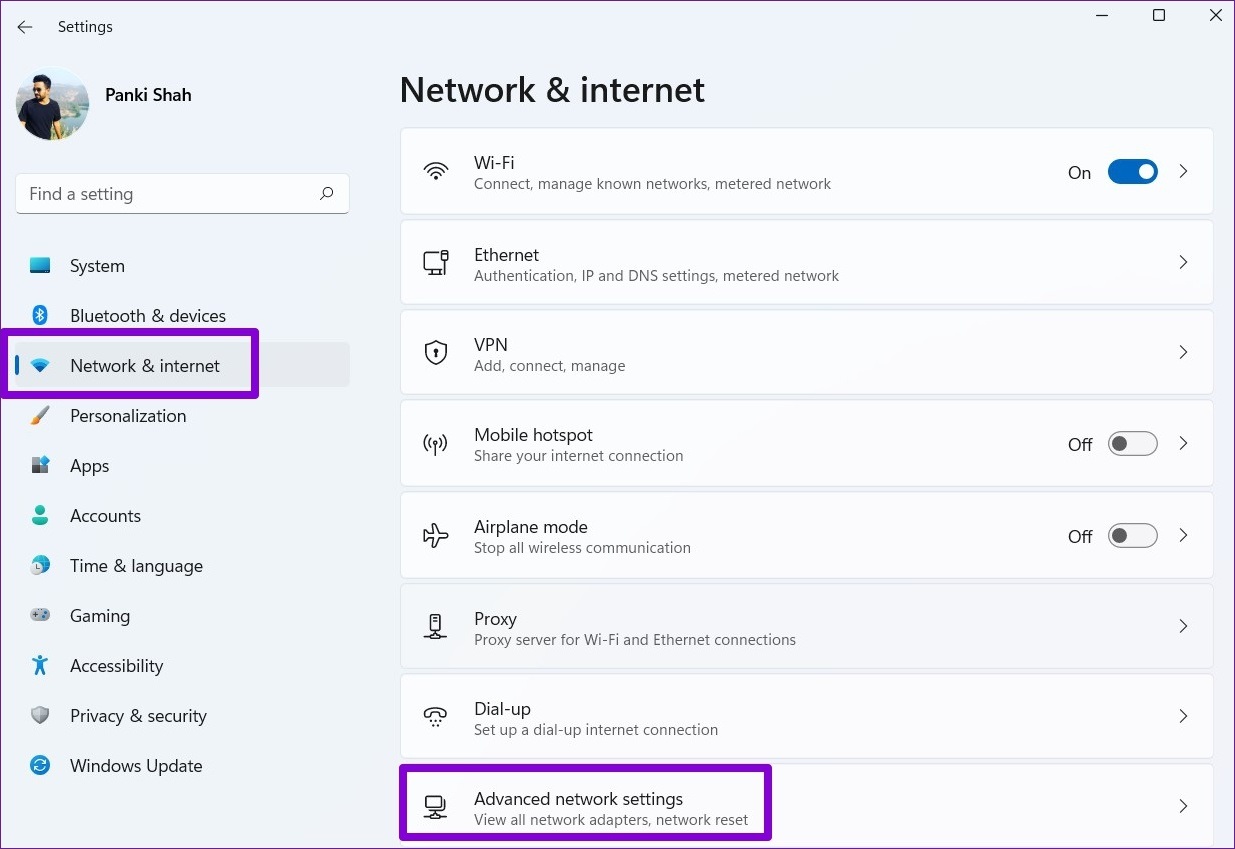
Step 2: Click Network reset.

Step 3: Click on Reset now next to Network reset.
Was this helpful?
Last updated on 24 July, 2024
2 Comments
Leave a Reply
Read Next
 Top 7 Ways to Fix Windows Key Not Working on Windows 10
Windows 10 operating system is full of keyboard shortcuts.
Top 7 Ways to Fix Windows Key Not Working on Windows 10
Windows 10 operating system is full of keyboard shortcuts.
 6 Ways to Fix Windows Security Not Opening or Working on Windows 11
Try Basic Fixes Uninstall any third-party antivirus program: Third-party antivirus programs can sometimes interfere with the Windows Security app and prevent it from opening on your Windows 11 PC.
6 Ways to Fix Windows Security Not Opening or Working on Windows 11
Try Basic Fixes Uninstall any third-party antivirus program: Third-party antivirus programs can sometimes interfere with the Windows Security app and prevent it from opening on your Windows 11 PC.
 7 Ways to Fix Windows Key Not Working in Windows 11
Basic Fixes Check for physical damage: There might be physical damage or dirt buildup on your keyboard.
7 Ways to Fix Windows Key Not Working in Windows 11
Basic Fixes Check for physical damage: There might be physical damage or dirt buildup on your keyboard.
 4 Ways to Fix Telegram Notifications Not Working on Windows 10 and Windows 11
Try Basic Fixes Disable Do Not Disturb mode: The Telegram app may not be showing notifications due to the Do Not Disturb mode on your Windows PC.
4 Ways to Fix Telegram Notifications Not Working on Windows 10 and Windows 11
Try Basic Fixes Disable Do Not Disturb mode: The Telegram app may not be showing notifications due to the Do Not Disturb mode on your Windows PC.
 3 Best Ways to Fix Keyboard Backlight Not Working on Windows 10 and Windows 11
Try Basic Fixes Toggle the keyboard backlight using the hotkey: You can use a key combination to quickly enable or disable the keyboard backlight on your Windows 11 PC.
3 Best Ways to Fix Keyboard Backlight Not Working on Windows 10 and Windows 11
Try Basic Fixes Toggle the keyboard backlight using the hotkey: You can use a key combination to quickly enable or disable the keyboard backlight on your Windows 11 PC.
 5 Ways to Fix Phone Link App Not Working on Windows 11
Fix 1: Enable Phone Link Features The Phone Link app allows you to enable or disable specific features for your linked devices.
5 Ways to Fix Phone Link App Not Working on Windows 11
Fix 1: Enable Phone Link Features The Phone Link app allows you to enable or disable specific features for your linked devices.
 3 Ways to Fix the Notification Sound Not Working on Windows 11
Basic Fixes: Unmute your Windows PC: You might have muted your Windows PC and forgotten to unmute it after an important meeting or work hours.
3 Ways to Fix the Notification Sound Not Working on Windows 11
Basic Fixes: Unmute your Windows PC: You might have muted your Windows PC and forgotten to unmute it after an important meeting or work hours.
 5 Ways to Fix Camera Not Working in Google Chrome on Windows 11
Basic Fixes: Close all background apps: If the camera is not working in Google Chrome, check and see if other apps are using the camera in the background.
5 Ways to Fix Camera Not Working in Google Chrome on Windows 11
Basic Fixes: Close all background apps: If the camera is not working in Google Chrome, check and see if other apps are using the camera in the background.
The article above may contain affiliate links which help support Guiding Tech. The content remains unbiased and authentic and will never affect our editorial integrity.


it worked! thanks
you’re welcome