Try Basic Fixes
- Restart Windows Explorer: Windows Explorer facilitates the graphical interface for several utilities, including the Quick Settings panel. So, if the Quick Settings panel isn’t responding, restarting Windows Explorer can help.
- Install Windows updates: A buggy or outdated Windows build could prevent you from using the Quick Settings panel. Install any pending Windows updates and see if that gets the Quick Settings to work.
Fix 1: Run SFC and DISM Scan
Issues with your PC’s system files can cause such problems. Running the SFC (System File Checker) and DISM (Deployment Image Servicing and Management) scans can help you repair those files. Here’s how to do it.
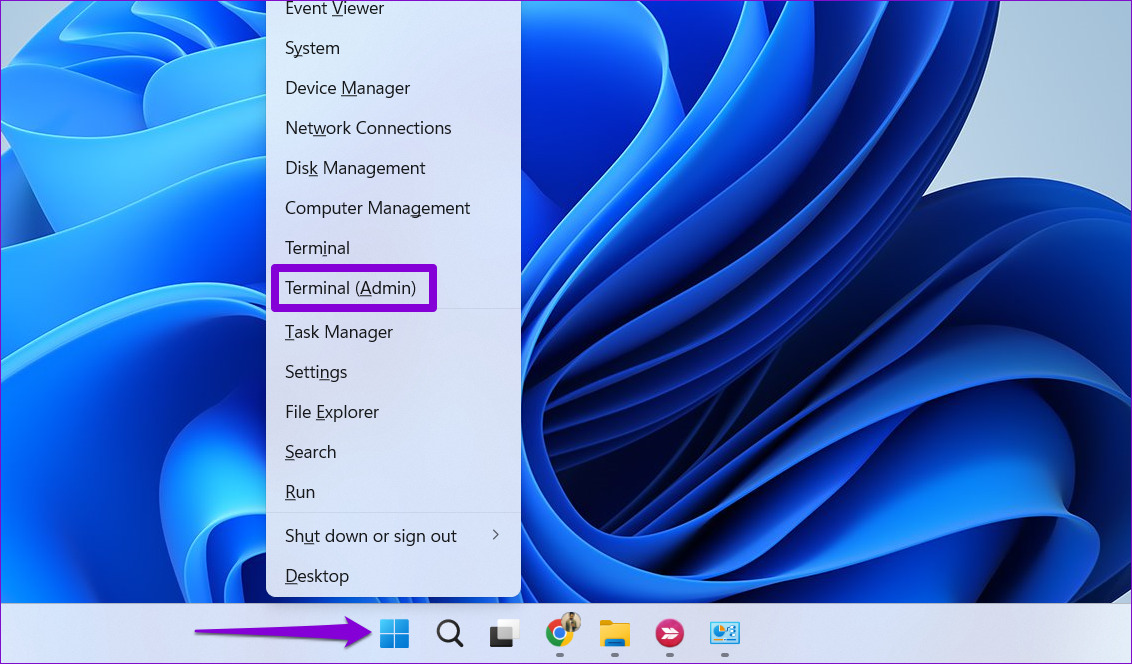
Step 1: Right-click on the Start icon > select Terminal (Admin) from the resulting menu.
Step 2: Type the command mentioned below and press Enter.
SFC /scannow

Step 3: Run the following commands one by one to execute the DISM scan:
DISM /Online /Cleanup-Image /CheckHealth
DISM /Online /Cleanup-Image /ScanHealth
DISM /Online /Cleanup-Image /RestoreHealth

After that, restart your PC and see if you can use Quick Settings.
Fix 2: Re-Register Action Center
Problems with the Action Center can also prevent you from using the Quick Settings panel on Windows. To fix it, re-register the Action Center on Windows by following the steps below.
Step 1: Click the search icon on the taskbar, type windows powershell, and select Run as Administrator.

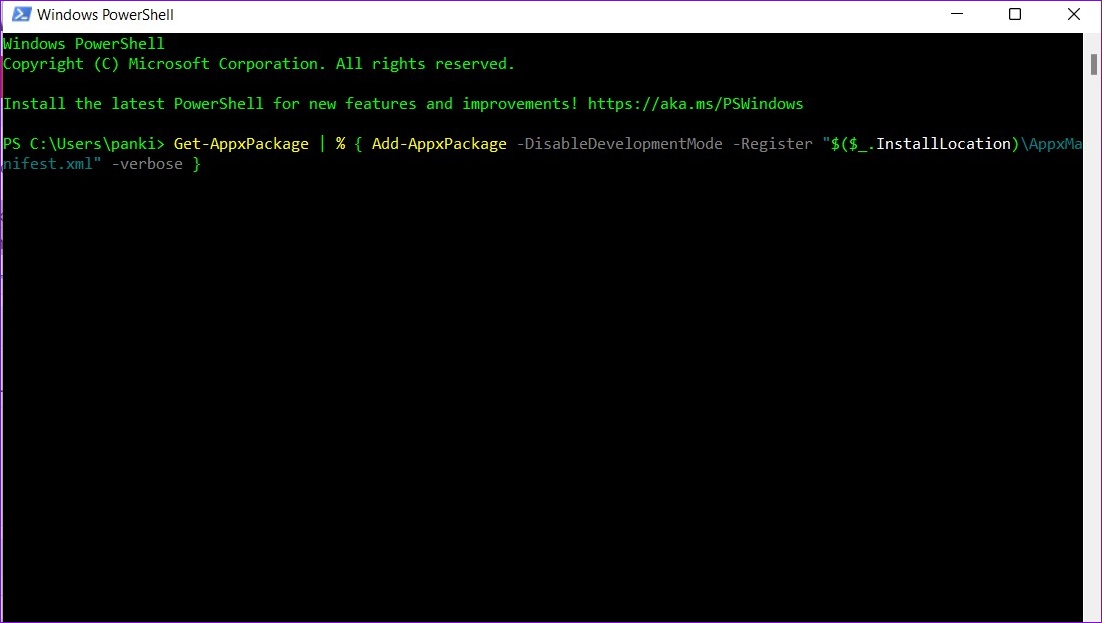
Step 2: Copy and paste the command mentioned below and press Enter to run it.
Get-AppxPackage | % { Add-AppxPackage -DisableDevelopmentMode -Register "$($_.InstallLocation)\AppxManifest.xml" -verbose }
After running the above command, restart your PC, and try using Quick Settings again.
Fix 3: Check Windows Services
Connected Devices Platform is an essential service that needs to be running to access and use the Quick Settings panel. If this service is disabled, you must enable it by following the steps below.
Step 1: Press the Windows key + R to launch the Run dialog box, type services.msc, and press Enter.
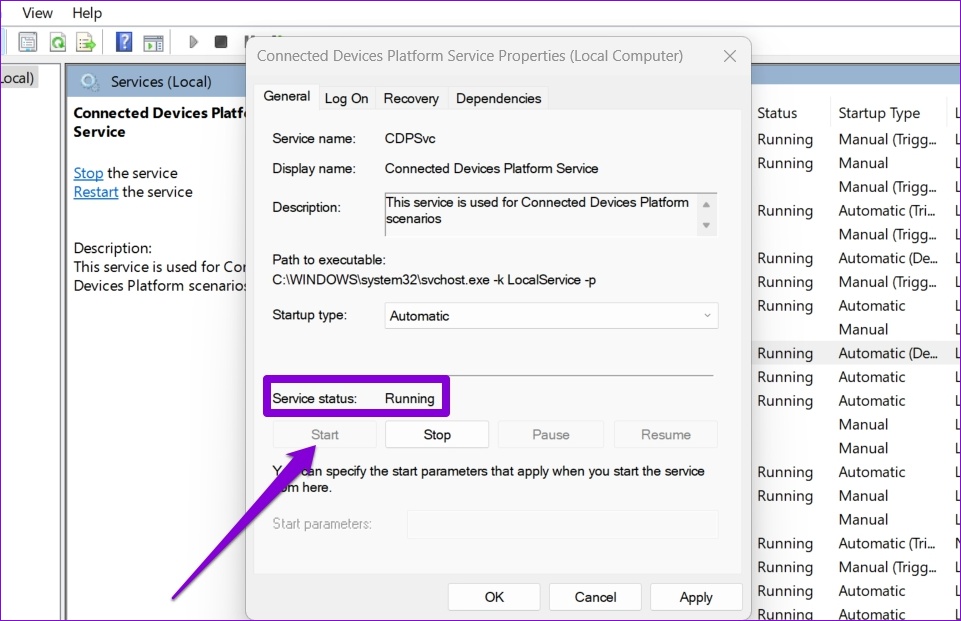
Step 2: Locate and double-click Connected Devices Platform Service.

Step 3: Use the drop-down menu next to Startup type to select Automatic and hit Apply.

If the service is still not running, click Start in the same window.
Fix 4: Modify Registry Files
If the issue persists, try modifying a few registry files to fix problems with the Quick Settings panel. Here’s how:
Step 1: Press the Windows key + R to open the Run dialog. Type regedit and press Enter.
Step 2: Use the address bar at the top to navigate to the following key:
HKEY_CURRENT_USER\Software\Microsoft\Windows\CurrentVersion\Policies\Explorer
Step 3: Right-click the Explorer key > select New > DWORD (32-bit) Value. Name it NoControlPanel.

Step 4: Double-click on the newly created DWORD > type 0 (zero) in the value data field > hit OK.

Restart your PC for changes to take effect and try using Quick Settings again.
Fix 5: Create a New User Account
If the issue remains, it might be due to corrupted user account files. In that case, creating and switching to a new user account on Windows can help resolve the problem.
Step 1: Press the Windows key + I to launch the Settings app. Then, go to Accounts > Family & other users.

Step 2: Under Other users, click Add account.

Step 3: Click I don’t have this person’s sign-in information and follow the on-screen prompts to create a new account.

Sign in with the newly created user account and check if the issue is resolved.
Was this helpful?
Last updated on 16 August, 2024
Read Next
 5 Ways to Fix Quick Assist Not Working on Windows 11
Fix 1: Run Quick Assist as an Administrator If the Quick Assist app lacks the necessary permissions, some features may not function as expected.
5 Ways to Fix Quick Assist Not Working on Windows 11
Fix 1: Run Quick Assist as an Administrator If the Quick Assist app lacks the necessary permissions, some features may not function as expected.
 5 Ways to Fix Quick Access Not Working on Windows 11
https://youtu.be/NlAnVpZD1hA Fix 1: Check File Explorer Options If Quick Access is not showing your recently opened files and frequently used folders, check File Explorer's Options to ensure the feature is
5 Ways to Fix Quick Access Not Working on Windows 11
https://youtu.be/NlAnVpZD1hA Fix 1: Check File Explorer Options If Quick Access is not showing your recently opened files and frequently used folders, check File Explorer's Options to ensure the feature is
 3 Quick Ways to Find Product Key on Windows 10 or Windows 11
1.
3 Quick Ways to Find Product Key on Windows 10 or Windows 11
1.
 5 Quick Ways to Fix Can’t Change Power Plan in Windows 11
Are you unable to change the power plan on your Windows PC?
5 Quick Ways to Fix Can’t Change Power Plan in Windows 11
Are you unable to change the power plan on your Windows PC?
 5 Quick Ways to Open Services on Windows 11
Method 1: Using the Task Manager The Task Manager is used to monitor computer performance, background applications running, and system resource usage.
5 Quick Ways to Open Services on Windows 11
Method 1: Using the Task Manager The Task Manager is used to monitor computer performance, background applications running, and system resource usage.
 7 Quick Ways to Open Credential Manager in Windows 11
Are you looking for a password manager to save your login credentials securely?
7 Quick Ways to Open Credential Manager in Windows 11
Are you looking for a password manager to save your login credentials securely?
 7 Quick Ways to Open Remote Desktop Connection Tool in Windows 11
Method 1.
7 Quick Ways to Open Remote Desktop Connection Tool in Windows 11
Method 1.
 5 Quick Ways to Show FPS Counter in Windows 11
Method 1: Using the Xbox Game Bar Xbox Game Bar is baked into Windows 10 and Windows 11.
5 Quick Ways to Show FPS Counter in Windows 11
Method 1: Using the Xbox Game Bar Xbox Game Bar is baked into Windows 10 and Windows 11.
The article above may contain affiliate links which help support Guiding Tech. The content remains unbiased and authentic and will never affect our editorial integrity.