Fix 1: Reconnect the Battery and Perform a Power Cycle
You can start by removing your laptop’s battery if possible and installing it again. While you’re at it, clean the contact points and the battery compartment with a dry cloth.
Another thing you should do is perform a power cycle. Doing so will discharge residual power from the laptop’s capacitor and reset all the temporary configurations.
Step 1: Power off your laptop and unplug all the external devices.
Step 2: Remove your laptop’s battery and press the physical power button for around 15 seconds.
Step 3: Re-insert the battery and boot your PC. After that, plug in the power cord and see if Windows can detect the battery.
Fix 2: Re-Enable Battery Adapter
Battery drivers on your PC help Windows connect and communicate with your laptop’s battery. However, if those drivers aren’t functioning properly, Windows may fail to detect your laptop’s battery. Here’s what you can do to fix that.
Step 1: Right-click on the Start icon and select Device Manager from the list.

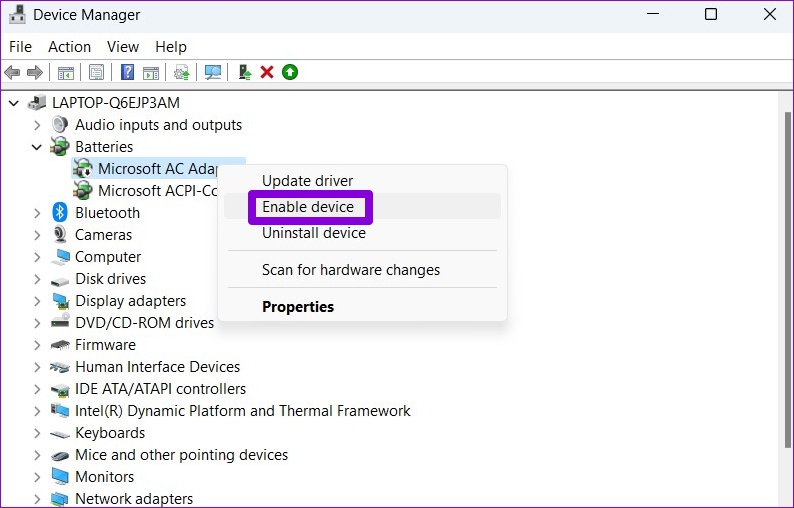
Step 2: In the Device Manager window, double-click on Batteries to expand it. Right-click on the battery adapter and select Disable device.

Step 3: Right-click on the battery adapter again and select Enable device.
Fix 3: Update the Battery Driver
If re-enabling the battery driver does not help, you can try updating it to see if that gets rid of the “No battery is detected” message on Windows. Here’s how.
Step 1: Open Device Manager on your PC.
Step 2: Under Batteries, right-click on the battery adapter and select Update driver.

From there, follow the on-screen instructions to finish updating the driver. If the error remains, it could be caused by a corrupted battery driver. In that case, you can try uninstalling the driver instead. Restart your PC after that to allow Windows to install the removed driver again.

Fix 4: Reset BIOS Settings
At times, issues with your PC’s BIOS can also lead to the “No battery is detected” message on Windows 11. To fix it, you can try resetting the BIOS to its default settings.
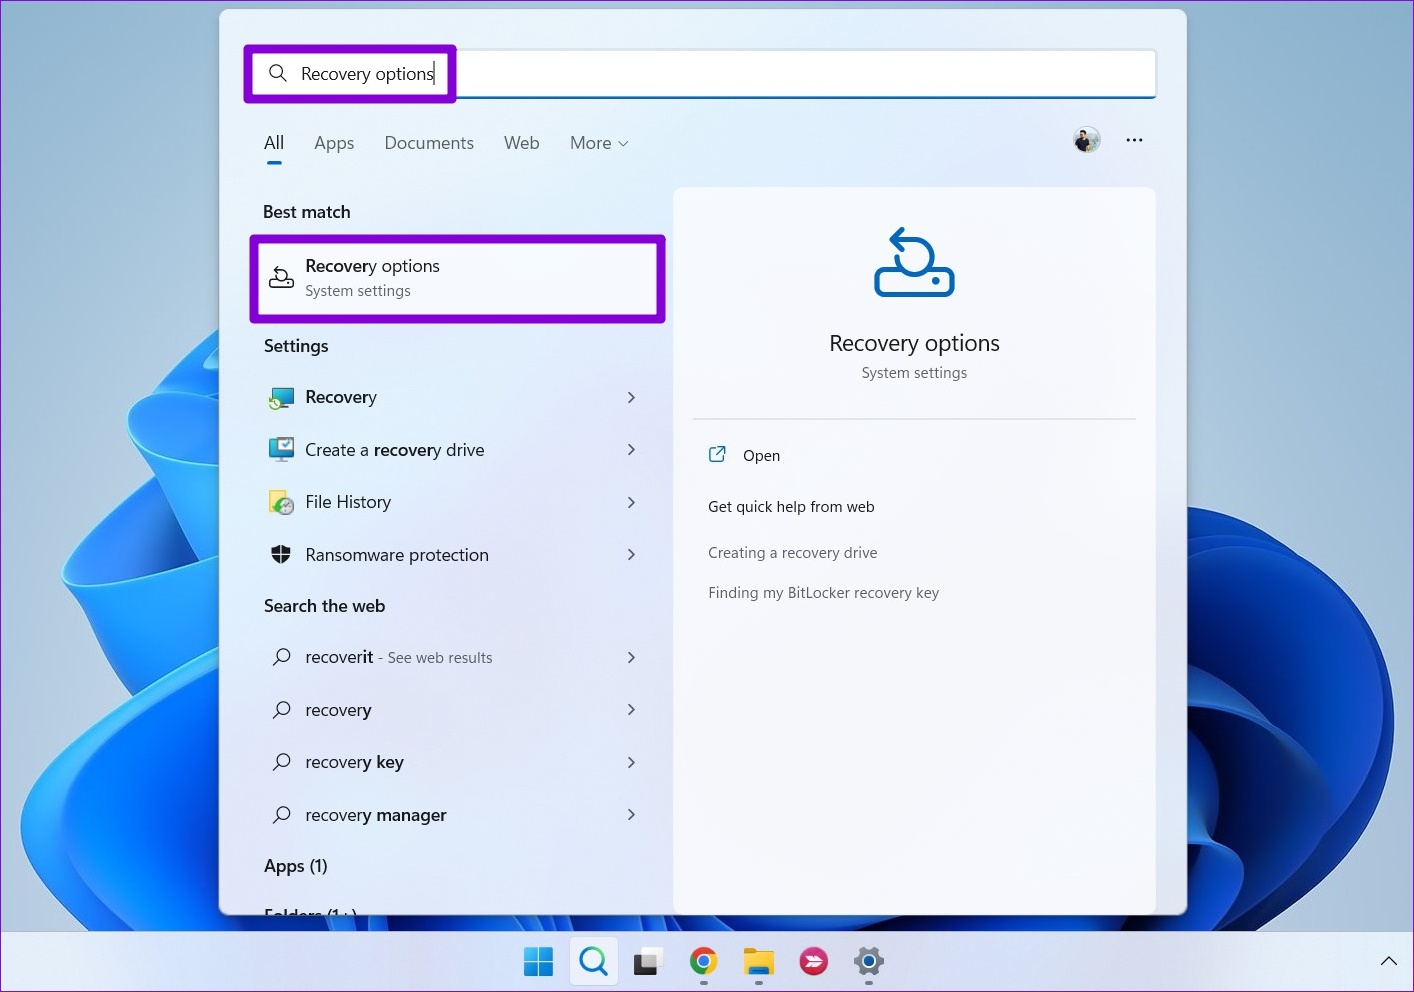
Step 1: Press the Windows key + S to open the search menu. Type in recovery options in the box and press Enter.
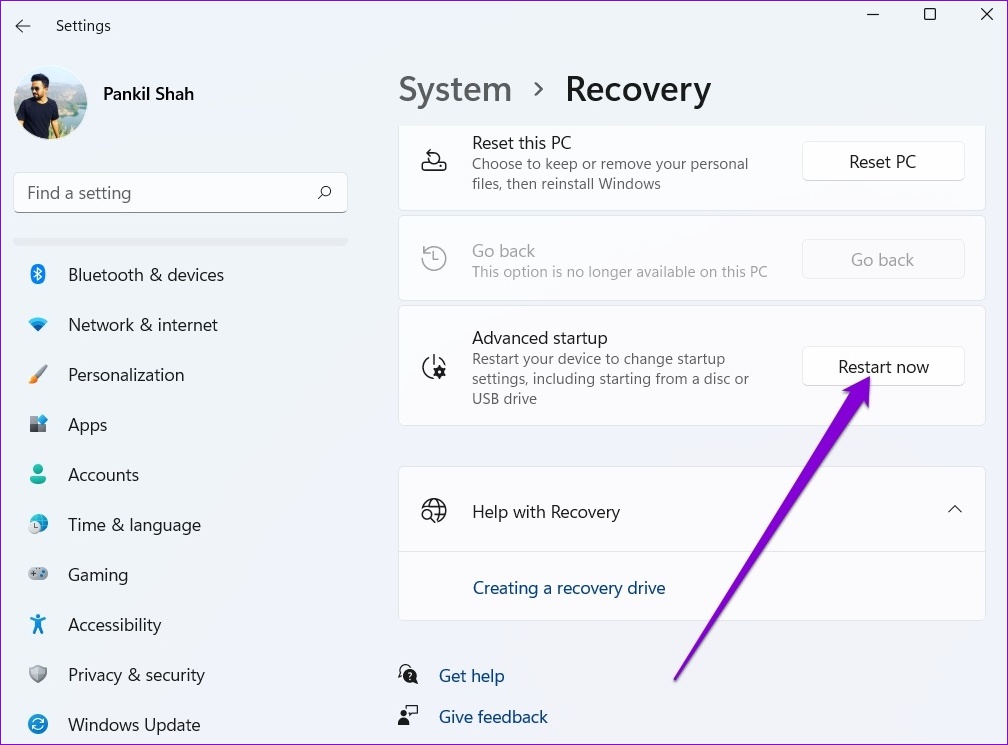
Step 2: Click on the Restart now button next to Advanced startup.
Step 3: Go to Troubleshoot > Advanced options > UEFI Firmware Settings.

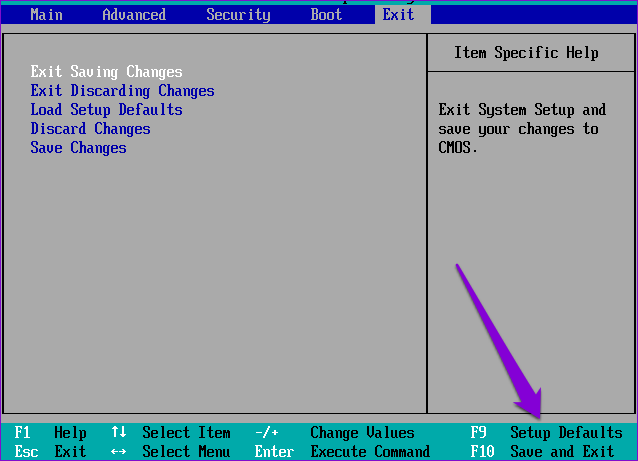
Step 4: Once you’re in the BIOS, press F9 to access the Setup Defaults option. Then, select Yes.
Step 5: Press F10 to save changes and exit BIOS.
Was this helpful?
Last updated on 19 May, 2024
Read Next
 How to Fix Battery Not Detected in Windows 10 Error in 8 Ways
The battery is what keeps your laptop alive when it’s not connected to a power outlet.
How to Fix Battery Not Detected in Windows 10 Error in 8 Ways
The battery is what keeps your laptop alive when it’s not connected to a power outlet.
 3 Ways to Fix Windows 11 Laptop Showing Wrong Battery Percentage
https://youtu.be/5XEdrPhBF9s Try Basic Fixes Install Windows updates: If you have disabled automatic updates on your device, you might need to look for newer updates manually.
3 Ways to Fix Windows 11 Laptop Showing Wrong Battery Percentage
https://youtu.be/5XEdrPhBF9s Try Basic Fixes Install Windows updates: If you have disabled automatic updates on your device, you might need to look for newer updates manually.
 4 Ways to Fix Liquid Detected in Lightning Connector Error on iPhone
Why Does iPhone Keep Showing Liquid Detected in Lighting Connector Error?
4 Ways to Fix Liquid Detected in Lightning Connector Error on iPhone
Why Does iPhone Keep Showing Liquid Detected in Lighting Connector Error?
 10 Ways to Fix Moisture Detected in Charging Port Error on Samsung Galaxy Phones
Most Samsung Galaxy devices these days come with an IP rating.
10 Ways to Fix Moisture Detected in Charging Port Error on Samsung Galaxy Phones
Most Samsung Galaxy devices these days come with an IP rating.
 12 Ways to Save Battery on Any Windows Laptop
Windows laptops are capable machines that can do almost all the tasks.
12 Ways to Save Battery on Any Windows Laptop
Windows laptops are capable machines that can do almost all the tasks.
 How to Prevent Battery Drain When Windows Laptop Lid Is Closed
Common Fixes Unplug external devices: Disconnect all plugged-in devices (e.g., USB devices, external hard drives, etc.) to prevent them from waking up the laptop when the lid is closed.
How to Prevent Battery Drain When Windows Laptop Lid Is Closed
Common Fixes Unplug external devices: Disconnect all plugged-in devices (e.g., USB devices, external hard drives, etc.) to prevent them from waking up the laptop when the lid is closed.
 2 Fixes for “We’ve Detected Automated Behavior on Your Account” Warning on Instagram
Try Basic Fixes Avoid engaging in spammy behavior: Activities such as following, unfollowing, or sending direct messages to a large number of people in a short time can trigger this
2 Fixes for “We’ve Detected Automated Behavior on Your Account” Warning on Instagram
Try Basic Fixes Avoid engaging in spammy behavior: Activities such as following, unfollowing, or sending direct messages to a large number of people in a short time can trigger this
 Should You Keep Laptop Plugged in or Use It on Battery Power?
Can You Overcharge Your Laptop Battery?
Should You Keep Laptop Plugged in or Use It on Battery Power?
Can You Overcharge Your Laptop Battery?
The article above may contain affiliate links which help support Guiding Tech. The content remains unbiased and authentic and will never affect our editorial integrity.