It can be frustrating if Windows 11 keeps showing you the ‘A driver cannot load on this device’ message whenever you start your computer. Such an error typically occurs when Windows fails to load a specific driver due to compatibility issues or misconfigured security settings.
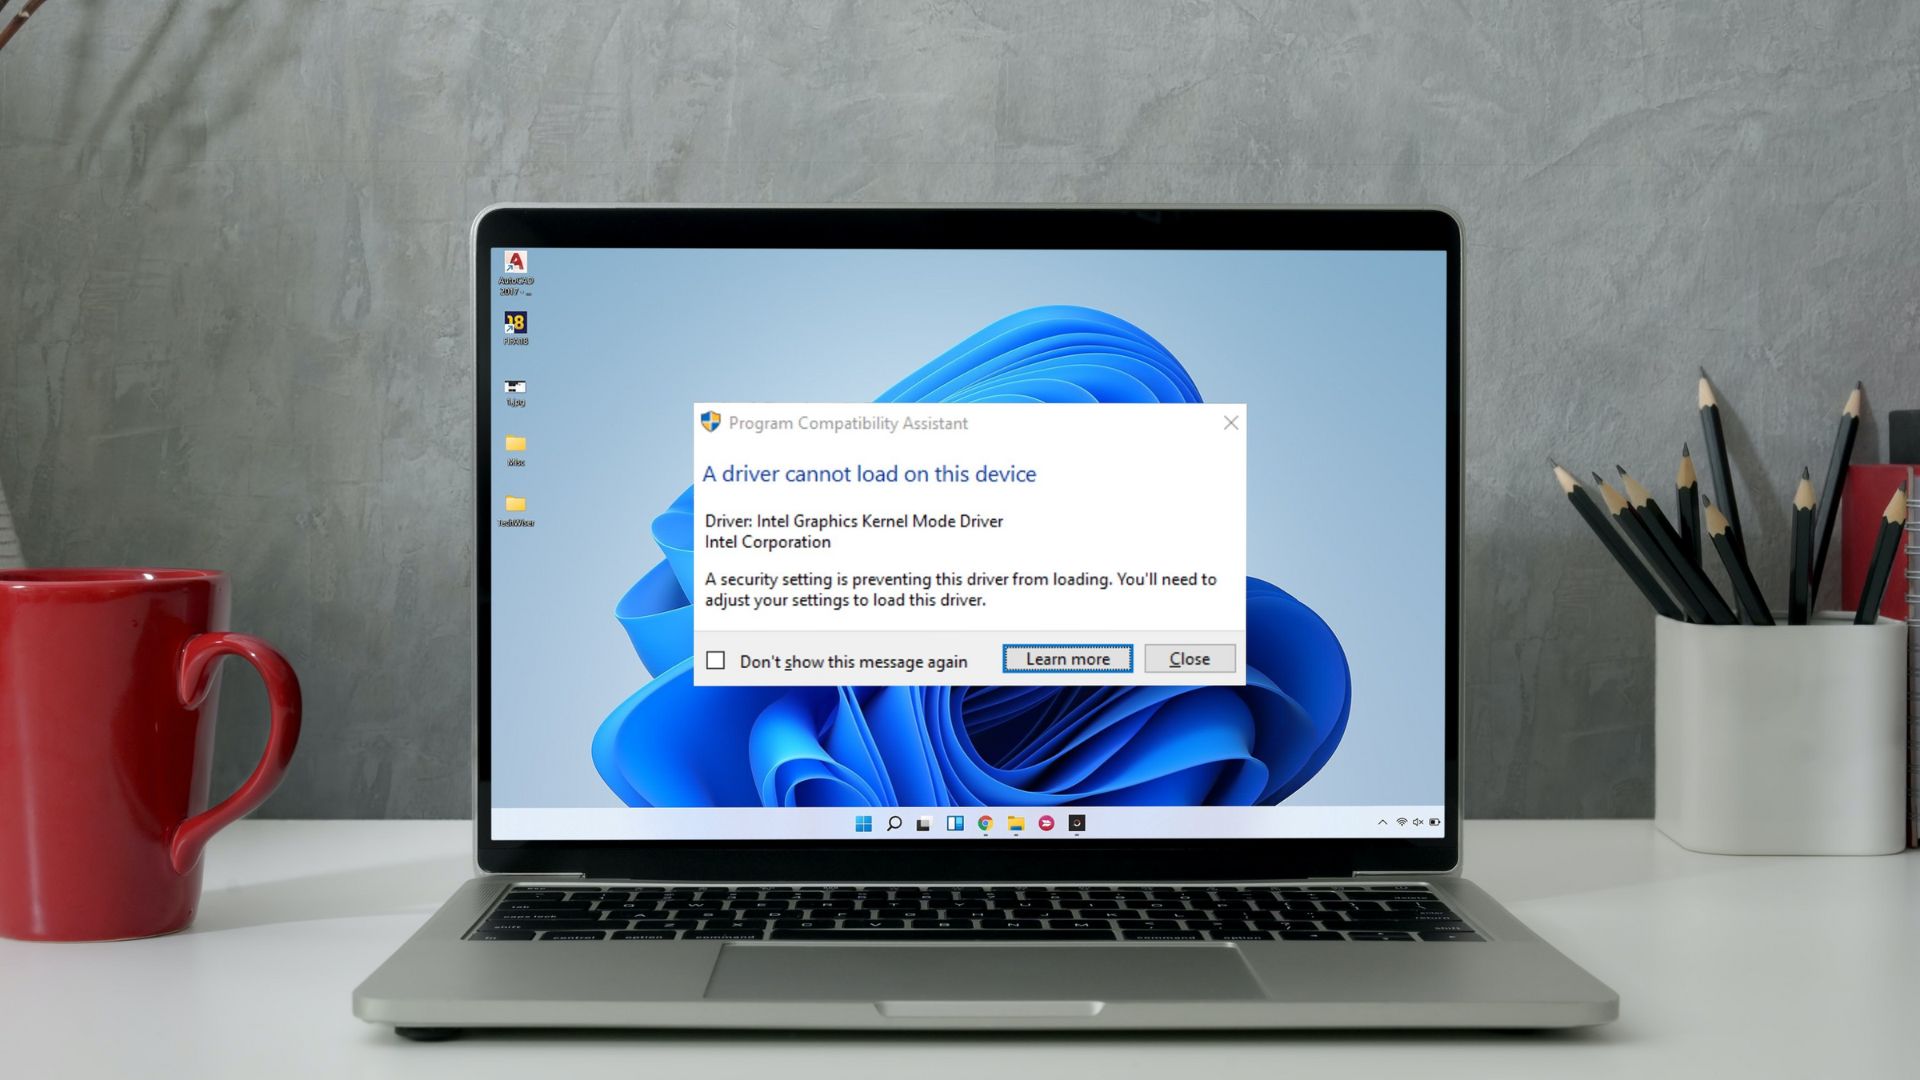
Thankfully, the error message also cites the driver that needs attention. In this post, we’ll share a few ways how to fix the ‘A driver cannot load on this device’ message on your Windows 11 PC. So, let’s start.
1. Update Driver
If a driver is incompatible, Windows may fail to load it. In most cases, you can fix such issues by merely updating the driver. Hence, you should start with that.
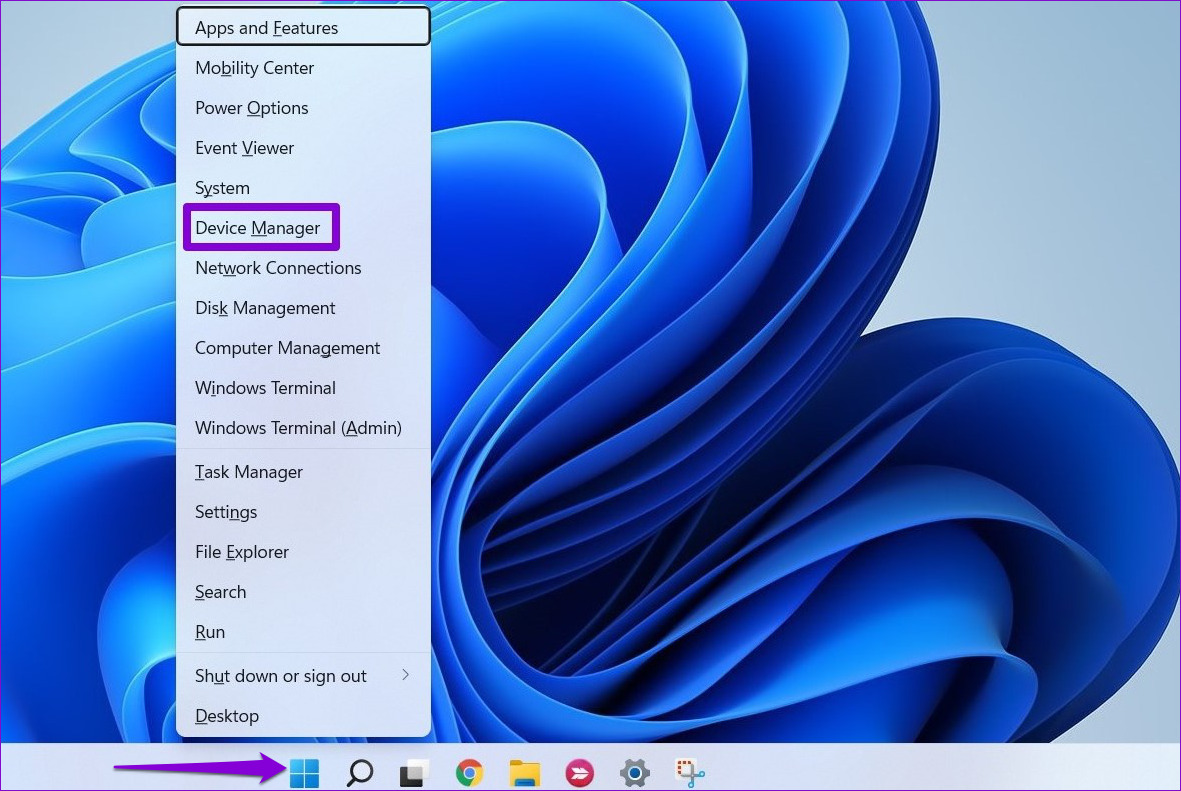
Step 1: Right-click the Start button and select Device Manager from the list.
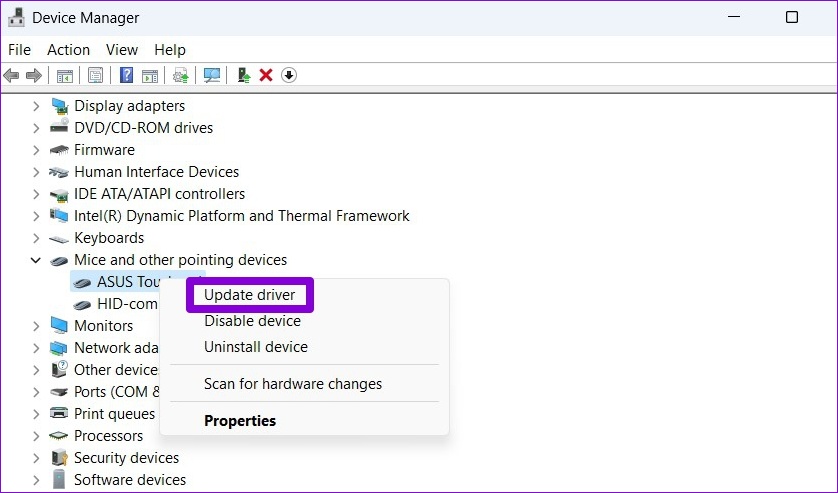
Step 2: Navigate to the problematic driver, right-click on it, and select Update driver.
After that, follow the on-screen instructions to finish updating the driver and see if the error appears again.
2. Roll Back to Previous Driver
If the ‘A driver cannot load on this device’ message only started appearing after a recent driver update, you can try reverting to the previous version of the driver. Here’s how.
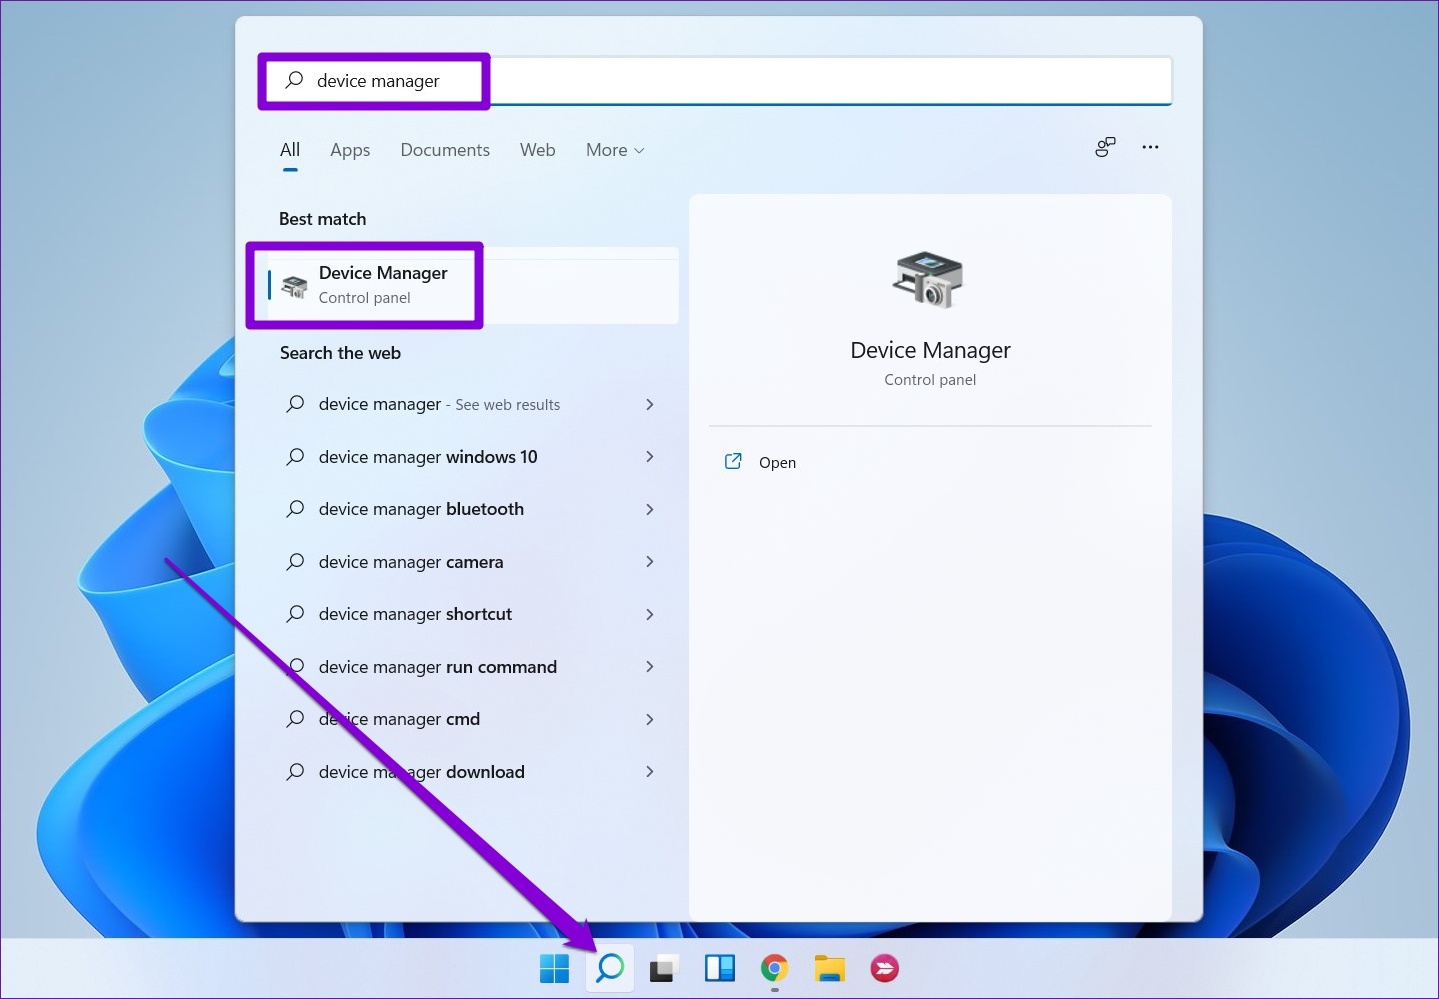
Step 1: Click on the search icon on the Taskbar, type in device manager, and press Enter.
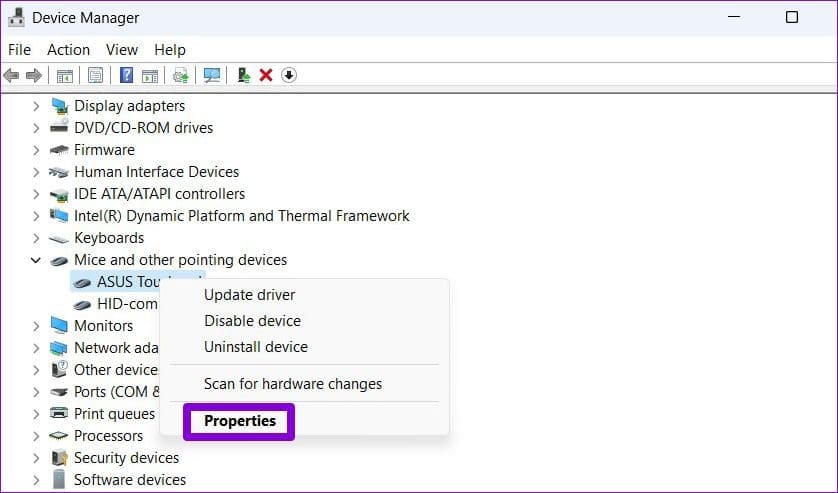
Step 2: Navigate to the troublesome driver, right-click on it, and select Properties.
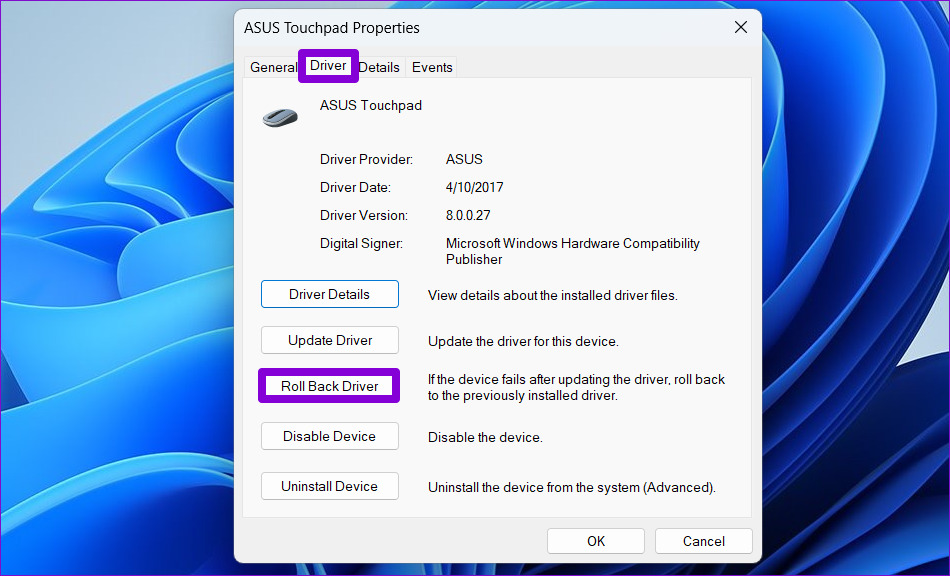
Step 3: Under the Driver tab, click on Roll Back Driver.
Step 4: Select a reason for the rollback and click on Yes to continue.
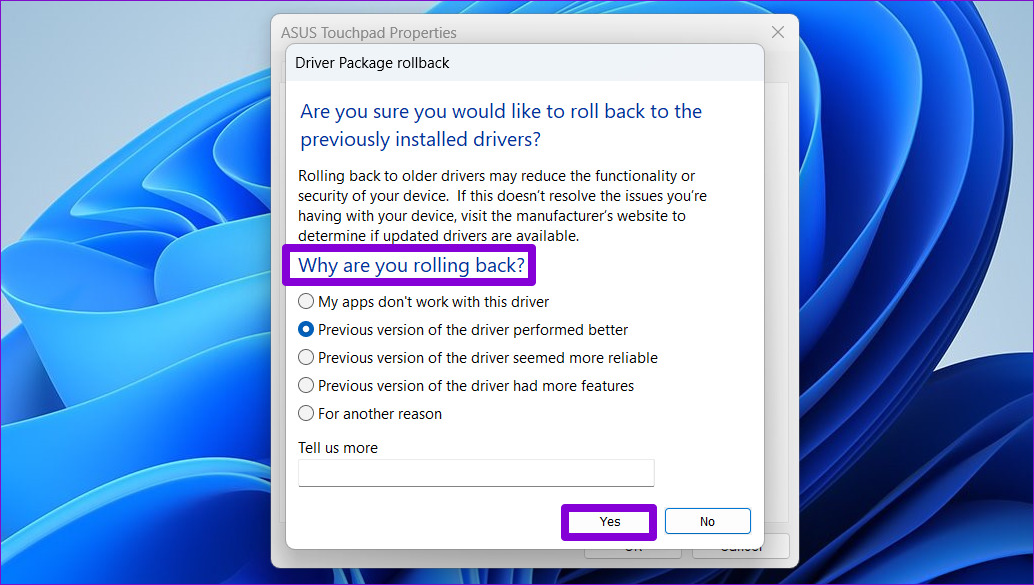
When you restart your computer, Windows will restore the previous version of driver to fix the ‘A driver cannot load on this device’ error.
3. Turn Off Memory Integrity in Windows Security
Memory Integrity is a feature in Windows Security that may prevent a driver from loading at times. You might see the ‘A driver cannot load on this device’ error when that happens. Microsoft recommends that you disable the Memory Integrity feature to get rid of it.
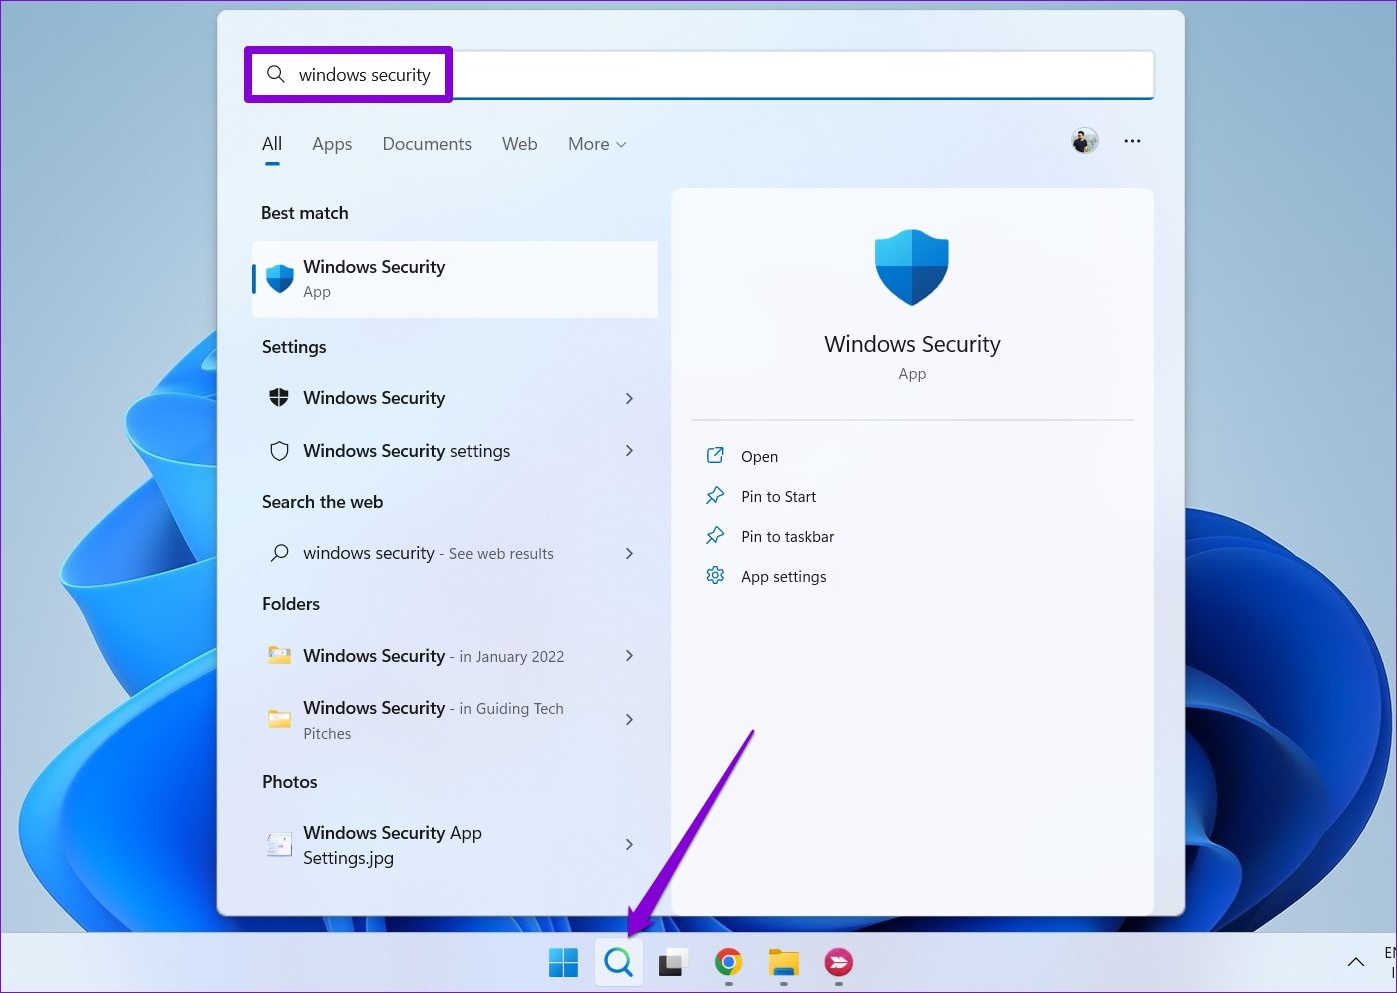
Step 1: Press the Windows key + S to open Windows Search, type in windows security, and press Enter.
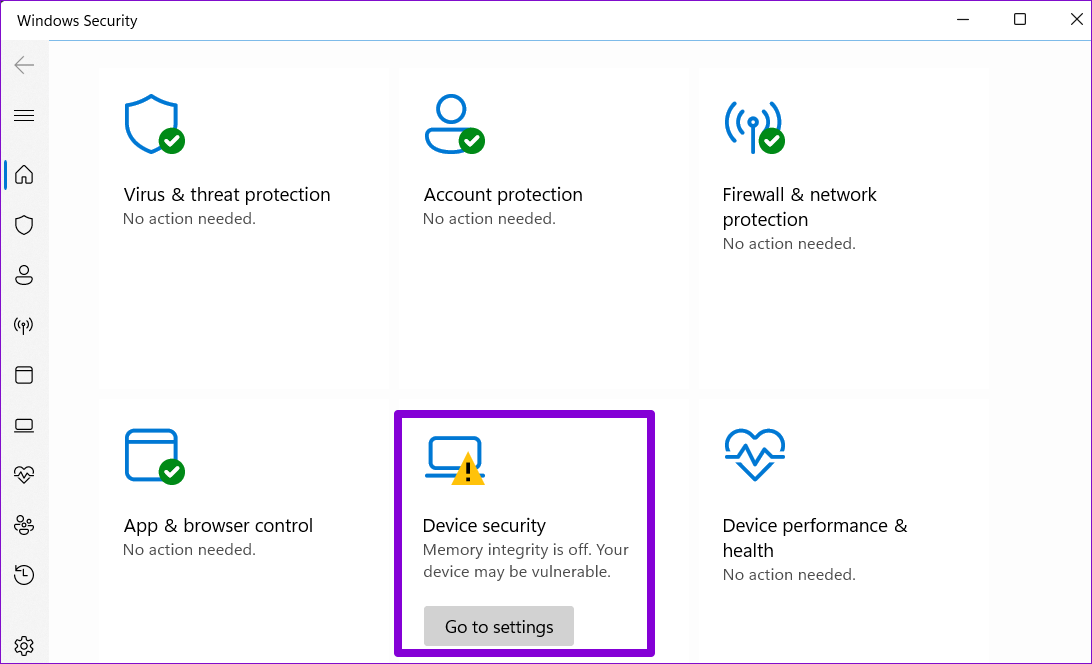
Step 2: Go to Device security.
Step 3: Click on Core isolation details.
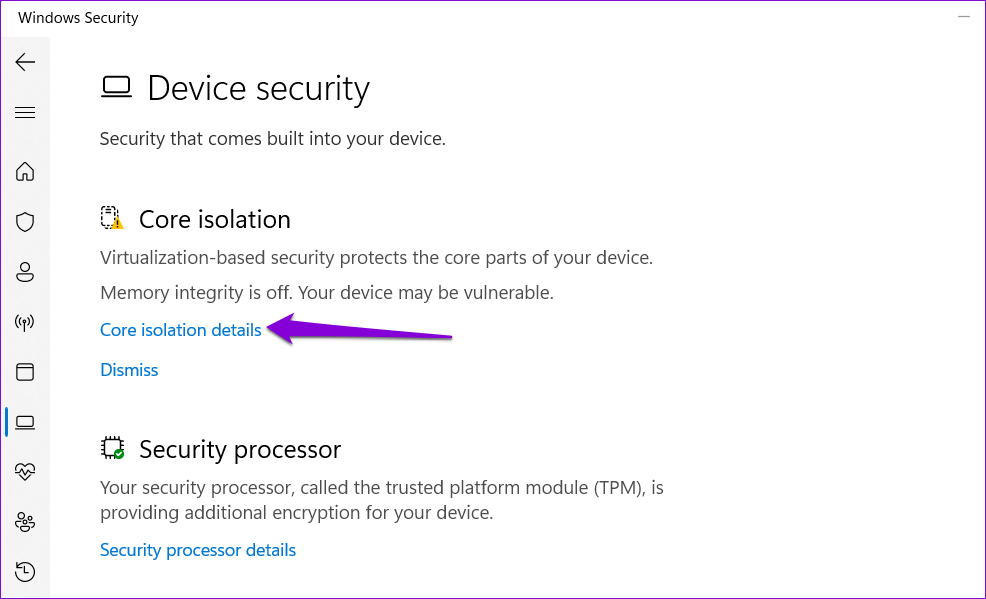
Step 4: Toggle off the Memory integrity option.
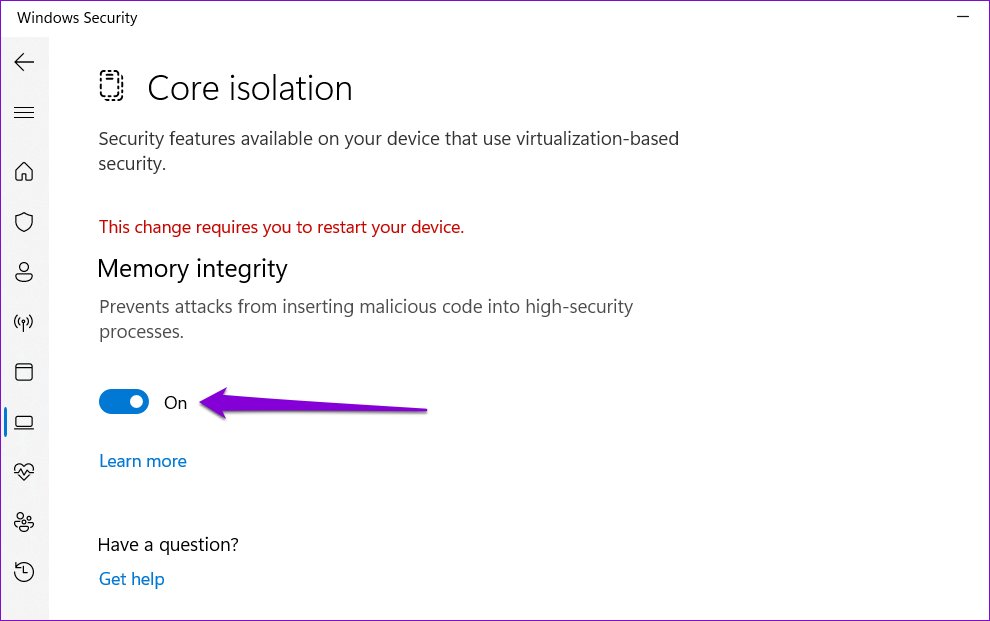
Once disabled, your driver should load fine.
4. Delete the UpperFilters and LowerFilters Registry Values
Such an error could also appear when some of the registry entries associated with the device are corrupt. Specifically, UpperFilters and LowerFilters are the two keys that you need to delete to get rid of this error.
To do so, first, you need to know the correct Class GUID (Globally Unique Identifier) of the relevant device in question. Here’s how to find it.
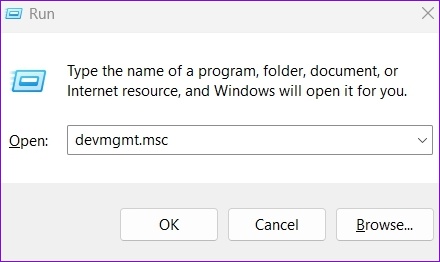
Step 1: Press the Windows key + R to open the Run dialog box. Type devmgmt.msc in the Open field and press Enter.
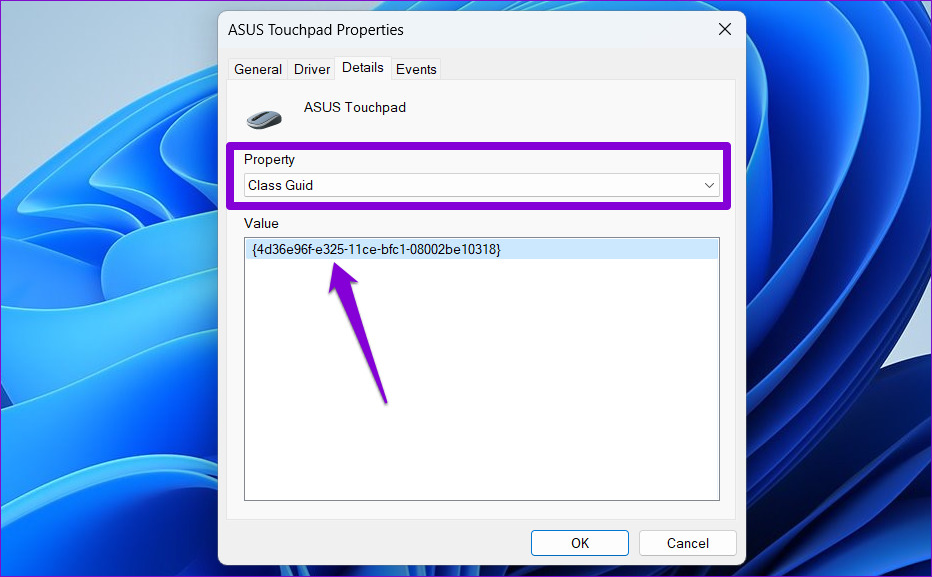
Step 2: Right-click the problematic driver (For this guide, we’re checking ASUS TouchPad driver) and select Properties.

Step 3: Switch to the Details tab and use the drop-down menu under Property to select Class GUID. Then, note down the value that appears in the box.
After that, delete the UpperFilters and LowerFilters registry values associated with the device by following the steps below. Make sure you take a backup all the registry files before that.
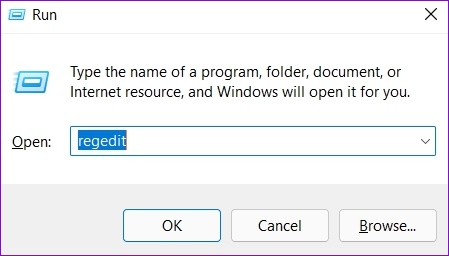
Step 1: Press the Windows key + R to open the Run dialog. Type in regedit and press Enter.
Step 2: In the Registry Editor window, paste the following path in the address bar at the top to navigate to the Class key.
HKEY_LOCAL_MACHINE\SYSTEM\CurrentControlSet\Control\Class
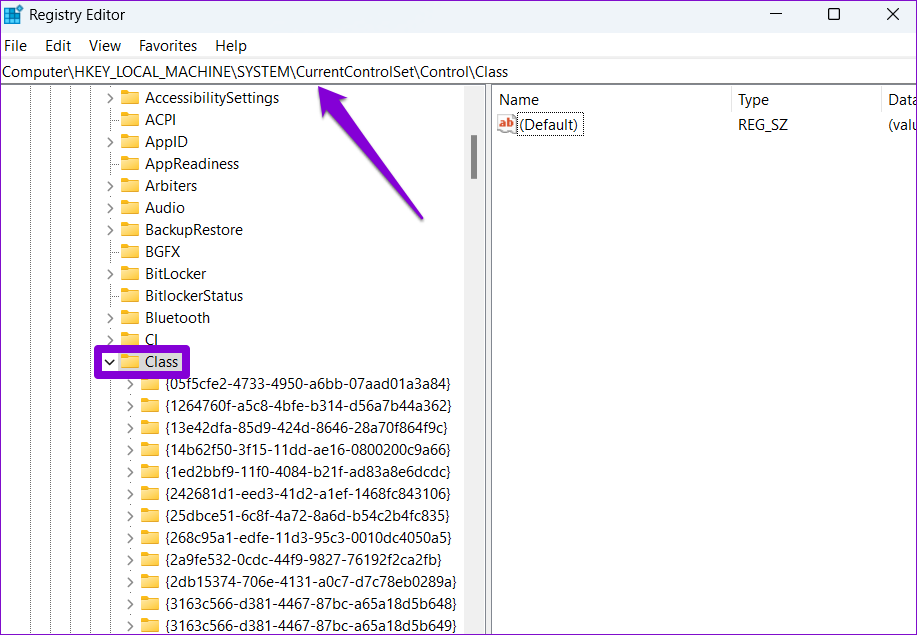
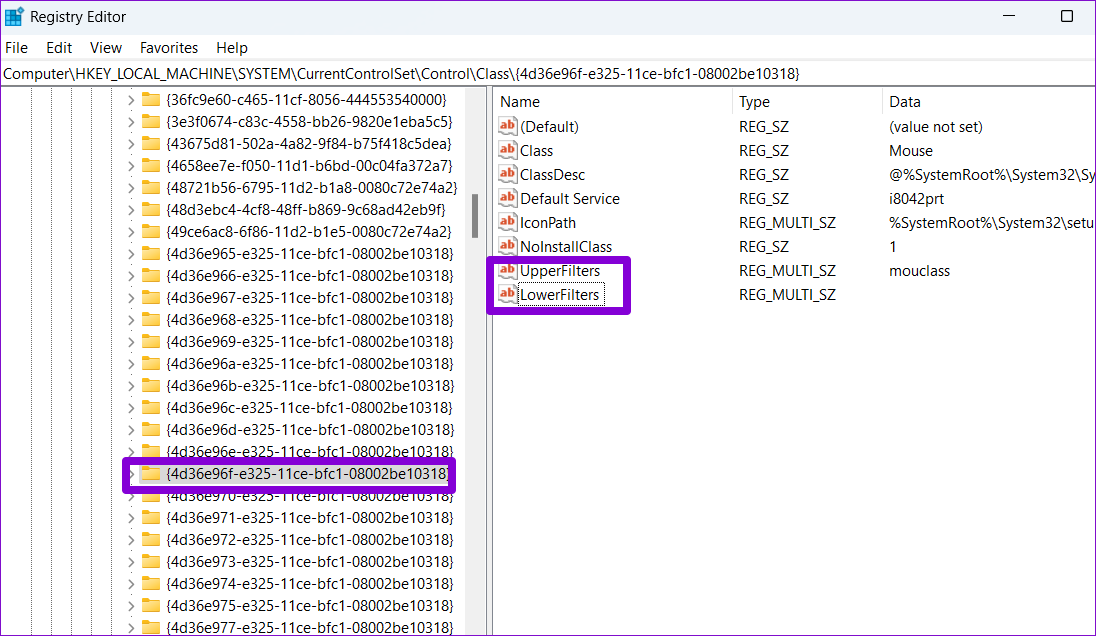
Step 3: Inside the Class key, locate the Class GUID noted earlier. On your right, you’ll see the UpperFilters and LowerFilters values. In some cases, you may only see either of the two values, which is perfectly normal.
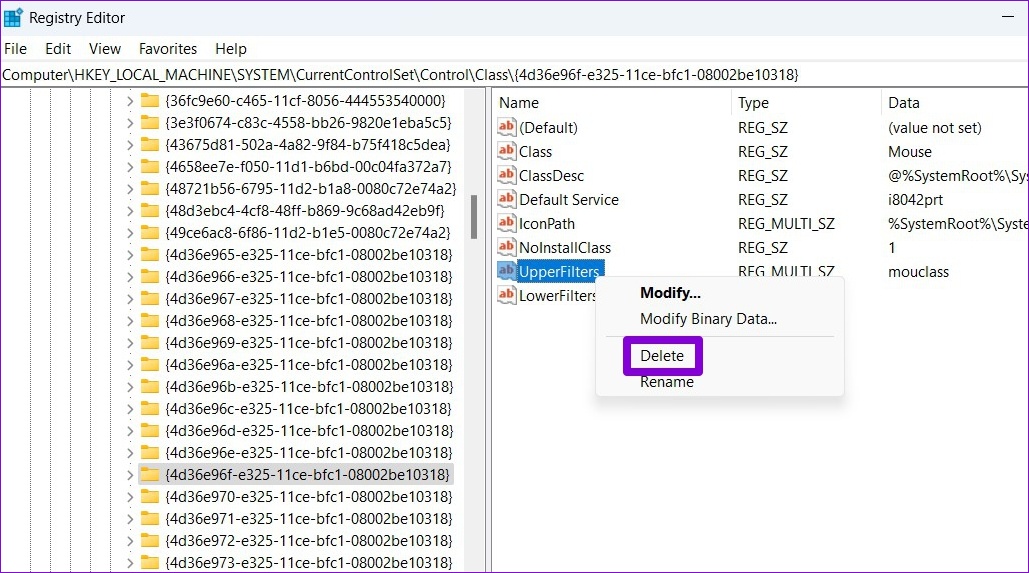
Step 4: Right-click on UpperFilters and select Delete. Choose Yes when prompted. Repeat this step to delete the LowerFilters entry as well.
Restart your PC after this and check to see if the error appears again.
5. Perform System Restore
There’s a chance that a recent change made to the system settings or a newly installed program is interfering with the driver and preventing it from loading. Performing a system restore will allow you to undo those changes by reverting to a point before the error first appeared.
To perform a system restore on Windows, follow the steps below.
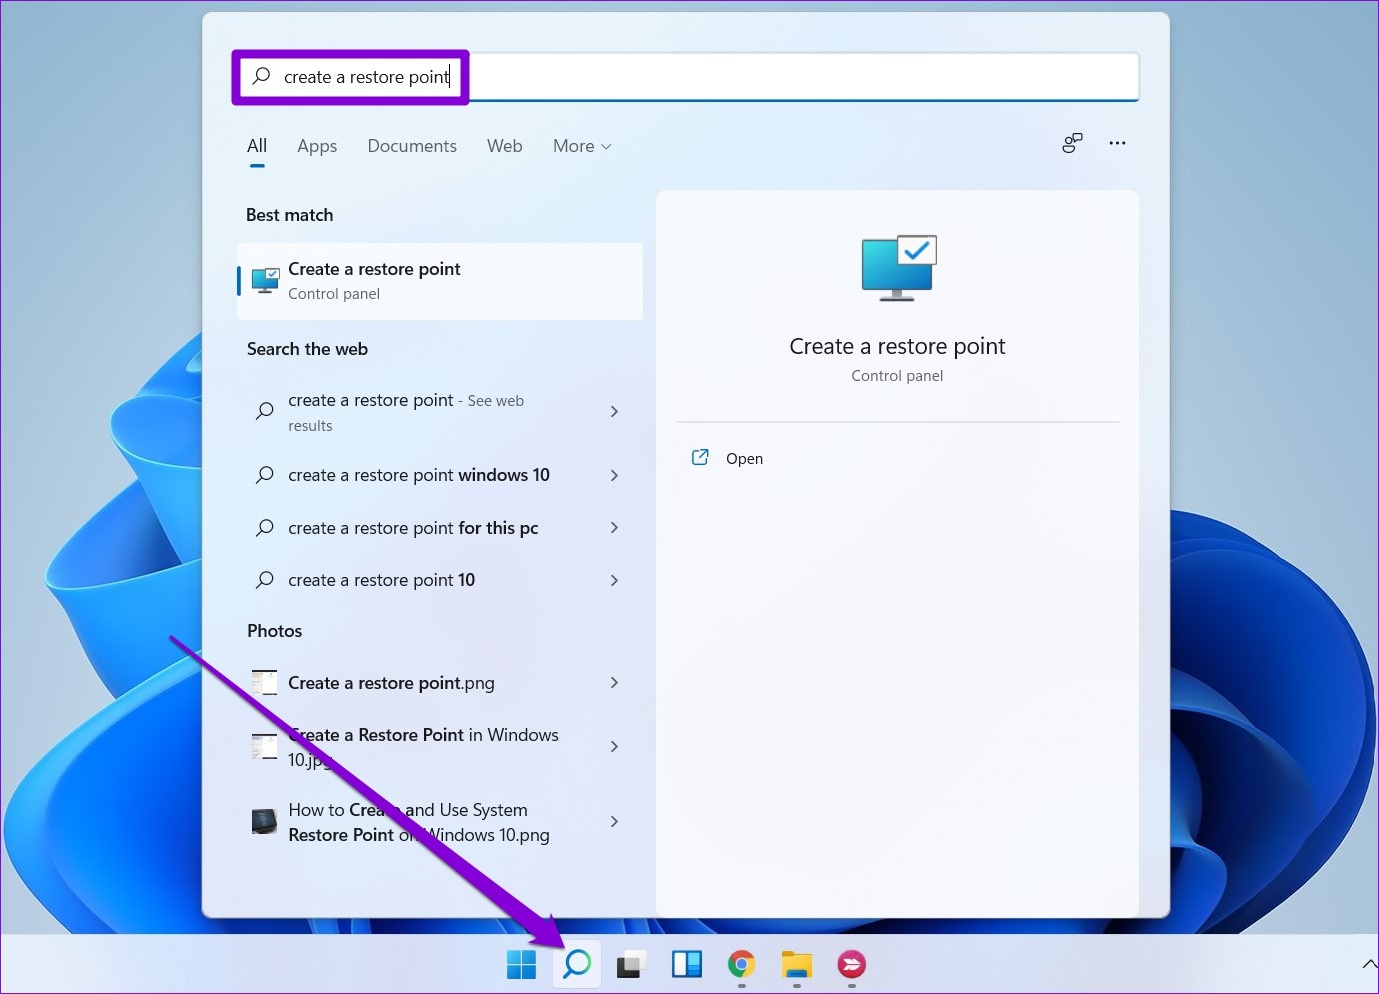
Step 1: Open the Start Menu, type in create a restore point, and press Enter.
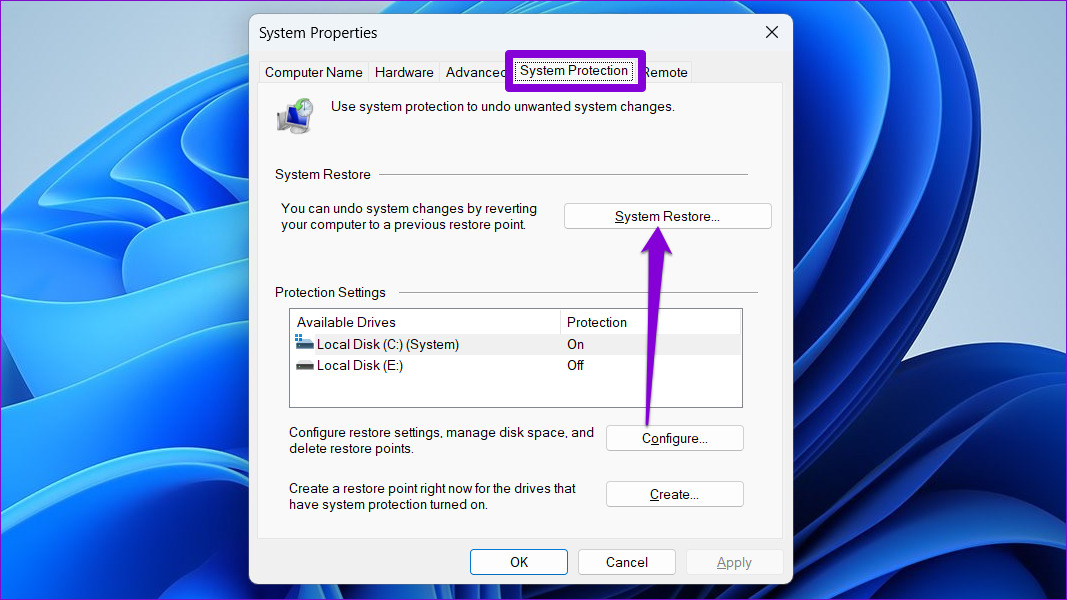
Step 2: Under the System Protection tab, click on the System Restore button.
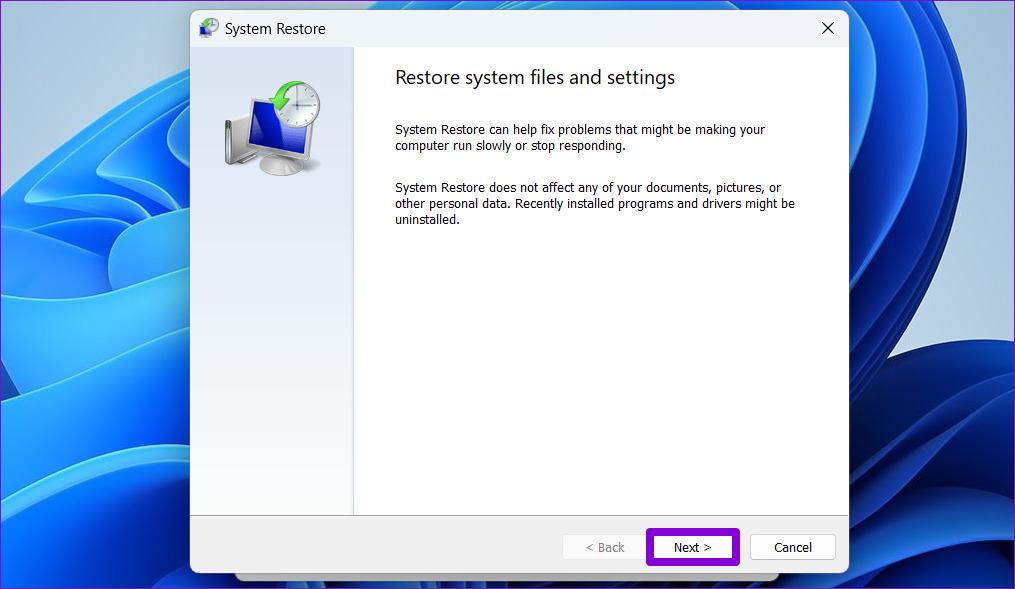
Step 3: Click on Next.
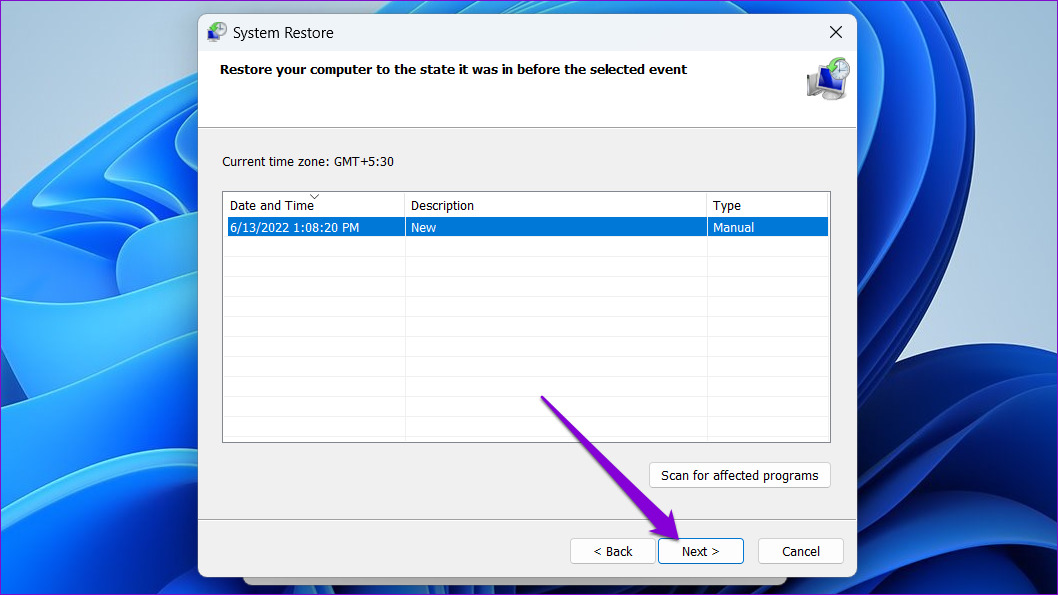
Step 4: Select the restore point before the error first occurred. Then, hit Next.
Step 5: Review all the details and hit Finish.
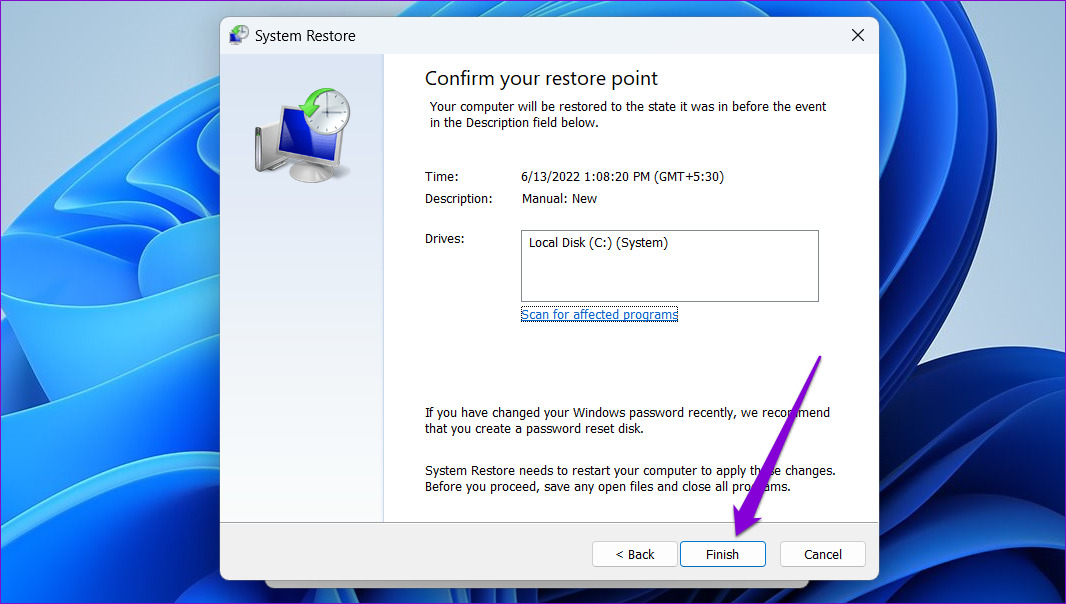
Your PC will restart and revert to the selected restore point. Following that, the error should no longer bother you.
Drive Safe
Such driver issues can affect the overall functionality of your device. Therefore, you should never ignore them. We hope that going through the solutions mentioned above should help you fix the ‘A driver cannot load on this device’ error on Windows 11, and things are back to normal.
Was this helpful?
Last updated on 20 June, 2022
The article above may contain affiliate links which help support Guiding Tech. The content remains unbiased and authentic and will never affect our editorial integrity.

