Fix 1: Use the Command Prompt to Access the Shared Folder
If you can’t open the shared folder in File Explorer, use Command Prompt to access it. Here’s how.
Step 1: Right-click on the Start icon and select Terminal (Admin) from the list.

Step 2: Type the details like PC name, server name, and shared folder name in the following command and hit Enter.
net use <DeviceName>: \\<ServerName>\<ShareName>

Fix 2: Enable File Sharing Support
You should also ensure the sharing protocol is enabled on your Windows PC. Here’s how to check.
Step 1: Click the search icon on the taskbar, type turn windows features on or off, and press Enter.
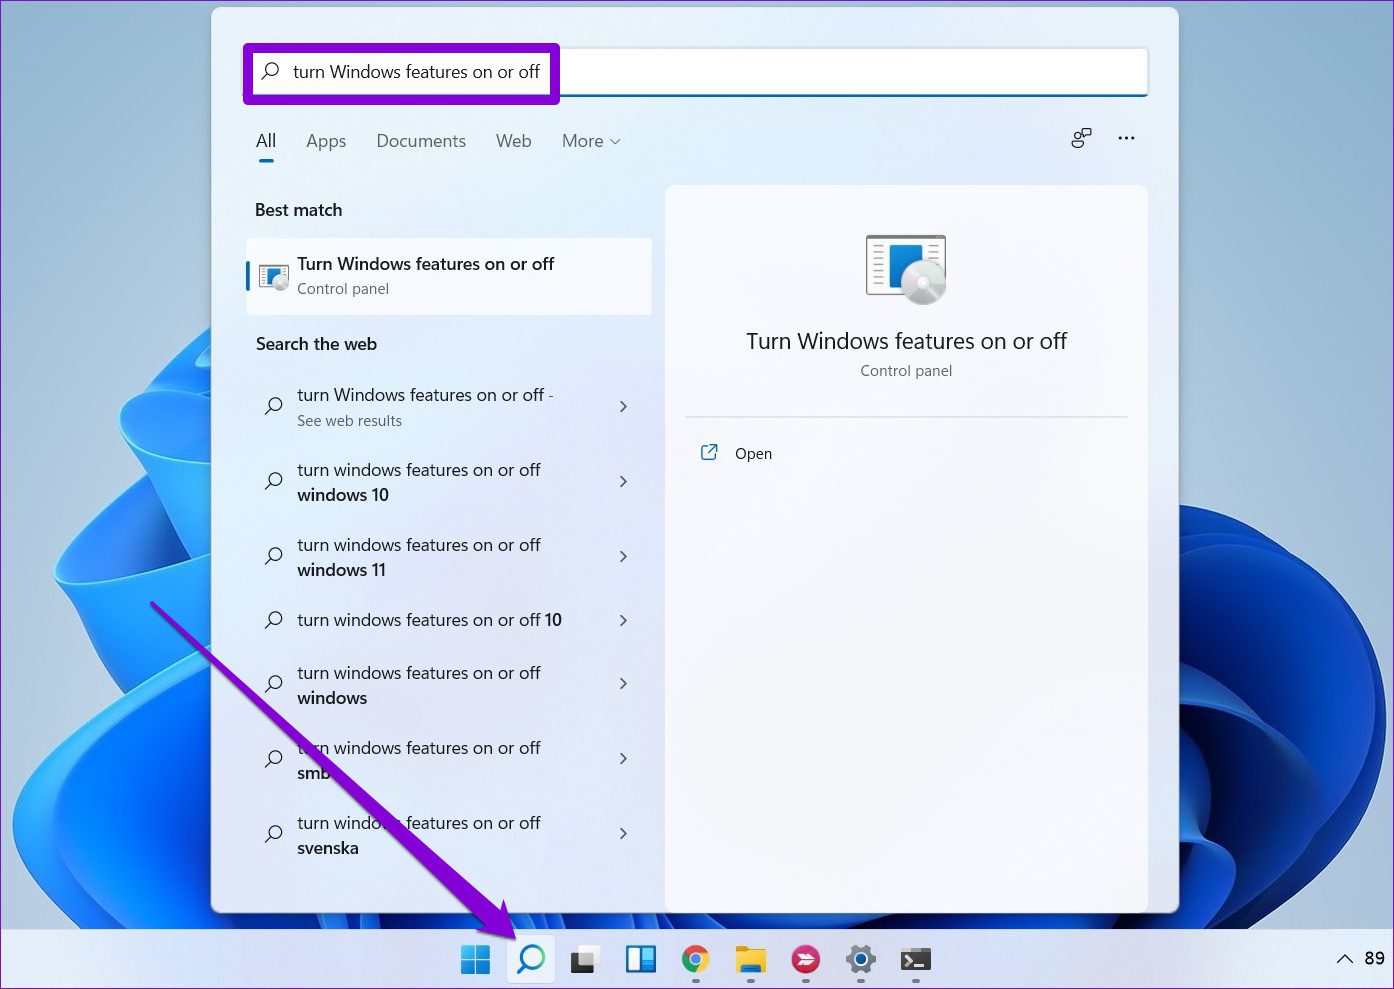
Step 2: Locate and check the box for SMB 1.0/CIFS File Sharing Support. Then, click OK.

Fix 3: Enable Network Discovery
Another reason your PC might fail to access the shared folder is if Network Discovery is disabled. Turning it on will allow your PC to view and access shared folders on the same network.
Step 1: Open the search menu, type control panel, and press Enter.

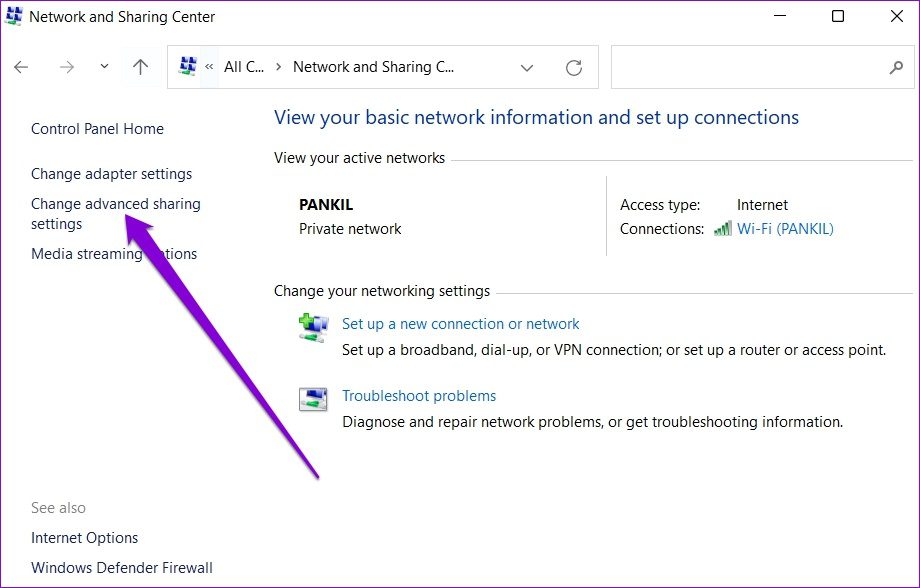
Step 2: Change the view type to Large icons. Then, click on Network and Sharing Center.

Step 3: Click on Change advance sharing settings in the left pane.
Step 4: Under Private, select Turn on network discovery.

Step 5: Expand All Networks and navigate to the Password protected sharing section. Select Turn on password protected sharing and hit Save changes.

Fix 4: Check Folder Permissions
Improper setup or lack of sharing permissions can prevent you from accessing a shared folder on Windows. To avoid this, ensure that the folder permissions for the shared folder are configured correctly.
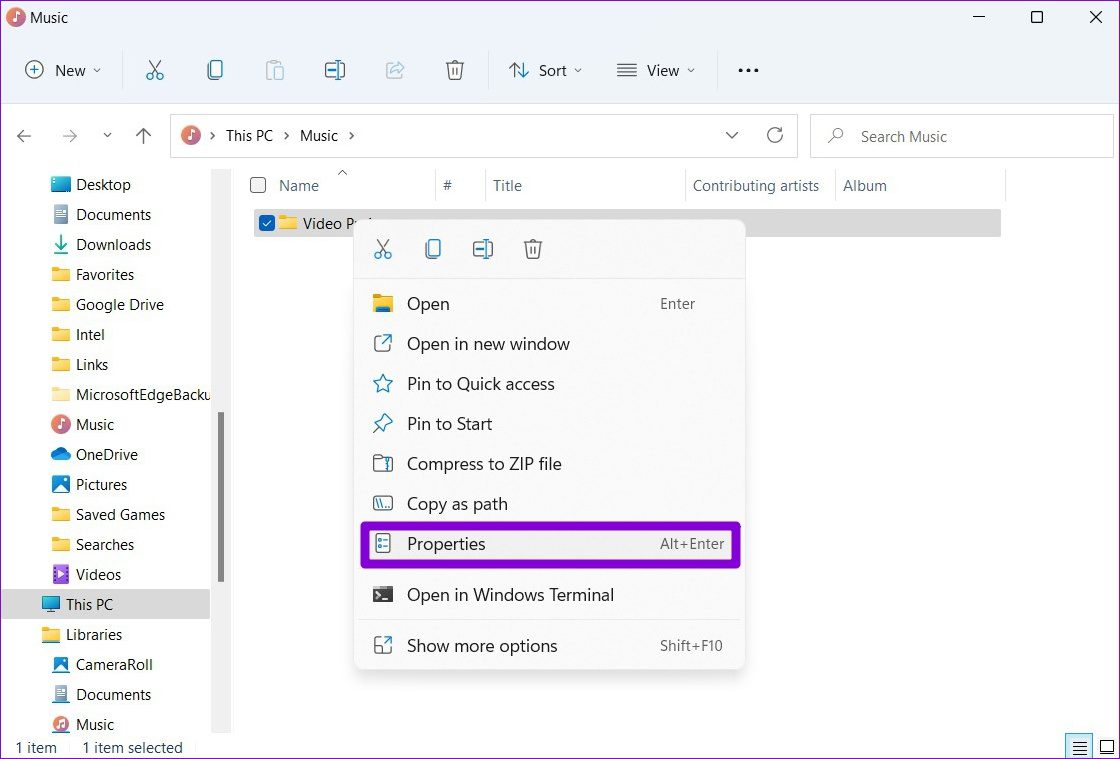
Step 1: Press the Windows key + E to launch the File Explorer. Right-click on the folder you wish to share and select Properties.
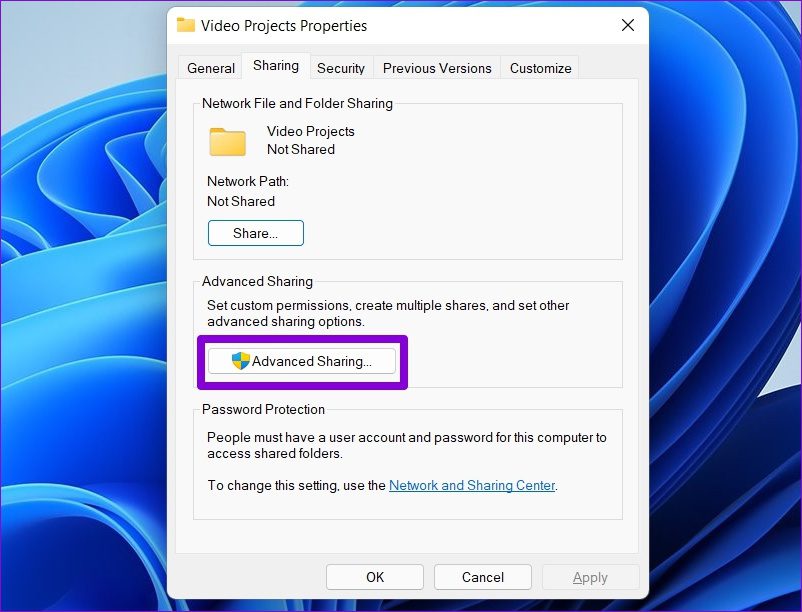
Step 2: In the Properties window, switch to the Sharing tab. Then click Advanced Sharing.
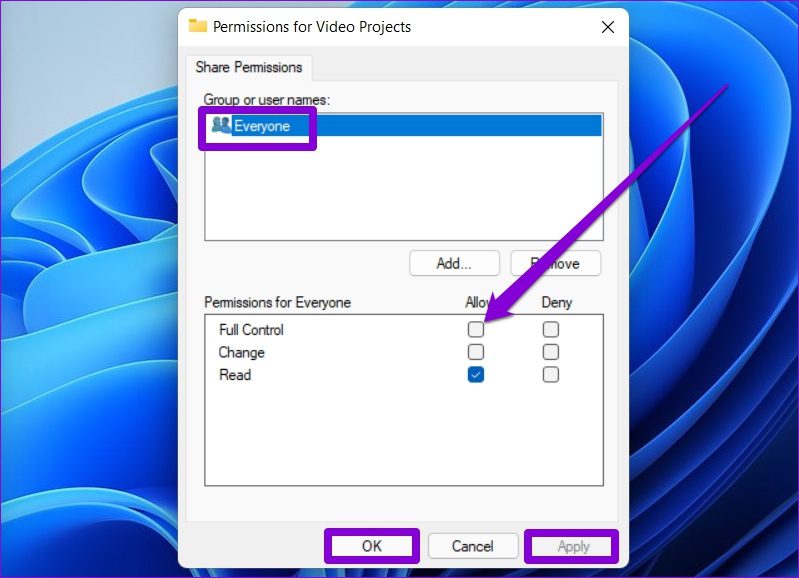
Step 3: Click on Permissions.

Step 4: Under Group or user names, select Everyone and allow Full Control. Then, hit Apply, followed by OK.
Fix 5: Start Sharing Services
If you still can’t access the shared folder on Windows, the network and sharing services on your PC may not be running. Here’s how to fix that.
Step 1: Press the Windows key + R to launch the Run command. Type services.msc and press Enter.
Step 2: In the Services window, you’ll find all the services arranged alphabetically. Right-click on Function Discovery Provider Host and select Start from the menu.

Repeat the above step to start Function Discovery Resource Publication, SSDP Discovery, and UPnP Device Host services as well.
Fix 6: Modify Registry Files
If nothing works, you can modify your PC’s file-sharing policies via the registry editor. Here are the steps:
Step 1: Press the Windows key + R, type regedit, and press Enter.
Step 2: Use the address bar at the top to navigate to the following key.
Computer\HKEY_LOCAL_MACHINE\SOFTWARE\Policies\Microsoft\Windows\LanmanWorkstation
If you can’t find LanmanWorkstation, right-click on the Windows key > go to New > Key. Name it LanmanWorkstation.

Step 3: Select the LanmanWorkstation key, right-click anywhere on the empty space on your right, and select New > DWORD (32-bit) Value. Name it AllowInsecureGuestAuth.

Step 4: Double-click the newly created DWORD and change its value data to 1. Then, click OK.

Restart your PC and access the shared folder again.
Was this helpful?
Last updated on 03 July, 2024
1 Comment
Leave a Reply
Read Next
 6 Ways to Fix “Folder Access Denied” Error on Windows
Basic Fixes Check if the folder is encrypted. The administrator could have password-locked or encrypted the folder, so contact them for assistance.
6 Ways to Fix “Folder Access Denied” Error on Windows
Basic Fixes Check if the folder is encrypted. The administrator could have password-locked or encrypted the folder, so contact them for assistance.
 3 Ways to Access the WindowsApps Folder on Windows
https://youtu.be/Sug1OVa0Q3A Method 1: Gain Access to the WindowsApps Folder via File Explorer The easiest way to open the WindowsApps folder is through File Explorer.
3 Ways to Access the WindowsApps Folder on Windows
https://youtu.be/Sug1OVa0Q3A Method 1: Gain Access to the WindowsApps Folder via File Explorer The easiest way to open the WindowsApps folder is through File Explorer.
 4 Ways to Access Secure Folder on Samsung Galaxy Phones
Method 1: From the App Drawer or Home Screen Once you create the Secure Folder the first time, you can access it easily from your phone’s App drawer or home
4 Ways to Access Secure Folder on Samsung Galaxy Phones
Method 1: From the App Drawer or Home Screen Once you create the Secure Folder the first time, you can access it easily from your phone’s App drawer or home
 6 Ways to Fix Multiple Connections to a Server or Shared Resource by the Same User
Network and file sharing issues can be frustrating, especially when encountering errors like 'Multiple Connections to a Server or Shared Resource by the Same User.' In this article, we'll delve
6 Ways to Fix Multiple Connections to a Server or Shared Resource by the Same User
Network and file sharing issues can be frustrating, especially when encountering errors like 'Multiple Connections to a Server or Shared Resource by the Same User.' In this article, we'll delve
 How to Manage and Share Files and Folder Access on Microsoft OneDrive
Like iCloud and Google Drive, Microsoft's OneDrive is a great cloud storage platform to store your data.
How to Manage and Share Files and Folder Access on Microsoft OneDrive
Like iCloud and Google Drive, Microsoft's OneDrive is a great cloud storage platform to store your data.
 2 Ways to Fix Apple Photos Not Showing Shared Albums
Basic Fixes Check Apple server status: You can visit Apple's official System Status support page to check if the Photos app is facing any issues in the backend.
2 Ways to Fix Apple Photos Not Showing Shared Albums
Basic Fixes Check Apple server status: You can visit Apple's official System Status support page to check if the Photos app is facing any issues in the backend.
 6 Best Ways to Access Windows Tools on Windows 11
Windows Tools carries useful utilities like Event Viewer, Task Scheduler, and System Configuration Tool, organized into a folder for easy access.
6 Best Ways to Access Windows Tools on Windows 11
Windows Tools carries useful utilities like Event Viewer, Task Scheduler, and System Configuration Tool, organized into a folder for easy access.
 4 Ways to Fix Exception Access Violation Error on Windows 11
Fix 1: Use the Built-in Troubleshooter The Hardware and Device troubleshooter can help you resolve hardware-related issues that trigger the Exception Access Violation error.
4 Ways to Fix Exception Access Violation Error on Windows 11
Fix 1: Use the Built-in Troubleshooter The Hardware and Device troubleshooter can help you resolve hardware-related issues that trigger the Exception Access Violation error.
The article above may contain affiliate links which help support Guiding Tech. The content remains unbiased and authentic and will never affect our editorial integrity.

I tried all the steps to connect my Windows 11 home workstation to the old Windows NT Server shared folders. It will not accept any of the login credentials that are used on the server and other Windows 7 workstations. Don’t know what else to try. Any suggestions?