Basic Fixes:
- Ensure that Streamlabs is installed in C drive: If you have installed Streamlabs on any drive other than the default location (C drive), you will face issues with game capture not working in Streamlabs in some games.
- Run Streamlabs as an administrator: Some features in Streamlabs may only work if it has administrative privileges. So, you must terminate it using the Task Manager and then open it with administrator privileges.
Fix 1: Use Window Capture as Source
If the selected capture source isn’t working and Streamlabs cannot capture the screen, you must change it. Here’s how to do it:
Step 1: Launch Streamlabs with administrator privileges.
Step 2: Click on the plus icon next to the Sources option.

Step 3: Select a source from the available options and click the Add Source button.

Step 4: Enter a name for the new capture source and click the Add Source button.

Step 5: If you pick the window capture option, select any open window from the list and click the Done button.

Step 6: Launch a game and check if Streamlabs works appropriately.
Fix 2: Enable the Anti-cheat Hook
Popular AAA multiplayer games use anti-cheat services to deter players from using hacks to win games. But if you use the Game Capture mode and haven’t enabled the anti-cheat hook, the Game Capture won’t work. Here’s how to enable it in Streamlabs:
Step 1: Launch Streamlabs with administrative privileges.
Step 2: Click the Settings icon next to the Game Capture option.

Step 3: Select the Use anti-cheat compatibility hook option.

Step 4: Close the Settings window.
Step 5: Start the capture and check if it records the game without issues.
Fix 3: Disable Third-Party In-Game Overlays
If you use another overlay like Windows Game Bar or NVIDIA GeForce while using Streamlabs, you must disable it. Windows Game Bar, in particular, runs in the background, and you must disable it from doing so. Here’s how to do it:
Step 1: Press the Windows key + I to open the Settings app.
Step 2: Click on the System option in the left-hand side vertical menu.

Step 3: Scroll down and click on the System Components option.

Step 4: Click on the three-dots button next to the Game bar. Select the Advanced options.

Step 5: Scroll down and click on the Terminate button.

Step 6: Go to the Background Component permissions section. Expand the drop-down list and select the Never option.

Step 7: Close the Settings app.
Repeat the following steps to disable the NVIDIA GeForce Experience overlay:
Step 1: Go to the system tray icons area and right-click on the NVIDIA GeForce Experience option.

Step 2: Click on the Settings option.
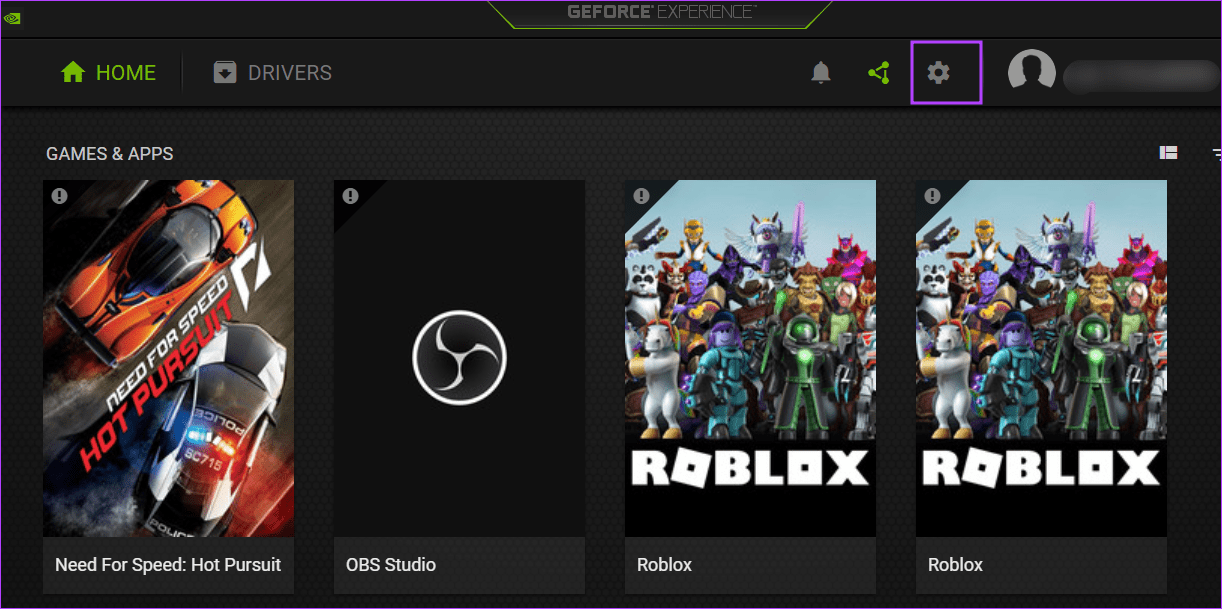
Step 3: Scroll down to the In-Game Overlay option. Click on the toggle to disable it.

Step 4: Close the NVIDIA GeForce Experience app.
Was this helpful?
Last updated on 17 July, 2024
Read Next
 8 Fixes for Microphone Not Working in Xbox Game Bar on Windows 11
Basic Fixes Reconnect the external microphone: Plug out the external connected microphone, wait a few seconds, and reconnect it.
8 Fixes for Microphone Not Working in Xbox Game Bar on Windows 11
Basic Fixes Reconnect the external microphone: Plug out the external connected microphone, wait a few seconds, and reconnect it.
 3 Fixes if GeForce Experience Not Recording Game Audio in Windows 11
Common Fixes Close and restart GeForce Experience - Click the Arrow button in the system tray notifications area and right-click the NVIDIA icon to select Exit.
3 Fixes if GeForce Experience Not Recording Game Audio in Windows 11
Common Fixes Close and restart GeForce Experience - Click the Arrow button in the system tray notifications area and right-click the NVIDIA icon to select Exit.
 7 Best Fixes for Game Controller Acting Like a Mouse on Windows 11
Fix 1.
7 Best Fixes for Game Controller Acting Like a Mouse on Windows 11
Fix 1.
 5 Fixes When Discord Is Picking Up Game Audio in Windows 11
Before going into the fixes, ensure the USB connector is connected to the motherboard USB port.
5 Fixes When Discord Is Picking Up Game Audio in Windows 11
Before going into the fixes, ensure the USB connector is connected to the motherboard USB port.
 How to Solve Windows 10 Game Bar Not Working and Other Common Issues
With the recent Windows 10 version 1809 update, Microsoft pushed a bunch of improvements to the Xbox Game Bar.
How to Solve Windows 10 Game Bar Not Working and Other Common Issues
With the recent Windows 10 version 1809 update, Microsoft pushed a bunch of improvements to the Xbox Game Bar.
 5 Ways to Fix Xbox Game Bar Not Working on Windows 11
Fix 1: Enable Xbox Game Bar in Windows Settings If you can't launch the Xbox Game Bar from your connected game controller on Windows 11, head to Windows Settings to
5 Ways to Fix Xbox Game Bar Not Working on Windows 11
Fix 1: Enable Xbox Game Bar in Windows Settings If you can't launch the Xbox Game Bar from your connected game controller on Windows 11, head to Windows Settings to
 Best Ways to Capture Scrolling Screenshots on macOS
When you want to capture an entire webpage, document, or any content that extends beyond the visible screen, a scrolling screenshot is the best route.
Best Ways to Capture Scrolling Screenshots on macOS
When you want to capture an entire webpage, document, or any content that extends beyond the visible screen, a scrolling screenshot is the best route.
 How to Capture and Edit Screenshots on Mac
Capture Screenshots on Mac Just like Windows, macOS comes with a built-in screenshot-capturing tool that you can summon with keyboard shortcuts.
How to Capture and Edit Screenshots on Mac
Capture Screenshots on Mac Just like Windows, macOS comes with a built-in screenshot-capturing tool that you can summon with keyboard shortcuts.
The article above may contain affiliate links which help support Guiding Tech. The content remains unbiased and authentic and will never affect our editorial integrity.