Check if the Error is Software or Hardware-based
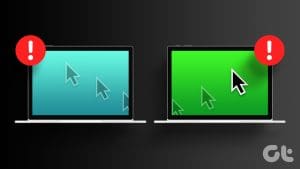
To fix the vertical blue lines on your laptop screen, you need to find the root cause. The image below shows a blue line appearing randomly on a laptop. You can determine whether it is a software-related or a hardware issue in a couple of ways. Try both options to make sure what exactly you are dealing with.

Method 1: Take a Screenshot
This is the easiest way to find the origin of the problem. As you may know, a screenshot captures whatever visuals are displaying on the screen at a time. If it’s Windows bug, then the blue line will appear on the captured screenshot too.
Step 1: Press the Windows + Print Screen keys together to take a screenshot of your desktop window.
Step 2: Now, navigate to Windows Explorer > Pictures > Screenshots. If you can see the vertical blue line in the screenshot, then its software related otherwise its hardware breakdown.

In the image above, you can see that there is no blue line appearing on the screenshot, which leads us to believe that the issue may be related to hardware. Now follow the second option to confirm your findings.
Method 2: Entering BIOS
BIOS (Basic Input/Output System) is the program a personal computer’s microprocessor uses to get the computer system started after you turn it on. BIOS is free of the Operating System and as a result, it can be helpful in such tasks.
Step 1: First off, shut down your laptop completely.
Step 2: Now, press the power key and keep pressing down F2 key or the respective keys shown on the screen when the system boots.
Once you’re in the BIOS, you should be able to verify if the line is visible there or not. If it’s a hardware issue, then the vertical blue line will be visible.
How to Fix Vertical Blue Lines
For Software Related Issues
Most of the Windows bugs are tied to outdated drivers. Thankfully, it’s quite easy to check for an update to the latest drivers. Here’s how.
Step 1: Press the Windows + I keys on your keyboard to open Settings.
Step 2: Inside, switch to the Windows Update tab on the left side. Then, click on Check for Updates.

Alternatively, you can manually check and update the drives from the device manager.
Step 3: To do that, press the Windows key + R shortcut to launch the Run dialog box. Type in the following command and press Enter.
devmgmt.mscStep 4: In the device manager, expand Display adapters. Then, right-click your graphics card device and select Update driver.

Step 5: Select Search automatically for updated driver software.

And that’s it. Windows will automatically search online for new drivers, and then install them. Once it is installed, you will be asked to restart your PC. Close the window and restart the computer.
For Hardware Issues
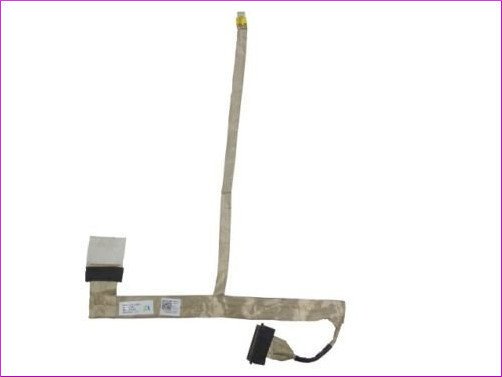
Now, that’s a tricky one and requires some tools and expertise to solve it. First, the blue lines may be appearing due to a loose display cable. The cable that connects the screen to the base of the laptop usually runs through the rotating hinge. And due to the continuous opening/closing of the hinge, the cable may need re-positioning.
Warning:
You can follow the guide here to remove and attach the same cable with a little caution. And if it doesn’t work then you will need to buy the new display cable for your laptop and replace the old one by following the same guide.
However, the display cable could only be one of the possible issues. The LCD panel might be faulty, or there might be a shorting in the laptop’s motherboard.
In either case, the best solution would be to visit a service center. A professional will be able to closely examine why there are vertical blue lines on your laptop’s display and accordingly offer you a repair or replacement. If your laptop is under warranty, we suggest visiting the official service center only.
Was this helpful?
Last updated on 09 July, 2024
Read Next
 3 Ways to Fix Vertical or Horizontal Lines on Android Screen
Basic Fixes Restart your device: Restart your device to remove any bugs or glitches causing the problem.
3 Ways to Fix Vertical or Horizontal Lines on Android Screen
Basic Fixes Restart your device: Restart your device to remove any bugs or glitches causing the problem.
 3 Ways to Fix Telegram Photos Not Appearing in Gallery
Basic Fixes Check network connection: If your device is not connected to the internet or has an issue, Telegram won't download pictures to your gallery.
3 Ways to Fix Telegram Photos Not Appearing in Gallery
Basic Fixes Check network connection: If your device is not connected to the internet or has an issue, Telegram won't download pictures to your gallery.
 5 Fixes for Blue Screen of Death When PC Is Idle on Windows 11
Try Basic Fixes Uninstall Windows update: If you notice the Blue Screen of Death when Windows 11 is idle after an update, you should roll back the Windows update.
5 Fixes for Blue Screen of Death When PC Is Idle on Windows 11
Try Basic Fixes Uninstall Windows update: If you notice the Blue Screen of Death when Windows 11 is idle after an update, you should roll back the Windows update.
 5 Best Ergonomic Vertical Mouse To Buy in 2024
Traditional mice can wreak havoc on your hand and wrist health, leading to discomfort, reduced productivity, and even potential injuries like carpal tunnel syndrome.
5 Best Ergonomic Vertical Mouse To Buy in 2024
Traditional mice can wreak havoc on your hand and wrist health, leading to discomfort, reduced productivity, and even potential injuries like carpal tunnel syndrome.
 Top 6 Ways to Fix Amazon Echo Stuck on Blue Light
An Amazon Echo speaker or display can be of great help if you wish to add a touch of smartness to your home.
Top 6 Ways to Fix Amazon Echo Stuck on Blue Light
An Amazon Echo speaker or display can be of great help if you wish to add a touch of smartness to your home.
 Can’t Type in CMD? Here Are 5 Ways to Solve It
A couple of days ago, I was trying to troubleshoot the 100% disk usage error on my Windows 10 PC.
Can’t Type in CMD? Here Are 5 Ways to Solve It
A couple of days ago, I was trying to troubleshoot the 100% disk usage error on my Windows 10 PC.
 Mouse Without Borders Not Working? 8 Ways to Solve It
The seamless flow between multiple computers with Mouse Without Borders is a productivity dream.
Mouse Without Borders Not Working? 8 Ways to Solve It
The seamless flow between multiple computers with Mouse Without Borders is a productivity dream.
The article above may contain affiliate links which help support Guiding Tech. The content remains unbiased and authentic and will never affect our editorial integrity.