Restrict or Disable Messaging on Tumblr
If you’re tired of getting constant message notifications on Tumblr, disabling the Instant Messaging feature becomes reasonable. Sadly, there’s no native setting to completely turn it off. However, you can restrict the number of received messages to only blogs and people you follow — translating to turning off instant messaging.
Once restricted, you can only receive messages from Tumblrs you follow and no followers or random visitors should be able to message you (unless you’ve chatted with them previously). Follow these steps to enable it on your desktop and smartphone:
On Desktop
Step 1: Access Tumblr in a new tab on your browser and select Settings from the left sidebar.
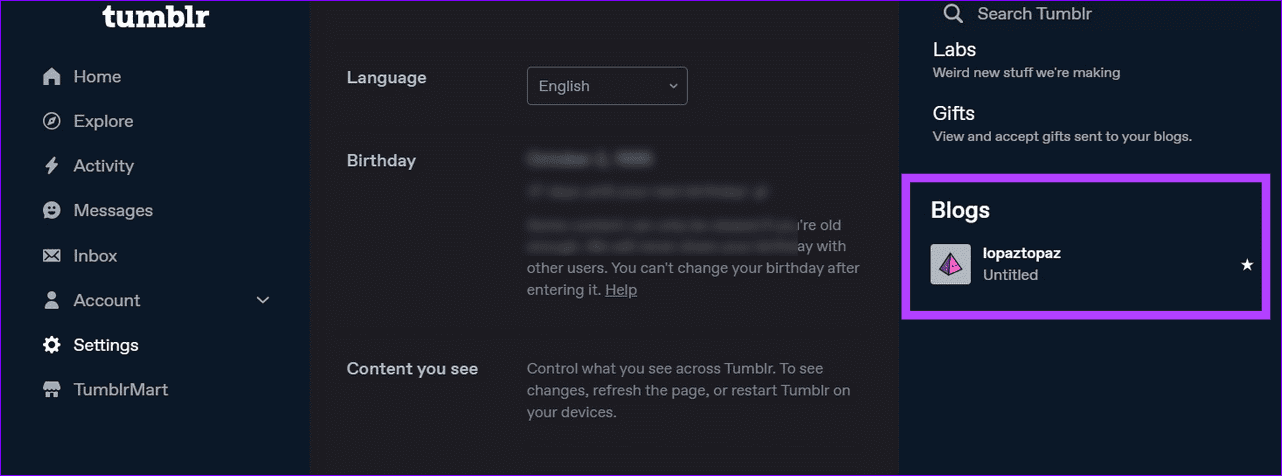
Step 2: Select your desired Tumblr blog to configure its preferences.
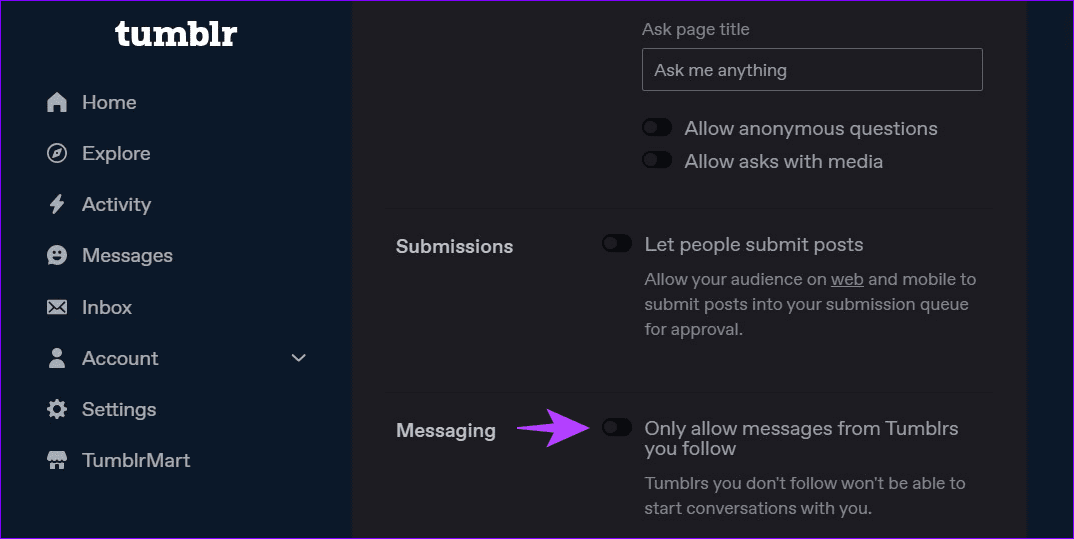
Step 3: Scroll down to Messaging and turn on its toggle to restrict messaging from accounts you don’t follow on Tumblr.
On Phone
Step 1: Open the Tumblr app, select the Account icon at the bottom right, and tap the Gear icon.
Step 2: Select Account settings and tap Messaging.


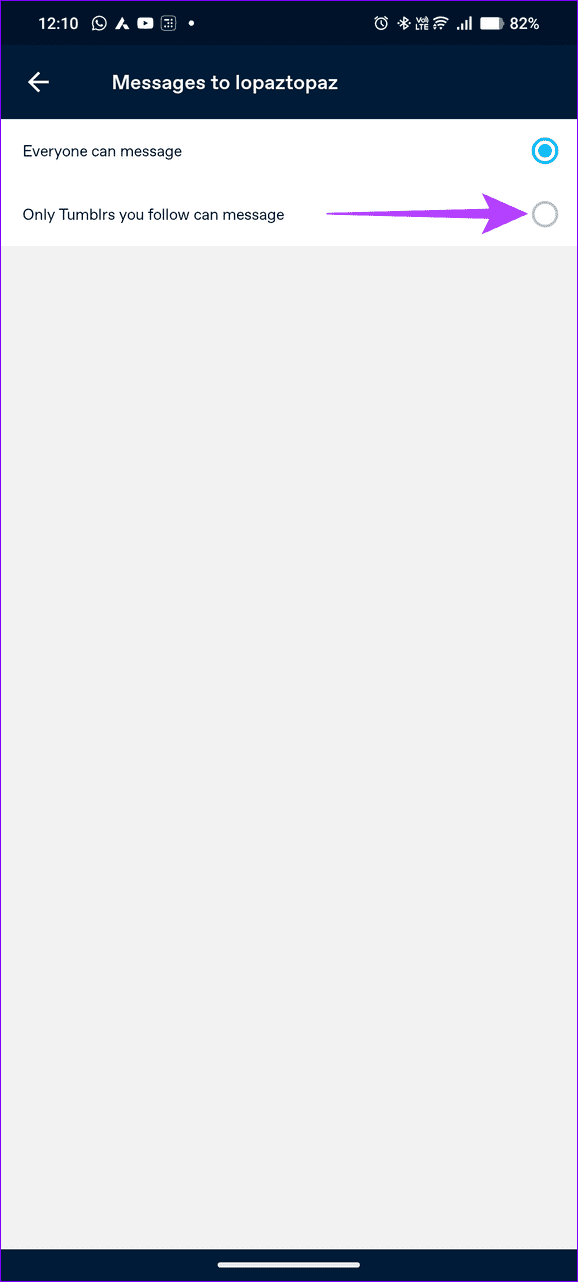
Step 3: Select your Tumblr blog and enable Only Tumblrs you follow can message to restrict Instant messaging on the platform.

Was this helpful?
Last updated on 26 August, 2024
Read Next
 How to Disable and Remove Truecaller Messaging Service (and Cool Tricks)
Step 1: Begin by going to Settings and searching for Default Apps.
How to Disable and Remove Truecaller Messaging Service (and Cool Tricks)
Step 1: Begin by going to Settings and searching for Default Apps.
 How to Disable Tumblr Safe Mode or Bypass it Without an Account
Tumblr is a great place to get your daily fix of cool GIFs and memes.
How to Disable Tumblr Safe Mode or Bypass it Without an Account
Tumblr is a great place to get your daily fix of cool GIFs and memes.
 How to Disable or Restrict Apps from Getting Deleted on iPhone
Method 1: Don't Allow Deleting Apps In the Content Restrictions menu on your iPhone, you can disable deleting apps.
How to Disable or Restrict Apps from Getting Deleted on iPhone
Method 1: Don't Allow Deleting Apps In the Content Restrictions menu on your iPhone, you can disable deleting apps.
 10 Best Messaging Apps That Work Without a Phone Number
Sharing your phone number on chatting platforms can expose you to unwanted spam, potential security breaches, and even compromise your identity.
10 Best Messaging Apps That Work Without a Phone Number
Sharing your phone number on chatting platforms can expose you to unwanted spam, potential security breaches, and even compromise your identity.
 Restrict vs Block on Facebook: Which Privacy Setting Should You Use
Picture this — your parents join Facebook, and they add you.
Restrict vs Block on Facebook: Which Privacy Setting Should You Use
Picture this — your parents join Facebook, and they add you.
 How to Restrict WhatsApp Group Activities
WhatsApp Group Restrictions WhatsApp offers several features that allow group admins to set boundaries and control the flow of information.
How to Restrict WhatsApp Group Activities
WhatsApp Group Restrictions WhatsApp offers several features that allow group admins to set boundaries and control the flow of information.
 What Happens When You Restrict Someone on Instagram
Here is the list of things you should know when restricting someone on Instagram.
What Happens When You Restrict Someone on Instagram
Here is the list of things you should know when restricting someone on Instagram.
 4 Ways to Fix “We Restrict Certain Activity to Protect Our Community” on Instagram
Basic Fixes Check if Instagram is down: Check if Instagram is facing downtime.
4 Ways to Fix “We Restrict Certain Activity to Protect Our Community” on Instagram
Basic Fixes Check if Instagram is down: Check if Instagram is facing downtime.
The article above may contain affiliate links which help support Guiding Tech. The content remains unbiased and authentic and will never affect our editorial integrity.