Have you ever tried making a slow-motion video on your iPhone? This might seem overwhelming if you are new to video shooting and editing on an iPhone. Worry not; in this article, we have shared how to record or make a slow-mo video on your iPhone in the simplest steps.
A slow-motion video is all about tweaking its frame rates. But what’s the frame rate? A frame rate in a video is the number of frames the camera captures every second while filming a video, in this case, your iPhone. Let’s dive in and learn more about slow-mo videos and how to make one easily.
What Is a Slow Mo Video
A Slow-Mo or slow-motion video is a video that has been recorded at a higher framer rate and then slowed to a lower or normal frame rate when played back. Your iPhone lets you record slow-mo videos at 120 fps and 240 fps. And since the video has more frame rates than a normal video, it will look slow compared to normal motion when slowed.
Add Slow Motion to Recorded Video on iPhone
You can slow down any video shot at more than 30 fps, i.e., 50, 60, 120, or 240 fps, down to 25 or 30 fps (i.e., normal playback frame rates). So, if you wish to slow down a video on your iPhone, here are the three easiest methods.
Tip: If you have a laptop and know some basic editing, you can be more creative with larger-screen real estate and better editing software than on a mobile platform.
Method 1: Use the Photos App
If you have a video shot in high fps, i.e., 120 or 240 fps on an iPhone, and wish to make a slow-mo video out of it, you can do so easily using the Photos app on your iPhone. Here are the steps to take.
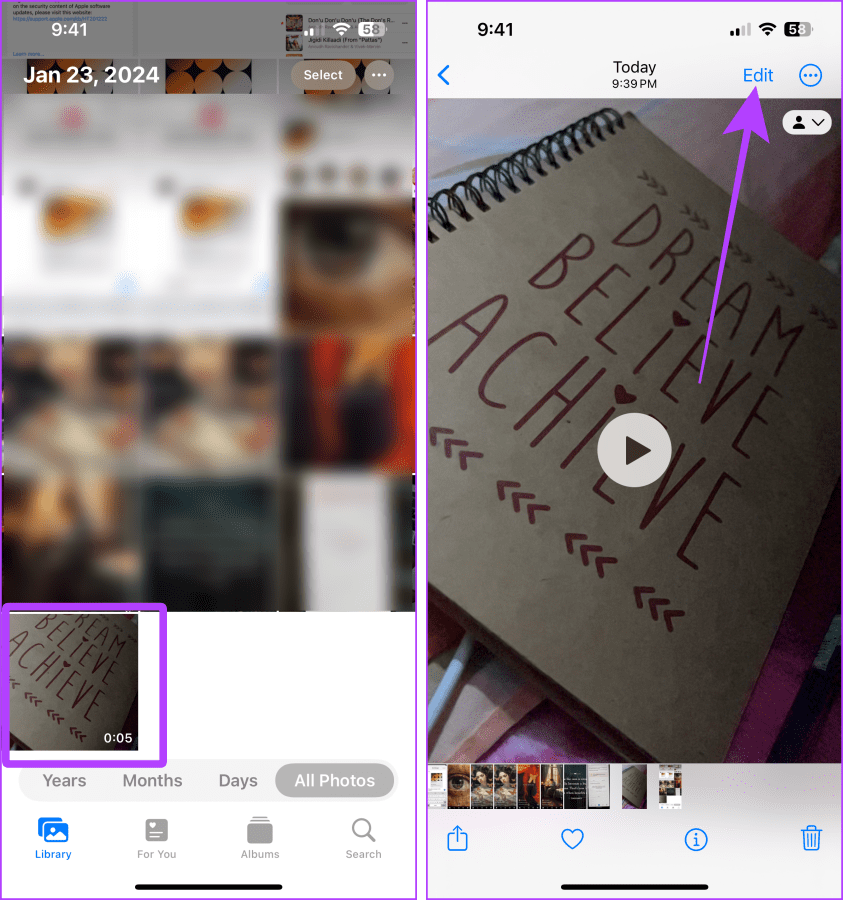
Step 1: Open the Photos app on your iPhone and tap on the video you wish to slow down to open it in the full screen.
Step 2: Tap Edit near the top right corner of the screen.
Step 3: Drag the handles to adjust which part of the video you want to slow down.
Tip: The slow-mo part of the video will have lines spaced farther than the normal video’s part.
Step 4: Tap and hold the handle further for precision editing.
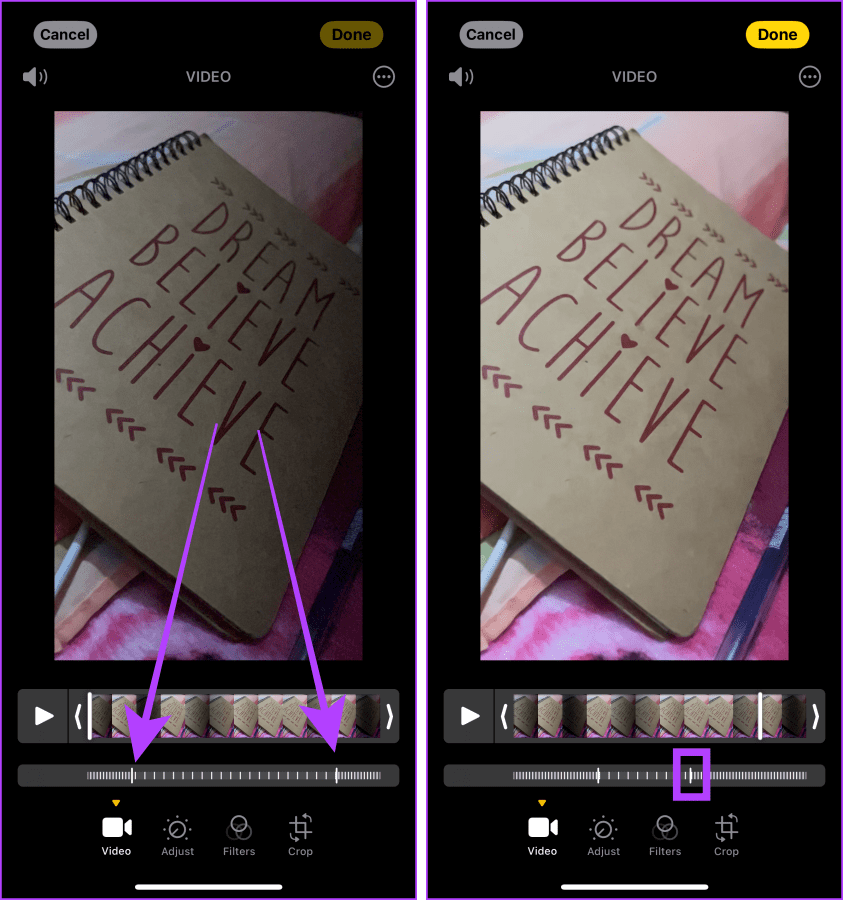
Step 5: Swipe left or right to adjust the handle precisely and leave it when done.
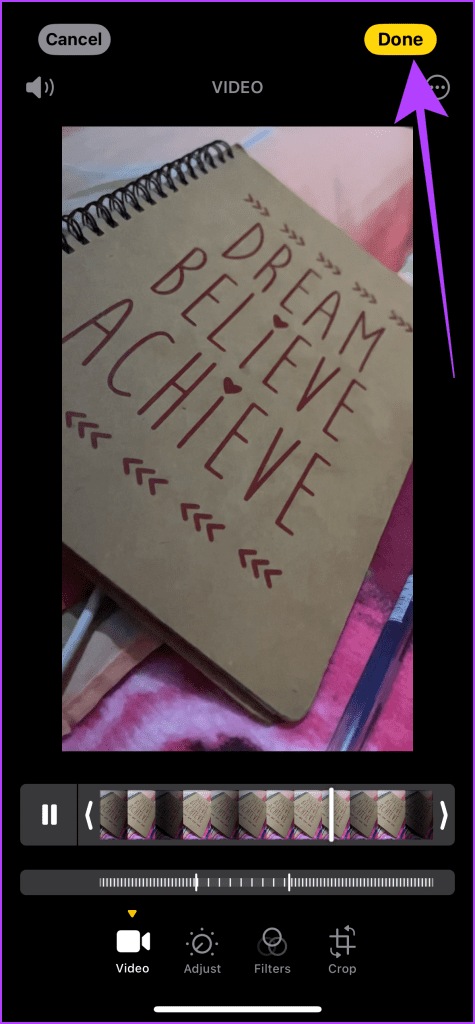
Step 6: Tap the play button to preview the slow-mo video.
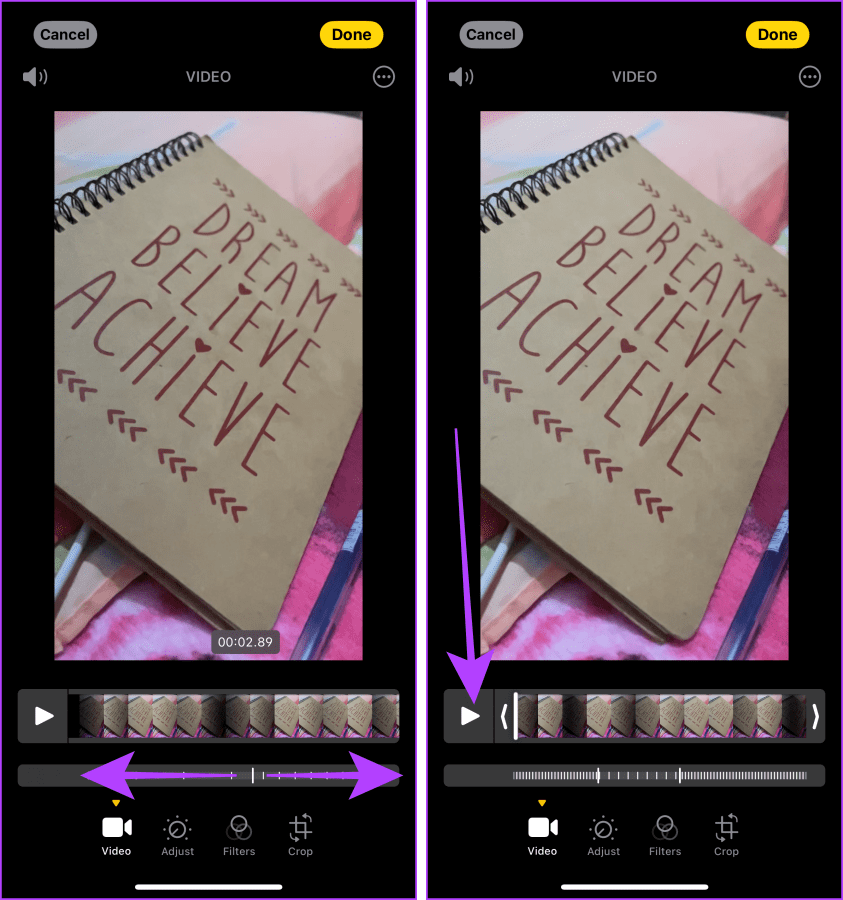
Step 7: If you’re satisfied with the video, tap Done to save the slow-mo video to your iPhone.
Method 2: Use iMovie
You can also use iMovie to make a slow-motion video on your iPhone. It provides more options to customize the speed further, like speeding up and slowing down some parts. Let’s look at the steps.
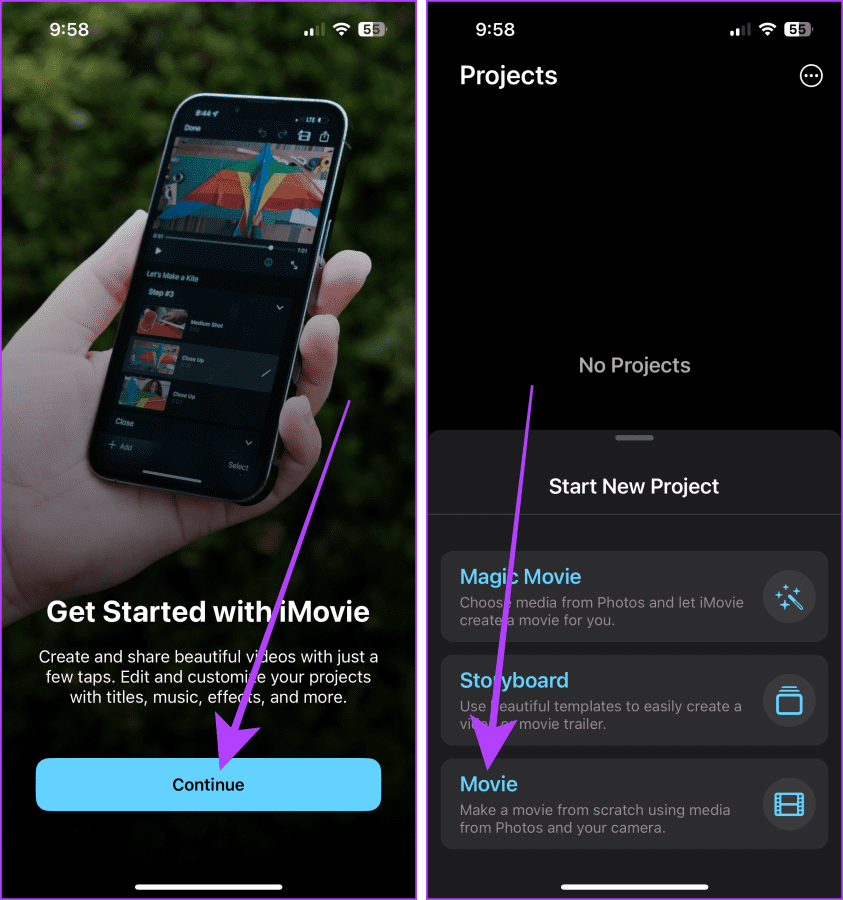
Step 1: Install and launch the iMovie app on your iPhone and tap Continue.
Note: You’ll get this screen only if you open the app for the first time.
Step 2: Tap Movie.
Step 3: Now, tap and select the video you wish to slow down.
Step 4: Tap Create Movie.

Step 5: Pinch with two fingers to zoom out the timeline.
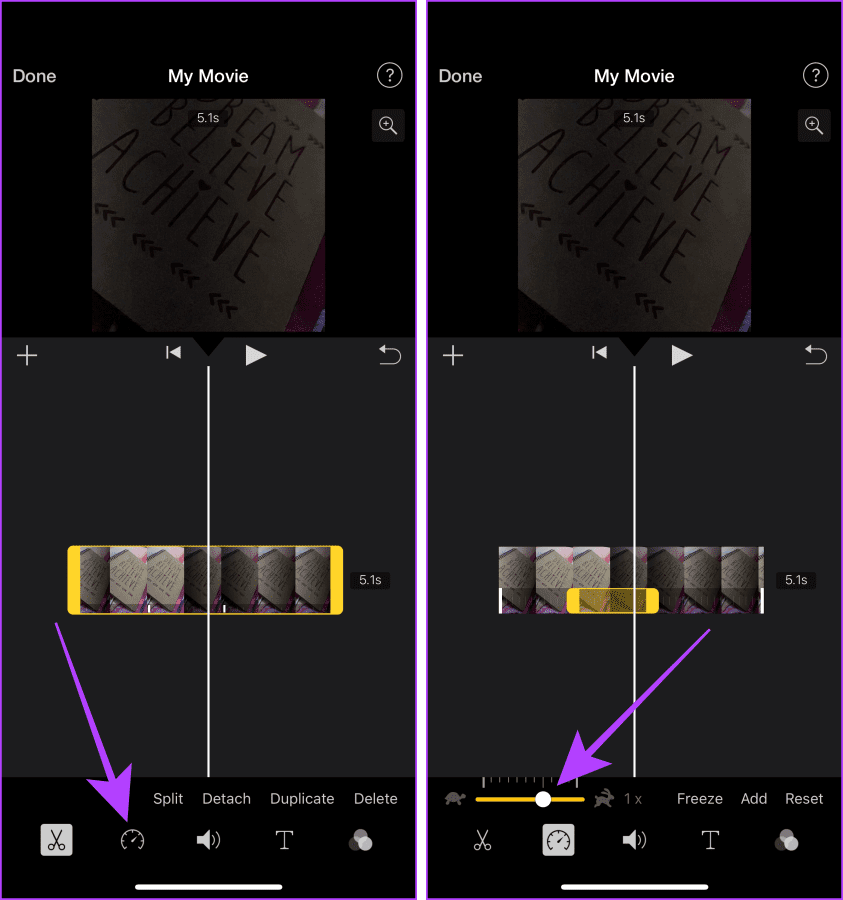
Step 6: Tap the video on the timeline to select it.

Step 7: Tap the speed tool icon from bottom.
Note: If the video is shot using iPhone’s Slow-Mo mode, it will automatically select one part of the clip upon tapping the speed tool icon. If not, the whole video gets selected.
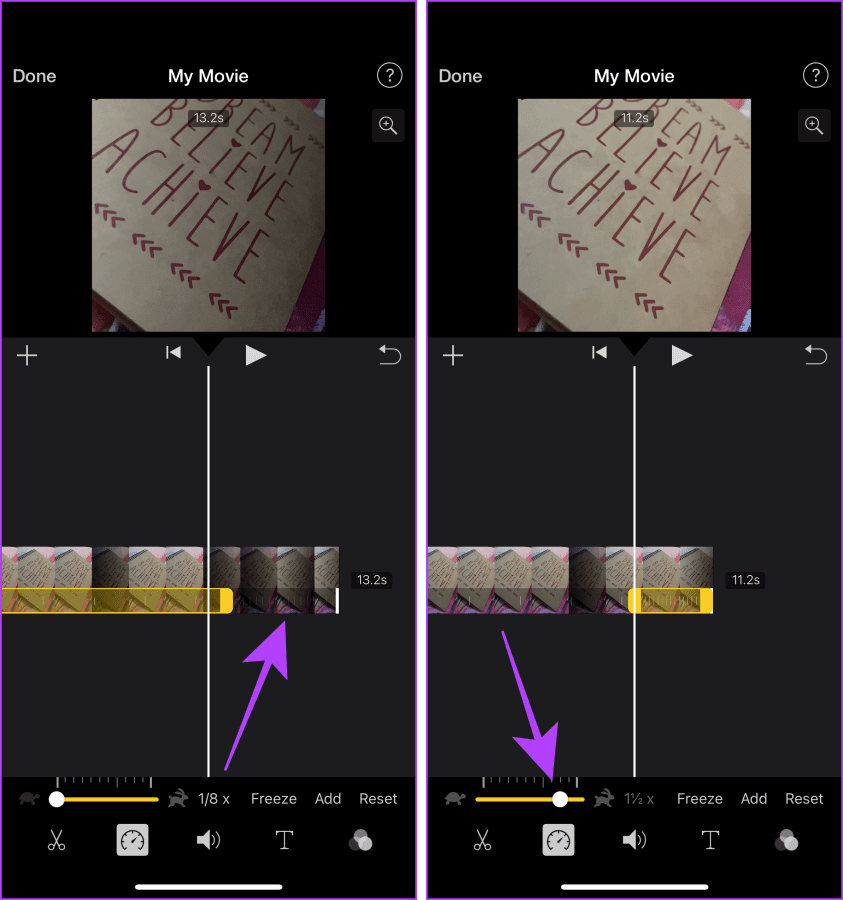
Step 8: Now, hold and drag the slider towards the left or right to adjust its speed.
Step 9: Tap the clip’s other part to select it.
Step 10: Now, drag the handle left or right to adjust its speed.
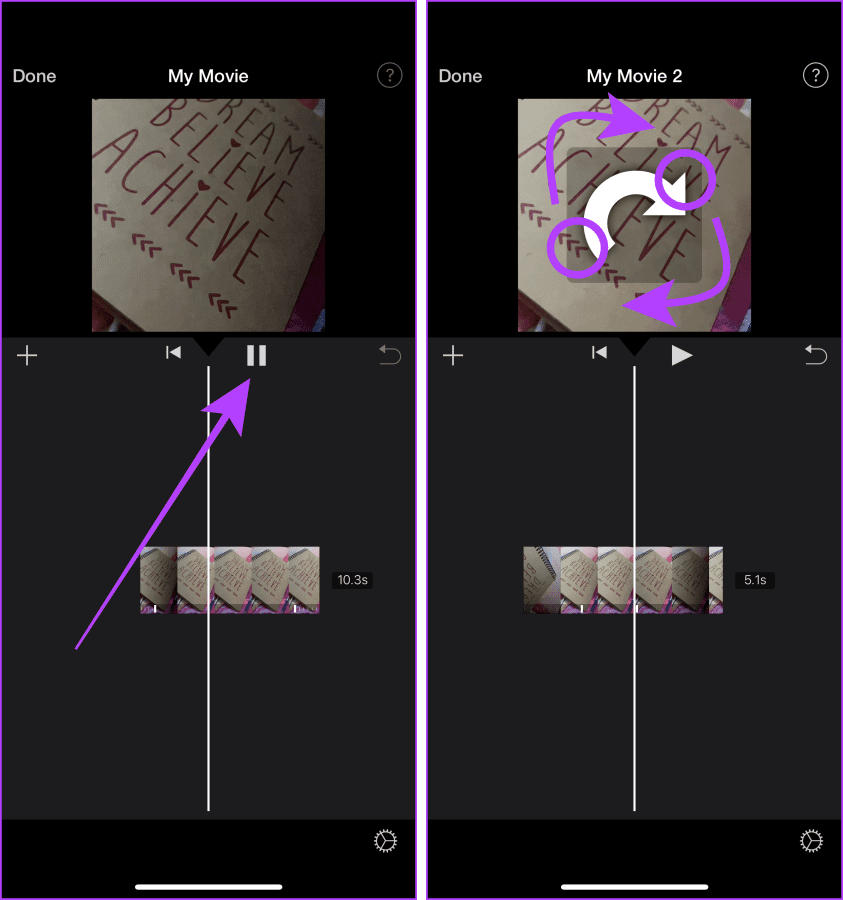
Step 11: Tap the play/pause button to preview.
Step 12: If your video is shot in the vertical orientation, you must tap and hold the video preview with two fingers and swipe clockwise to make it fit the screen; otherwise, you’ll end up with a square-cropped video.
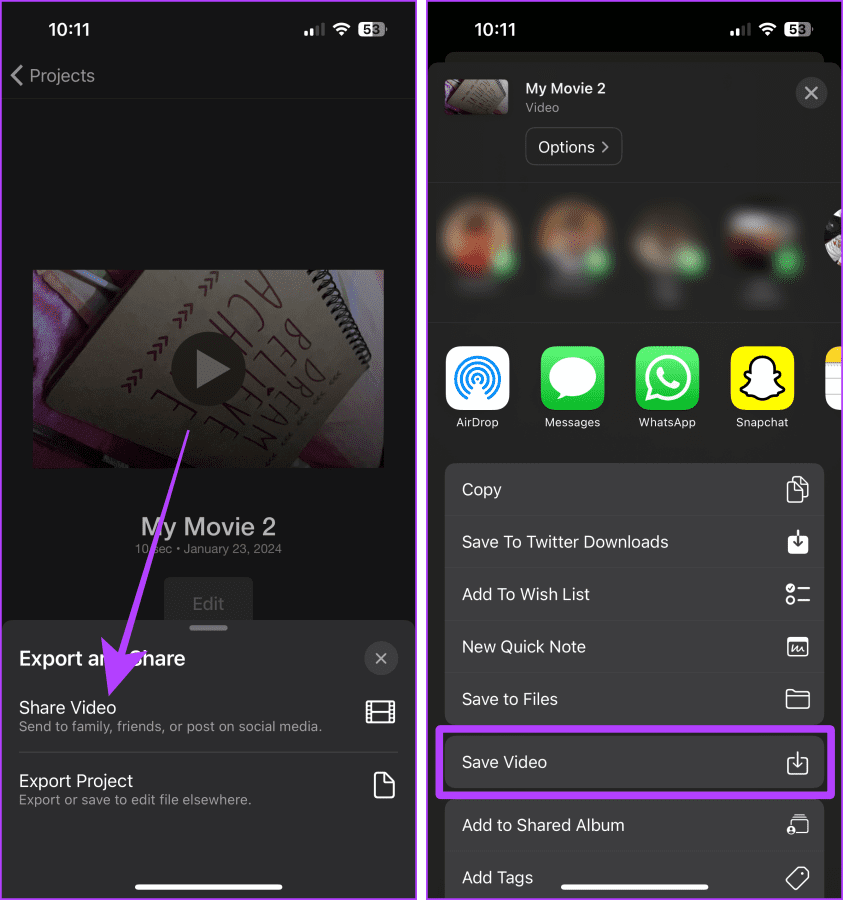
Step 13: Tap Done, followed by the Share button.
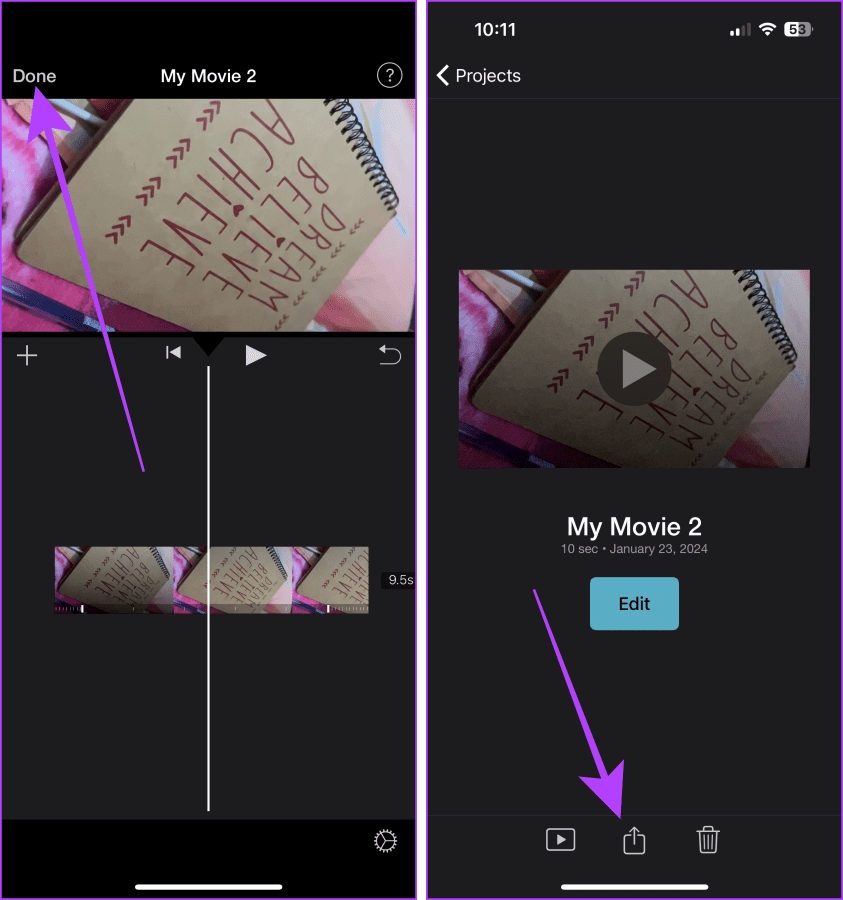
Step 14: Tap Share Video and select Save Video to save it to your iPhone Photos library.
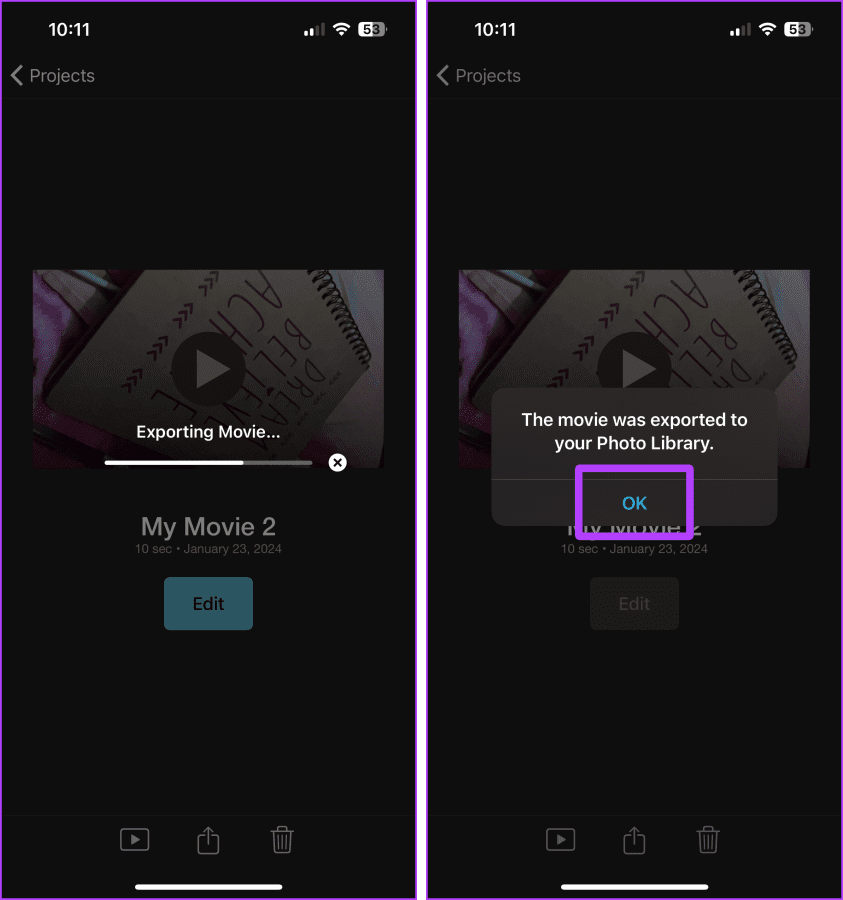
Step 15: Wait for the video to export and tap OK. The video will be saved to your Photos library.
Method 3: Use a Third-Party App Like VN
You can also use a third-party app on your iPhone to turn a video into slow motion. One such app is VN. The best part about editing with VN is that it provides you with speed ramp presets to speed up or slow down a video quickly. Here’s how to do it.
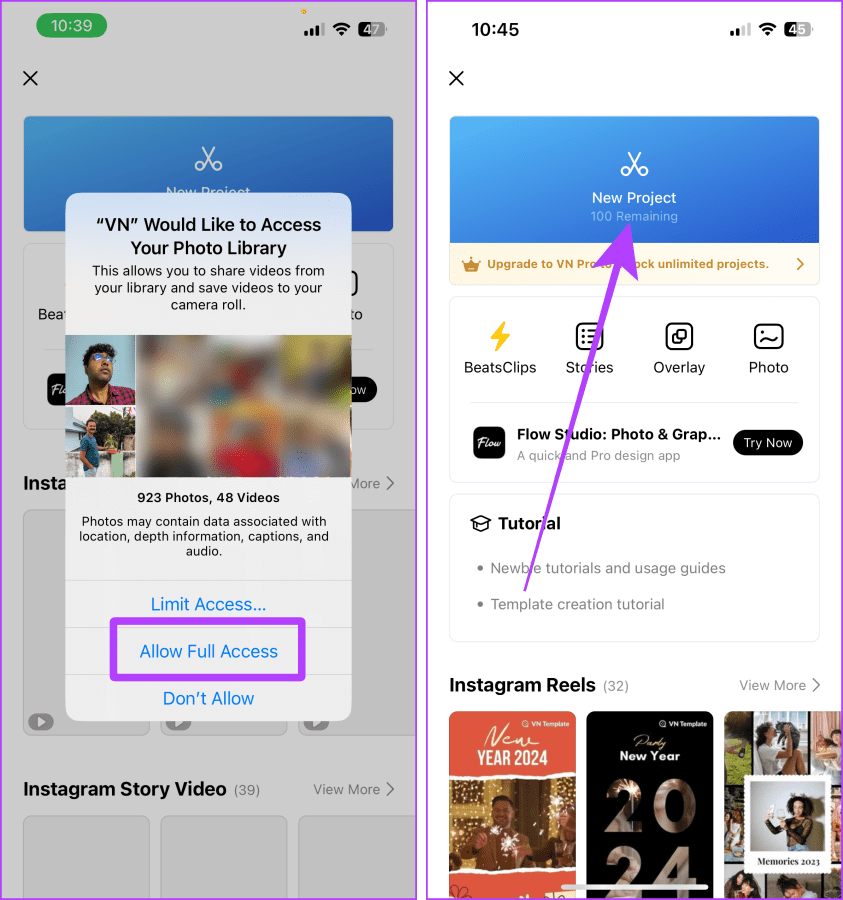
Step 1: Download and launch the VN app on your iPhone. Tap Allow Full Access if it asks for Photo Library permission.
Step 2: Tap New Project.
Step 3: Tap and select the video you want to make slow-mo and hit the next arrow near the bottom right corner of the screen.
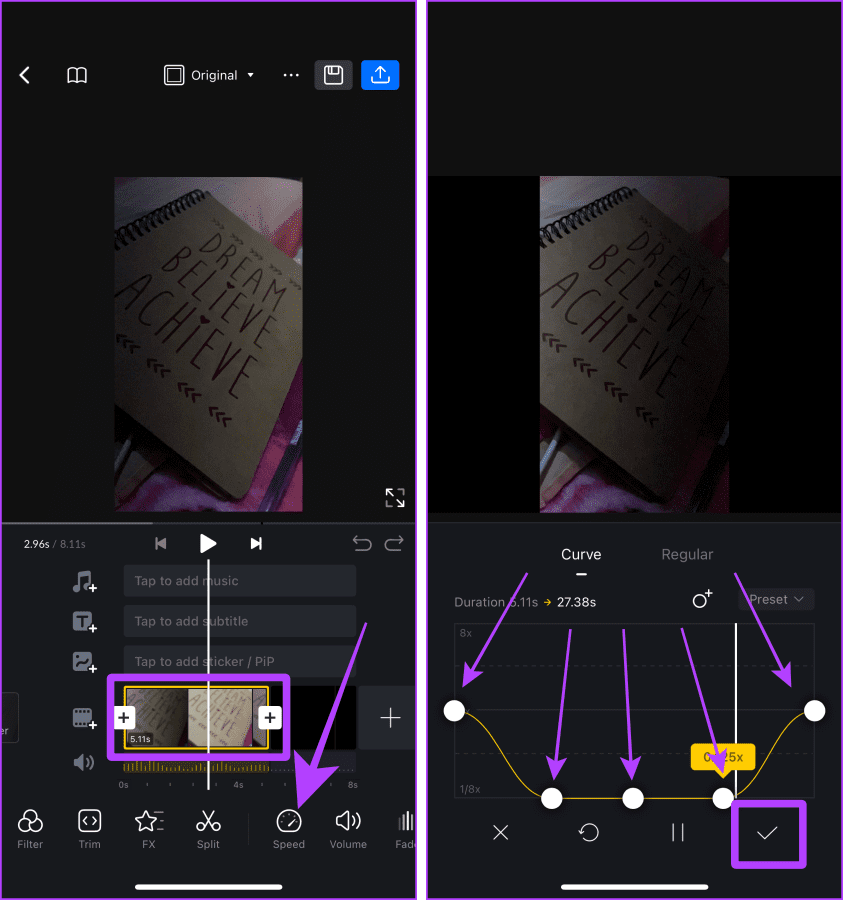
Step 4: Pinch with two fingers to zoom out the timeline.
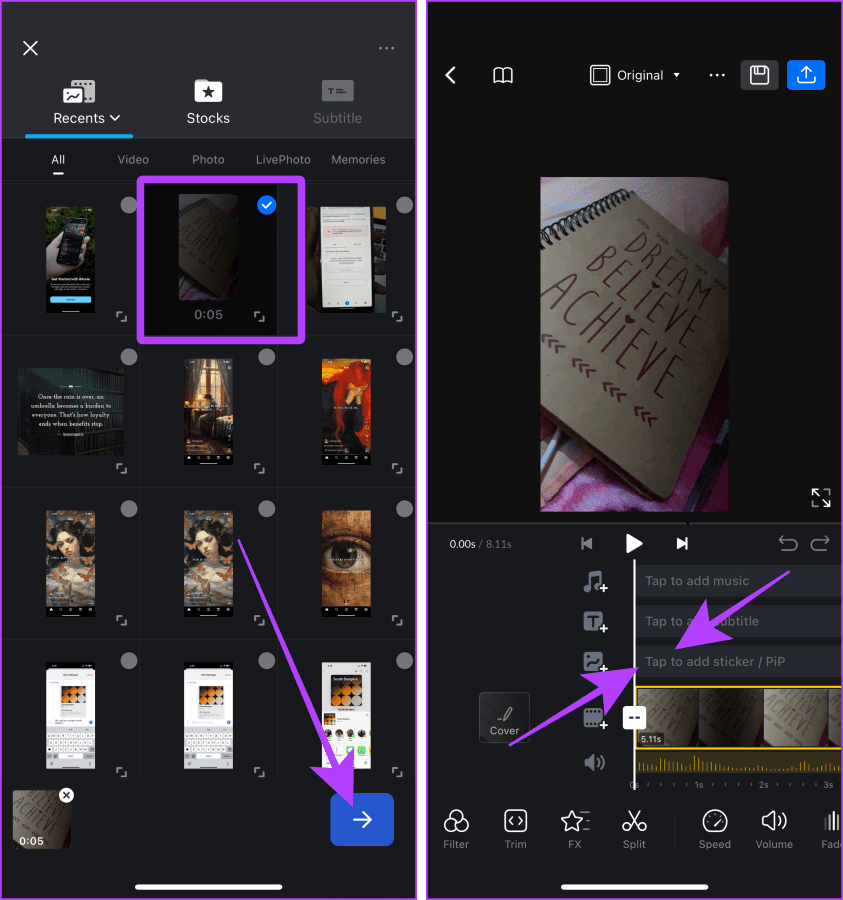
Step 5: Tap and select the clip and tap the speed tool.
Step 6: Tap and drag the anchors to play with the clip’s speed, and tap the check mark button to proceed further.
Pro Tip: Dressing the anchors upwards will speed up the video and vice-versa.
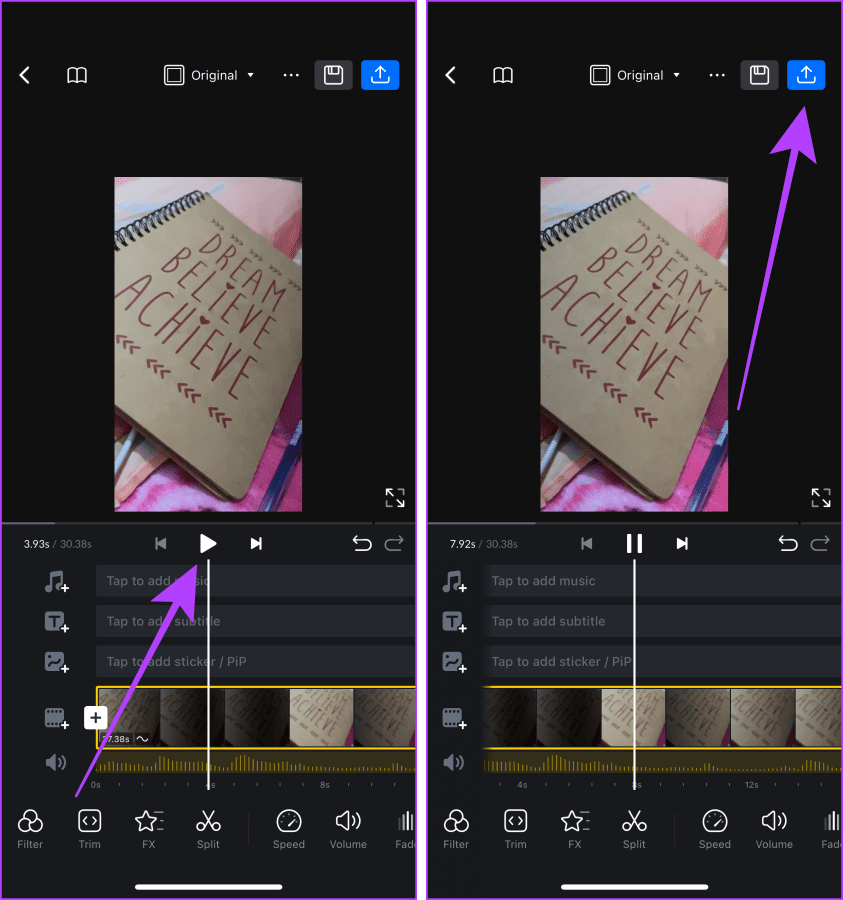
Step 7: Tap the play button to preview the edited clip.
Step 8: If you’re satisfied with the edited clip, tap the share button near the top right corner of the screen.
Step 9: Tap Export.
Tip: If you want to export to a custom setting, tap and select Manual.
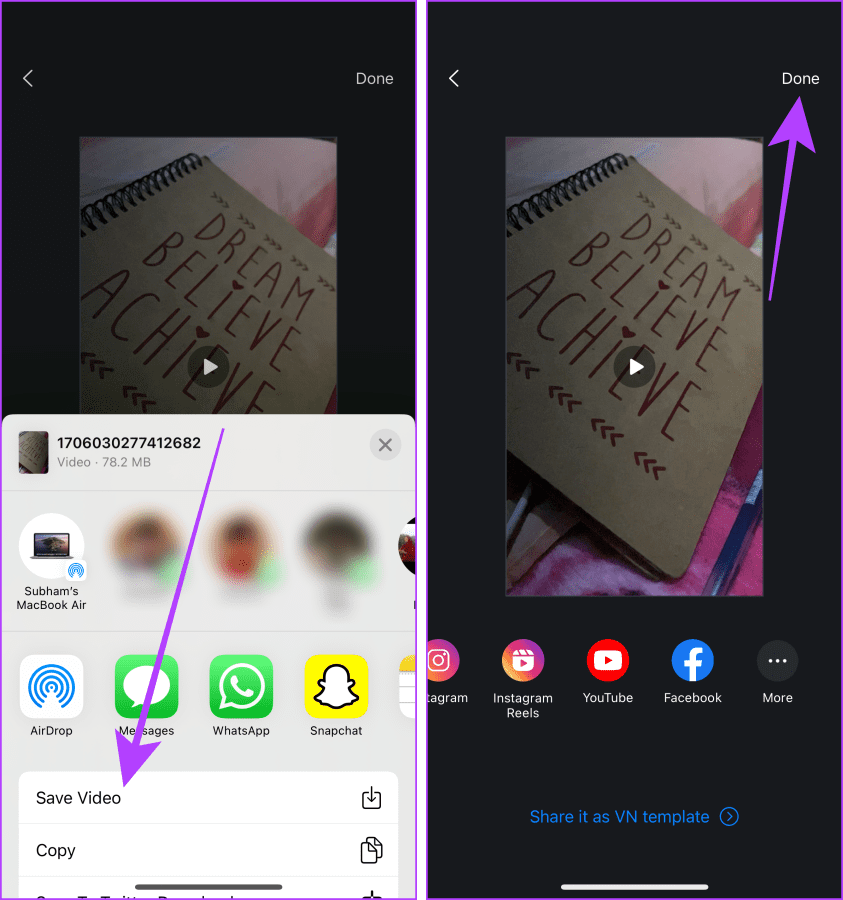
Step 10: Once the export is complete, tap More.

Step 11: Tap Save Video from the Share sheet to save the video in your Photos library.
Step 12: Tap Done.
Also Read: Best video editing apps for iPhone
How to Record a Slow-Mo Video on iPhone
iPhones can shoot a slow-mo video of up to 240 frames per second. And that video can be slowed down to 30 fps (or 24 fps), i.e., 8x slower than the normal video shot at 30 fps. Here’s how to shoot a slow-mo video on your iPhone.
Note: When you shoot a slow-mo video, you might see flickering on your screen if it is slightly dark. It’s natural as it tries to capture more frames in less time. Turn on your iPhone’s flash, an additional bulb, or a light source to eliminate flickering or darkness.
Part 1: Choose a Slow-Mo Speed
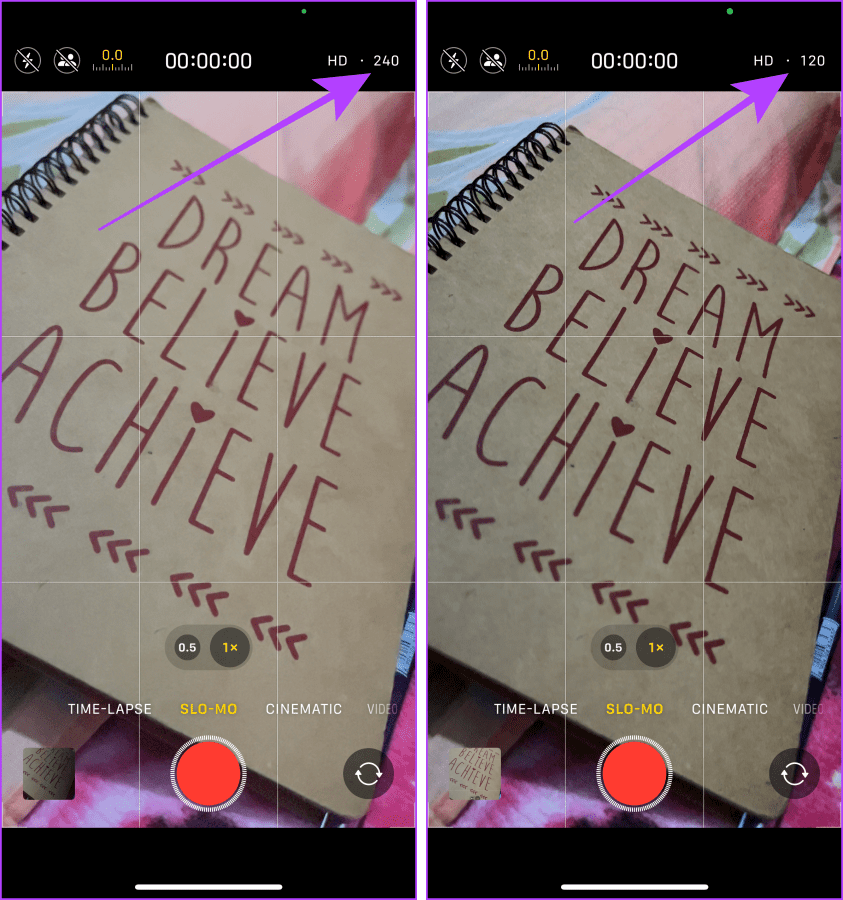
There are two options to choose from if you’re trying to record a slow-mo video on your iPhone, i.e., 120 fps and 240 fps. Here’s how to change them according to your requirements.
Note: iPhone models from 5s to 7 can shoot only 120 fps slow-mo videos. iPhone 8 and later can shoot both 120 fps and 240 fps slow-mo videos.
Tip: If you are shooting a fast-moving object, switch to 240 fps.
Method 1: From Camera
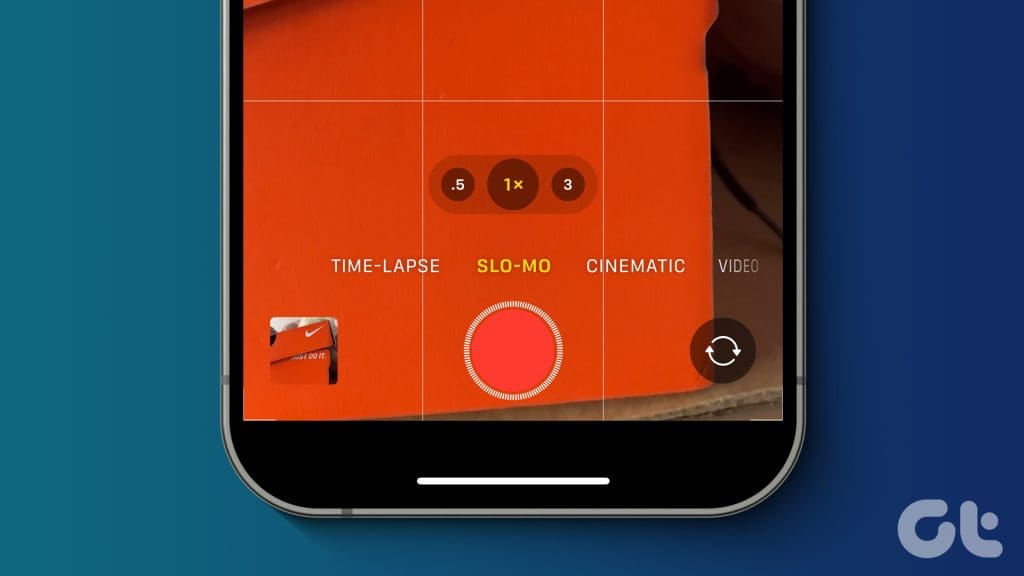
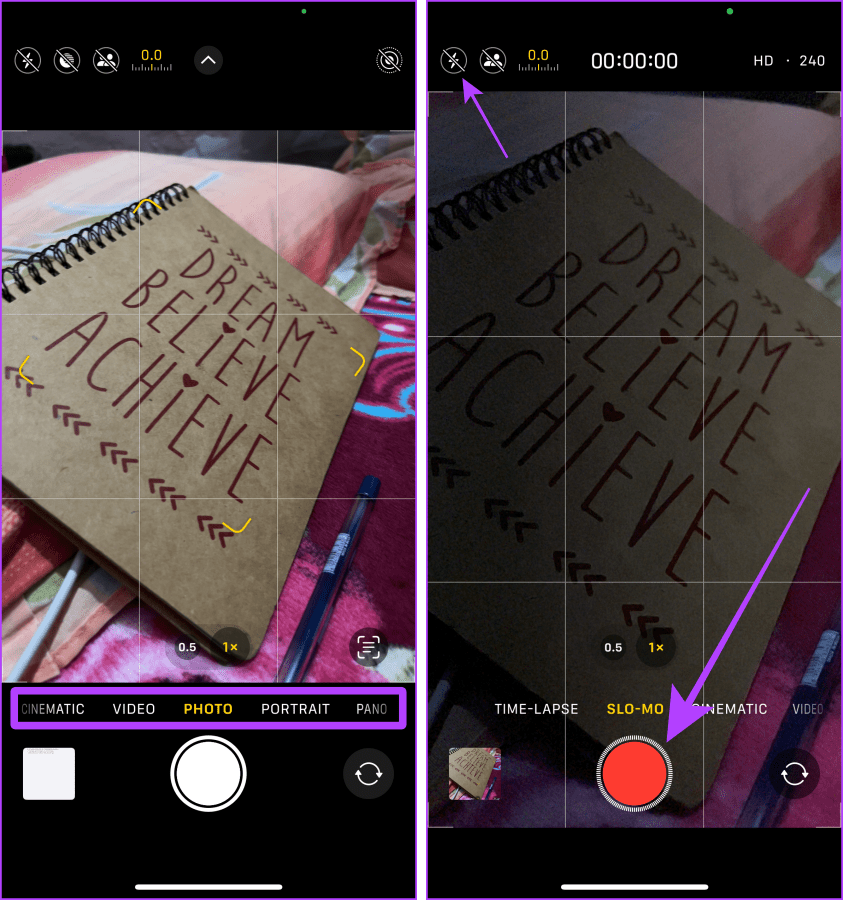
Step 1: Launch the Camera app on your iPhone and swipe to select Slow-Mo mode.
Step 2: Tap the 120 or 240 near the top right corner of the screen to toggle it back and forth.
Method 2: From Settings
Additionally, you can also change it from the Settings app. Let’s look at the steps to do so.
Step 1: Open the Settings app and go to Camera.
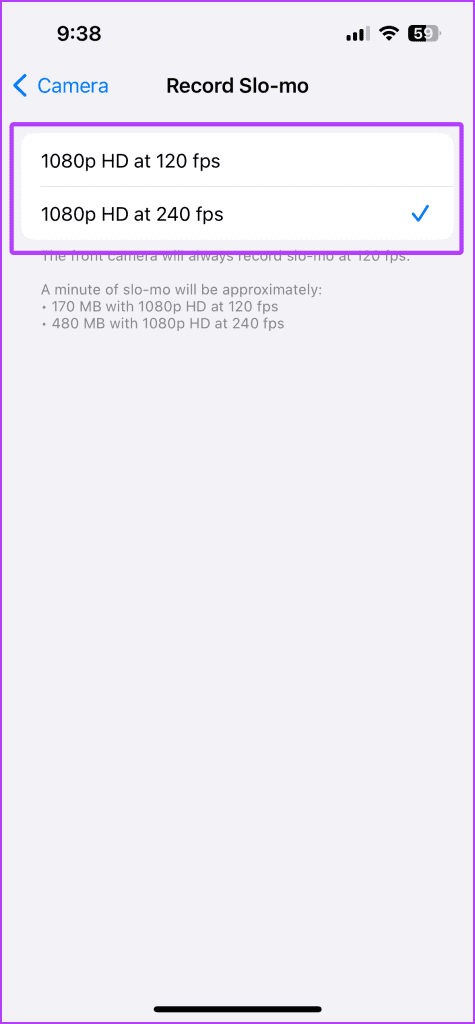
Step 2: Tap Record Slow-mo.
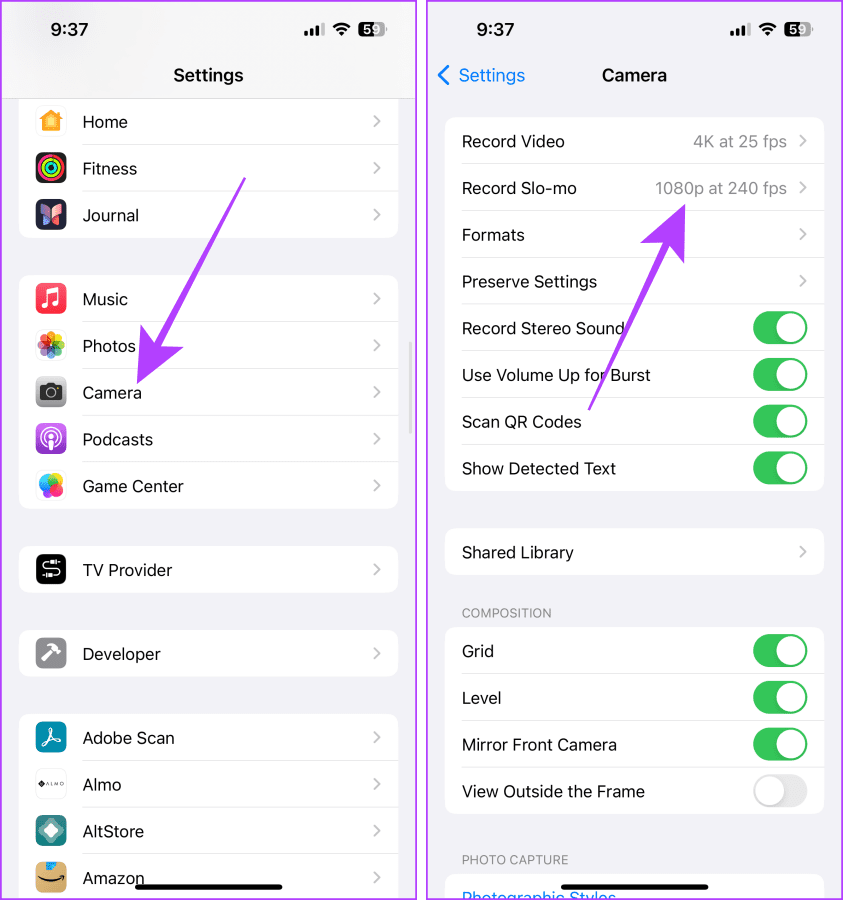
Step 3: Tap and select ‘1080p HD at 240 fps’ (or 120 fps).
Part 2: Shoot a Slow-Mo Video
Shooting a slow-mo video on an iPhone is effortless. Here are the simple steps to follow.
Step 1: Launch the Camera app and swipe to Slow-Mo mode.
Step 2: Point your camera towards the subject and hit record.
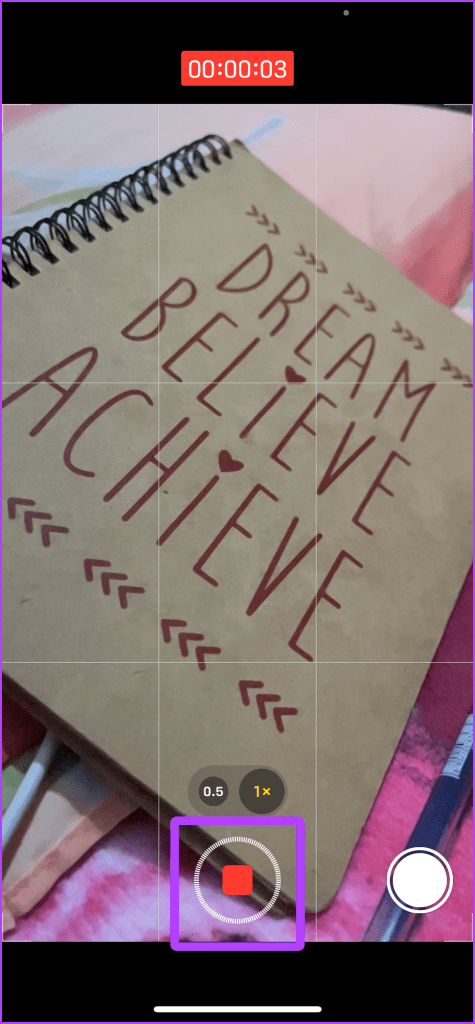
Step 3: Once done, hit stop. And that’s it.
Also Read: How to convert slow motion video to normal video on iPhone
Capture Life in Slow-Mo Effortlessly
There you go; you can now shoot or make slow-mo videos effortlessly on your iPhone. Follow the steps in this guide, level up your skills, and turn moments into cinematic tales.
Was this helpful?
Last updated on 31 January, 2024
Read Next
 How to Convert Slow Motion Video to Normal Video on iPhone
Recording a video in slow motion can add an artistic flair to your content and make it visually appealing.
How to Convert Slow Motion Video to Normal Video on iPhone
Recording a video in slow motion can add an artistic flair to your content and make it visually appealing.
 3 Ways to Fix Slow Facebook on Android and iPhone
Fix 1: Disable Data Saver in the Facebook App Enabling the data saver option in Facebook can restrict the app’s ability to use data freely, resulting in loading issues.
3 Ways to Fix Slow Facebook on Android and iPhone
Fix 1: Disable Data Saver in the Facebook App Enabling the data saver option in Facebook can restrict the app’s ability to use data freely, resulting in loading issues.
 Top 8 Ways to Fix Slow Google Maps on Android and iPhone
Google Maps is arguably the best navigation app available in the market.
Top 8 Ways to Fix Slow Google Maps on Android and iPhone
Google Maps is arguably the best navigation app available in the market.
 7 Best Ways to Fix Microsoft Store Slow Download Speeds on Windows PC
Want to download your favorite app, but experiencing slow download speeds on the Microsoft Store?
7 Best Ways to Fix Microsoft Store Slow Download Speeds on Windows PC
Want to download your favorite app, but experiencing slow download speeds on the Microsoft Store?
 9 Fixes for Windows 10 File Explorer Is Slow or Loading Slowly Error
It's a hellish experience if you want to access a file or a folder, but Windows Explorer is loading slowly.
9 Fixes for Windows 10 File Explorer Is Slow or Loading Slowly Error
It's a hellish experience if you want to access a file or a folder, but Windows Explorer is loading slowly.
 7 Fixes for Slow Download Speeds in Steam on Windows 11
Steam offers a vast library of games to download and play on your PC.
7 Fixes for Slow Download Speeds in Steam on Windows 11
Steam offers a vast library of games to download and play on your PC.
 4 Ways to Fix Slow Download Speed in Microsoft Edge for Windows
Basic Yet Essential Fixes Check internet speed: If your internet speed is slow or bandwidth is less, all downloads will get slow.
4 Ways to Fix Slow Download Speed in Microsoft Edge for Windows
Basic Yet Essential Fixes Check internet speed: If your internet speed is slow or bandwidth is less, all downloads will get slow.
 How to Fix Slow Mounting of ISO Image Files on Windows 11
Why Does Mounting ISO Take So Long on Windows 11?
How to Fix Slow Mounting of ISO Image Files on Windows 11
Why Does Mounting ISO Take So Long on Windows 11?
The article above may contain affiliate links which help support Guiding Tech. The content remains unbiased and authentic and will never affect our editorial integrity.