Method 1: Upgrade to a Dedicated GPU
The best way to increase the dedicated Video RAM (VRAM) on your Windows is by upgrading the Graphics card in your PC. As new graphics cards come with better VRAM with more memory capacity. However, if that’s too expensive or if you own an un-upgradable laptop, see the next few sections to increase the VRAM on your Windows PC.

Method 2: Get More Video Memory (VRAM) Using BIOS
To increase the dedicated Video RAM in Windows 10 or 11 systems, you need to first enter into BIOS/UEFI. Next, follow the below steps.
Note: The steps mentioned here are for Windows 10 and 11 PCs that come with the old BIOS UI. Even in that, there might be some difference in the option names. We have tested the following steps on a Lenovo laptop that comes with the old BIOS UI.
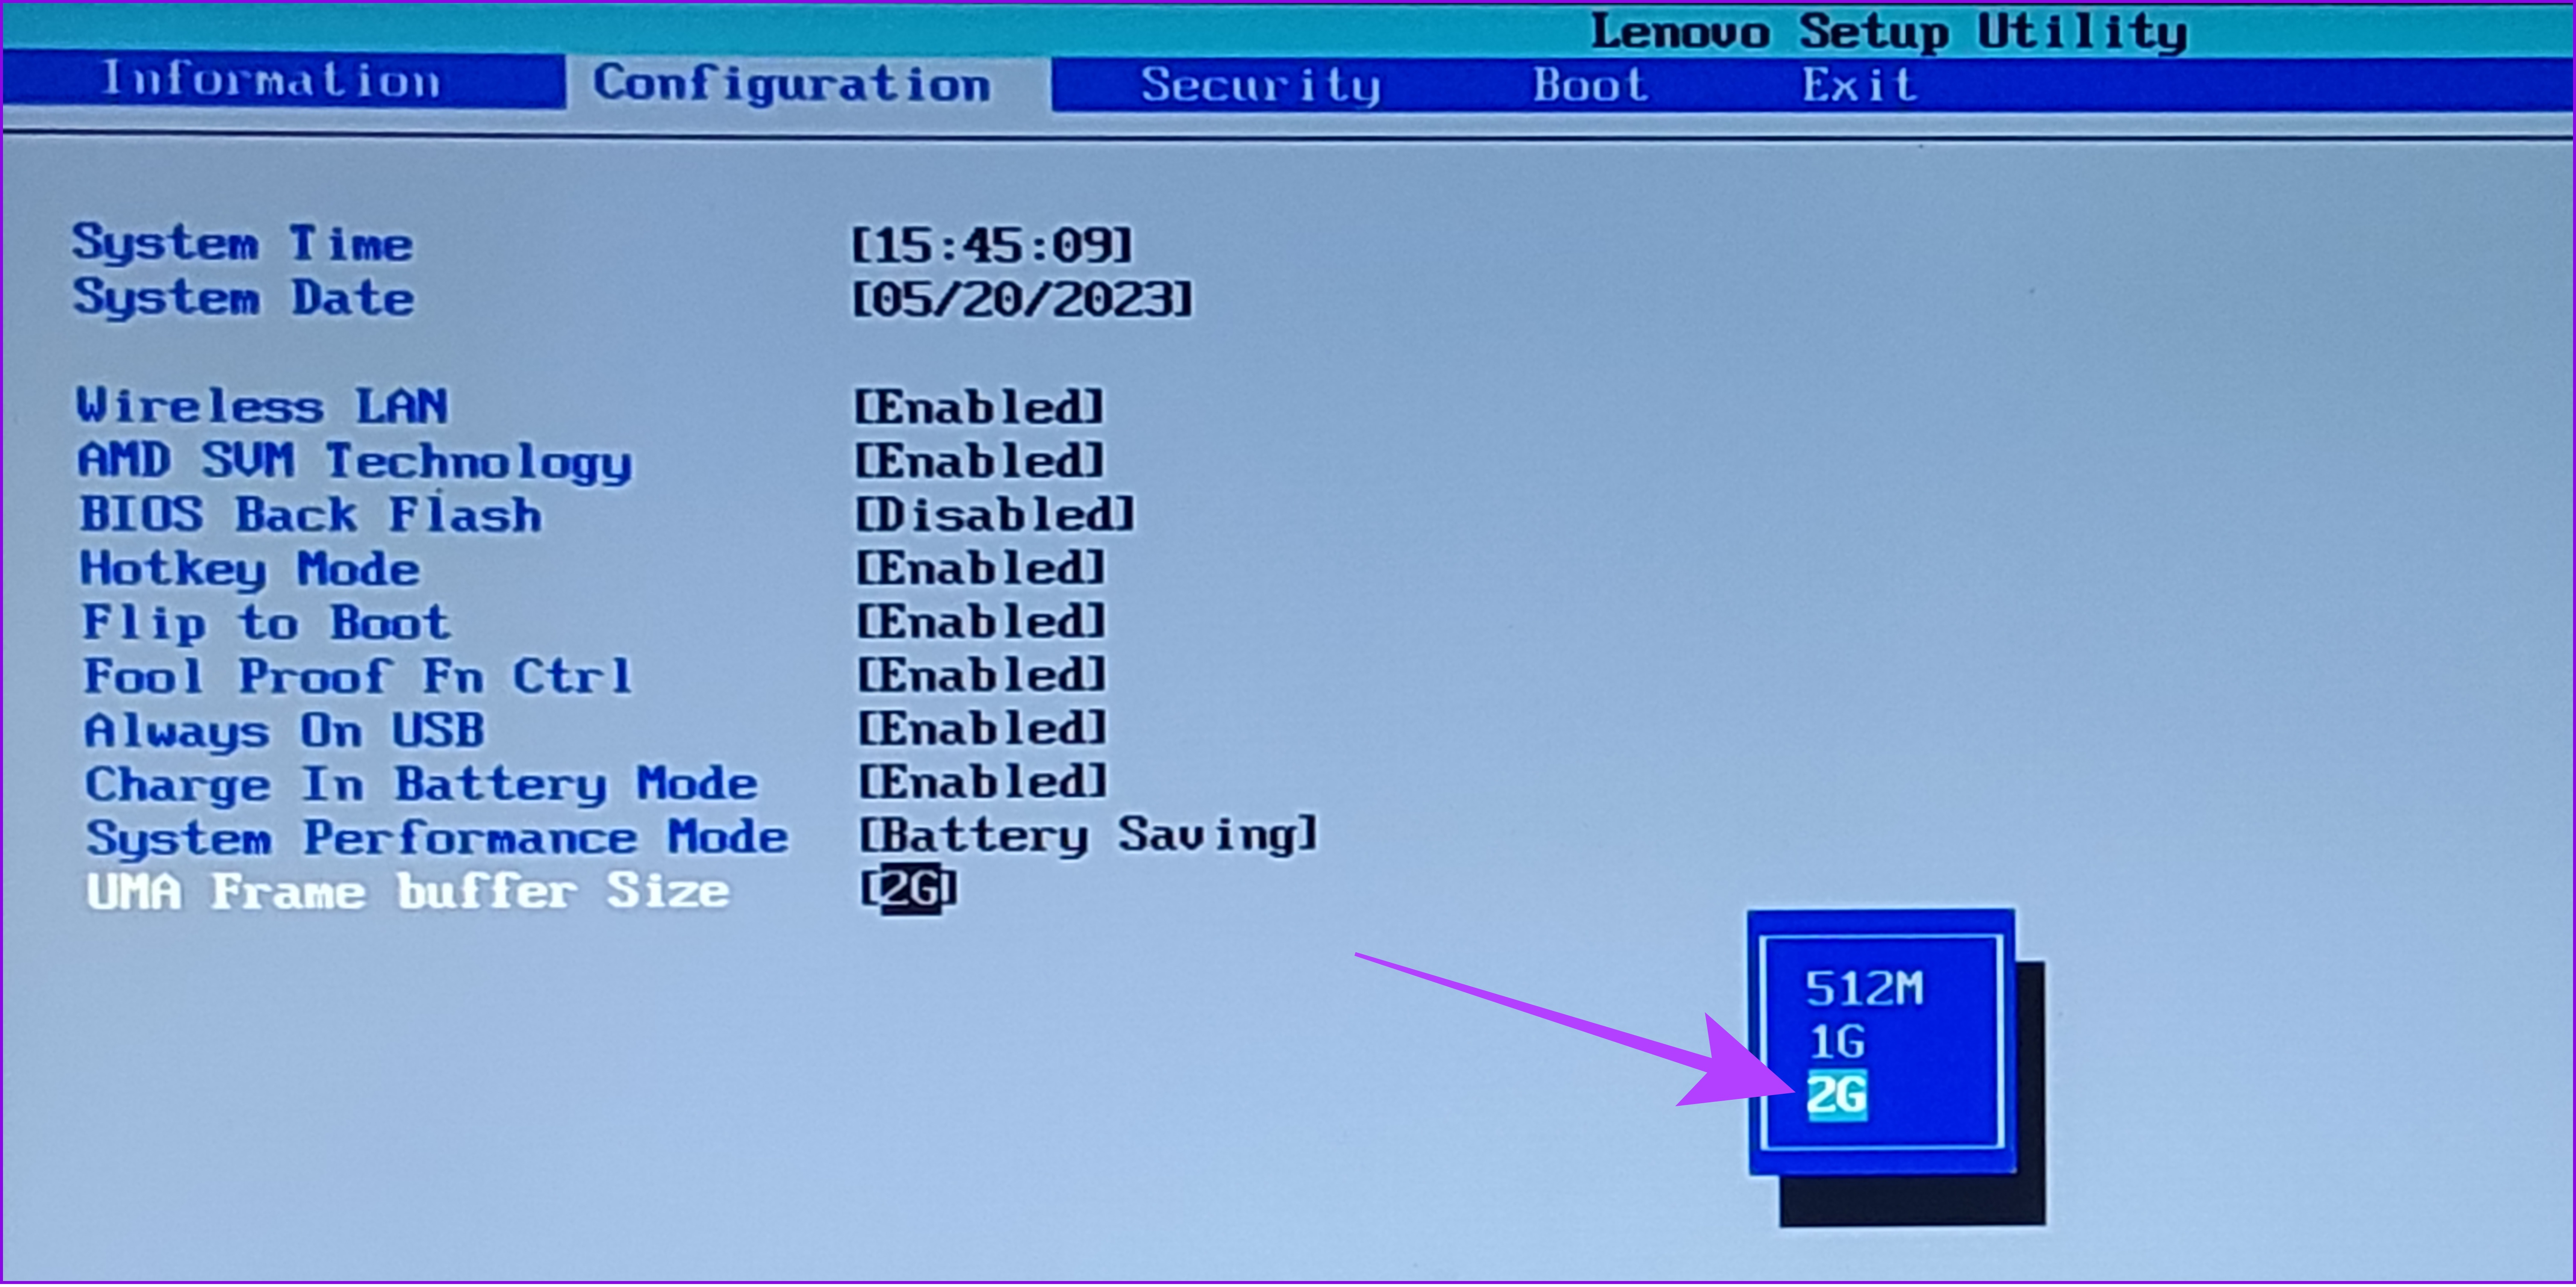
Step 1: Once you enter the BIOS menu, go to the Configuration tab.
Tip: You can use arrow keys to navigate in BIOS.

Step 2: Go to UMA Frame buffer size at the bottom and hit Enter.

Step 3: Now, choose the size of your choice and hit Enter.
Step 4: Once you make the necessary changes, hit F10.
Step 5: Choose Yes to confirm the changes and boot back to Windows.

If you can’t see the same menu options in your Windows system, then it might be because your manufacturer shipped the system with a new recovery UI. In that case, we would suggest you check with the brand support or forum to know the right menu names.
Method 3: Modify Value in Registry Editor
You can make many changes in your system and increase the allocated VRAM memory. However, it doesn’t increase the Video RAM. Instead, it just modifies a dummy value with which you can fool the games that require a specific amount of VRAM to run.
Note: Since the VRAM value is not actually changed, it might put some pressure on your system if you run applications that consume the maximum Video RAM.
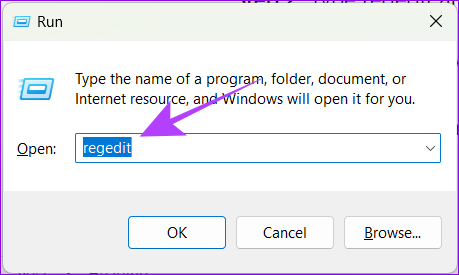
Step 1: Open Run by using the key combination Windows key + R.
Step 2: Type regedit and hit Enter.
Step 3: Paste the following path and hit Enter.
HKEY_LOCAL_MACHINE\Software\Intel
Note: You can paste this step even if you have an AMD-powered Windows machine.
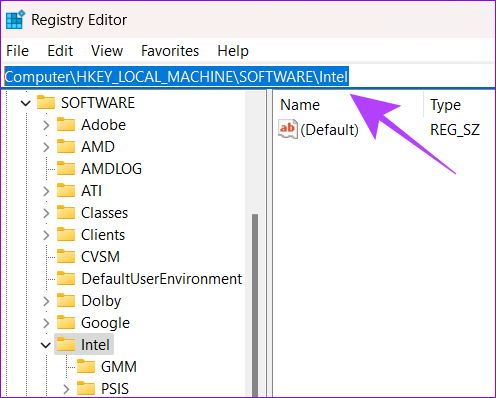
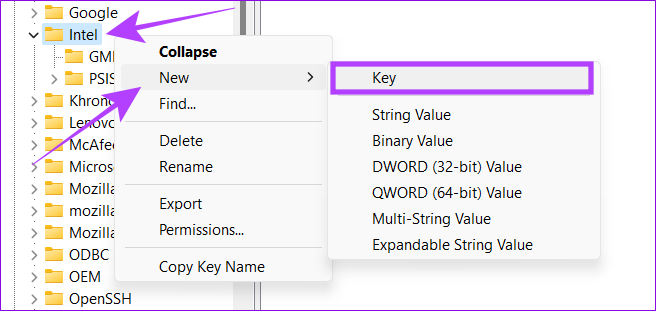
Step 4: Right-click the Intel folder and navigate to New > Key.
Note: If you have multiple user IDs on your Windows PC, you should perform these steps on your admin user.
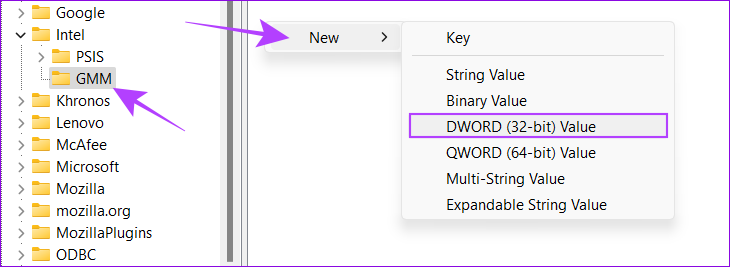
Step 5: Name the new Key as GMM.
Step 6: Choose the GMM folder and right-click on the right side.
Step 7: Select New and hit DWORD (32-bit) Value.
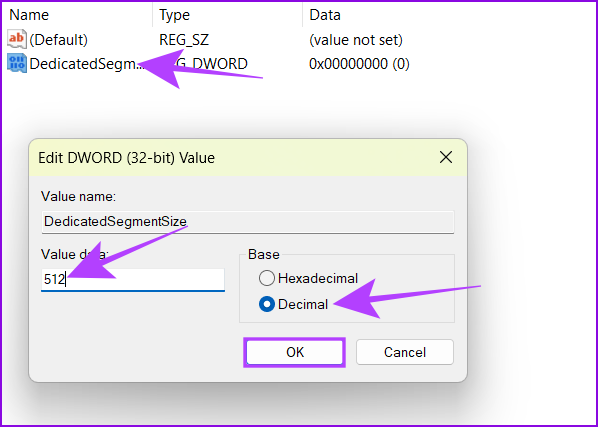
Step 8: Name it DedicatedSegmentSize.

Step 9: Right-click and choose Modify.
Step 10: In the pop-up that appears, type any value between 0 and 512, choose Decimal, and hit OK.
Step 11: Restart your system and see if you notice any difference.
Tip: You can increase the value if you aren’t able to notice any difference.
Method 4: Upgrade System RAM
If there’s no dedicated video memory, your PC will utilize the system RAM for graphic-intensive tasks by default. Increasing the value by following the steps mentioned above will take up more RAM and might affect the general performance.
You can free up RAM on your Windows system or upgrade the default RAM so that it can be allocated for such tasks.
FAQs on Increasing Dedicated Windows VRAM
The need for VRAM varies based on the tasks you want to perform with it. Regardless, we would suggest having at least 2GB of VRAM to perform minimal gaming and other graphical tasks such as video editing or more.
You cannot download VRAM as it’s a hardware component built into your graphics card or integrated graphics of the chipset.
Sometimes, despite increasing the dedicated VRAM, you will face performance issues if the GPU is not powerful enough to handle the tasks you throw at it.
Was this helpful?
Last updated on 27 July, 2024
Read Next
 How to Increase Virtual Memory on Windows 11
Steps to Increase Virtual Memory on Windows 11 Increasing virtual memory on Windows 11 isn't rocket science.
How to Increase Virtual Memory on Windows 11
Steps to Increase Virtual Memory on Windows 11 Increasing virtual memory on Windows 11 isn't rocket science.
 3 Ways to Check VRAM Capacity on Windows 11
Method 1: Check VRAM Capacity From the Task Manager Task Manager is a useful system application that helps you track system processes and monitor resource consumption.
3 Ways to Check VRAM Capacity on Windows 11
Method 1: Check VRAM Capacity From the Task Manager Task Manager is a useful system application that helps you track system processes and monitor resource consumption.
 How to Increase Internal Memory on Any Xiaomi Phone
In March this year, we had written a post on how to increase the internal storage on Android devices using adaptable storage.
How to Increase Internal Memory on Any Xiaomi Phone
In March this year, we had written a post on how to increase the internal storage on Android devices using adaptable storage.
 4 Fixes for ‘Video Memory Management Internal’ Error on Windows
Basic Fixes Restart PC: Restart your PC to fix temporary bugs and glitches.
4 Fixes for ‘Video Memory Management Internal’ Error on Windows
Basic Fixes Restart PC: Restart your PC to fix temporary bugs and glitches.
 3 Ways to Increase or Decrease Touchpad Sensitivity on Windows 11 Laptops
Method 1: Increase or Decrease Touchpad Sensitivity via the Settings App The Settings app in Windows makes it simple to adjust touchpad-related settings on your laptop.
3 Ways to Increase or Decrease Touchpad Sensitivity on Windows 11 Laptops
Method 1: Increase or Decrease Touchpad Sensitivity via the Settings App The Settings app in Windows makes it simple to adjust touchpad-related settings on your laptop.
 5 Eco-Friendly Ways to Increase Performance of Your Aging PC
1.
5 Eco-Friendly Ways to Increase Performance of Your Aging PC
1.
 How to Increase Downloading Speed in Xbox App for Windows 11
Try These Things First Restart the Xbox app: At times, the Xbox app might misbehave and cause issues like slow downloading speed due to a temporary glitch or bug.
How to Increase Downloading Speed in Xbox App for Windows 11
Try These Things First Restart the Xbox app: At times, the Xbox app might misbehave and cause issues like slow downloading speed due to a temporary glitch or bug.
 5 Ways to Fix “Your Computer Is Low on Memory” Error on Windows 10 and Windows 11
Try Basic Fixes Close unwanted apps and programs: Start by closing any unwanted apps and programs on your computer, especially the ones consuming a major chunk of your PC’s memory.
5 Ways to Fix “Your Computer Is Low on Memory” Error on Windows 10 and Windows 11
Try Basic Fixes Close unwanted apps and programs: Start by closing any unwanted apps and programs on your computer, especially the ones consuming a major chunk of your PC’s memory.
The article above may contain affiliate links which help support Guiding Tech. The content remains unbiased and authentic and will never affect our editorial integrity.