In general, indented paragraphs in a document make for a compelling reading experience. So, a writer needs to indent paragraphs or lines whenever required. If you’re a Google Docs user like me, you’d be glad to know that the platform offers several ways to indent paragraphs on both mobile and PC.

Whether you want to create a First Line indent, Hanging indent, or a Paragraph indent, Google Docs carries all the options you need. In this post, we’ll walk you through ways to use indents for paragraphs in Google Docs. Let’s get started.
How to Make an Indent in Google Docs on PC
While you can easily create a First Line indent using the Tab key on your keyboard, there are certainly better ways to indent a paragraph or a line in Google Docs. Let’s start with indenting paragraphs on PC.
Use Ruler in Google Docs
The first and probably the easier way to indent a paragraph is by using the Ruler in Google Docs. Here’s how to do it.
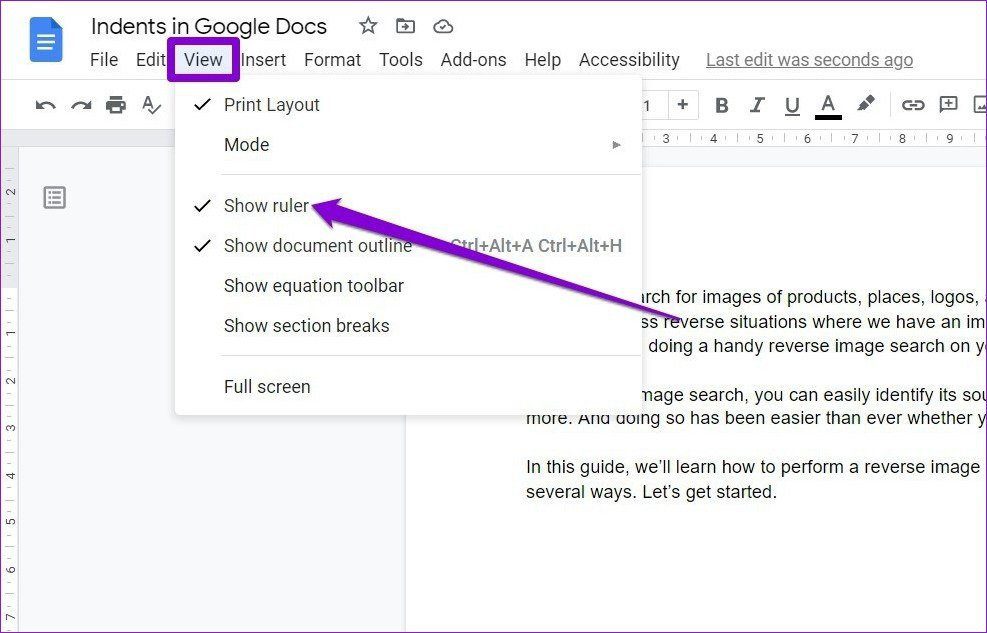
Open up your Google Docs document. By default, Google Docs will show a Ruler right above the document. If you can’t find it, go to View and select the Show ruler option from the list.
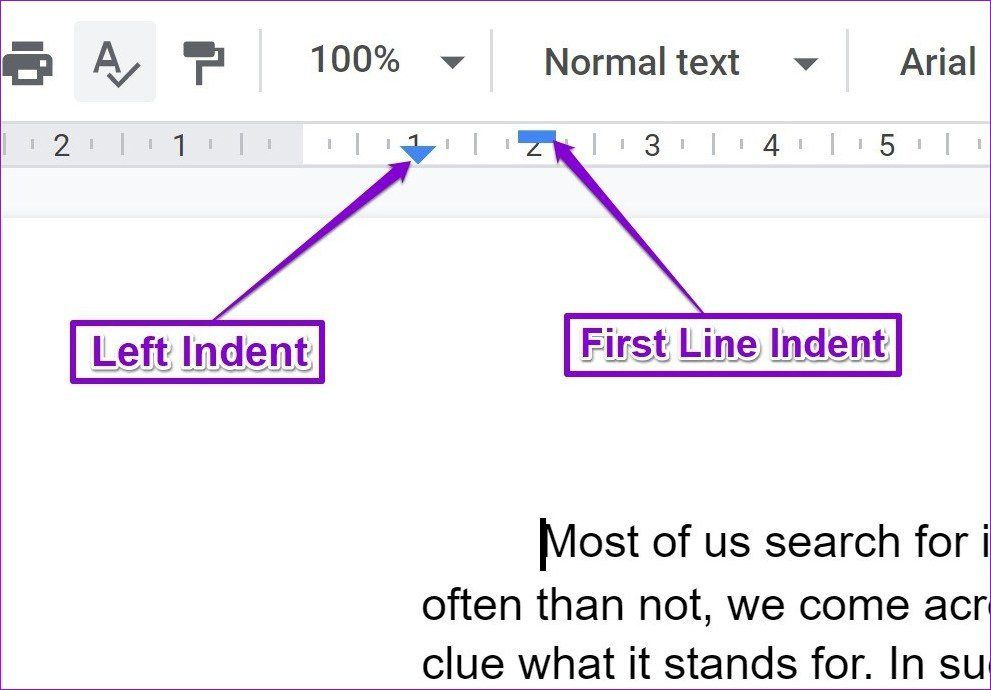
On the left of the Ruler, you’ll find two blue markers. One horizontal line and an upside-down triangle. The horizontal line is the First Line Indent marker, while the upside-down triangle is the Left Indent marker.
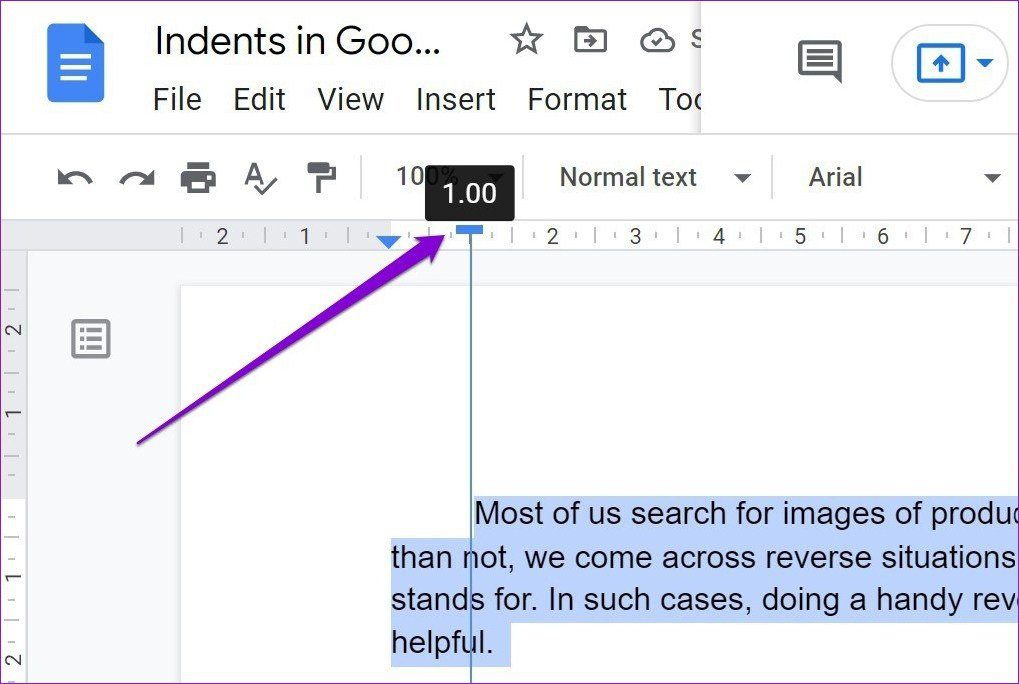
To indent the first line of a paragraph, select the paragraph you wish to indent. Now drag the First Line Indent marker (Horizontal bar) to its right. A blue line will appear with measurement displayed at the top. Next, move the slider accordingly to create a First Line indent.
Similarly, if you’re looking to indent the entire paragraph to its right, you can use the Left Indent marker. Select the paragraph in question and move the Left Indent marker (upside-down triangle) to its right.
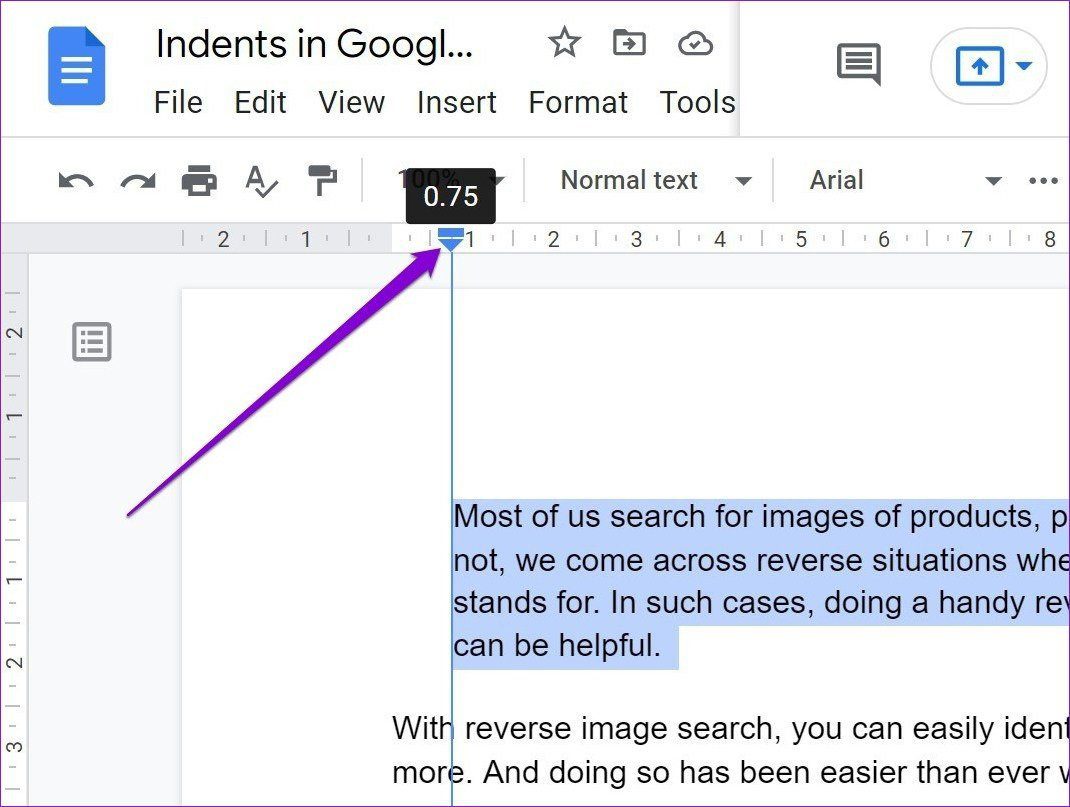
And voila! Now you’ve your paragraph indented. Easy, right?
Use Keyboard Shortcuts
Aside from using the Ruler, Google Docs also carries handy shortcuts at the top that you can use to indent paragraphs. Here’s how.
Fire up your Google Docs document. Select the paragraph that you wish to indent and use the Increase Indent or Decrease Indent shortcuts in the toolbar at the top to indent paragraphs.

Alternatively, you can also use the Ctrl + ] shortcut to increase indent and Ctrl + [ shortcut to decrease indent.
Aside from the above, if you’re looking for more precision while indenting paragraphs, you can go to Format > Align and indent > Indentation options.

Here, you can set precise indentation distance in centimeters. You can also choose to create a First Line or Hanging indent using the Special indent option. When done, click on Apply.
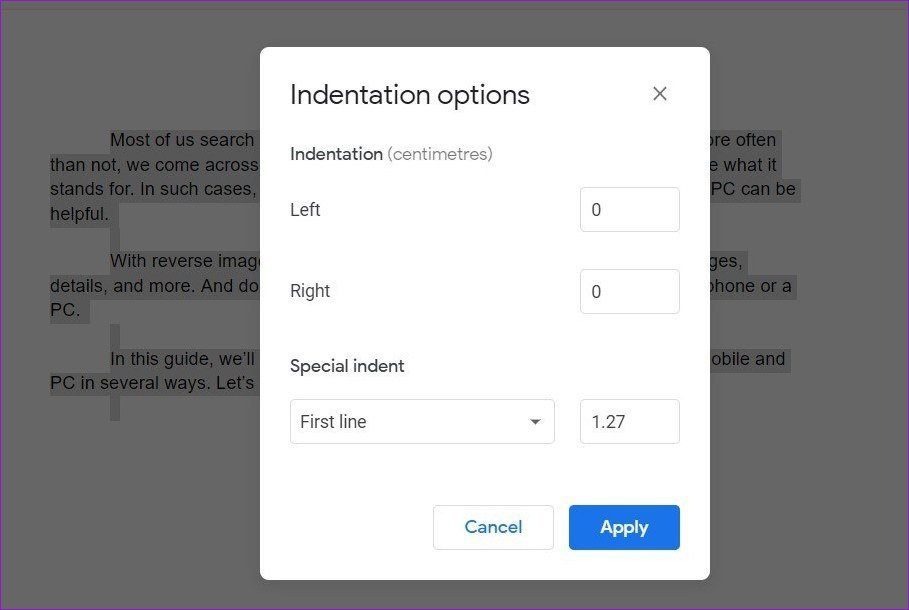
As we just saw, using the format tool is an effective way to precisely indent paragraphs in Google Docs.
How to Make a Hanging Indent in Google Docs on PC
A Hanging indent (also known as Negative indent) is a style of paragraph indention in which the first line of the paragraph is not indented while the following lines are indented. Hanging indents can be useful when adding citations to your academic document.
Similar to First Line and Left Indent, you can also create a Hanging Indent in Google Docs. For that, you can either use the Ruler or the Format option in Google Docs. Here’re both.
Using Ruler to Make a Hanging Indent
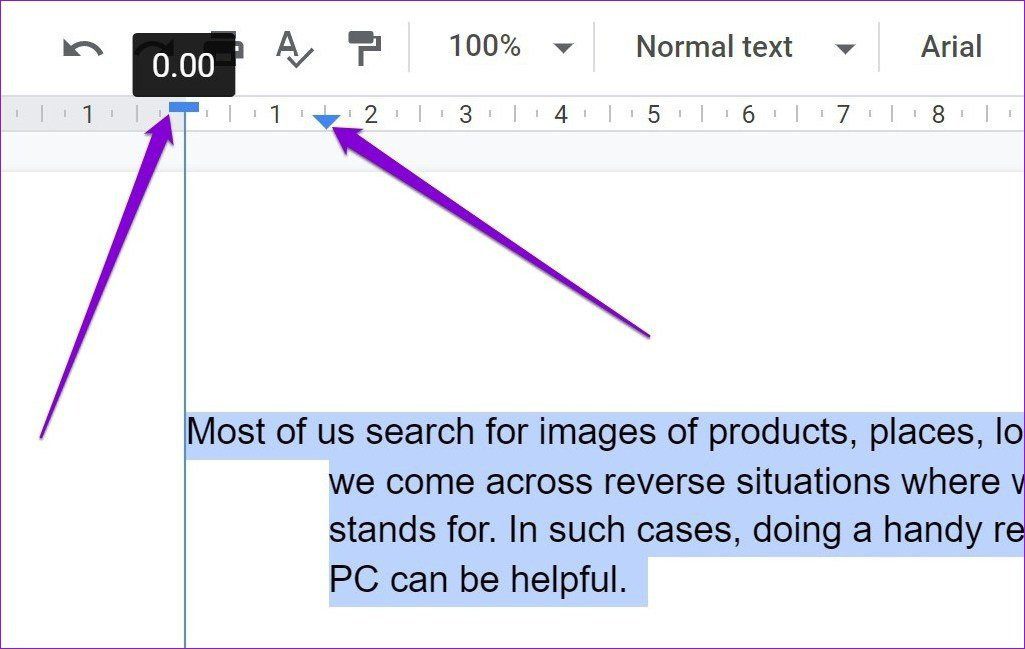
To create a hanging indent using the Ruler, select the paragraph that you want to apply a hanging indent to. Now drag the Left indent marker (upside-down triangle) to your right to set your paragraph indent.
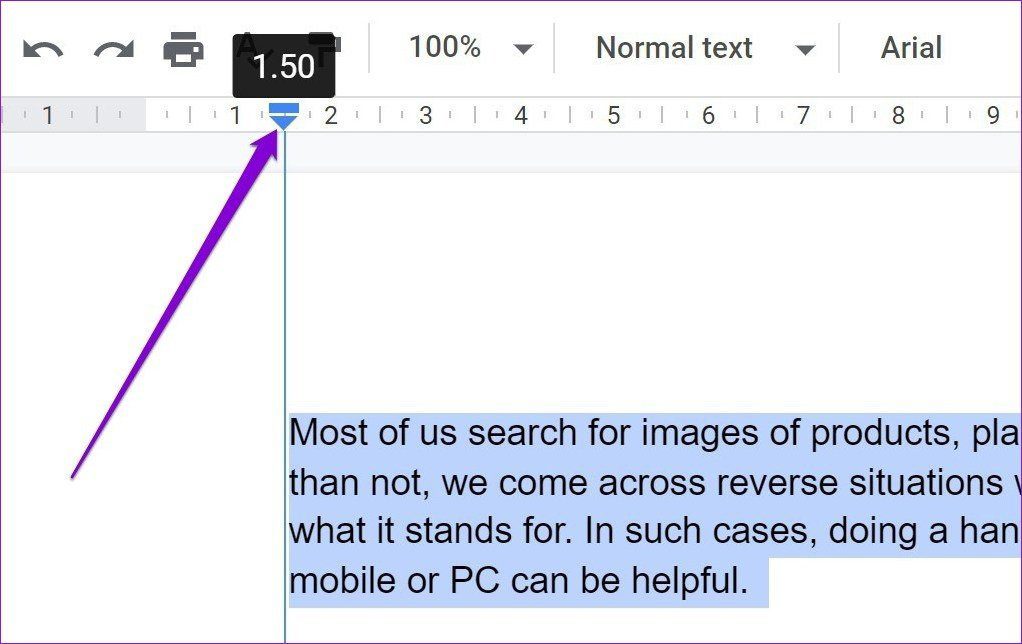
Now drag the First Line indent (horizontal bar) to your left. This way, you’ll only indent the first line to its left, and the rest of the paragraph will stay put.
Use Format Tool to Make a Hanging Indent
Alternatively, if you want to create a hanging indent at a custom value, you can use the Format tool in Google Docs. Here’s how.
Make a selection of the paragraph that you wish to indent. Now go to Format > Align and indent > Indentation options.
Under Special indent, use the drop-down menu to select Hanging from the list. In the box next to it, set a custom value in centimeters. Lastly, hit Apply.

That’s it. A hanging indent will be created at a specified distance.
How to Make an Indent in Google Docs on Mobile
Google Docs also allows indenting paragraphs in its mobile app on both Android and iPhone. Since there’s no ruler available in Google Doc’s mobile version, there’s no direct way to create a First Line or a Hanging indent. So, you’ll be limited to indenting the whole paragraph to the right. Here’s how it works.
Step 1: Open up your Google Docs document. Tap the Pencil icon in the bottom right to switch to edit mode.
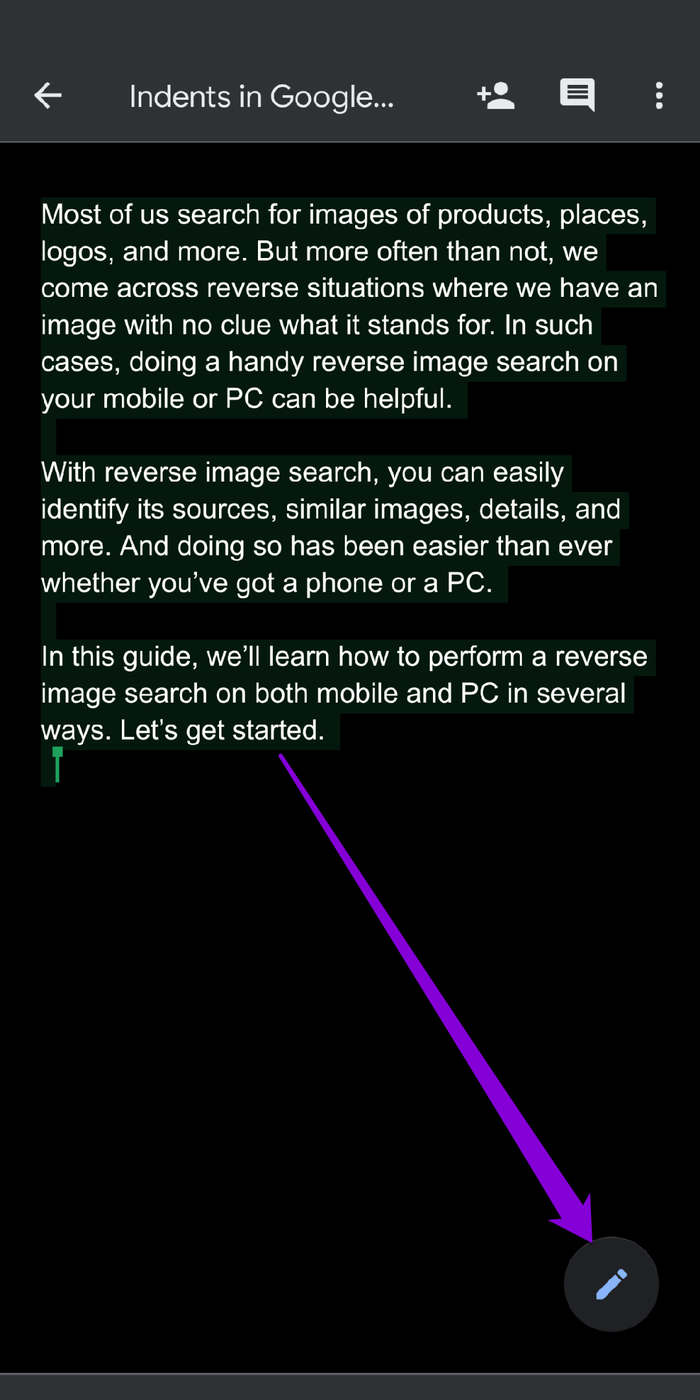
Step 2: Now place the cursor to the line of the paragraph that you wish to indent. Now tap on the format icon from the toolbar at the top.
Switch to the Paragraph tab and use the right Indent option.

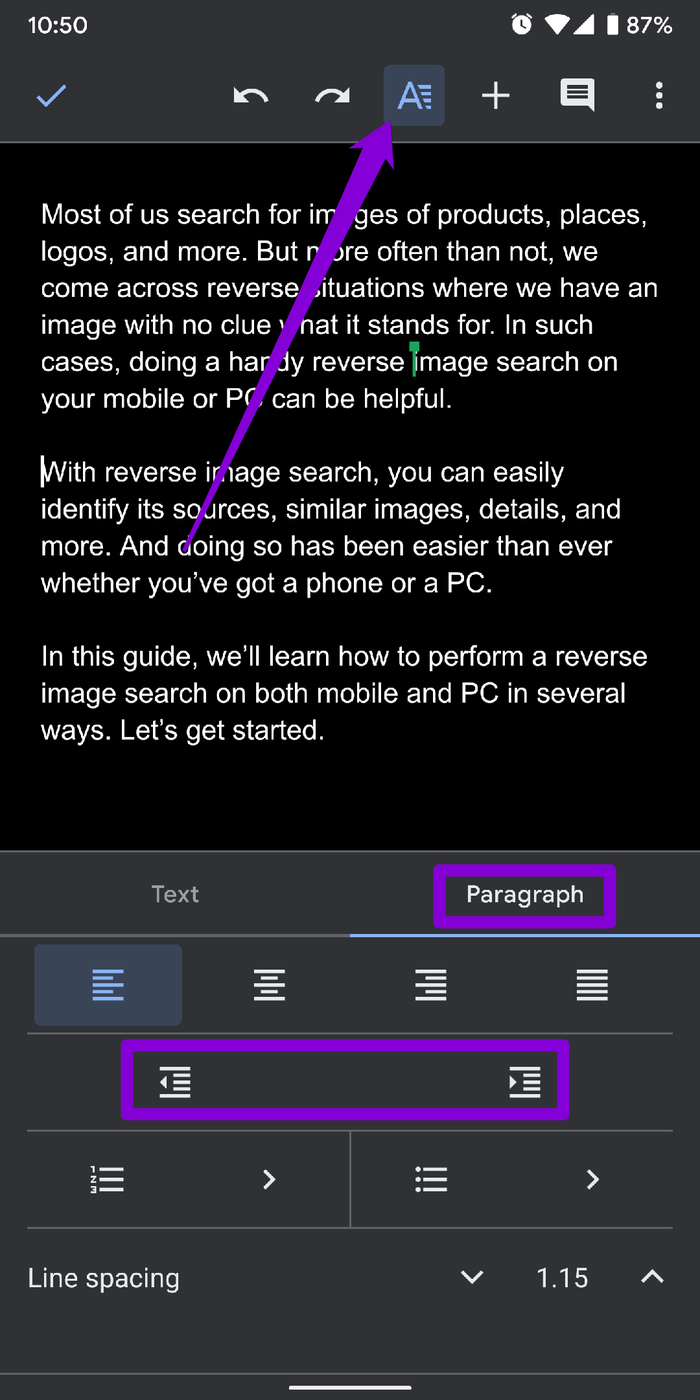
That’s it. This will indent the entire paragraph to its right.
Pro Tip: If you’re looking to indent the first line of a paragraph in the Google Docs app, place your cursor at the beginning of the paragraph. Now tap the spacebar on your keyboard multiple times to create a First Line indent. This workaround will get the job done.
Left or Right Indent
As expected, indenting paragraphs on Google Docs is a breeze. And while the mobile version may not have all the options you need, you can always use the web version to get the job done.
Was this helpful?
Last updated on 07 February, 2022
The article above may contain affiliate links which help support Guiding Tech. The content remains unbiased and authentic and will never affect our editorial integrity.


