How to Set an Audio File From WhatsApp as a Ringtone on Your iPhone
Before setting a WhatsApp audio file as a ringtone, you will first have to save it on your iPhone. Here’s how to do that.
Saving the WhatsApp Audio Onto Your iPhone
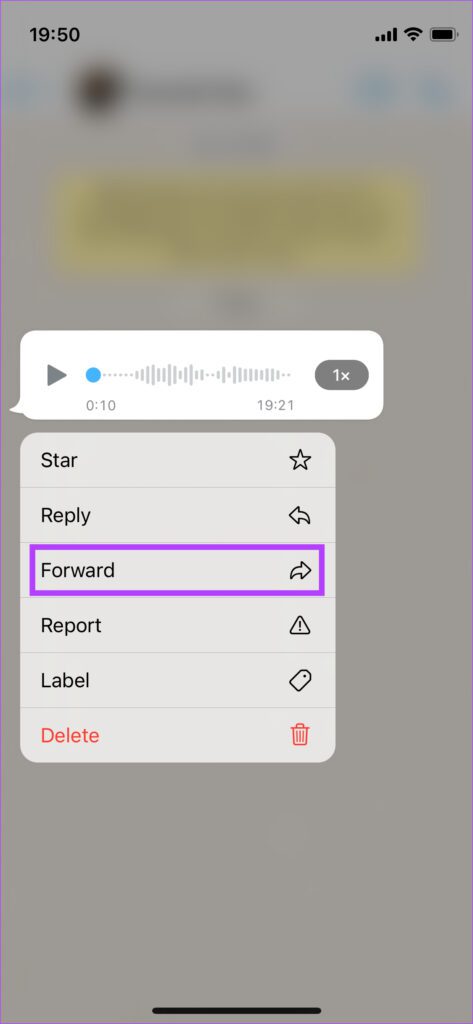
Step 1: Launch WhatsApp and open the chat where you’ve received the WhatsApp audio. Tap and hold on to the audio file and select Forward.
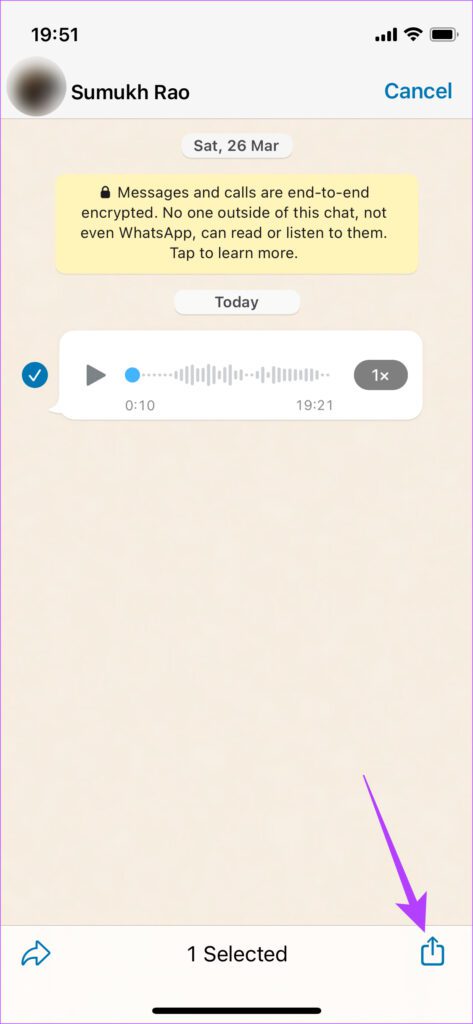
Step 2: Tap the share icon in the bottom-right corner of the screen.
Step 3: Select Save to Files in the list of options.

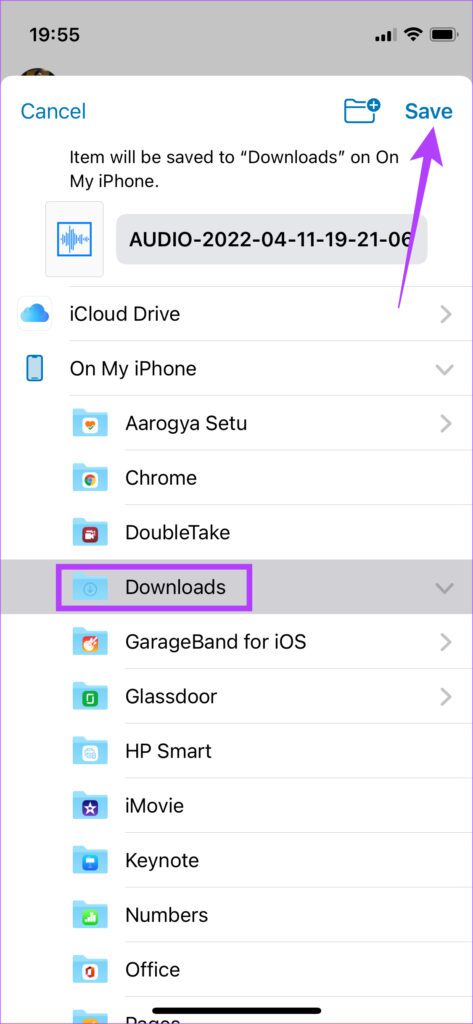
Step 4: The Files app will now open and you can choose where you want to save the audio. Select On My iPhone.
Step 5: Tap on the folder you want to save the audio in and select the Save option in the top-right corner.

Setting the WhatsApp Audio as Ringtone
You will need the GarageBand app that comes pre-installed on the iPhone for this method. In case you’ve uninstalled it, you can reinstall it on your iPhone. Once installed, follow these steps:
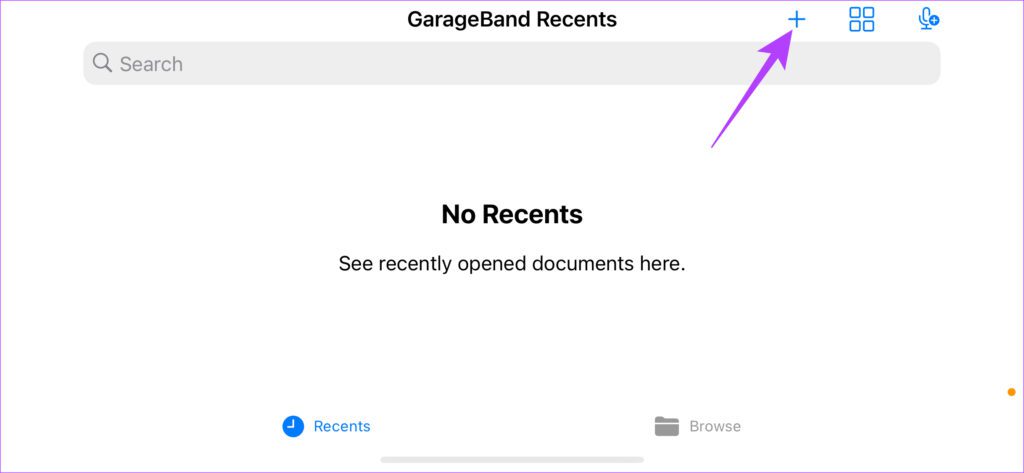
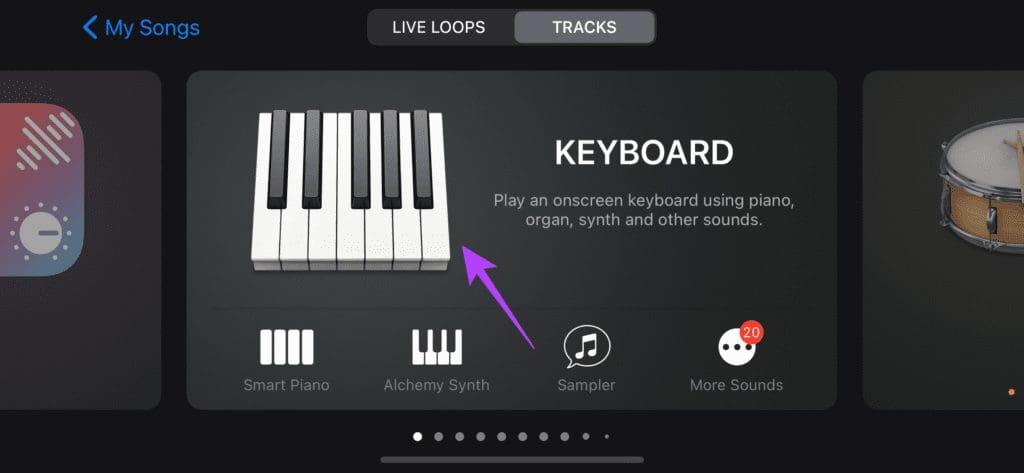
Step 1: Open the GarageBand app on your iPhone. Tap on the + icon in the top-right corner.
Step 2: Select any instrument from the list, like a keyboard.
Step 3: In the instrument pane, select the third icon from the top-left corner.
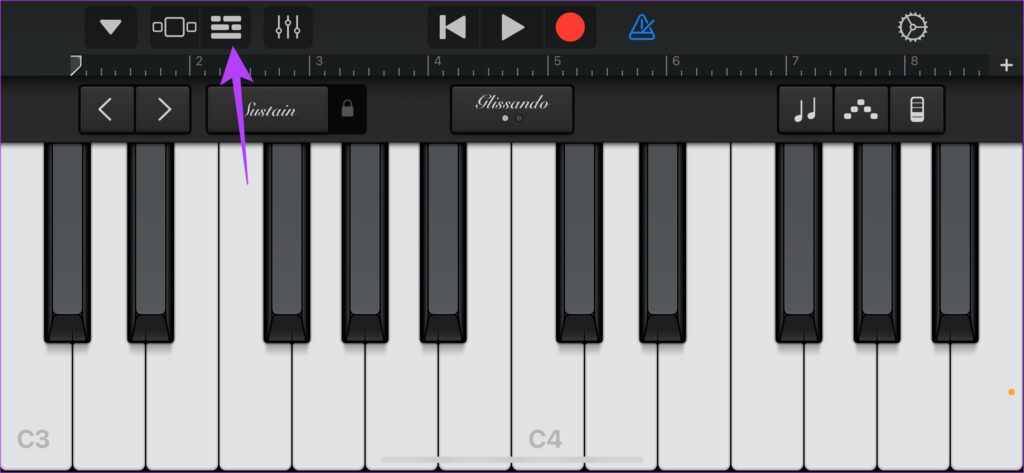
Step 4: Tap the loop icon in the top-right corner.

Step 5: Go to the Files tab and tap Browse items from the Files app.

Step 6: Navigate to the Browse tab and select the audio file from the location you had saved it.
Step 7: Tap on the WhatsApp audio file you want to set as a ringtone.

Step 8: Tap and hold on to the recording and let go when you see the GarageBand interface. Then, select the triangular icon next to the record button to disable the metronome.

Step 9: You can adjust the length of the audio by tapping on it and dragging the white handlebars on either side of the audio clip. Tap the Play button at the top to listen to the portion of the audio.

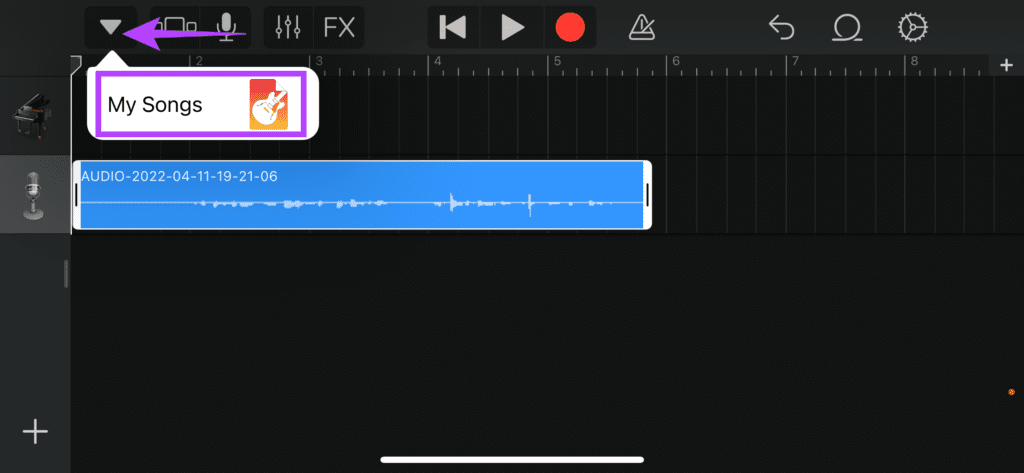
Step 10: Once you have finalized the audio clip, tap the arrow in the top-left corner of the screen and select My Songs.
Step 11: Press and hold on to the song till you see additional options. Select Share.

Step 13: Select the Ringtone option in the center.

Step 14: Rename the clip if you want and then select Export.

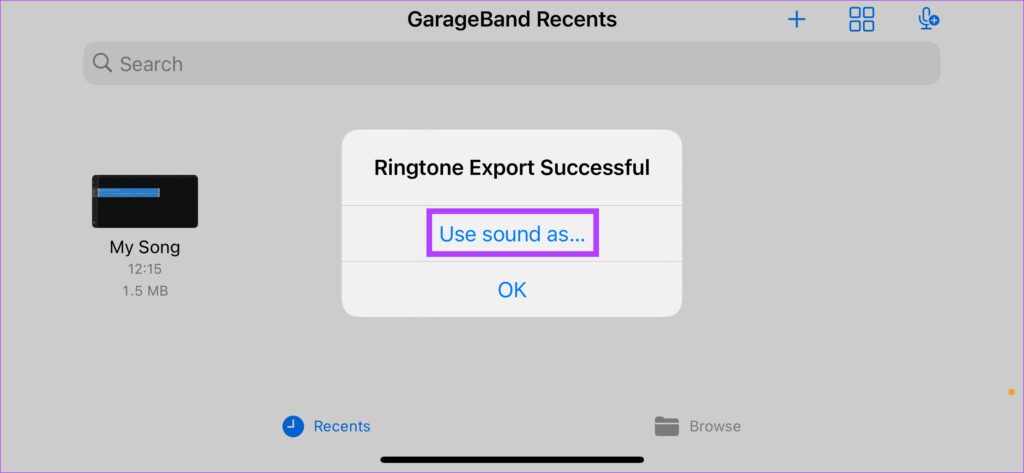
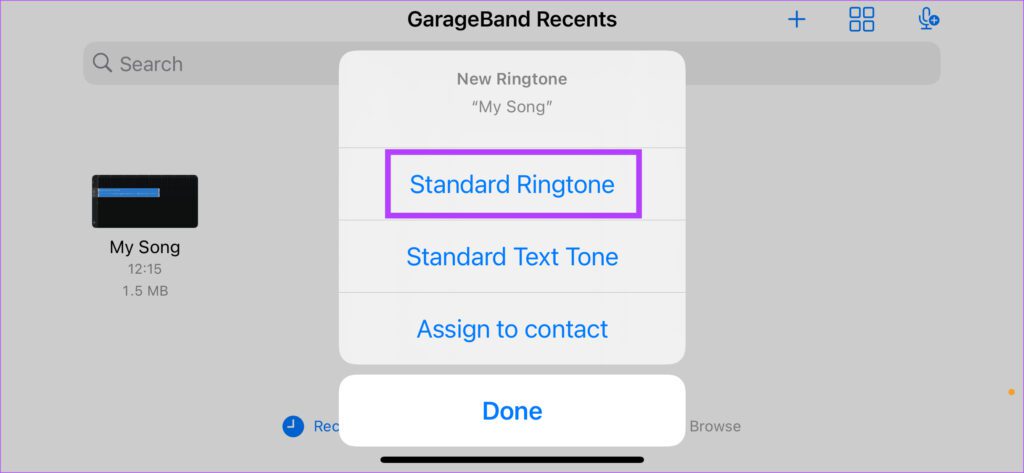
Step 15: When you see the Ringtone Export Successful dialog box, select Use sound as.
Step 16: Select Standard Ringtone.
Was this helpful?
Last updated on 02 September, 2024
4 Comments
Leave a Reply
Read Next
 How to Set a Video as a Ringtone on Android
Converting a Video to Audio Whether you already have a video downloaded on your smartphone or want to use a YouTube video, the first step would be to convert it
How to Set a Video as a Ringtone on Android
Converting a Video to Audio Whether you already have a video downloaded on your smartphone or want to use a YouTube video, the first step would be to convert it
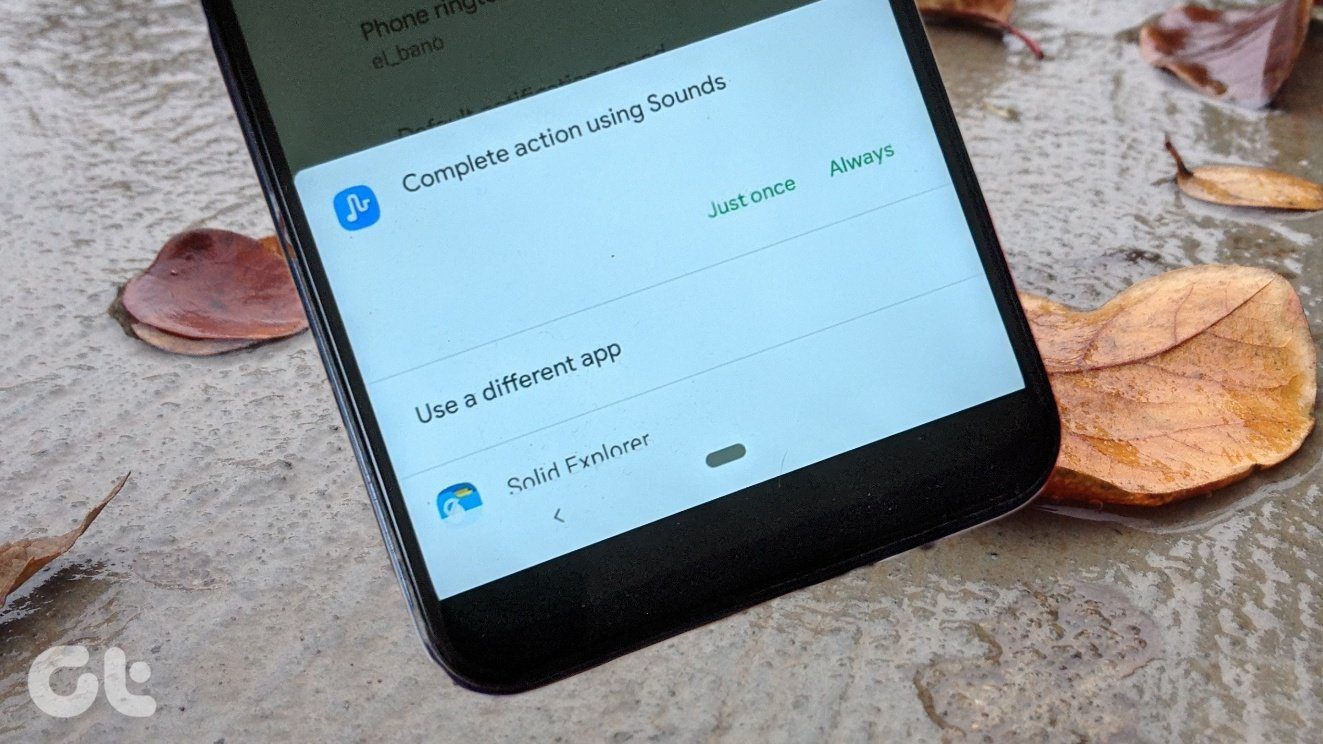 How to Reset the Default Ringtone App on Android
Method 1: Clear Defaults for the Ringtone App If you've accidentally set a third-party ringtone app (e.g.
How to Reset the Default Ringtone App on Android
Method 1: Clear Defaults for the Ringtone App If you've accidentally set a third-party ringtone app (e.g.
 How to Change Zoom App Ringtone and Notification Sound
How to Change Zoom Incoming Call Ringtone on Android, iPhone, and iPad If you use Zoom daily, you might be bored of its same ringtone or notification sound.
How to Change Zoom App Ringtone and Notification Sound
How to Change Zoom Incoming Call Ringtone on Android, iPhone, and iPad If you use Zoom daily, you might be bored of its same ringtone or notification sound.
 How to Fix Android Phone’s Ringtone Not Working Issue
Basic Fixes: Restart phone: Simple tricks are often the most useful.
How to Fix Android Phone’s Ringtone Not Working Issue
Basic Fixes: Restart phone: Simple tricks are often the most useful.
 How to Save WhatsApp Audio on iPhone, Android, and Web
How to Save Voice Message From WhatsApp on Android All the WhatsApp data is stored in your device's internal storage, which can be accessed using the File Manager.
How to Save WhatsApp Audio on iPhone, Android, and Web
How to Save Voice Message From WhatsApp on Android All the WhatsApp data is stored in your device's internal storage, which can be accessed using the File Manager.
 How to Change WhatsApp Audio Speed on Mobile and Desktop
Change Playback Speed for Audio Messages on WhatsApp WhatsApp allows you to change the playback speed of audio messages in three levels : 1x – 1x means WhatsApp will play
How to Change WhatsApp Audio Speed on Mobile and Desktop
Change Playback Speed for Audio Messages on WhatsApp WhatsApp allows you to change the playback speed of audio messages in three levels : 1x – 1x means WhatsApp will play
 5 Ways to Fix No Audio on WhatsApp Web
Preliminary Checks Check the video or try playing another/older video: Is the video a GIF?
5 Ways to Fix No Audio on WhatsApp Web
Preliminary Checks Check the video or try playing another/older video: Is the video a GIF?
 How to Optimize FaceTime Audio and Video Settings on iPhone
The FaceTime app is commonly available across all Apple devices, including the iPhone.
How to Optimize FaceTime Audio and Video Settings on iPhone
The FaceTime app is commonly available across all Apple devices, including the iPhone.
The article above may contain affiliate links which help support Guiding Tech. The content remains unbiased and authentic and will never affect our editorial integrity.


Wonderful step by step explanation with screenshots.
Thanks for your efforts.
Simple and wonderful explanation. Helped a lot. Thanks.
Great help, it look so easy
Damn, in android i just have to open music play recent files and put ringtone on, what a shit os system.