How to Rotate an Image
iPhone
The Photos app has a built-in powerful editor that helps you rotate an image. Let’s learn how to use it.
Tip: If you want to rotate an image saved in the Files app, first save it in the Photos app.
Step 1: Launch the Photos app on your iPhone and open the photo you wish to rotate on the full screen.
Step 2: Tap the Edit button at the top right corner.


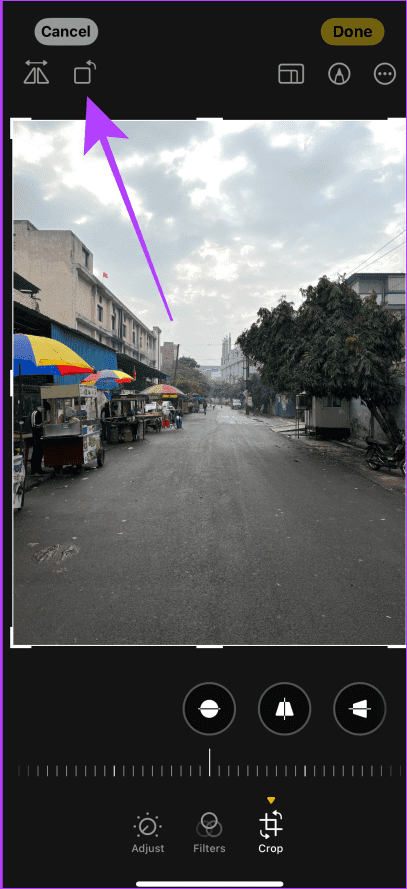
Step 3: The photo will open in the Photos editor; tap the Crop tool at the bottom.
Step 4: Tap the rotate tool to rotate the photo.

Step 5: Now, tap Done to save the image. And that’s it.
Tip: Tap the rotate tool multiple times to get the desired result.
Rotate Multiple Images Using a Shortcut
Step 1: Launch the Shortcut app on your iPhone.
Step 2: Tap the + sign, tap the name and tap Rename, then give it a name and tap Done.

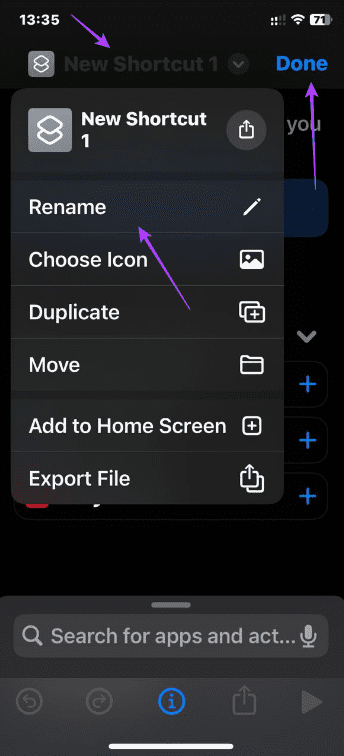
Step 3: Tap the 3 dots of the new shortcut to open it.
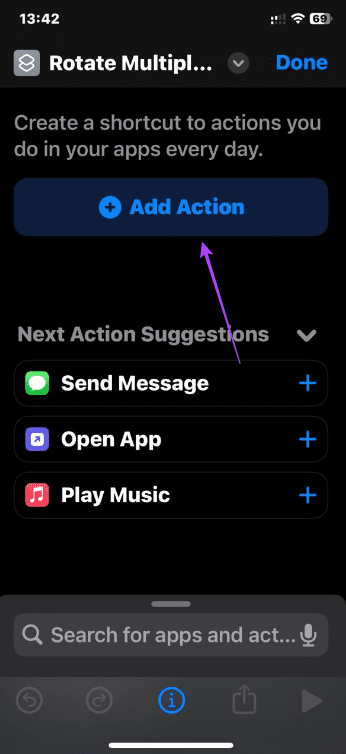
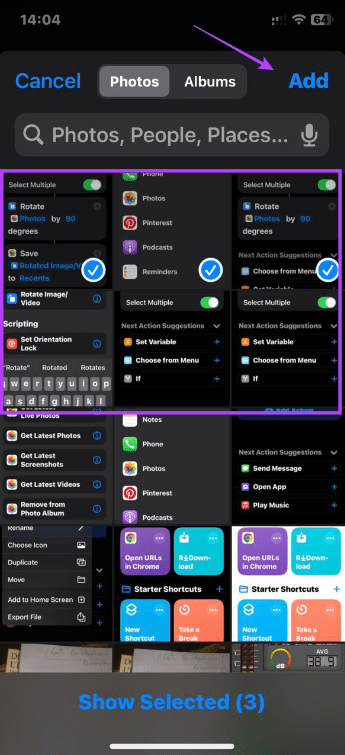
Step 4: Tap the Add action button, then tap Apps and the Photos app.

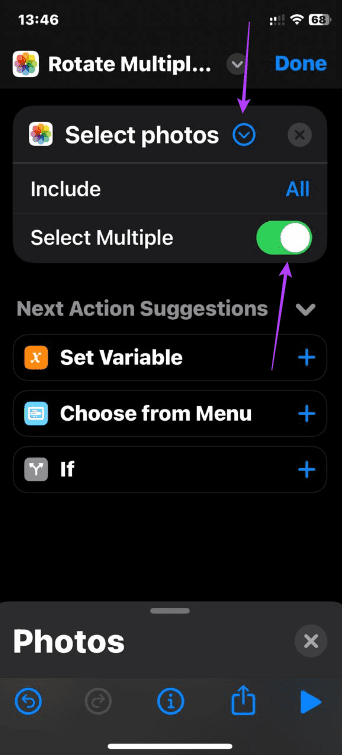
Step 5: Select the Select photos option, then expand Select photos and toggle on Select Multiple.

Step 6: Swipe up from the bottom and tap the X button, then search for rotate and select Rotate Image/Video.


Step 7: Swipe from the bottom again. Select the Apps button, then select Photos.


Step 8: Tap Save to Photo Album and tap Done.
Now you are ready to use the shortcut.
Step 1: Click your newly created shortcut from the Shortcut app interface.
Step 2: Select your photos and tap Add.

Now the same photos should be rotated in the Photos app.
Also Read: How to invert or flip a picture on your iPhone and iPad
Android + Samsung
The Google Photos app is the easiest way to rotate an image on an Android smartphone. The app comes pre-installed on most Android devices. Here are the simple steps to follow.
Step 1: Launch the Google Photos app and open the photo you wish to rotate on the full screen.
Step 2: Tap Edit or the pencil icon at the bottom, then tap the rotate icon.

Tip: Tap the rotate tool multiple times to get the desired result.
Step 5: Once done, tap Save.
There are no built-in solutions to rotate multiple images simultaneously on Android.
Mac
Mac also allows you to rotate an image natively through these three methods.
Method 1: Using Quick Look (AKA Quick Preview)
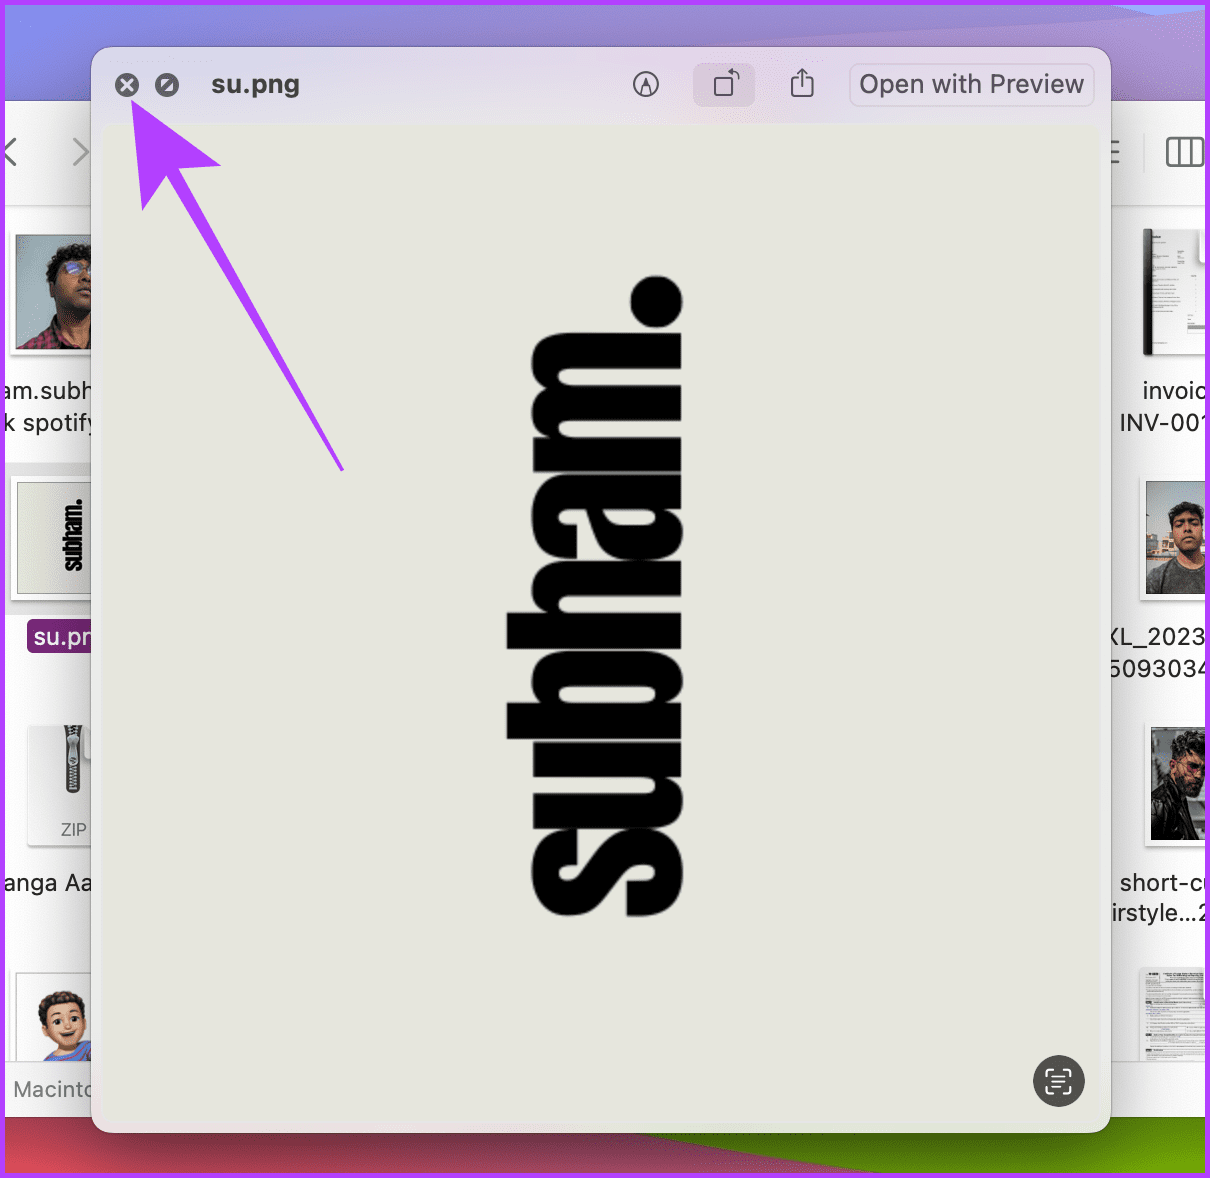
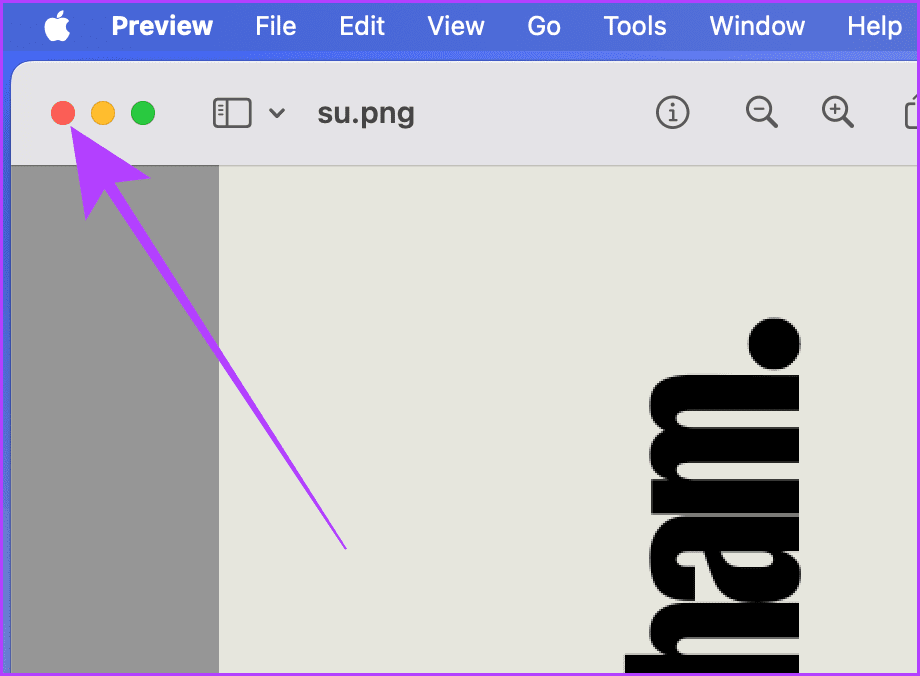
Step 1: Locate the photo in Finder on your Mac and click to select it.

Step 2: Now, hit the Spacebar on your Mac’s keyboard to open the photo in Quick Look.

Step 3: The photo will now open in Quick Look. Click on the rotate tool to rotate the photo.

Step 4: Click x to close the Quick Look and save the rotated image. You can also hit the Spacebar again on the keyboard to close the Quick Look.
Sometimes, the rotate tool isn’t in the Quick Look; in such cases, follow these steps.
Step 5: First, open the photo in Quick Look by following the abovementioned steps and click on the markup tool.
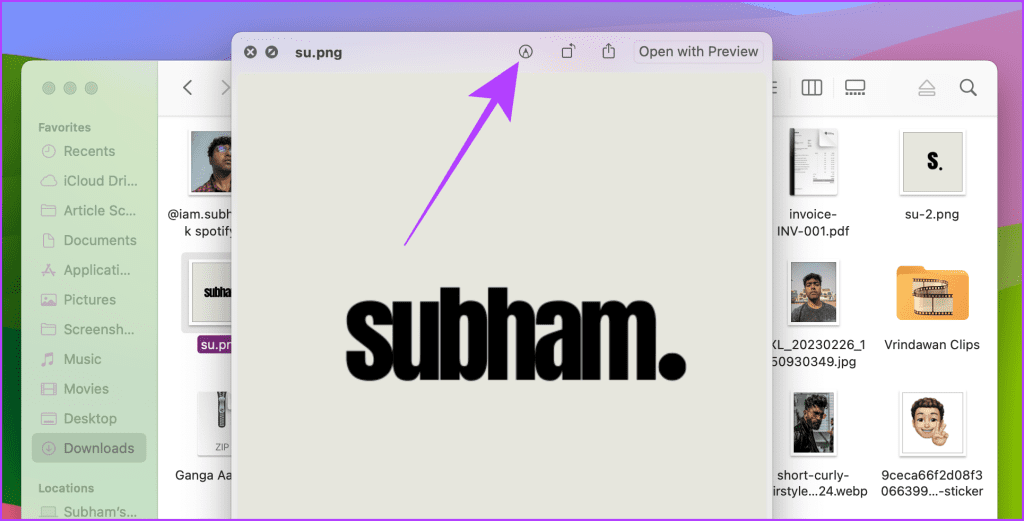
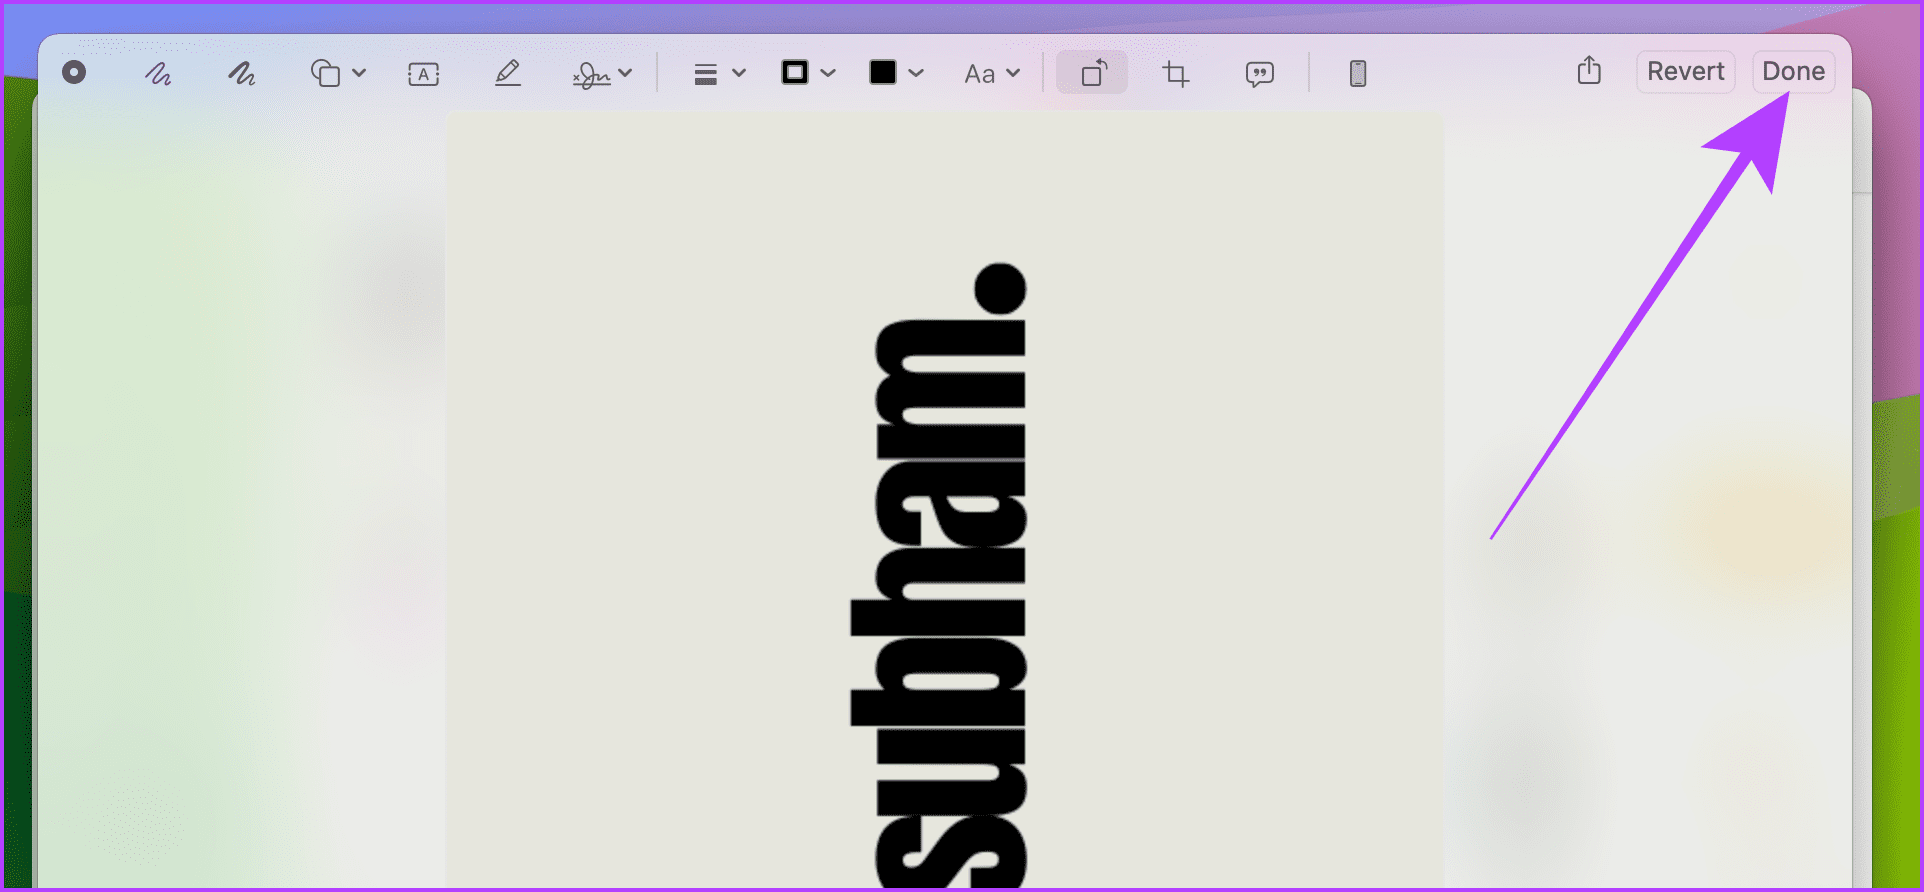
Step 6: The Quick Look Editor will now open. Click the rotate tool to rotate the image and get the desired orientation.

Step 7: Click Done to save the image.
Step 8: Click x to close the Quick Look. Or hit Spacebar on your Mac’s keyboard to close the Quick Look without a mouse or trackpad.

Method 2: From Right-Click Menu
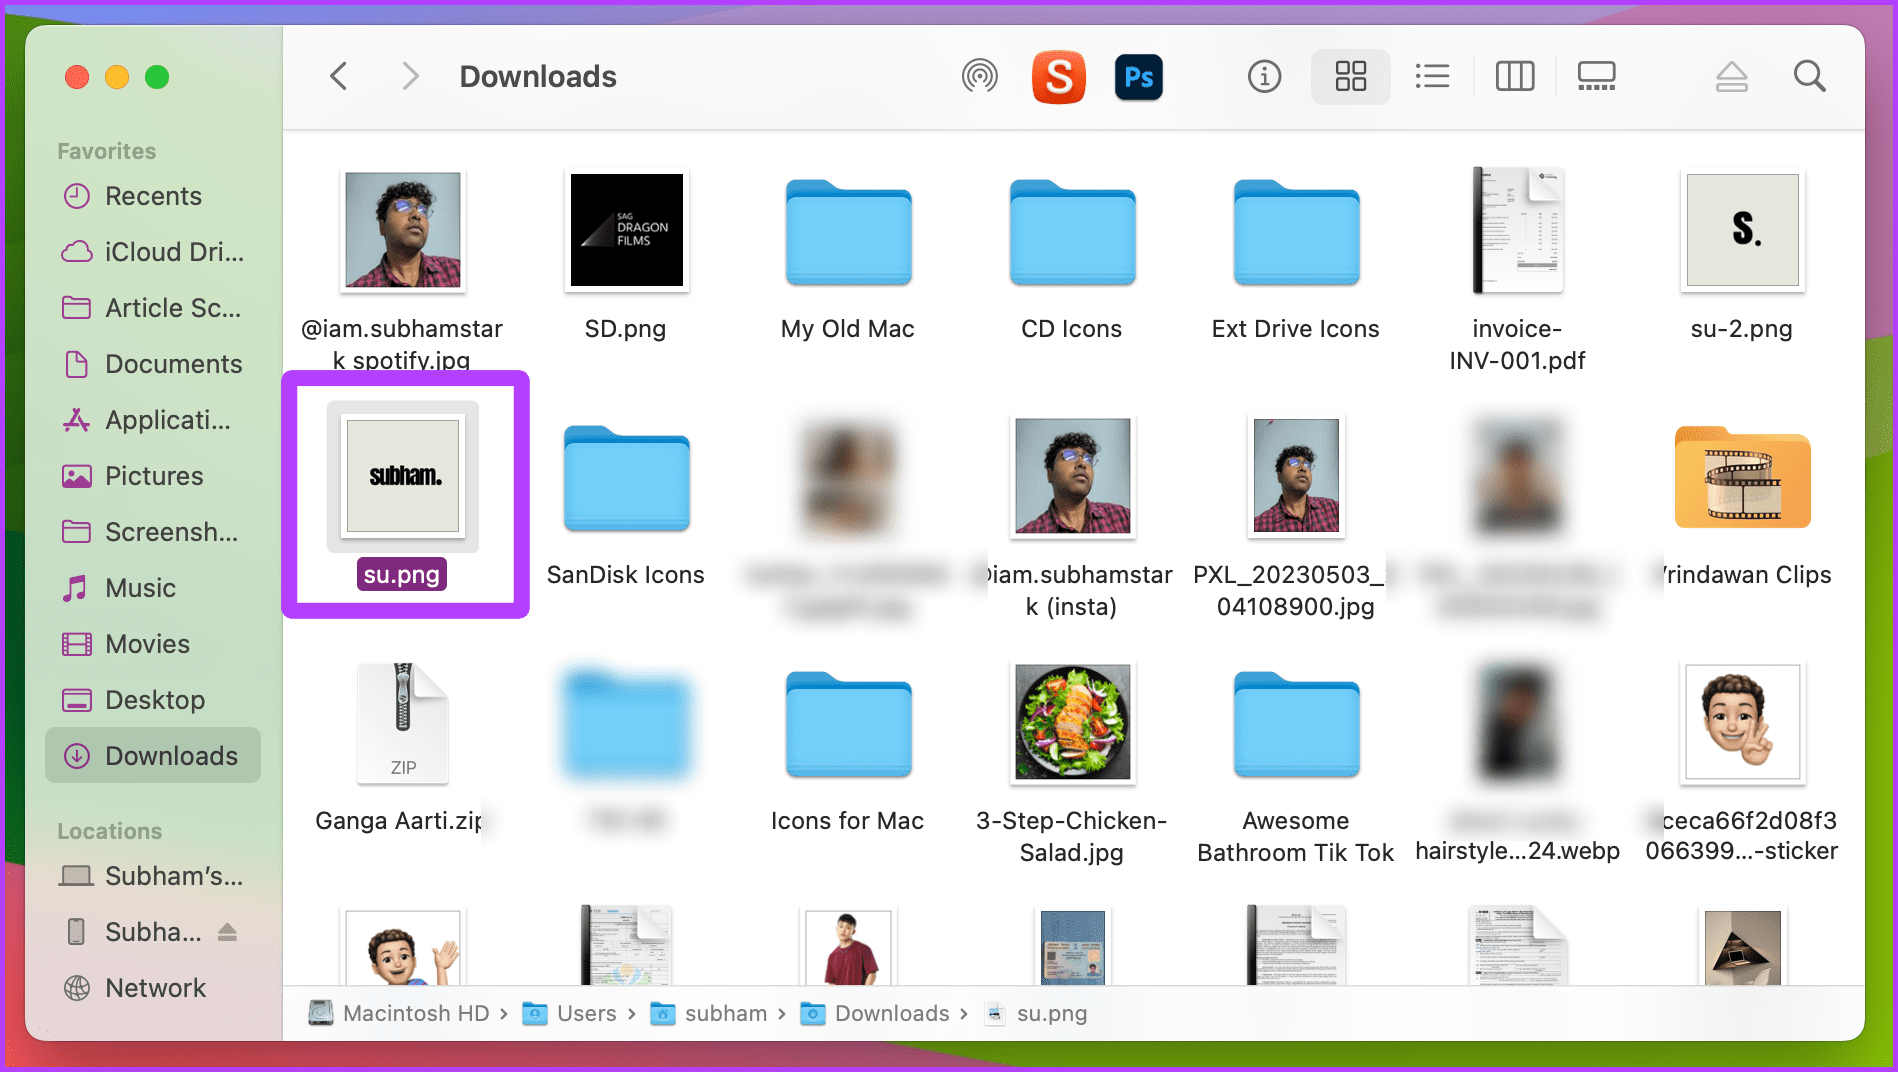
Step 1: Launch Finder on your Mac and locate the photo you want to rotate.
Step 2: Right-click on the photo.
Step 3: Drag the mouse cursor and place it over Quick Actions from the drop-down menu to show more options.
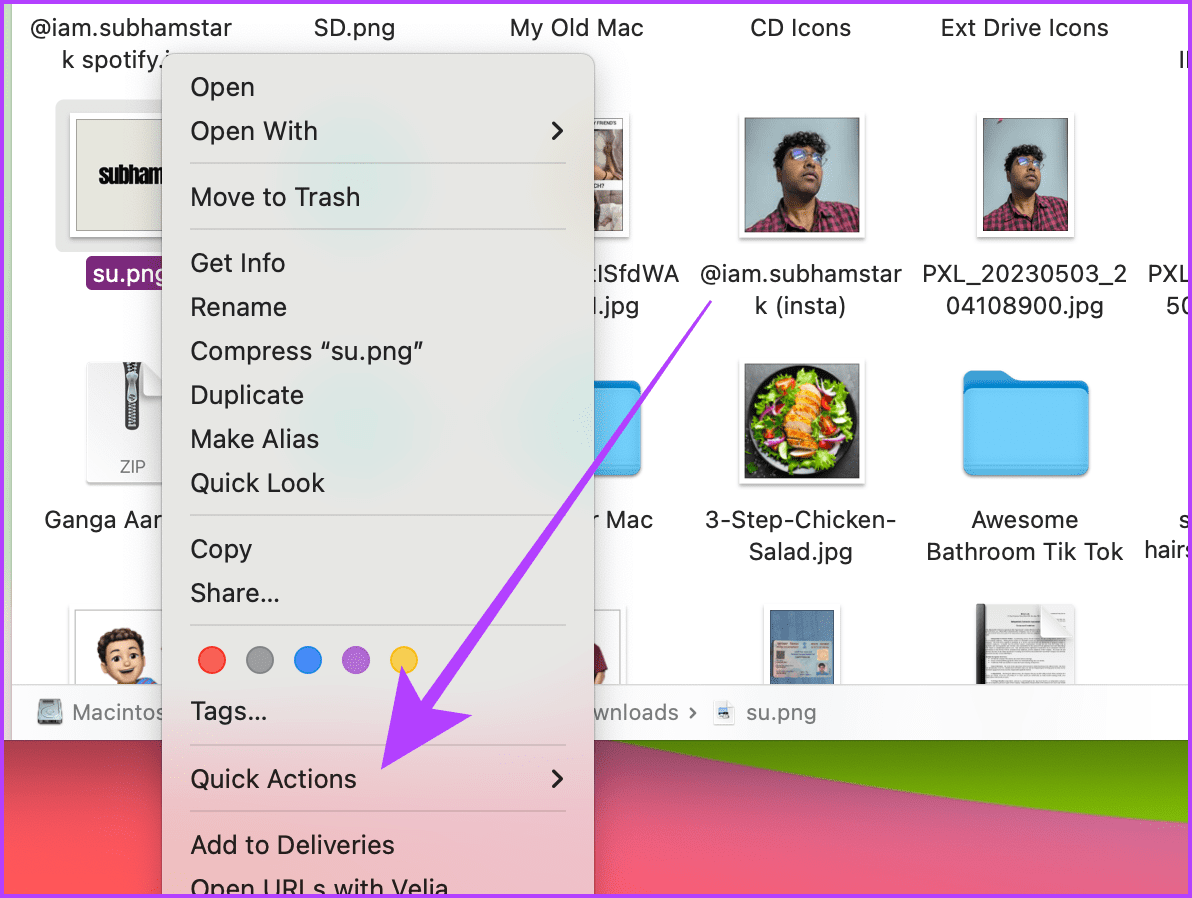
Step 4: Click Rotate Left to rotate the selected image counterclockwise. Repeat the process until you’re satisfied with the image’s orientation.
Method 3: Use the Preview App
Step 1: Open the Finder app on your Mac, go to the photo you wish to rotate, and double-click to open it in Preview.
Step 2: Once the photo is open in Preview, click Tools from the menu bar.
Step 3: Click Rotate Left or Rotate Right to rotate the picture. You can also use the keyboard shortcut Cmd + L/R to do the same without using the mouse.

Step 4: Click the red button to close the Preview window and save the rotated image.
Step 5: You can also click the rotate tool from the Preview window to quickly rotate the image.

Method 4: Rotate Images in the Photos App
Step 1: Launch the Photos app on your Mac using Spotlight Search or Launchpad.
Step 2: Navigate to the photo you wish to rotate and right-click on it.
Tip: To rotate more than one image in the Photos app on your Mac, select multiple images by holding the Cmd key on your keyboard and following these steps.

Step 3: Click Rotate Clockwise from the drop-down menu, and the image will be rotated.

Windows
Sometimes, you might need to change the picture’s orientation when uploading an important document to an official website. And if you have a Windows PC, you can do it easily without installing third-party software. There are two methods to do so on your Windows PC
Method 1: From Right-Click Menu
Step 1: Open File Explorer, navigate to the photo you wish to rotate, and right-click on it.

Step 2: Click Rotate right or Rotate left from the drop-down menu, depending upon your preference. And that’s it.

Method 2: Using the Photos App
You can also use the default Photos app of your Windows PC to rotate a photo. Here’s how to do it.
Step 1: Launch the File Explorer, navigate to the photo you wish to rotate, and double-click to open it in Photos.
Step 2: Now, click the rotate tool icon or hit Ctrl + R on the keyboard to rotate the picture.

Was this helpful?
Last updated on 28 August, 2024
Read Next
 3 Ways to Rotate an Image in Google Docs
Method 1: Rotate an Image Using Rotation Control Google Docs lets you freely rotate a picture using rotational control.
3 Ways to Rotate an Image in Google Docs
Method 1: Rotate an Image Using Rotation Control Google Docs lets you freely rotate a picture using rotational control.
 2 Ways to Fix Auto Rotate Not Working on iPhone
https://youtu.be/S_vIJ_3hn1s Try Basic Fixes Turn off the screen rotation lock: Ensure that the rotation lock is turned off on your iPhone: swipe down from the top right > tap the
2 Ways to Fix Auto Rotate Not Working on iPhone
https://youtu.be/S_vIJ_3hn1s Try Basic Fixes Turn off the screen rotation lock: Ensure that the rotation lock is turned off on your iPhone: swipe down from the top right > tap the
 4 Ways to Fix Auto Rotate Not Working on Android
Try Basic Fixes Remove your phone’s case: Start by removing your phone’s case and see if that gets the auto-rotate feature to work.
4 Ways to Fix Auto Rotate Not Working on Android
Try Basic Fixes Remove your phone’s case: Start by removing your phone’s case and see if that gets the auto-rotate feature to work.
 How to Rotate Videos in Windows 11
How to Rotate a Video and View It on Windows Media Player If you wish to rotate a video just for viewing purposes.
How to Rotate Videos in Windows 11
How to Rotate a Video and View It on Windows Media Player If you wish to rotate a video just for viewing purposes.
 4 Ways to Rotate Screen in Windows 11
Method 1: Use Screen Rotation Hotkeys You can quickly change screen orientation in Windows 11 with hotkeys without a mouse.
4 Ways to Rotate Screen in Windows 11
Method 1: Use Screen Rotation Hotkeys You can quickly change screen orientation in Windows 11 with hotkeys without a mouse.
 8 Ways to Fix iPad Screen Won’t Rotate
You've downloaded a new Netflix series to watch on your 8-hour flight journey.
8 Ways to Fix iPad Screen Won’t Rotate
You've downloaded a new Netflix series to watch on your 8-hour flight journey.
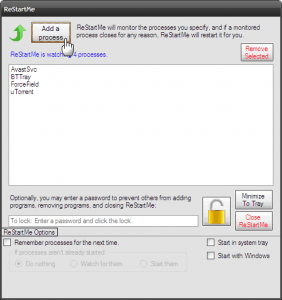 Quickly Auto-Restart a Windows Process or Program that Crashes
No one’s ever been killed in a Windows crash, so the Microsoft jokes don’t die down.
Quickly Auto-Restart a Windows Process or Program that Crashes
No one’s ever been killed in a Windows crash, so the Microsoft jokes don’t die down.
The article above may contain affiliate links which help support Guiding Tech. The content remains unbiased and authentic and will never affect our editorial integrity.