Method 1: Using Windows Search
Step 1: Press the Windows key on your keyboard or click the on-screen Windows icon.
Step 2: Type Local Security Policy and click Run as administrator.

In the prompt, select Yes.
If you cannot see the search bar on your Windows PC, fix the missing search bar by following a few simple steps.
Method 2: From Windows Tool
Step 1: Press the Windows key on the keyboard or click the Windows icon on the taskbar and select All apps.
Step 2: From the list of programs, scroll down and click on Windows Tools.
Note: If you are on Windows 10, find the Windows Administrative Tool.

Step 3: Finally, click on Local Security Policy.

If you don’t want to access Windows Tools from the Start Menu, there are multiple ways to do so.
Method 3: Using File Explorer
Step 1: Press the Windows key on your keyboard, type File Explorer, and click Open.
Step 2: Navigate to the address bar, type the below command, and hit Enter.
secpol.msc

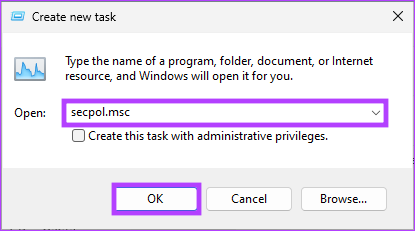
Method 4: Using Task Manager
Step 1: Press the Windows key on your keyboard, type Task Manager, and click Open.
Step 2: Click on Run new task.

Step 3: In the Create new task window, in the text field, type secpol.msc, and click OK.
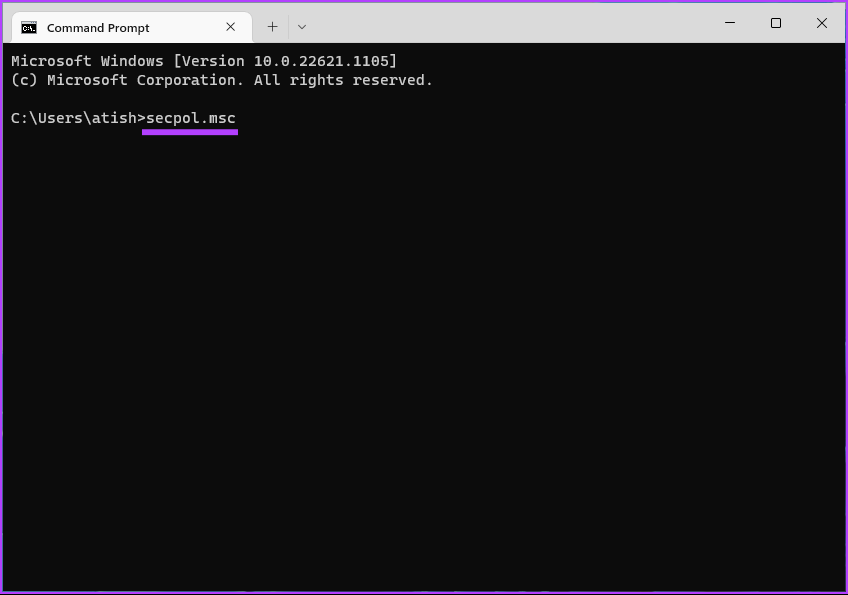
Method 5: From Run Command, Command Prompt, or PowerShell
Step 1: Press the Windows key on your keyboard, type Command Prompt or PowerShell or Windows Terminal, and click Run as administrator.
In the prompt, select Yes.
Step 2: Type the below command and hit Enter.
secpol.msc
Also Read: Top ways to back up the Local Group Policy editor on Windows 11
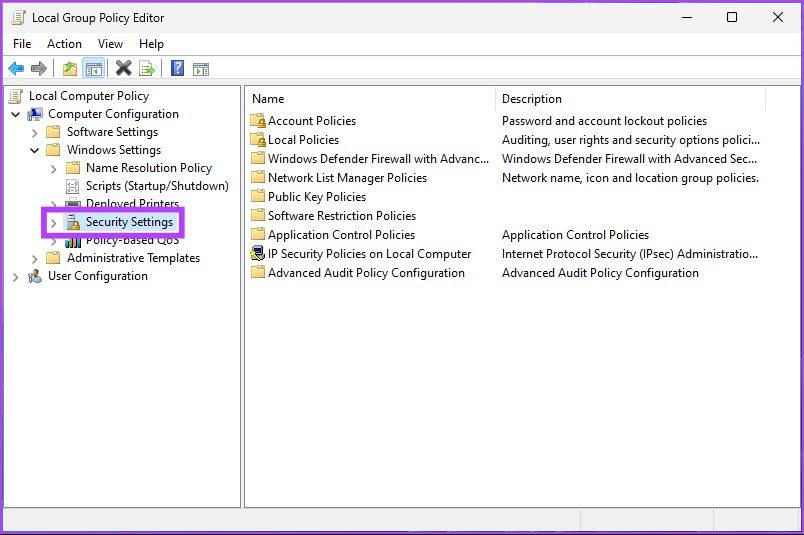
Method 6: Using Group Policy
Group Policy Editor is an excellent tool for managing Windows settings, including the Windows Firewall.
Step 1: Press the Windows keys on your keyboard, type gpedit, and click Open.
Step 2: In the left pane, under Local Computer Policy, select Computer Configuration.

Step 3: In the right pane, double-click on Windows Settings.

Step 4: Select the Security Settings option.
If you have any queries, check out the FAQ section below.
FAQs
It depends on the changes to the local security policy and the operating system being used. Some changes to the local security policy might take effect immediately, while policies such as user rights, password policies, or firewall rules may require a reboot for the changes to take effect.
It depends on the security policy and the operating system you use. System administrators are usually in charge of security policies because they have the necessary rights and permissions to do so.
Was this helpful?
Last updated on 26 April, 2024
Read Next
 2 Ways to Reset Local Group Policy Settings on Windows 11
Method 1: Reset Local Group Policy Settings Using the Group Policy Editor To reset local group policy settings on Windows 11, set all policies to 'Not Configured' individually using the
2 Ways to Reset Local Group Policy Settings on Windows 11
Method 1: Reset Local Group Policy Settings Using the Group Policy Editor To reset local group policy settings on Windows 11, set all policies to 'Not Configured' individually using the
 5 Ways to Fix Security Policy Prevents Camera Use on Android
Fix 1: Turn Off Sensors and On Again Your Android phone has a hidden option that lets you turn off all the sensors, and the camera sensor is one of
5 Ways to Fix Security Policy Prevents Camera Use on Android
Fix 1: Turn Off Sensors and On Again Your Android phone has a hidden option that lets you turn off all the sensors, and the camera sensor is one of
 3 Ways to Fix Can’t Take Screenshot Due to Security Policy on Android
Fix 1: Enable Screenshots in Chrome Incognito Mode The Android OS prevents screenshots from being taken while in Incognito Mode in the Chrome browser.
3 Ways to Fix Can’t Take Screenshot Due to Security Policy on Android
Fix 1: Enable Screenshots in Chrome Incognito Mode The Android OS prevents screenshots from being taken while in Incognito Mode in the Chrome browser.
 3 Ways to Fix “The Local Device Name Is Already in Use” Error on Windows 11/10
Fix 1: Assign or Change Drive Letter Step 1: Right-click the Windows Start button, locate Disk management, and click to open.
3 Ways to Fix “The Local Device Name Is Already in Use” Error on Windows 11/10
Fix 1: Assign or Change Drive Letter Step 1: Right-click the Windows Start button, locate Disk management, and click to open.
 2 Ways to Fix Group Policy Editor (gpedit) Missing on Windows
Why Can't I Find the Group Policy Editor on Windows PC?
2 Ways to Fix Group Policy Editor (gpedit) Missing on Windows
Why Can't I Find the Group Policy Editor on Windows PC?
 6 Ways to Fix “This Installation Is Forbidden by System Policy” Error in Windows 11
Fix 1: Use Another Installer File Try using a new installer file and then check if the installation completes without an error.
6 Ways to Fix “This Installation Is Forbidden by System Policy” Error in Windows 11
Fix 1: Use Another Installer File Try using a new installer file and then check if the installation completes without an error.
 How to Set Up Local Folder Sharing Between Windows and Mac
If you use both a Windows PC and a Mac, you might be spending quite some time fumbling around with flash drives to transfer data between them.
How to Set Up Local Folder Sharing Between Windows and Mac
If you use both a Windows PC and a Mac, you might be spending quite some time fumbling around with flash drives to transfer data between them.
 3 Ways to Play Local MP3 Files on iPhone
Method 1: Using the Files App The native Files app on your iPhone offers an easy way to play local MP3 files.
3 Ways to Play Local MP3 Files on iPhone
Method 1: Using the Files App The native Files app on your iPhone offers an easy way to play local MP3 files.
The article above may contain affiliate links which help support Guiding Tech. The content remains unbiased and authentic and will never affect our editorial integrity.