Note: It is vital that you save your work before proceeding with the below-mentioned steps and methods.
Method 1. Using Task Manager
Step 1: Press the Windows key, type Task Manager, and click Run as administrator. In the prompt, click Yes.
Step 2: Under the Processes tab, scroll down to find Service Host: DCOM Server Process Launcher.
Step 3: Select the Process and click End task from the top-right corner.

Step 4: In the prompt, check Abandon unsaved data and shut down, and click Shut down.
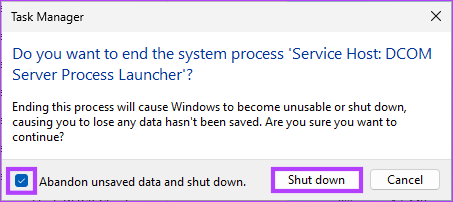
And that’s it. Your PC will crash with a Blue Screen of Death, displaying the stop code as Critical Process Died. If you are uncomfortable using Task Manager, there’s another way to use PowerShell.
Method 2. Using Powershell
Step 1: Press the Windows key, type PowerShell, and click Run as administrator. In the prompt, click Yes.
Step 2: Type the command mentioned below and press Enter.
Wininit
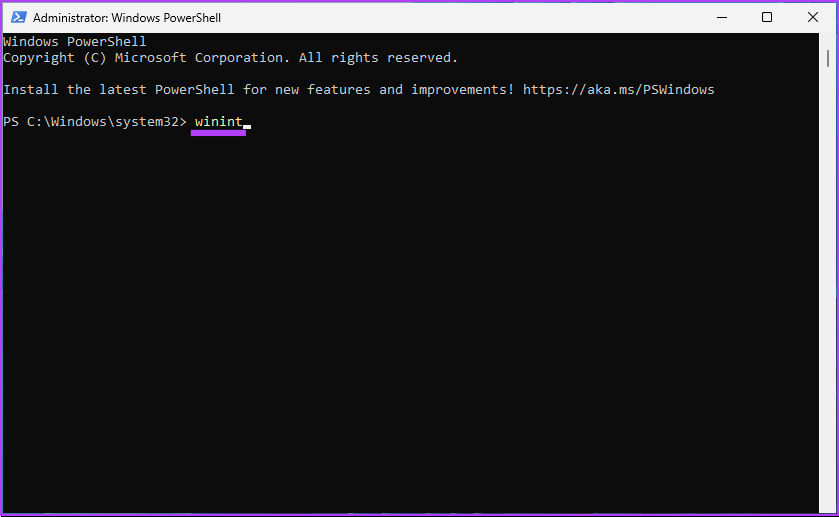
And there you go. Your Windows PC will crash, displaying a Blue Screen of Death.
Method 3. Using Command Prompt
Step 1: Press the Windows key, type Command Prompt, and click Run as administrator. In the prompt, click Yes.
Step 2: Type the following command and press Enter.
taskkill /IM svchost.exe /f
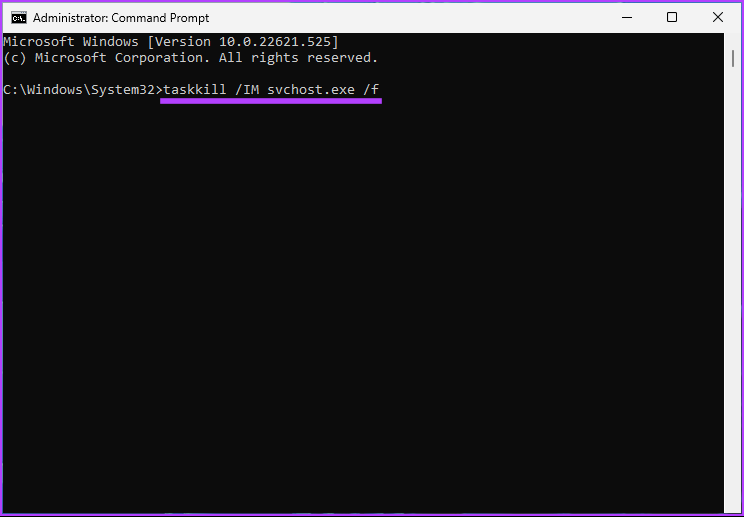
There you go. This is how you can fake Blue Screen of Death on your Windows PC.
Method 4. Using Registry Editor
Step 1: Press the Windows key, type Registry Editor, and click Run as administrator. In the prompt, select Yes.
Step 2: In the top address bar, enter the mentioned address.
HKEY_LOCAL_MACHINE\SYSTEM\CurrentControlSet\services\i8042prt\Parameters
If you are using a USB keyboard, ignore the above command and type the below command
HKEY_LOCAL_MACHINE\SYSTEM\CurrentControlSet\Services\kbdhid\Parameters
Step 3: Under the Parameters folder, right-click, select New, and choose DWORD (32-bit) Value.

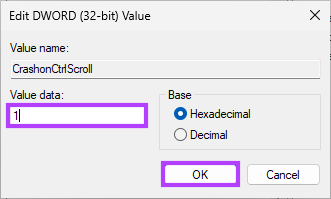
Step 4: Type CrashonCtrlScroll in the name field.
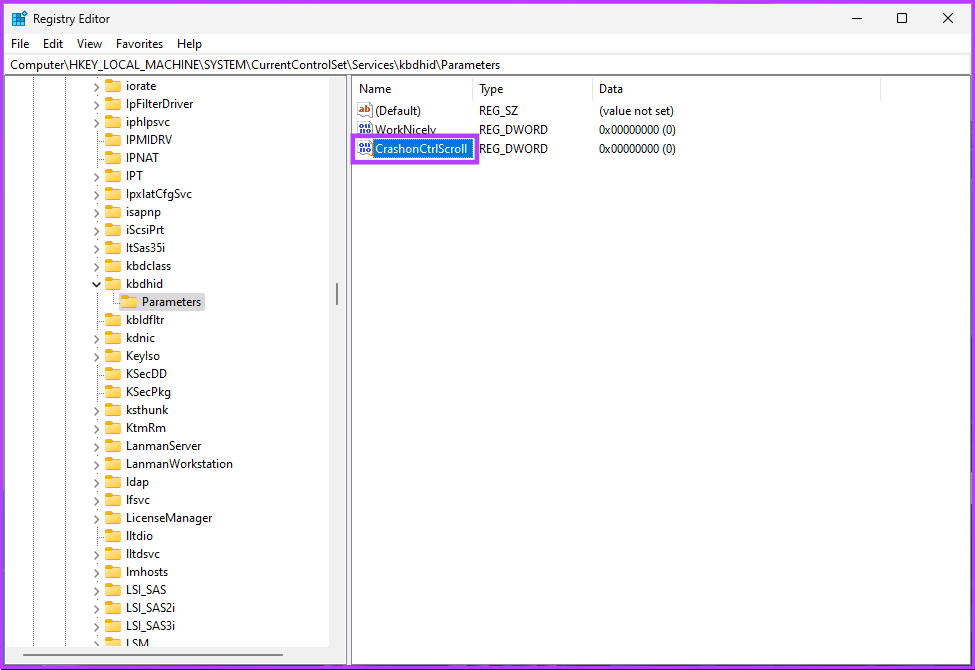
Step 5: Double-click on CrashonCtrlScroll, type 1 in the Value Data field, and press OK.
Finally, restart the system to implement the changes. And that’s it! When the system boots back, press the (right) Ctrl key + Scroll lock twice to force your Windows PC to display the BSOD error.
Method 5. Use a Third-Party BSOD Simulator
We will be using the Not My Fault app, which is, more or less, a BSOD simulator that forces your Windows PC to go Blue Screen of Death with a click of a button. Follow the steps mentioned below.
Step 1: Go to the Not My Fault app download page using the link below and click on Download.

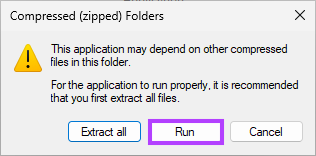
Step 2: Install and run the app on your computer.
Step 3: When you open the blue screen simulator app, you will be given choices to force the Windows crash. Under the Crash tab, select any option (Ex: High IRQL fault) and click Crash.
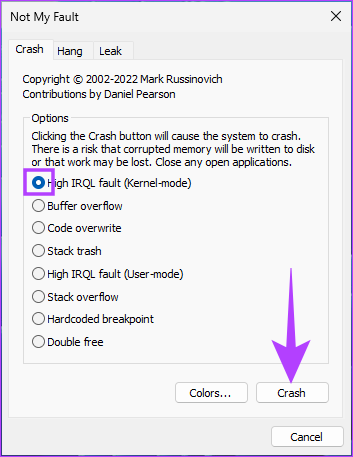
That’s it. Your PC will crash, and you will see a Blue Screen of Death. The Stop Code will depend on the option you choose to crash.
FAQs
Many factors can cause BSOD errors. So, when you reset your Windows PC to factory settings, you are only fixing small problems and not eliminating the root causes.
Yes, corrupt files, bad drivers, software problems, and hardware problems can all contribute to the BSOD error.
Whenever you encounter multiple BSOD errors, it is recommended to start Windows in safe mode first to configure settings or execute the solution.
Now that you know how to do it, you must understand that, at times, overdoing BSOD simulation may result in Windows functional and operational errors.
Was this helpful?
Last updated on 19 August, 2024
Read Next
 How to Fix “WHEA_UNCORRECTABLE_ERROR” on Windows 11
What Is the ‘WHEA_UNCORRECTABLE_ERROR’ BSOD Issue?
How to Fix “WHEA_UNCORRECTABLE_ERROR” on Windows 11
What Is the ‘WHEA_UNCORRECTABLE_ERROR’ BSOD Issue?
 2 Ways to Manually Update Google Play Services
Method 1: Update Google Play Services Using the Play Store One of the easiest ways to update Google Play Services is from the Google Play Store.
2 Ways to Manually Update Google Play Services
Method 1: Update Google Play Services Using the Play Store One of the easiest ways to update Google Play Services is from the Google Play Store.
 3 Ways to Manually Add New Passwords to Google Password Manager
Method 1: Using the Google App The Google Password Manager is nested in the Google app on your device.
3 Ways to Manually Add New Passwords to Google Password Manager
Method 1: Using the Google App The Google Password Manager is nested in the Google app on your device.
 How to Share a Facebook Post to Instagram Automatically or Manually
How to Automatically Post From Facebook to Instagram Before you can post content from Facebook to Instagram, there’s one prerequisite - link your Instagram and Facebook account/page.
How to Share a Facebook Post to Instagram Automatically or Manually
How to Automatically Post From Facebook to Instagram Before you can post content from Facebook to Instagram, there’s one prerequisite - link your Instagram and Facebook account/page.
 How to Update Apps on iPhone and iPad Manually or Automatically
https://youtu.be/JfkDtpEpKDw Method 1: Auto-Update Apps on iPhone and iPad iPhone and iPad usually have automatic app updates turned on by default.
How to Update Apps on iPhone and iPad Manually or Automatically
https://youtu.be/JfkDtpEpKDw Method 1: Auto-Update Apps on iPhone and iPad iPhone and iPad usually have automatic app updates turned on by default.
 6 Ways to Fix Airplane Mode Grayed Out on Windows 10 and Windows 11
Fix 1: Restart Radio Management Service Radio Management Service is an essential component that needs to run in the background for airplane mode to work.
6 Ways to Fix Airplane Mode Grayed Out on Windows 10 and Windows 11
Fix 1: Restart Radio Management Service Radio Management Service is an essential component that needs to run in the background for airplane mode to work.
 5 Ways to Fix “Your Computer Is Low on Memory” Error on Windows 10 and Windows 11
Try Basic Fixes Close unwanted apps and programs: Start by closing any unwanted apps and programs on your computer, especially the ones consuming a major chunk of your PC’s memory.
5 Ways to Fix “Your Computer Is Low on Memory” Error on Windows 10 and Windows 11
Try Basic Fixes Close unwanted apps and programs: Start by closing any unwanted apps and programs on your computer, especially the ones consuming a major chunk of your PC’s memory.
 6 Best Ways to Access Windows Tools on Windows 11
Windows Tools carries useful utilities like Event Viewer, Task Scheduler, and System Configuration Tool, organized into a folder for easy access.
6 Best Ways to Access Windows Tools on Windows 11
Windows Tools carries useful utilities like Event Viewer, Task Scheduler, and System Configuration Tool, organized into a folder for easy access.
The article above may contain affiliate links which help support Guiding Tech. The content remains unbiased and authentic and will never affect our editorial integrity.