Getting a PowerPoint presentation to look consistent can be tedious if you’re fixing slides one by one. There are several options to make PowerPoint format all slides the same so you don’t have to chase down each one manually. Here’s how to use them.
Option 1 – Use the Slide Master to Make PowerPoint Format All Slides at Once
The Slide master can apply consistent formatting across an entire presentation. Any change you make to the top-level master slide (including fonts, colors, background, logos, and placeholder positions) flows down to every slide in the deck automatically.
Step 1. Open your presentation and go to the View tab on the ribbon.
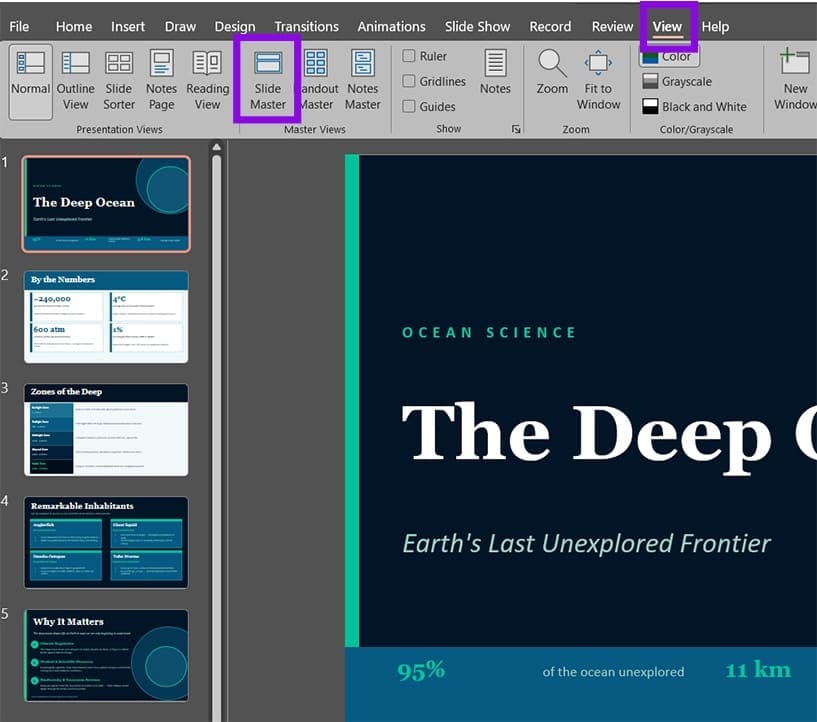
Step 2. Click on “Slide Master.” The view will switch to show a panel on the left with the master slide at the very top (larger than the others), and individual layout slides beneath it.
Step 3. Click on the top slide in the left panel. This is the main Slide Master, and changes here apply to every slide in the presentation, regardless of which layout they use. You can click on “Insert Slide Master” to get the default PowerPoint slides that you can then modify.
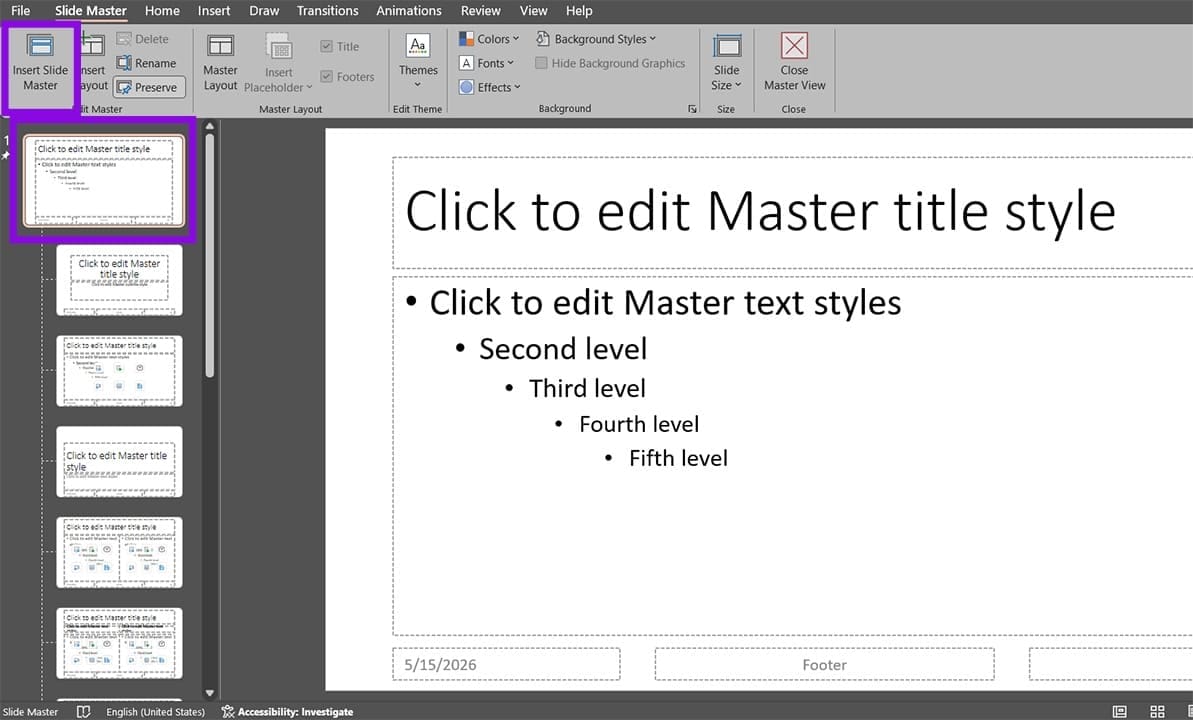
Step 4. Make your formatting changes. You can click on any placeholder or text element and change the font, size, and color. You can add a logo or watermark image, change the background color or fill, and adjust placeholder positions.
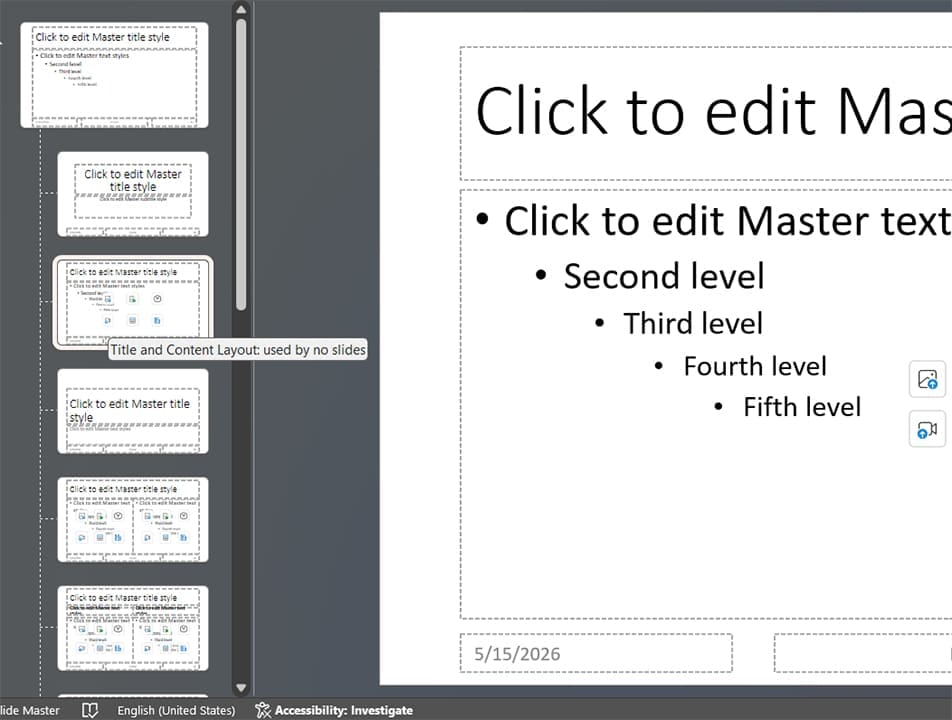
Step 5. If you only want changes to apply to slides using a specific layout, click one of the child layout slides below the master instead of the top slide. Changes made there only affect slides using that layout. Hovering over a slide shows its name so you can reference it later.
Step 6. When you’re done, click “Close Master View” on the Slide Master tab. Your changes are applied to all slides immediately.
Option 2 – Apply a Theme to Standardize Colors, Fonts, and Effects
A theme is a pre-packaged combination of color palette, font pairing, and visual effects. It’s one of the easiest ways to make a solid presentation when you don’t need a lot of customization and want to know how to format all PowerPoint slides the same.
Step 1. Go to the Design tab on the ribbon.
Step 2. Browse the themes shown in the Themes gallery. Click on the dropdown arrow to expand the selection, then hover over any theme to preview it on the current slide.
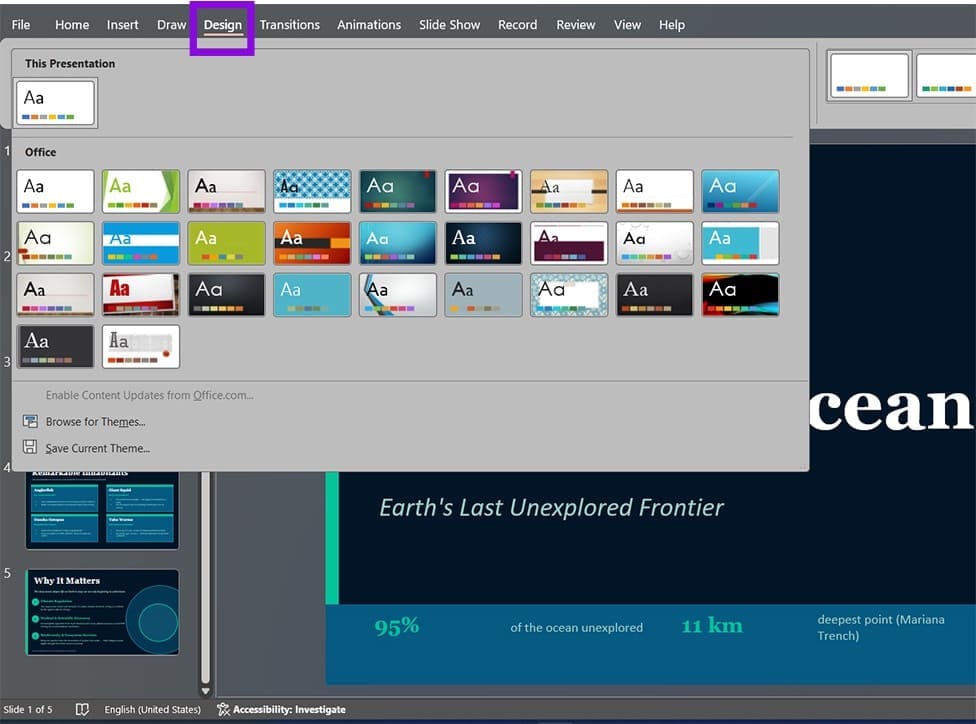
Step 3. Right-click a theme and select “Apply to All Slides.” A left-click without right-clicking also applies to all slides by default.
Once a theme is applied, you can adjust its color palette, fonts, and effects independently without switching to a completely different theme.
Note that theme formatting only affects elements that haven’t been manually reformatted. This can be handled separately.
Option 3 – Apply the Same Background to All Slides
Using a simple background can make a presentation look uniform even if the slides aren’t all the same.
Step 1. Go to the Design tab and click “Format Background” on the far right. A panel opens on the right side of the screen.
Step 2. Choose your background type: Solid fill, Gradient fill, Picture or texture fill, or Pattern fill. Configure the color or image using the options that appear below.
Step 3. Click “Apply to All” at the bottom of the panel. This puts the background on every slide in the presentation.

Check ‘Hide background graphics’ to remove Master slide elements like logos from a specific slide.
Option 4 – Replace Fonts Across All Slides
PowerPoint’s Replace Fonts tool can swap out every instance of one font for another in a single operation, across all slides at once.
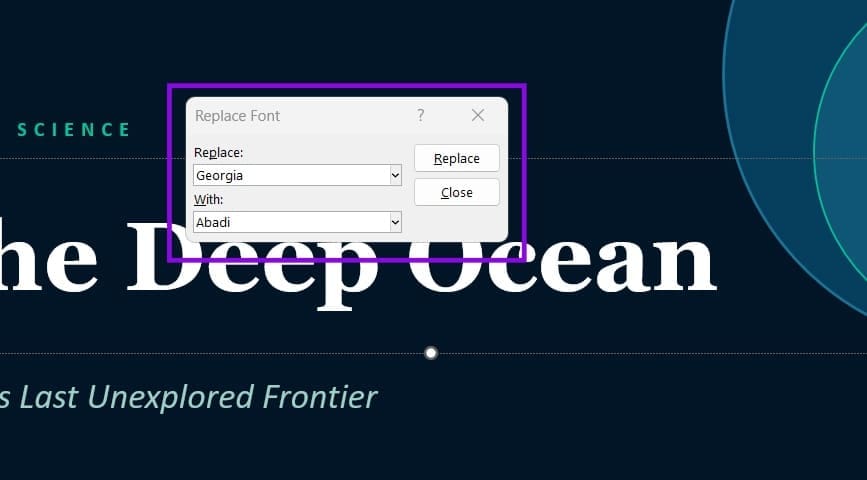
Step 1. Go to the Home tab and click the dropdown arrow on the “Replace” button (click the small arrow next to it). Select “Replace Fonts.”

Step 2. In the “Replace” dropdown, select the font you want to remove.
Step 3. In the “With” dropdown, select the font you want to use instead.
Step 4. Click “Replace.” PowerPoint immediately replaces every instance of that font throughout the entire presentation.
Step 5. Repeat the process for each unwanted font.
Option 5 – Use Format Painter to Copy Formatting from One Slide to Another
Format Painter copies the formatting of a selected element and pastes it onto another element.
Step 1. Click on the text box, shape, or object whose formatting you’re copying.
Step 2. On the Home tab, click “Format Painter” (the paintbrush icon). The cursor changes to show a paintbrush.
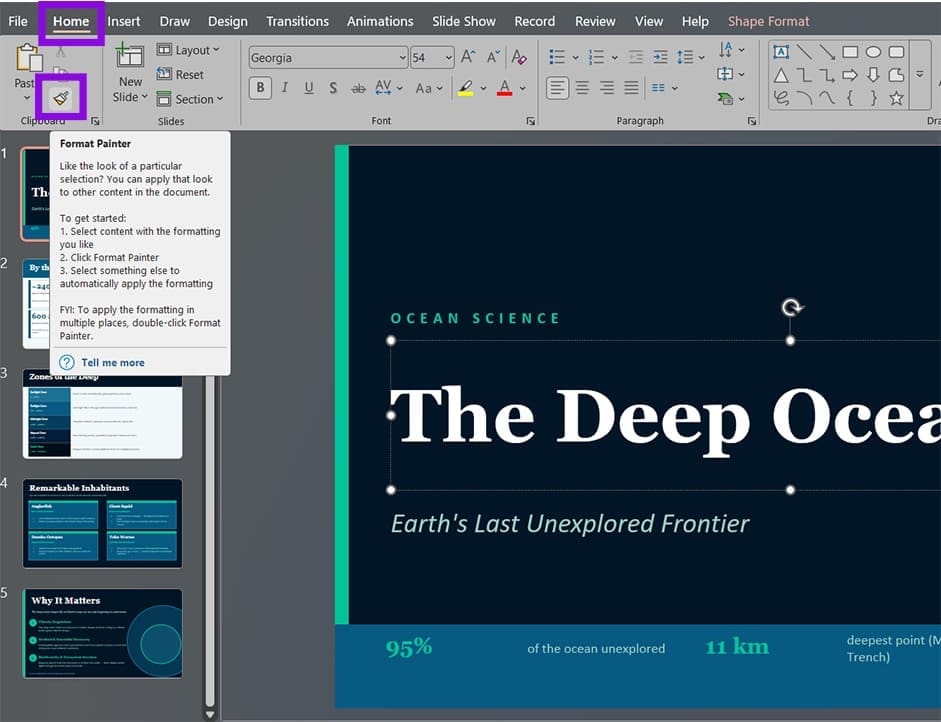
Step 3. Navigate to the slide where you want to apply the formatting, then click on the element you want to reformat. The formatting is applied immediately. Double-click the Format Painter icon to lock the feature.
Was this helpful?
Last updated on 20 May, 2026
Read Next
 How to Add Live Translation to Slides in PowerPoint
If you’re asked to give a live presentation using PowerPoint, there’s a good chance that not everyone in the audience will have English as their first language.
How to Add Live Translation to Slides in PowerPoint
If you’re asked to give a live presentation using PowerPoint, there’s a good chance that not everyone in the audience will have English as their first language.
 How to Create and Add Watermark in PowerPoint Slides
Create and Add Watermarks to Slides Use the Master Slide feature to add it to all the slides in one go.
How to Create and Add Watermark in PowerPoint Slides
Create and Add Watermarks to Slides Use the Master Slide feature to add it to all the slides in one go.
 PowerPoint vs. Google Slides – The Three Key Differences
PowerPoint vs.
PowerPoint vs. Google Slides – The Three Key Differences
PowerPoint vs.
 5 Ways to Format a Hard Drive on Windows 11
Method 1: Format a Hard Drive With File Explorer The File Explorer in Windows 11 makes it simple to format a hard drive on your PC.
5 Ways to Format a Hard Drive on Windows 11
Method 1: Format a Hard Drive With File Explorer The File Explorer in Windows 11 makes it simple to format a hard drive on your PC.
 Top 5 Ways to Format a USB Drive on Windows 11
Formatting a USB drive might seem easy as you can click the delete button to erase all the files the USB drive might store.
Top 5 Ways to Format a USB Drive on Windows 11
Formatting a USB drive might seem easy as you can click the delete button to erase all the files the USB drive might store.
 5 Ways to Format SD Card on Windows 11
Method 1: Format SD Card Using File Explorer The primary method for formatting your SD card is using File Explorer in Windows.
5 Ways to Format SD Card on Windows 11
Method 1: Format SD Card Using File Explorer The primary method for formatting your SD card is using File Explorer in Windows.
 How to Format Phone Numbers in Excel
Unfortunately, Excel doesn’t always handle phone numbers correctly - or, at least, it doesn’t handle them as we’d expect.
How to Format Phone Numbers in Excel
Unfortunately, Excel doesn’t always handle phone numbers correctly - or, at least, it doesn’t handle them as we’d expect.
 Excel How to Format a Whole Row Based on One Cell
By default, conditional formatting in Excel allows you to format the cell’s look (such as font or background color) based on its own value.
Excel How to Format a Whole Row Based on One Cell
By default, conditional formatting in Excel allows you to format the cell’s look (such as font or background color) based on its own value.
The article above may contain affiliate links which help support Guiding Tech. The content remains unbiased and authentic and will never affect our editorial integrity.