The NVIDIA app is a handy way to keep your system up to date with the latest drivers and to optimize the games you’re currently playing. If you’re encountering an error on startup that reads “There was a problem with the NVIDIA app,” then you’ll be looking for some ways to fix it. We’ve got some troubleshooters in this article to help.
Fixing “There Was a Problem With the NVIDIA App”
This error shows up when the NVIDIA app fails to open correctly. There can be a few causes for this, ranging from outdated software to backend conflicts. It’s also important to note that the NVIDIA app only supports graphics cards from the GeForce GTX 900 series and onwards. Regardless of the cause of your error, we’re here to help you get it sorted.
Restart the App
The first and most obvious troubleshooter is to restart the app and then your PC. Long-running programs and machines can become more erratic over time due to memory leaks and related issues.
Stop and Restart Services
Multiple NVIDIA services are running on your PC beyond the app. If one isn’t working properly, it might affect your app. Stopping and restarting these can fix the issue:
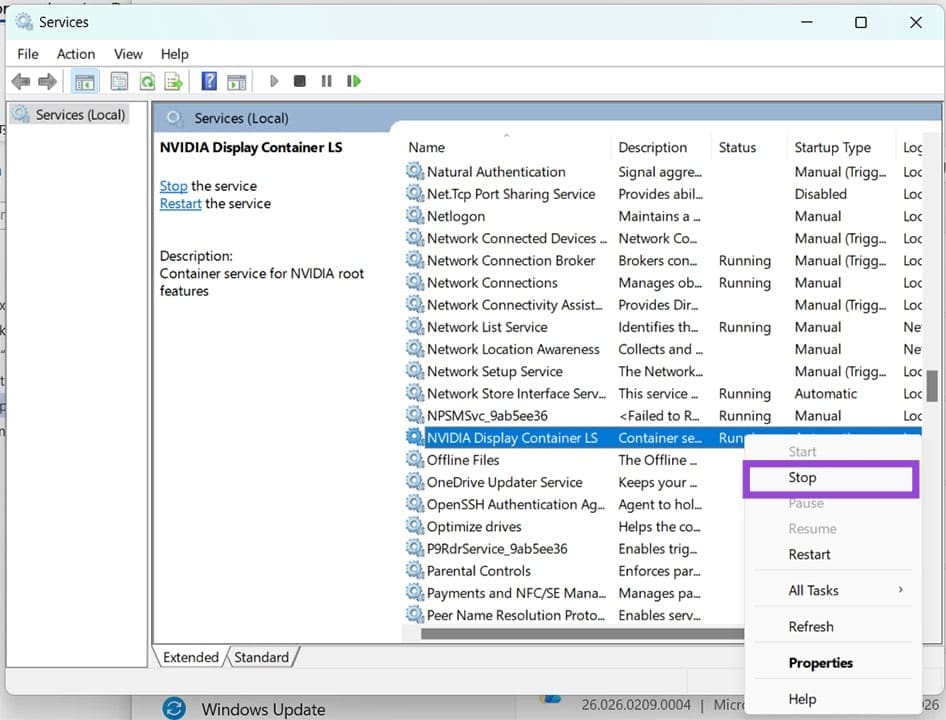
Step 1. Open the Run dialog (Win + R) and type “services.msc” and hit “OK.”
Step 2. Navigate to the following:
- NVIDIA Display Container LS
- NVIDIA FrameView SDK service
- NVIDIA LocalSystem Container
Step 3. Right-click on each and select “Stop” from the dropdown menu.
Step 4. Open an Explorer window (Win + E) and head to “[Drive]\ProgramData\NVIDIA Corporation\Drs”.
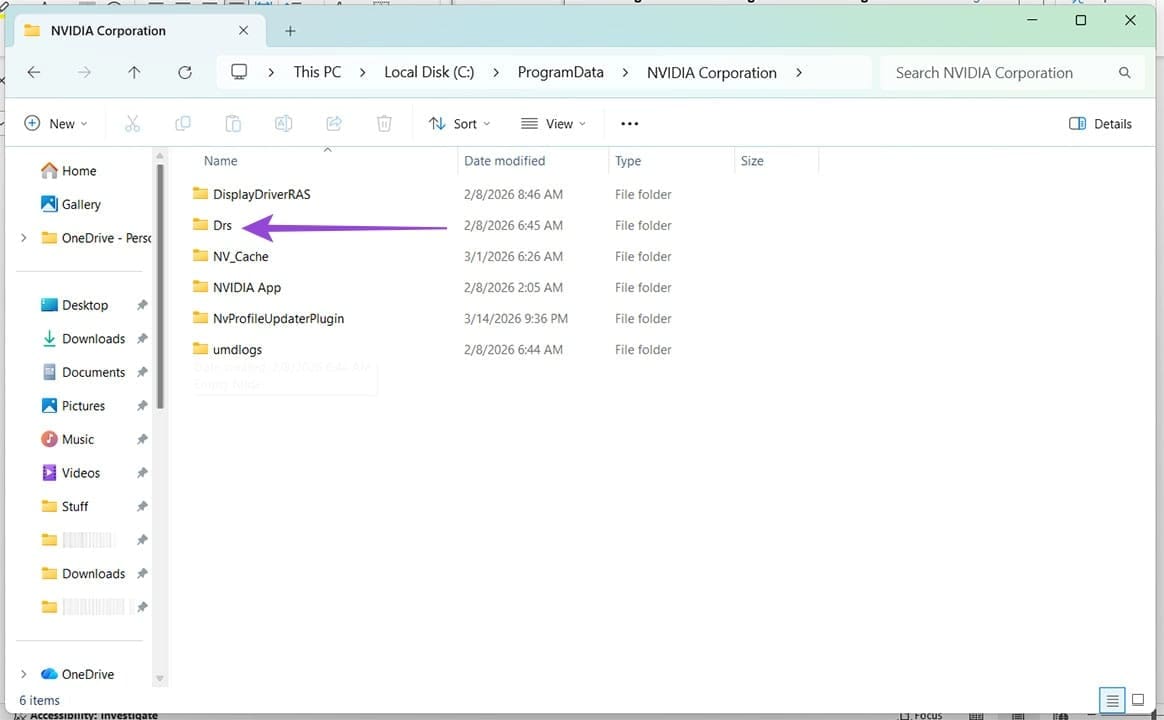
Step 5. (Shift + Del) the “Drs” folder. Don’t worry, Windows will automatically regenerate the folder with default settings.
Step 6. Head back to Services and restart each of the processes stopped.
Note: While this can fix the problem, it also resets all global and 3D settings per game.
Delete the Cache
The NVIDIA cache itself may become corrupted. Deleting the files and folders inside the cache folder might fix NVIDIA app problems:
Step 1. Open an Explorer window (Win + E) and navigate to “[Drive name]\Users\[Your name]\AppData\Local\NVIDIA\DXCache” for DirectX. For OpenGL/Vulkan, use “[Drive name]\Users\[Your name]\AppData\Local\NVIDIA\GLCache”.
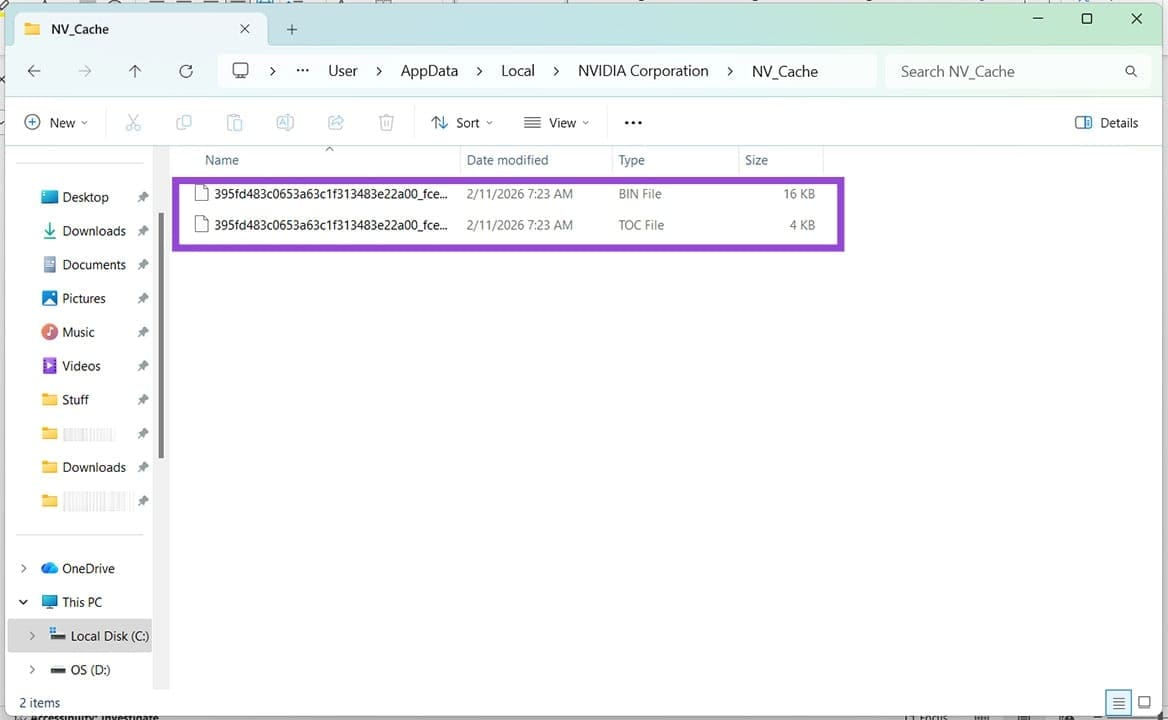
Step 2. Select everything and press (Shift +Del) on everything in this folder and restart your machine. Windows will recreate the lost files.
Step 3. Try running the app again.
Move a .dll File
Another trick is to shift the “_NvMessageBusBroadcast.dll” to another location like the Desktop, and see if the issue is resolved. You can find this file in “[Drive Name]\Program Files\NVIDIA Corporation\NvContainer\plugins\LocalSystem”. If the problem isn’t resolved, drag the .dll file back into the folder.
Reinstall the App
Sometimes the best thing is a fresh start. If problems persist, a reinstall of the NVIDIA app is perhaps in order:
Step 1. Open up Settings (Win + I) and click the “Apps” option in the sidebar.
Step 2. Click “Installed apps.”
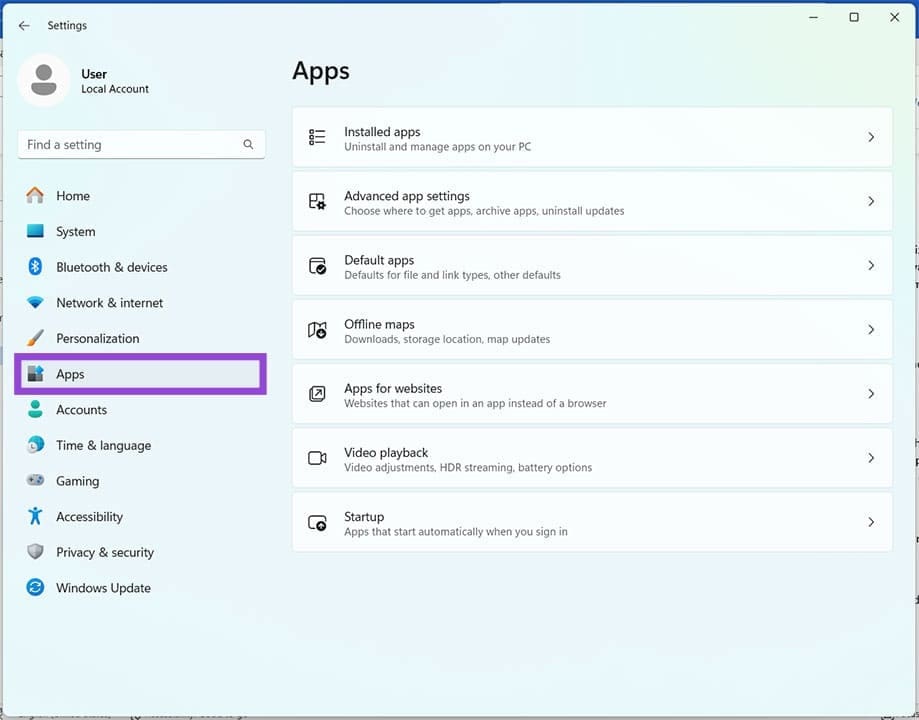
Step 3. Choose the NVIDIA app from the list of apps, and click the three dots next to it and choose “Uninstall” from the dropdown menu.
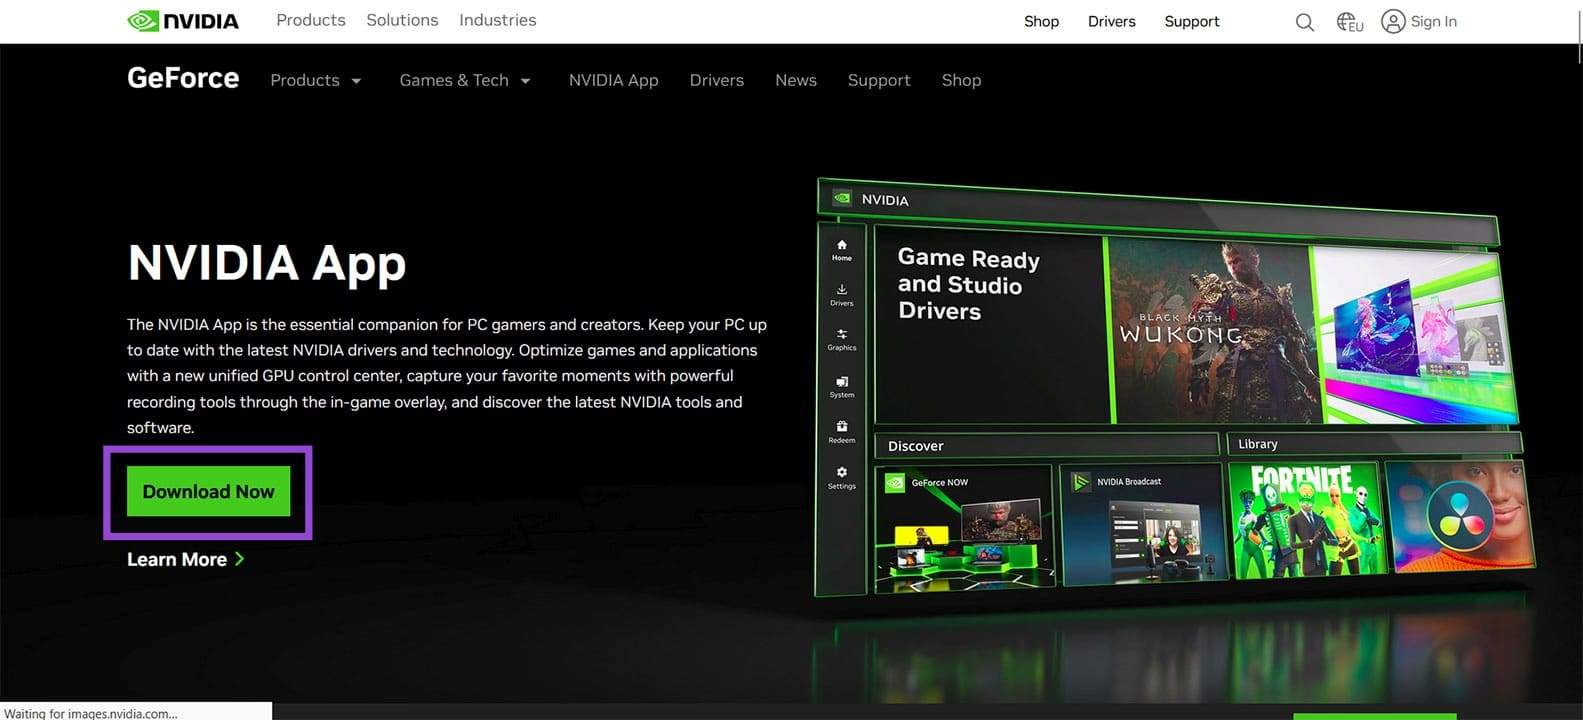
Step 4. Follow the steps to uninstall, then head to the NVIDIA site to download the app.
Step 5. Follow the installation steps and try running the app again.
If the app doesn’t work after this, try rolling back your app version to a previous one after uninstalling.
Was this helpful?
Last updated on 21 March, 2026
Read Next
 6 Ways to Fix NVIDIA’s ‘Unable to Change Display Mode’ Error on Windows 11
Method 1: Terminate and Restart the NVIDIA Control Panel It is common for apps and their associated processes to encounter glitches and stop working properly.
6 Ways to Fix NVIDIA’s ‘Unable to Change Display Mode’ Error on Windows 11
Method 1: Terminate and Restart the NVIDIA Control Panel It is common for apps and their associated processes to encounter glitches and stop working properly.
 Top 9 Ways to Fix NVIDIA GeForce Overlay Not Working on Windows
NVIDIA GeForce Experience is a utility that helps you keep the GPU drivers up to date.
Top 9 Ways to Fix NVIDIA GeForce Overlay Not Working on Windows
NVIDIA GeForce Experience is a utility that helps you keep the GPU drivers up to date.
 How to Download and Install NVIDIA Drivers Without GeForce Experience
Prerequisite 1: Check Which NVIDIA GPU You Have First, you need to check which NVIDIA graphics card you have installed on your system.
How to Download and Install NVIDIA Drivers Without GeForce Experience
Prerequisite 1: Check Which NVIDIA GPU You Have First, you need to check which NVIDIA graphics card you have installed on your system.
 How to Overclock a Monitor: NVIDIA, AMD, and Intel GPUs
When gaming, having a high-performance monitor can make a significant difference in your overall experience.
How to Overclock a Monitor: NVIDIA, AMD, and Intel GPUs
When gaming, having a high-performance monitor can make a significant difference in your overall experience.
 How to Use AMD FSR3 on NVIDIA RTX GPUs
If you already own an NVIDIA GPU, one of the best features available is DLSS technology.
How to Use AMD FSR3 on NVIDIA RTX GPUs
If you already own an NVIDIA GPU, one of the best features available is DLSS technology.
 How to Download and Use NVIDIA Chat with RTX on Windows
AI is almost everywhere; with platforms like ChatGPT, it is now even available on your smartphone.
How to Download and Use NVIDIA Chat with RTX on Windows
AI is almost everywhere; with platforms like ChatGPT, it is now even available on your smartphone.
 Fix Microsoft Store “This App Will Not Work on Your Device” Error
Try These Fixes First Restart your computer: Restart your computer to eliminate temporary bugs or glitches that might be causing the problem.
Fix Microsoft Store “This App Will Not Work on Your Device” Error
Try These Fixes First Restart your computer: Restart your computer to eliminate temporary bugs or glitches that might be causing the problem.
 5 Ways to Fix Azure Web App Crashing
Like any other web app, Azure sometimes experiences crashes, freezes, and bugs.
5 Ways to Fix Azure Web App Crashing
Like any other web app, Azure sometimes experiences crashes, freezes, and bugs.
The article above may contain affiliate links which help support Guiding Tech. The content remains unbiased and authentic and will never affect our editorial integrity.