What Does SOS Only Mean on iPhone
The simplest explanation is that you are outside the coverage area. If your iPhone is unable to connect to a cellular network properly, you’ll either see,
- A No Service or Searching error in the status bar, or,
- An SOS or SOS only at the top-right corner in iOS 16 and the top-left corner in iOS 15 and earlier. (Only available in the United States, Canada, and Australia)
Both options indicate that you can’t make or take phone calls, send messages, or use cellular data. However, you can use the emergency SOS service to make a call to 911 or the concerned authorities.
Note: If you’re seeing the No Service error, here’s how to fix the No Service error issue.
Why Does My Phone Say SOS Only
Your iPhone might be stuck in SOS mode due to,
- Faulty or weak network coverage.
- Carrier issues/
- SIM card isn’t inserted correctly, or it is broken or damaged somehow.
- A bug in iOS.
- Airplane mode is active.
Now that we know the common causes, let’s move on to the fixes for the SOS only error.
Basic Fixes
- Move to a place with better network connectivity – If you’re in an area with low or no network coverage, there’s nothing you can do to fix SOS only on iPhone. The only solution is to move around or go to a place that has better connectivity.
- Enable and disable Airplane mode – Your iPhone might be stuck in the SOS-only state due to a network error. When you enable and disable Airplane Mode, it attempts a fresh connection, mostly fixing up the error.
- Check for carrier outages – Maybe your SOS only error is due to server/network issues from your network carrier. If you can access the web, go to Downdetector and search if others are facing similar issues. If so, all you can do is wait for them to fix it.
- Enable data roaming – The culprit behind the SOS only on iPhone might be the disabled data roaming option. So, if you’re traveling, check this setting before moving on.
- Restart iPhone – Resetting the caches can resolve any bug or settings errors, allowing a stable network connection and fixing the issue at hand.
- Re-insert SIM – While this doesn’t happen often, the physical SIM card could disrupt the network connectivity. And a simple reset will help you get rid of SOS-only on your iPhone.
- Update iOS – You could be seeing the SOS symbol because of a software issue. Gratefully, you can easily resolve it with an OS update. So, check if an update is available and install it.
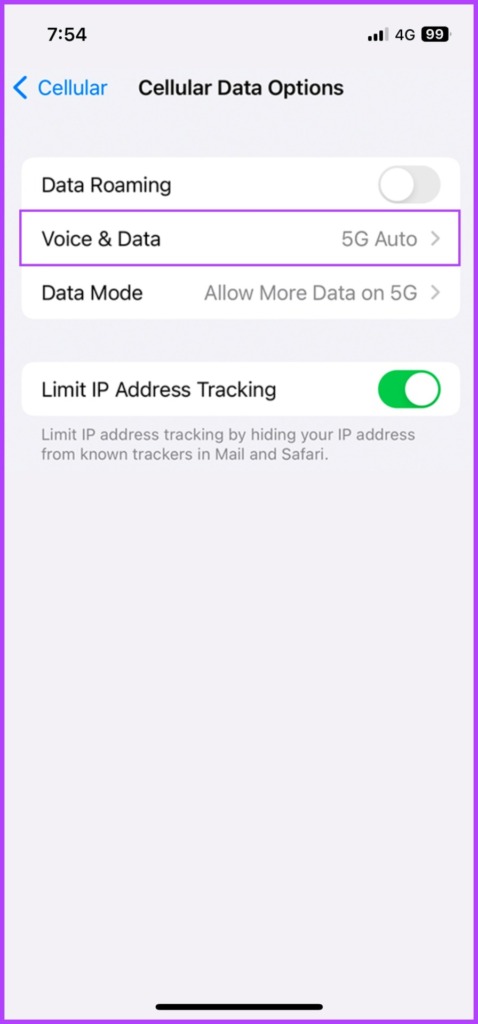
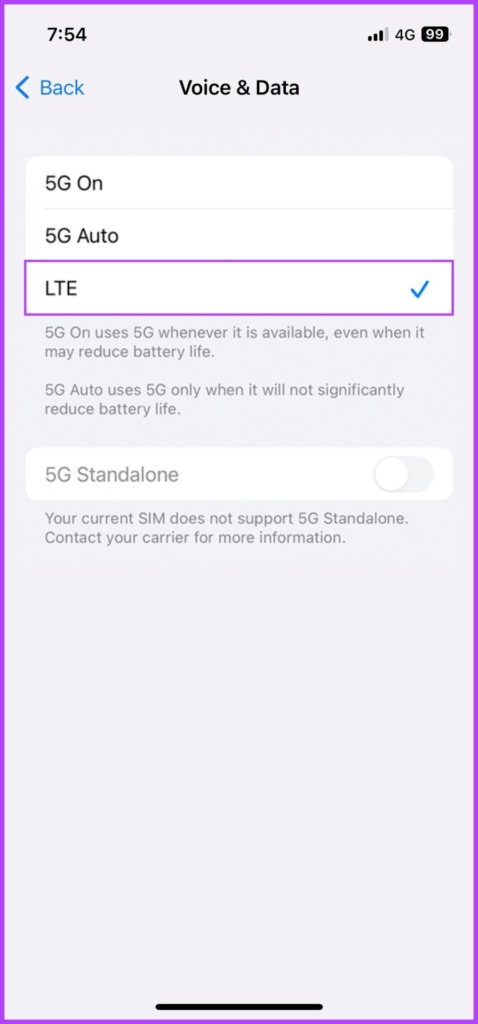
Fix 1. Switch to 4G or LTE
5G is still not fully functional across the globe and it might affect your signal strength and connection. So, it’s wiser to disable 5G on iPhone and stick to 4G if this problem persists.
Fix 2. Update Carrier Settings
Provided by the carrier, these settings are designed to improve cellular connectivity and overall performance. Although usually done automatically, you can also check and manually update carrier settings on your iPhone.
Step 1: In Settings, go to General. Tap About.

Step 2: If an update is available, a pop-up will appear; click Update to install.
If you’re setting up an eSIM or did one recently, you might need to manually download the new carrier settings. Once updated, the network bars should return to the status bar, otherwise, try out the next step.
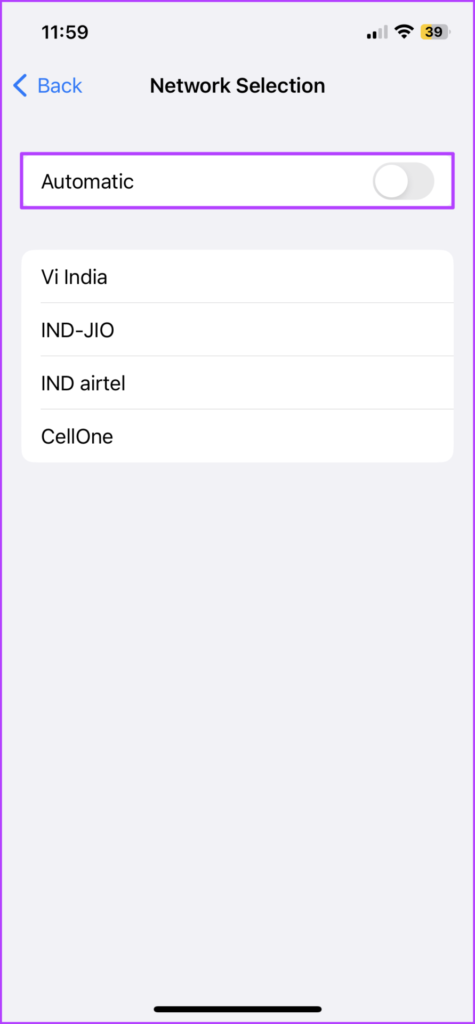
Fix 3. Disable and Enable Automatic Network Selection
This setting ensures that you’re connected to the right network (carrier), allowing a stable network connection. Turning it off and on pushes the device to re-establish the connection with the network, helping you turn off SOS only on the iPhone.
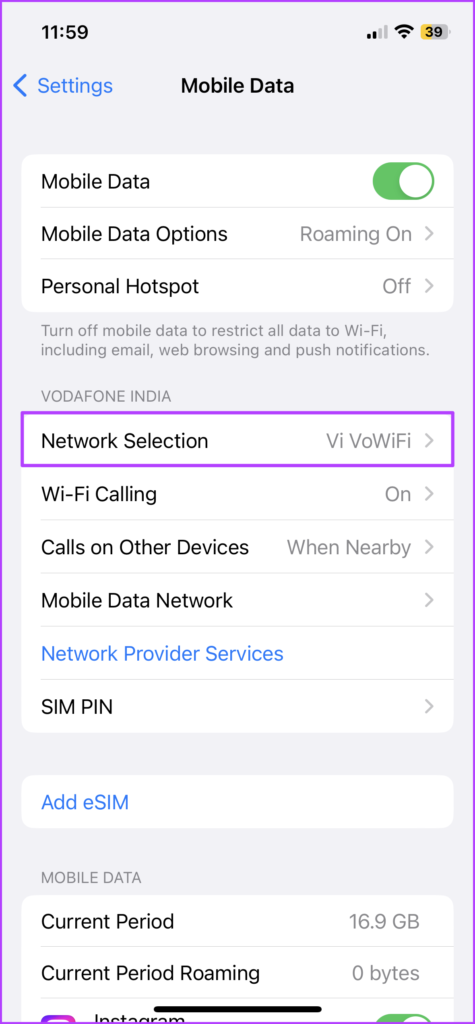
Step 1: Go to Settings → Cellular/Mobile Data.
Step 2: Select Network Selection. Toggle off the switch next to Automatic.
Step 3: After a few seconds, toggle it back on.

Fix4. Reset Your Network Settings
If the above methods didn’t get rid of SOS only on iPhones, it’s time to try the ultimate troubleshooting step. Why is resetting your network setting ultimate?
Because it will erase stored Bluetooth devices, Wi-Fi passwords, VPN configurations, and more. So, jot down all the necessary details before you proceed with this method.
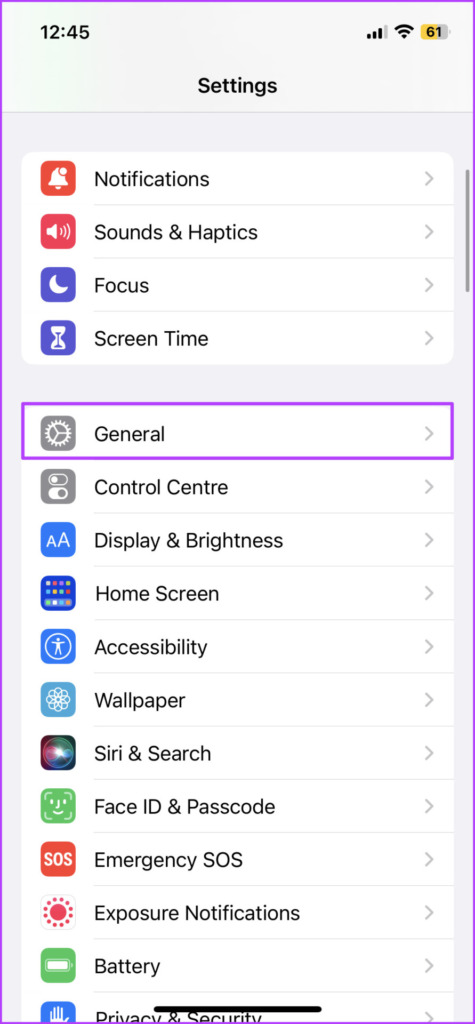
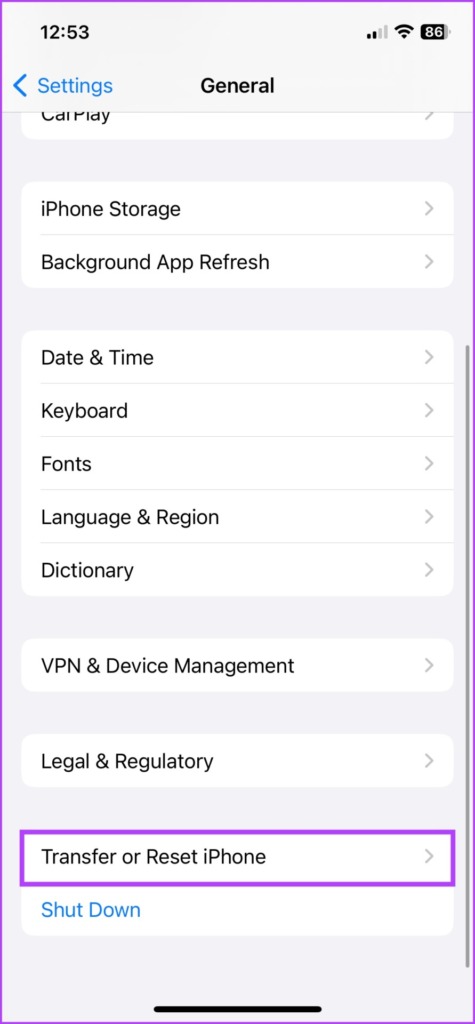
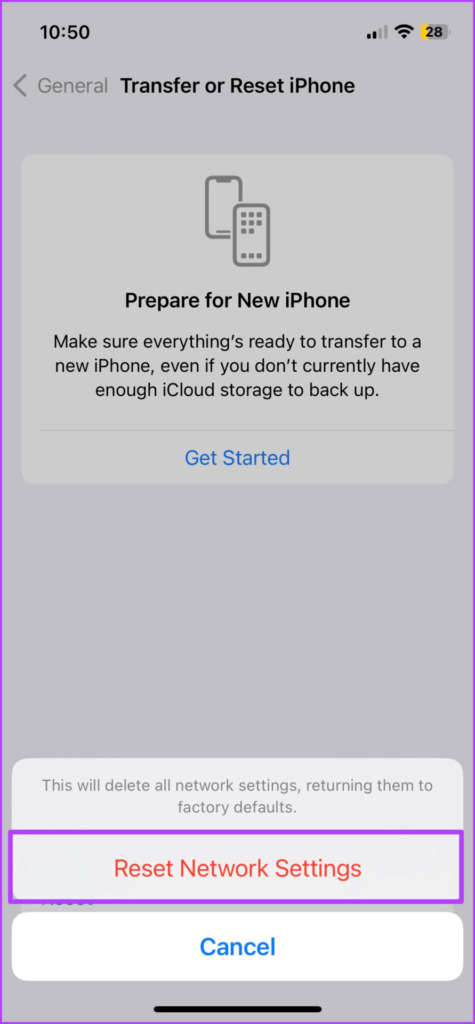
Step 1: Launch Settings → General. Scroll down and select ‘Transfer or Reset iPhone’.
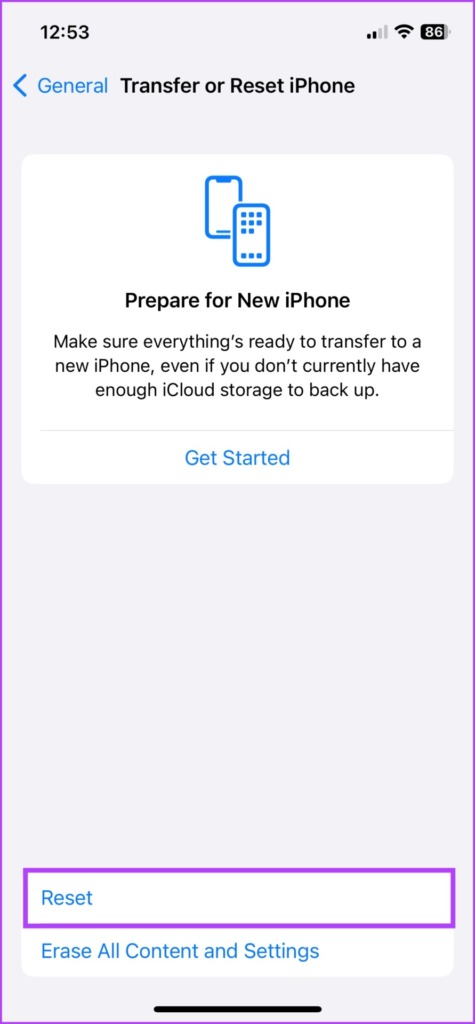
Step 2: Here, select Reset.
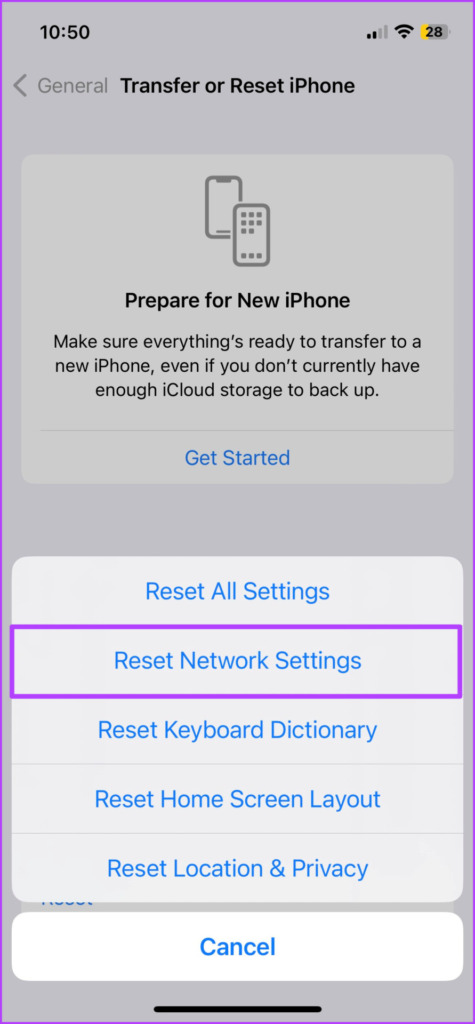
Step 3: Tap Reset Network Settings. Enter the passcode if prompted.
Step 4: Tap Reset Network Settings again to confirm the action.
We’ve covered almost all facets. However, if you still see SOS or SOS only next to the Wi-Fi icon, only your carrier can help you out of the situation. So, get on a call with them and get this thing fixed.
If even this effort doesn’t yield some fruitful results, try contacting Apple Support for a solution.
Was this helpful?
Last updated on 01 August, 2024
5 Comments
Leave a Reply
Read Next
 What Does iCloud Private Relay Is Active Mean on iPhone
What Is iCloud Private Relay Anyone on your local network can glance over the websites you have visited via DNS queries when you browse the web.
What Does iCloud Private Relay Is Active Mean on iPhone
What Is iCloud Private Relay Anyone on your local network can glance over the websites you have visited via DNS queries when you browse the web.
 What Does It Mean When Messages Turn Green on iPhone
Basic Fixes Add iMessage information for contact: The contact may not have registered with iMessage with their phone number.
What Does It Mean When Messages Turn Green on iPhone
Basic Fixes Add iMessage information for contact: The contact may not have registered with iMessage with their phone number.
 What Does FaceTime Photos Must be Enabled on Both Devices Mean
What Is the FaceTime Photos Must be Enabled on Both Devices Message This message means that the FaceTime Live Photos feature is disabled either on your or the other participant’s
What Does FaceTime Photos Must be Enabled on Both Devices Mean
What Is the FaceTime Photos Must be Enabled on Both Devices Message This message means that the FaceTime Live Photos feature is disabled either on your or the other participant’s
 What Does Mapping a Drive Mean in Windows, and How Is It Useful?
What Does Mapping a Drive Mean in Windows?
What Does Mapping a Drive Mean in Windows, and How Is It Useful?
What Does Mapping a Drive Mean in Windows?
 What Does Locking the Taskbar Mean in Windows
Many features exist on our Windows PC that we seldom use.
What Does Locking the Taskbar Mean in Windows
Many features exist on our Windows PC that we seldom use.
 What Does “Make Available Offline” Mean in Google Drive?
Difference Between Offline and Download Downloading a file creates a separate copy of the file independent of the original file in Google Drive.
What Does “Make Available Offline” Mean in Google Drive?
Difference Between Offline and Download Downloading a file creates a separate copy of the file independent of the original file in Google Drive.
 What Does Your Location Is Currently in Use Mean on Windows
Why Do Apps Track Your Location on Windows Weather, Maps, and news widgets frequently use your location to deliver astute results.
What Does Your Location Is Currently in Use Mean on Windows
Why Do Apps Track Your Location on Windows Weather, Maps, and news widgets frequently use your location to deliver astute results.
 What Does “No Caller ID” Mean and How to Trace the Caller
How to Unmask No Caller ID or an Unknown Caller Blocking calls with no caller IDs might inadvertently block calls from recruiters, banks, etc.
What Does “No Caller ID” Mean and How to Trace the Caller
How to Unmask No Caller ID or an Unknown Caller Blocking calls with no caller IDs might inadvertently block calls from recruiters, banks, etc.
The article above may contain affiliate links which help support Guiding Tech. The content remains unbiased and authentic and will never affect our editorial integrity.
One missing one that worked: Somehow the primary sim had been turned off (perhaps during an update). Going to cellular settings and turning that on worked. It almost looked like the SIM had been duplicated so there was a travel and a primary version of it.
thank you for clear instructions
Arshmeet Hora, what a great article. Thank you for righting it. I started to receive SOS on my phone after the last est Apple update and could not for the love of me call out, or if I could, the phone would quickly bounce back to sos and I’d lose my call.
You are a life saver.
I have tried every single one of the trouble shooting instructions that Google has given me & I am still seeing “SOS only” at the top of my screen so now what choice do I have but to contact customer support?? Are there any other option’s that someone would be able to share with me to help me out? Every lil bit will be greatly greatly appreciated. Thanx in advance
Great article. Tried them all but they unfortunately didn’t work. Half the time Verizon customer care is closed or doesn’t understand what I’m saying. And I don’t want to keep resetting everything on my phone because it’s such a pain to keep setting it all back up every single day again and takes so much time! I’m ready to switch carriers and dump the iPhone after an entire week of this daily nonsense. If anyone else has ideas, I’m all ears. Thanks all!