Basic Fixes
- Check the monitor connection: Ensure the monitor cable isn’t loose. Unplug and plug it again to solve the flickering black screen.
- Replace the HDMI cable: If it is damaged or has cuts on either side, replace it with a new HDMI cable.
- Uninstall problematic apps: Press the Windows + I shortcut to open Settings, select Apps from the sidebar, and click on Installed apps. Review the list and uninstall the unnecessary ones.
- Disable the Focus mode: Open Windows Settings (press the Windows + I shortcut), select System from the sidebar, and click Focus. Click on Stop Focus Session at the top right to disable it.
- Perform a clean boot: Clean boot your Windows 11 system and wait to check the black screen issue. If resolved, boot into the normal mode and uninstall conflicting monitor-related apps.
- Update or reinstall your graphics drivers: Press the Windows key, search Device Manager, and click to open it. Expand Display adapters, and right-click your graphic driver to update it. Alternatively, select Uninstall device and reboot the PC to install new drivers.
- Update Windows 11: Open Windows Settings, select Windows Update from the left sidebar, and install available updates.
Fix 1: Tweak Power Settings
Windows 11 automatically turns off the screen and puts your computer to sleep after a set period, causing your monitor screen to go black. Adjust the Power Settings manually to fix it.
Step 1: Press the Windows + I shortcut to open Settings, select System from the sidebar, and click on Power.

Step 2: Expand the Screen and sleep menu and click on the available drop-down lists to extend the set time limits.

Fix 2: Update the Monitor Firmware
Obsolete monitor firmware is a common reason behind the monitor screen going black randomly on Windows 11. Access the monitor settings to update it. Let’s take the Samsung monitor for demonstration.
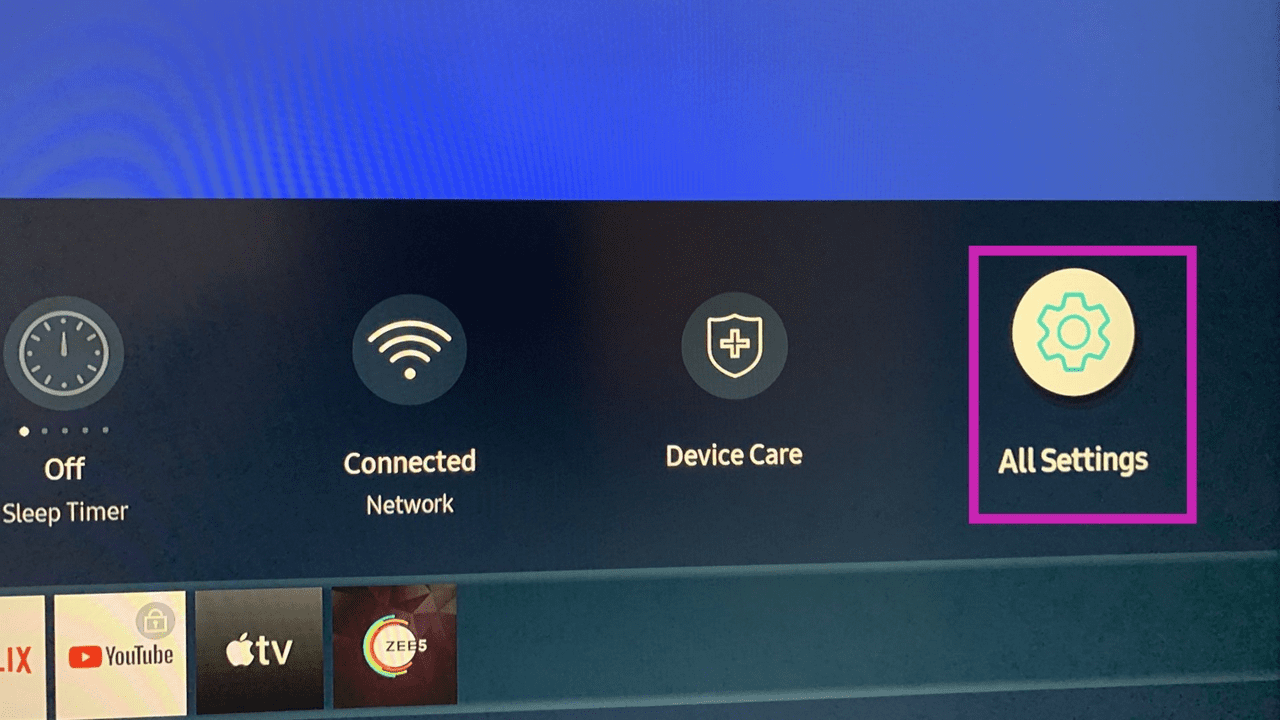
Step 1: Press the Home button on your Samsung monitor, slide left, and select the Gear icon.

Step 2: Select All Settings.
Step 3: Open Support from the sidebar and select Software Update.

Fix 3: Disable High Contrast Themes
Applying high-contrast themes on Windows 11 often messes up the monitor output, causing the screen to go black randomly. Disable it from the Windows Settings.
Tip: Press left Alt + left Shift + Print Screen on your keyboard to quickly disable or enable the high contrast theme.
Step 1: Open Windows Settings > select Accessibility from the left sidebar > click on Contrast themes.

Step 2: Click the drop-down menu next to Contrast themes and set it to None.

Fix 4: Disable Hardware Accelerated GPU Scheduling
Hardware-accelerated GPU-scheduling sends the high-priority threads, such as rendering frames, directly to the graphics processor instead of the CPU. While this reduces the processor load, it can sometimes create black screen issues. Disable it to restore normalcy.
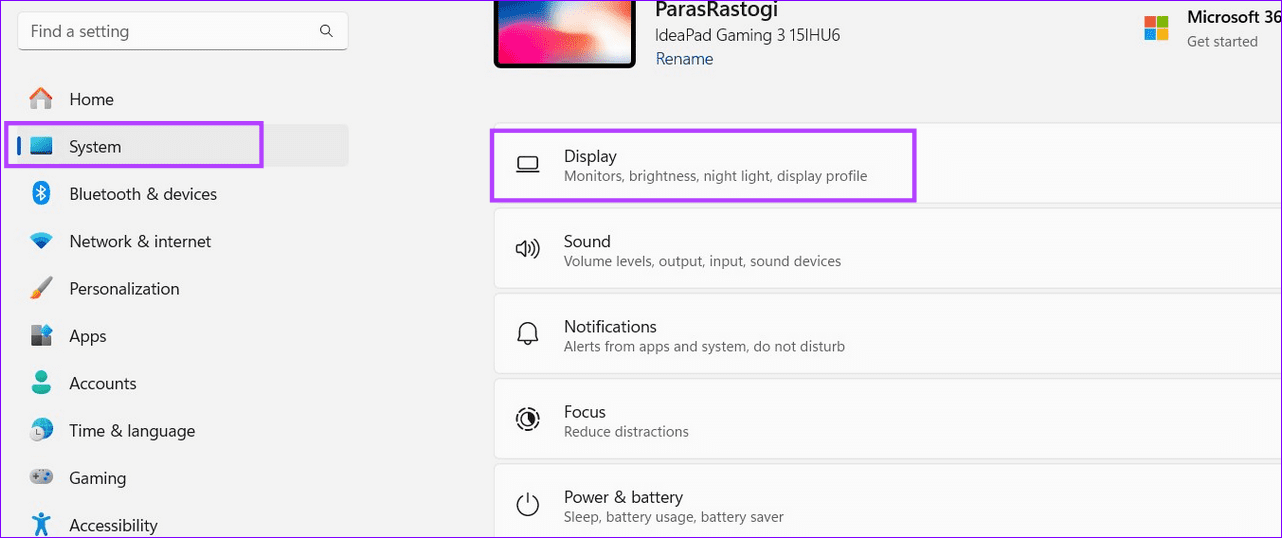
Step 1: Open Windows Settings (press the Windows + I shortcut) > select System from the left sidebar > click Display.

Step 2: Scroll down to the bottom and select Graphics.

Step 3: Click Change default graphics settings under Default settings.

Step 4: Toggle off Hardware-accelerated GPU scheduling.

Fix 5: Adjust Resolution and Refresh Rate Settings
Incorrect screen resolution and low refresh rates can cause random screen flickers and blackouts. Setting the correct resolution and increasing the screen refresh rate should solve the issue.
Note: You can only increase the screen refresh rate if your monitor supports it.
Step 1: Open Windows settings > select System from the sidebar > click on Display.
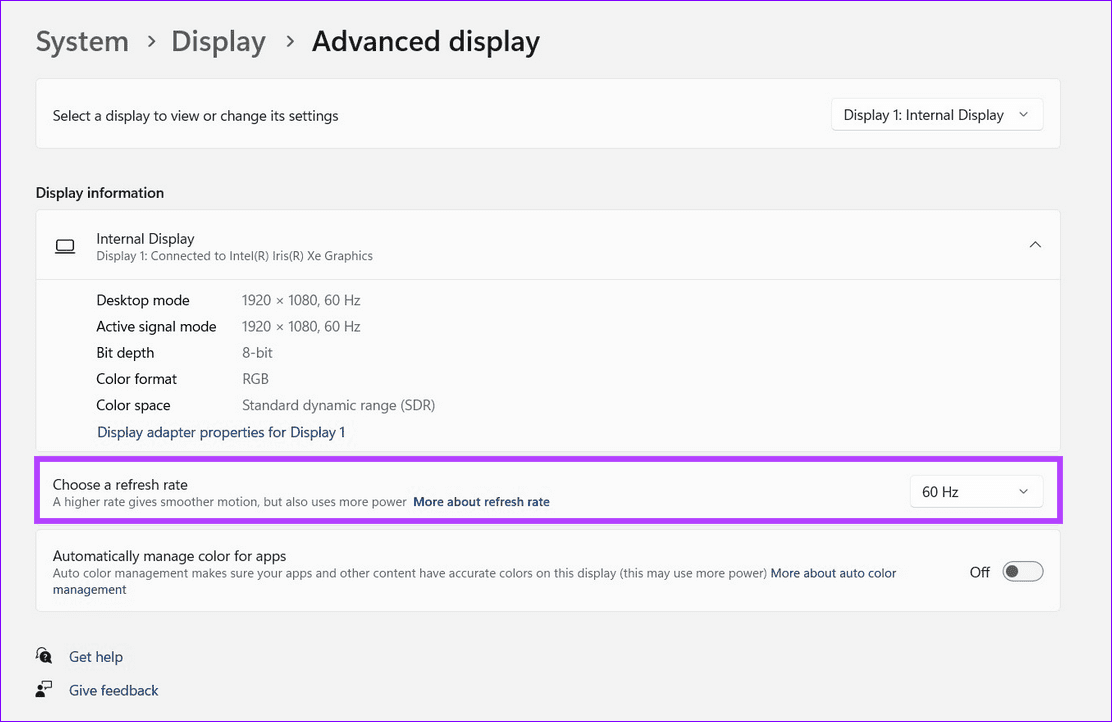
Step 2: Pick the appropriate screen resolution from the drop-down menu next to Display Resolution > select Advanced display.

Step 3: Finally, click on the drop-down menu next to Choose a refresh rate > set it to a higher value (e.g., 90Hz, 120Hz).
Was this helpful?
Last updated on 09 July, 2024
Read Next
 3 Ways to Fix Monitor Goes Black While Watching Netflix
Basic Fixes Disable G-SYNC in NVIDIA Control Panel: If your monitor is flickering or the screen goes black, disable G-SYNC in NVIDIA Control Panel.
3 Ways to Fix Monitor Goes Black While Watching Netflix
Basic Fixes Disable G-SYNC in NVIDIA Control Panel: If your monitor is flickering or the screen goes black, disable G-SYNC in NVIDIA Control Panel.
 5 Ways to Fix Android Phone Screen Goes Black During a Call
Before you begin, try restarting your Android device and update it to the latest available software version.
5 Ways to Fix Android Phone Screen Goes Black During a Call
Before you begin, try restarting your Android device and update it to the latest available software version.
 How to Fix iPhone Screen Goes Black During Call
https://youtu.be/AoTMsNjBpdw Why Does My iPhone Screen Go Black During Call?
How to Fix iPhone Screen Goes Black During Call
https://youtu.be/AoTMsNjBpdw Why Does My iPhone Screen Go Black During Call?
 How to Fix Samsung Phone Screen Goes Black During Call
Basic Fixes Restart the phone: Sometimes, the screen goes black due to a minor software glitch.
How to Fix Samsung Phone Screen Goes Black During Call
Basic Fixes Restart the phone: Sometimes, the screen goes black due to a minor software glitch.
 7 Best Ways to Fix Hibernate Goes to Lock Screen Error on Windows 10
The Hibernate mode, not to be confused with the Sleep feature, on Windows OS saves battery, but the best part is, you can close your lid to activate it.
7 Best Ways to Fix Hibernate Goes to Lock Screen Error on Windows 10
The Hibernate mode, not to be confused with the Sleep feature, on Windows OS saves battery, but the best part is, you can close your lid to activate it.
 7 Ways to Fix Volume Level Automatically Goes Up or Down in Windows 11
Fix 1: Run the Audio Troubleshooter Microsoft offers several troubleshooters to help you identify and resolve common system-related issues on Windows.
7 Ways to Fix Volume Level Automatically Goes Up or Down in Windows 11
Fix 1: Run the Audio Troubleshooter Microsoft offers several troubleshooters to help you identify and resolve common system-related issues on Windows.
 How to Take Screenshots of One Monitor on Windows 11 With a Multi-Monitor Setup
Method 1: PikPick Some screenshot tools allow you to configure their settings so that they will only capture screenshots of one monitor.
How to Take Screenshots of One Monitor on Windows 11 With a Multi-Monitor Setup
Method 1: PikPick Some screenshot tools allow you to configure their settings so that they will only capture screenshots of one monitor.
 8 Best Ways to Fix Mouse Sensitivity Changes Randomly on Windows 10
While mice and keyboards help while working with desktop or laptop, the mouse gets finicky sometimes.
8 Best Ways to Fix Mouse Sensitivity Changes Randomly on Windows 10
While mice and keyboards help while working with desktop or laptop, the mouse gets finicky sometimes.
The article above may contain affiliate links which help support Guiding Tech. The content remains unbiased and authentic and will never affect our editorial integrity.

