How to Encrypt a USB Flash
Using Built-in BitLocker (Windows 11 Pro, Enterprise, and Education editions)
BitLocker is exclusive to Windows Pro, Enterprise, and Education versions and uses the Advanced Encryption Standard (AES) to encrypt the data. Windows Home provides BitLocker drive protection. However, it can’t be used to encrypt external USB drives. As such, if you have a Windows Pro or Enterprise account, here’s how to encrypt a USB flash drive:
Step 1: Plug in the USB Flash Drive.
Step 2: Press the Windows key + E to open the File Explorer.
Step 3: Right-click on the USB drive. Click on the Show more options toggle.

Step 4: Select the Turn on BitLocker option.

Step 5: Click the Use a password to unlock a drive checkbox.
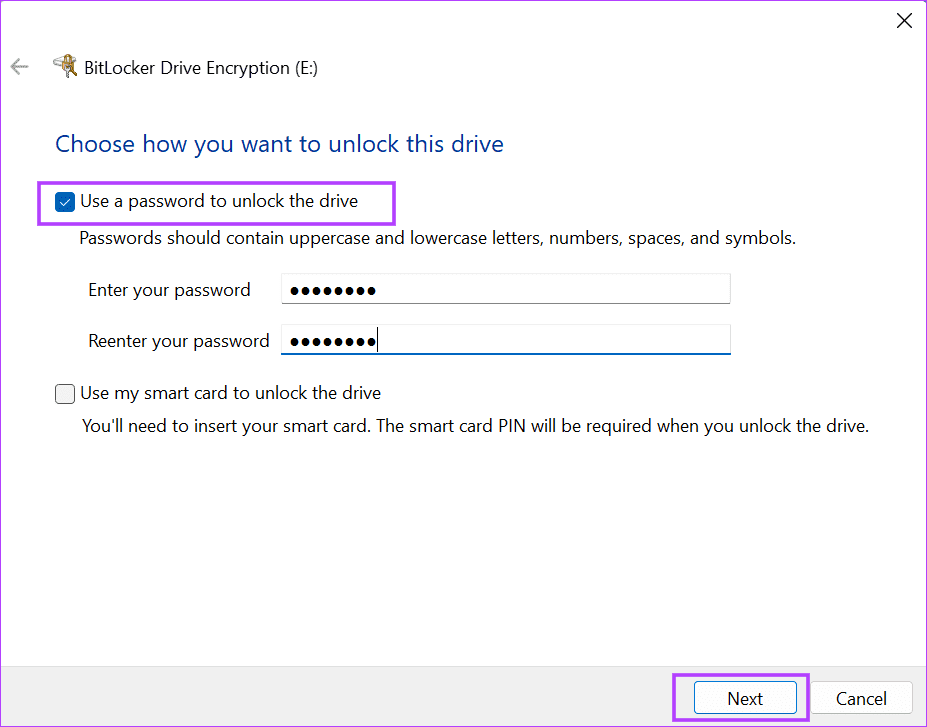
Step 6: Create a strong password and click on Next.
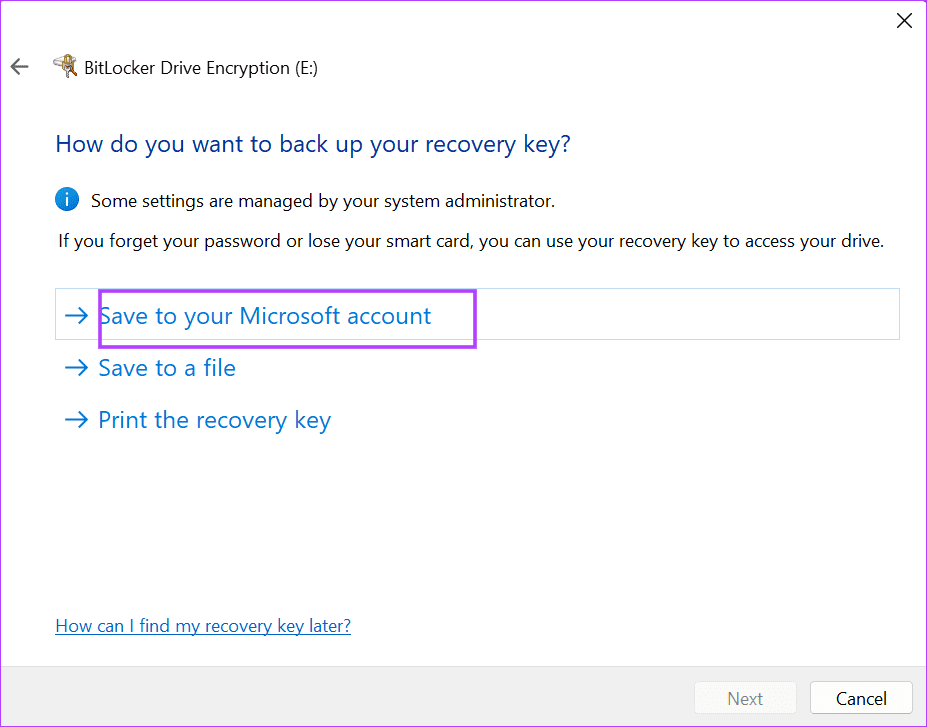
Now, you must back up the BitLocker recovery key. Pick at least two options out of the three that the tool offers. Using the Microsoft account and copying the key to another storage device will ensure that you never lose the BitLocker recovery key. Here’s how to do so:
Step 1: Click the Save to your Microsoft account option.
Step 2: Click the Save to a file option.
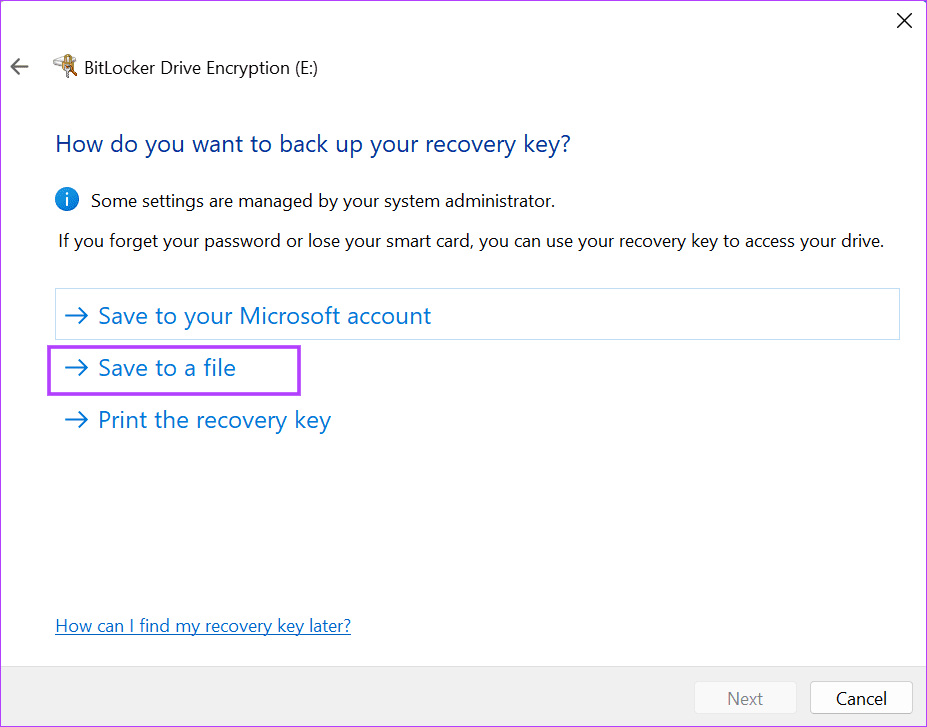
Step 3: Browse the PC for an appropriate location or save the file to another USB storage drive. Click on the Save button.

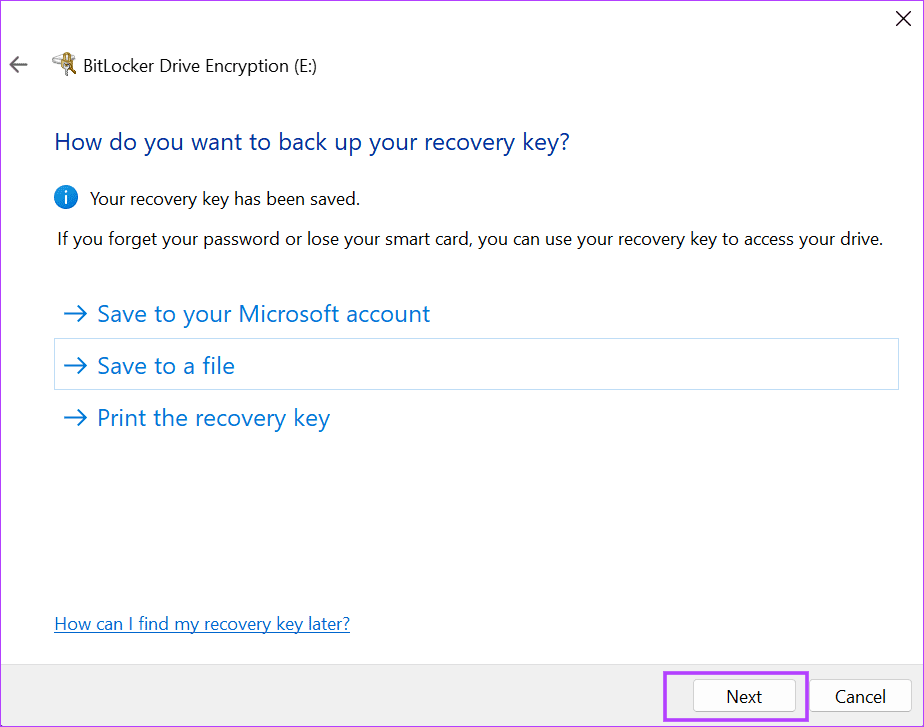
Step 4: Click on the Next button.
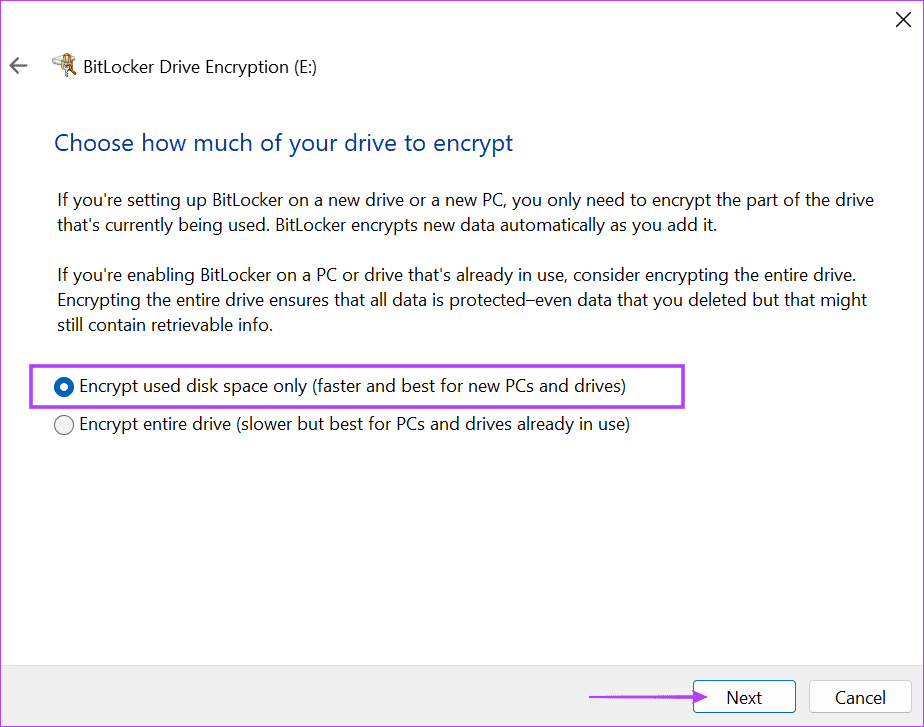
Step 5: Select the Encrypt used disk space only option. Click on the Next button.
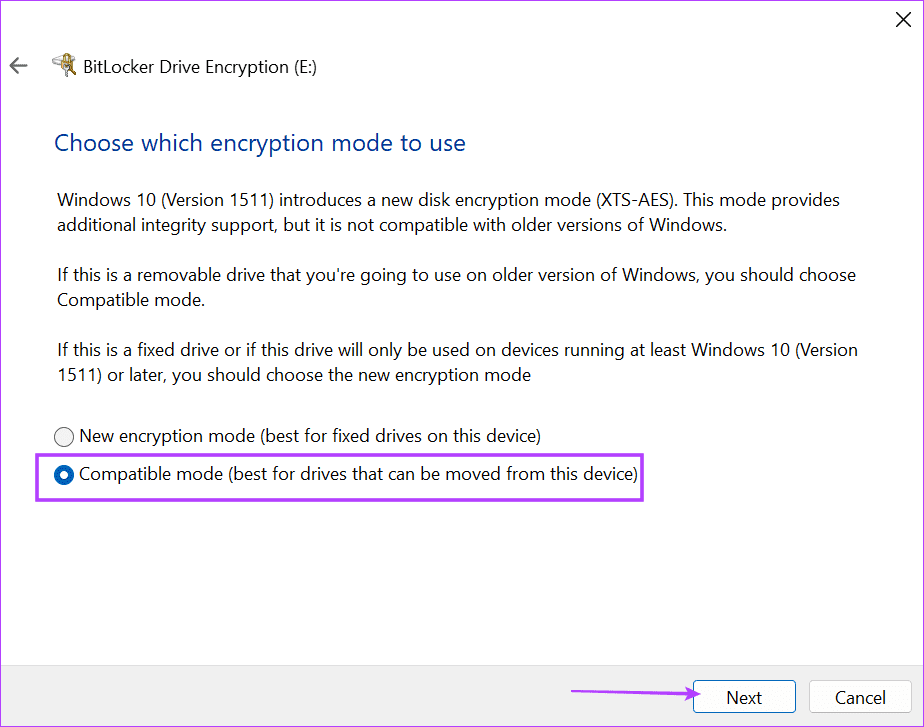
Step 6: Select the Compatible mode and click on Next.
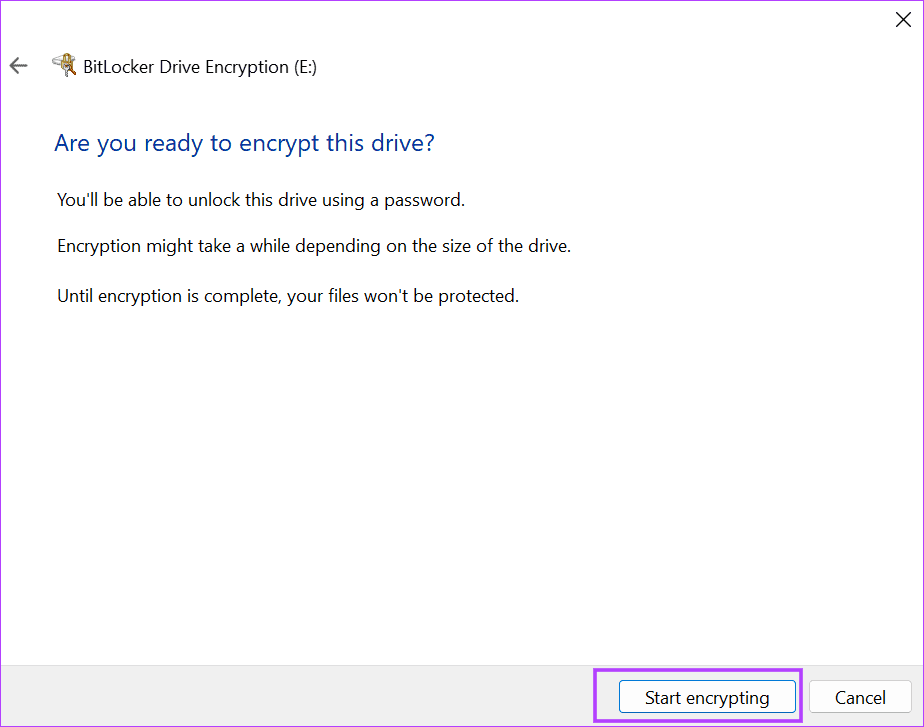
Step 7: Click on the Start encrypting button.
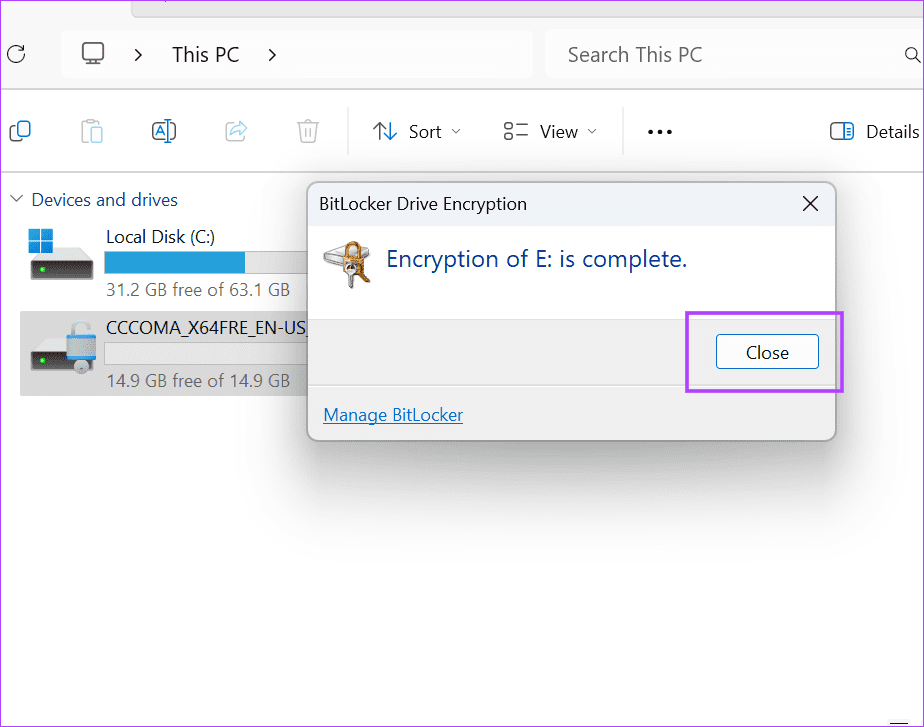
Step 8: Wait for the encryption process to complete. Depending on the size of the data on the USB drive, it can take a while. Then, click on the Close button.
Step 9: Press the Windows key + E to open the File Explorer. A yellow color lock icon will appear on the USB drive.

Step 10: To access the contents of the USB drive on any PC, double-click on it.
Step 11: Type the BitLocker password you created before encrypting the drive and press Enter.

The USB drive will be unlocked, and you can access its contents. However, it will remain unlocked until you eject it from your PC.
Using VeraCrypt
If you use the Home version of Windows 11 or 10, you must use a third-party USB encryption app. VeraCrypt is a completely free tool to protect the contents of your USB drives. It uses multiple encryption algorithms, including AES, to offer stellar security. Here’s how to use it:
Step 1: Download the VeraCrypt installer file.
Step 2: Launch the setup file and install the app on your PC.
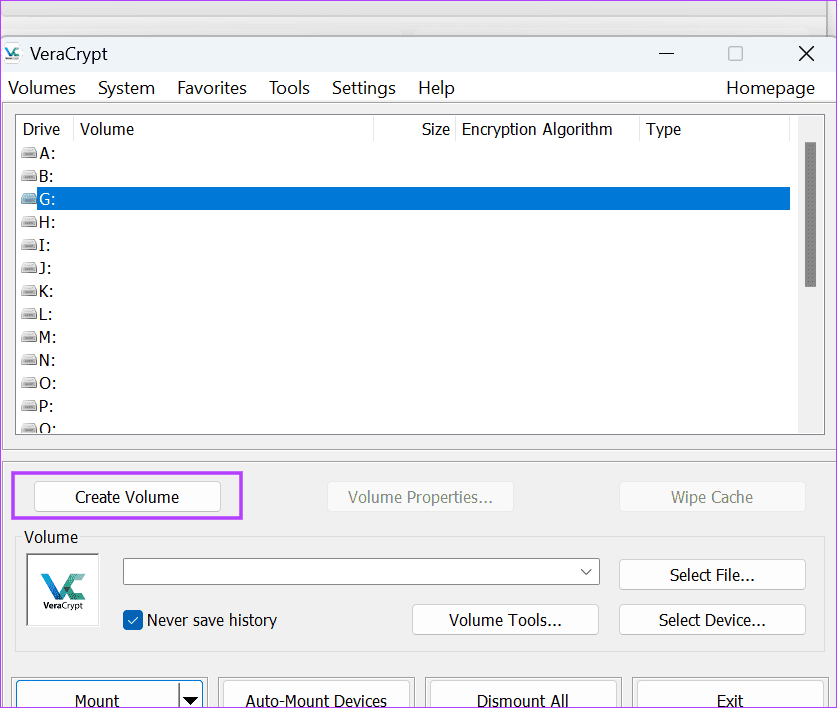
Step 3: Click on the Create volume button.
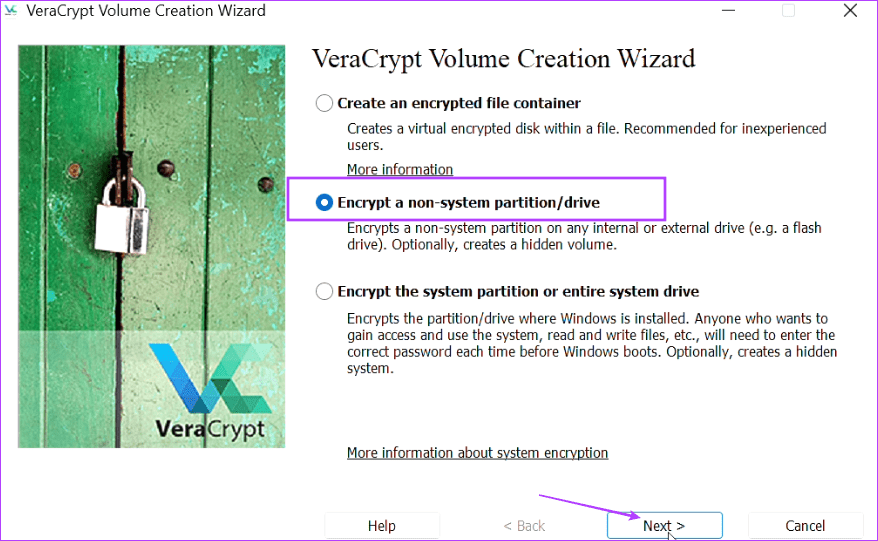
Step 4: Select the Encrypt a non-system partition/drive option. Click on Next.
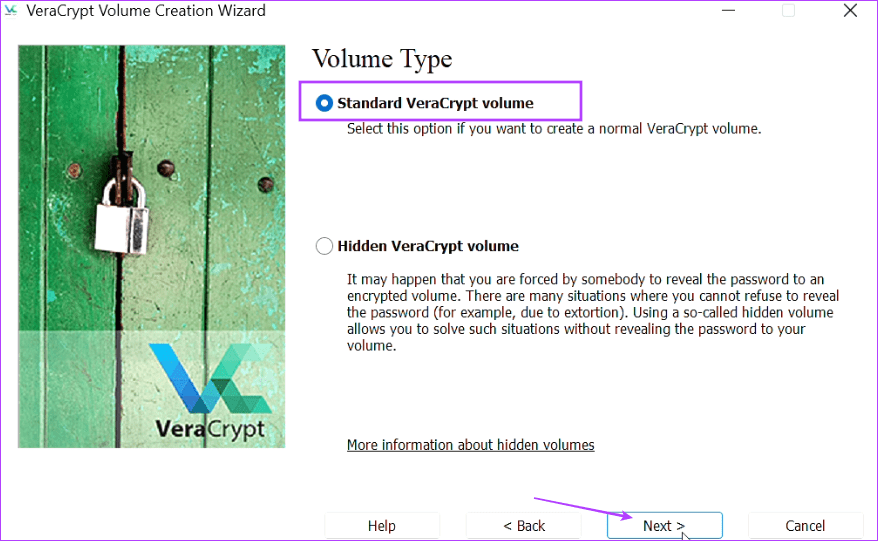
Step 5: Choose Standard VeraCrypt volume and click on Next.
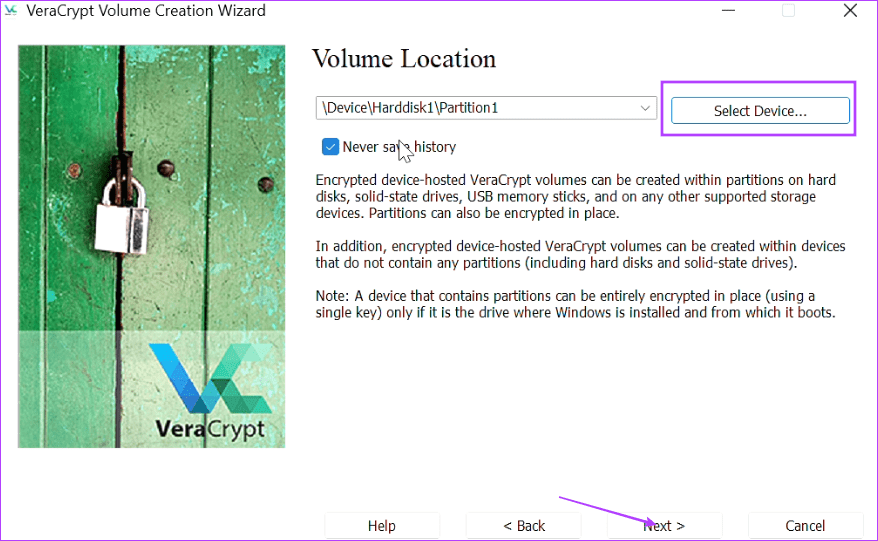
Step 6: Select the Select Device button and pick the USB drive. Click on Next.
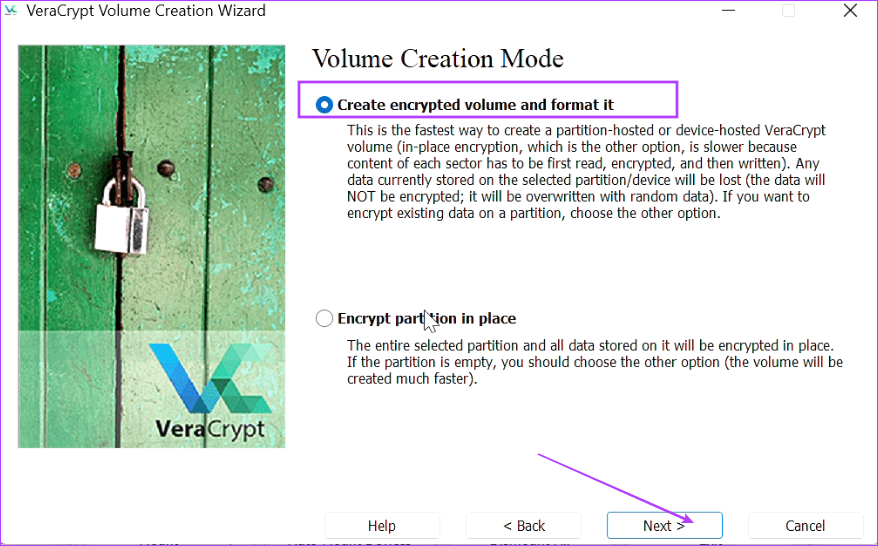
Step 7: Select the Create encrypted volume and format it option. Before doing so, copy the contents of the USB drive to another location.
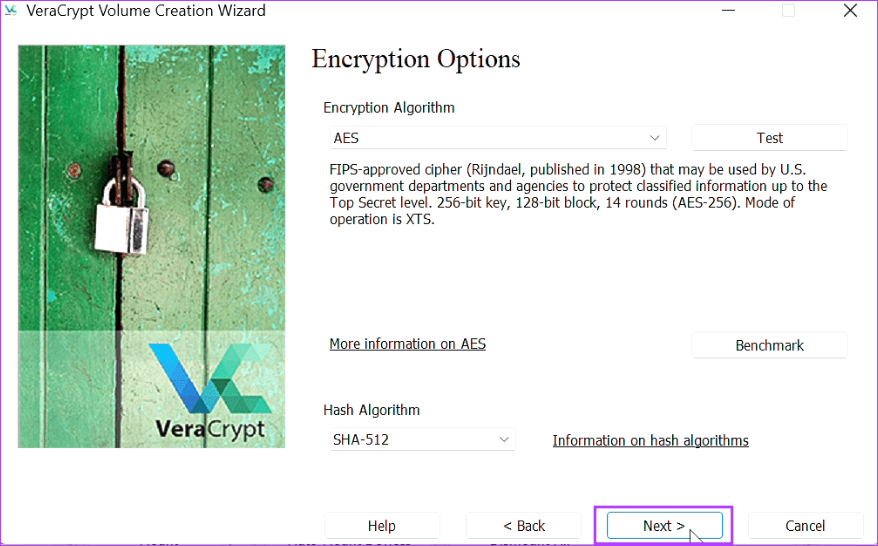
Step 8: Keep the encryption standard as default and click on Next.
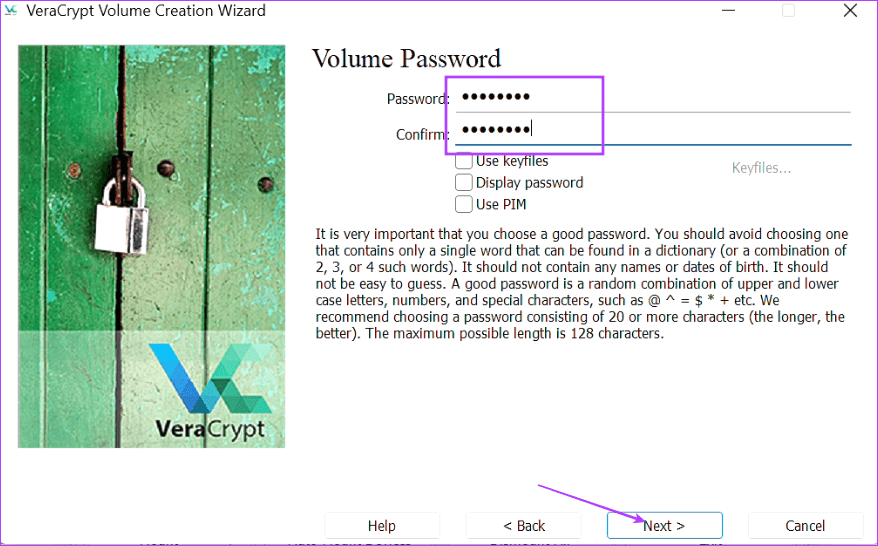
Step 9: Enter a 20-character password and click on Next.
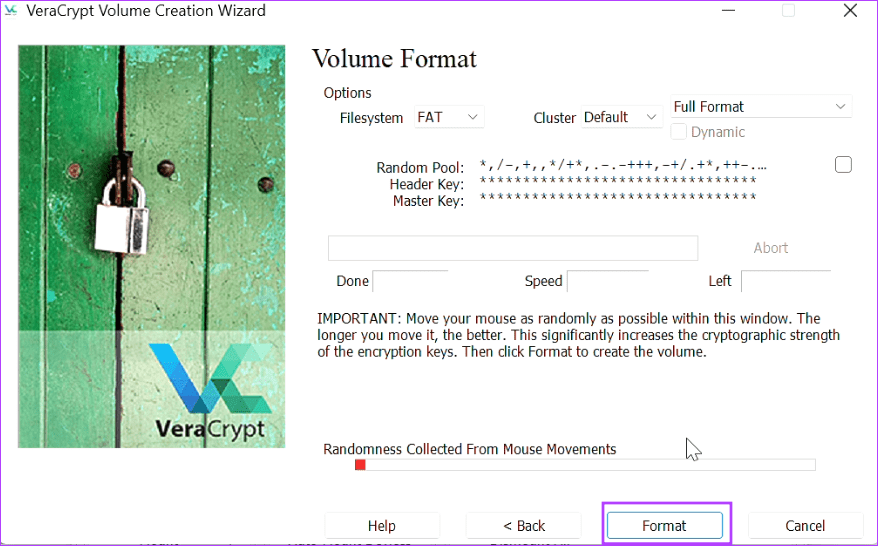
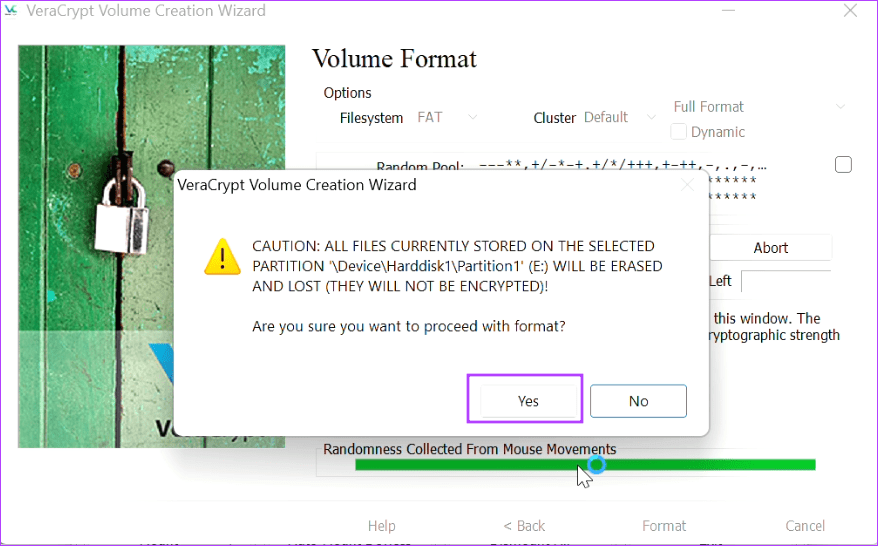
Step 10: Move the mouse randomly inside the VeraCrypt app window. Once the bar turns green, click on the Format option.
Step 11: Click on the Yes button.
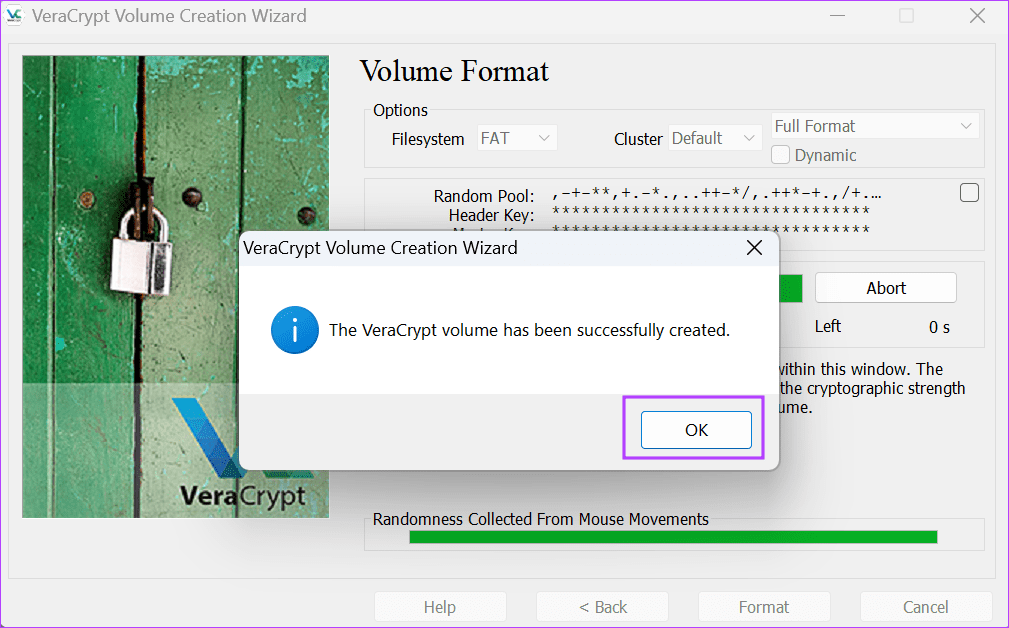
Step 11: Click on OK.
Once done, the utility will create an encrypted and hidden volume on your USB drive. Since it is a virtual volume, you must use VeraCrypt to mount it and then view the data inside. Here’s how:
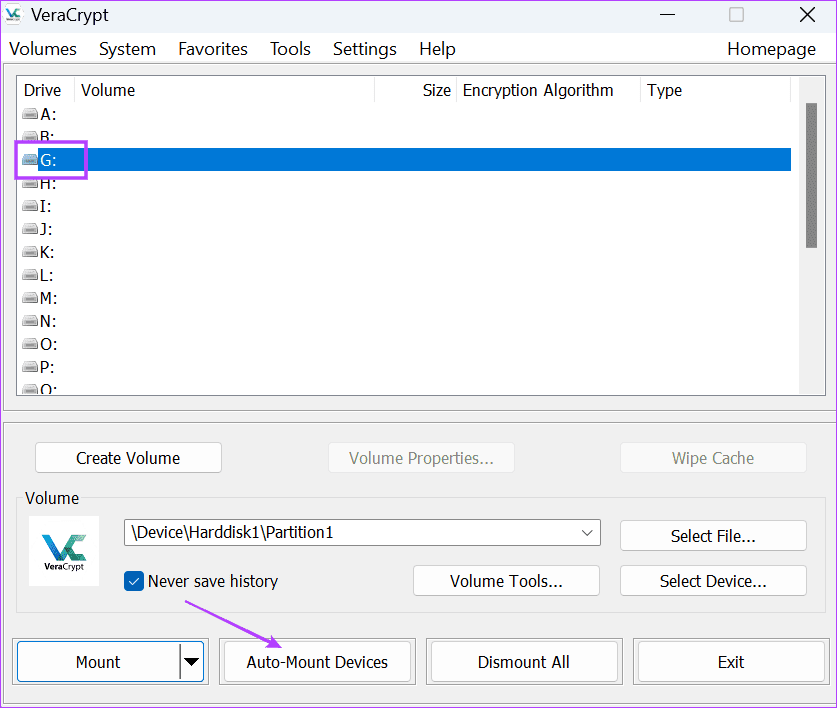
Step 1: Launch VeraCrypt.
Step 2: Select an unused drive letter from the list. Click on the Auto-Mount Devices button.
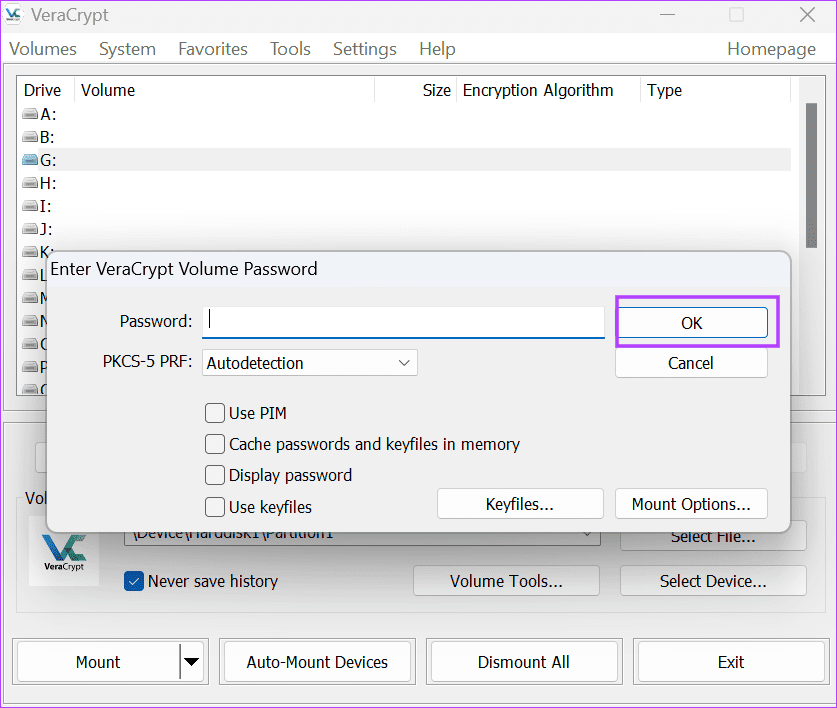
Step 3: Type the password and click on the OK button.
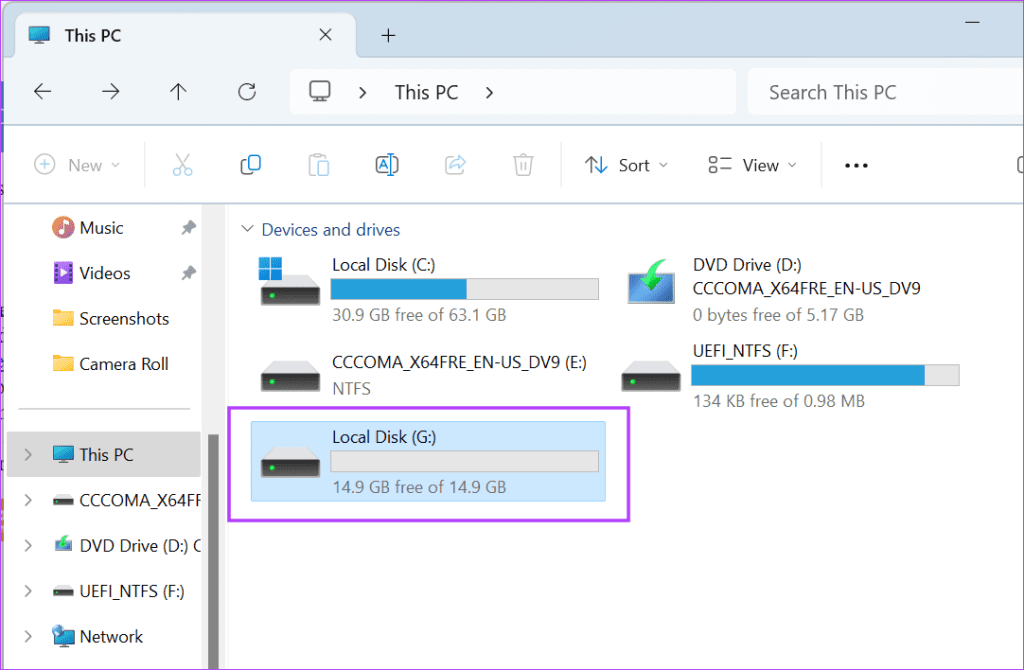
Step 4: After the tool mounts the volume, double-click on it to open it in a File Explorer window.
Step 5: Copy and manipulate the data and close the File Explorer.
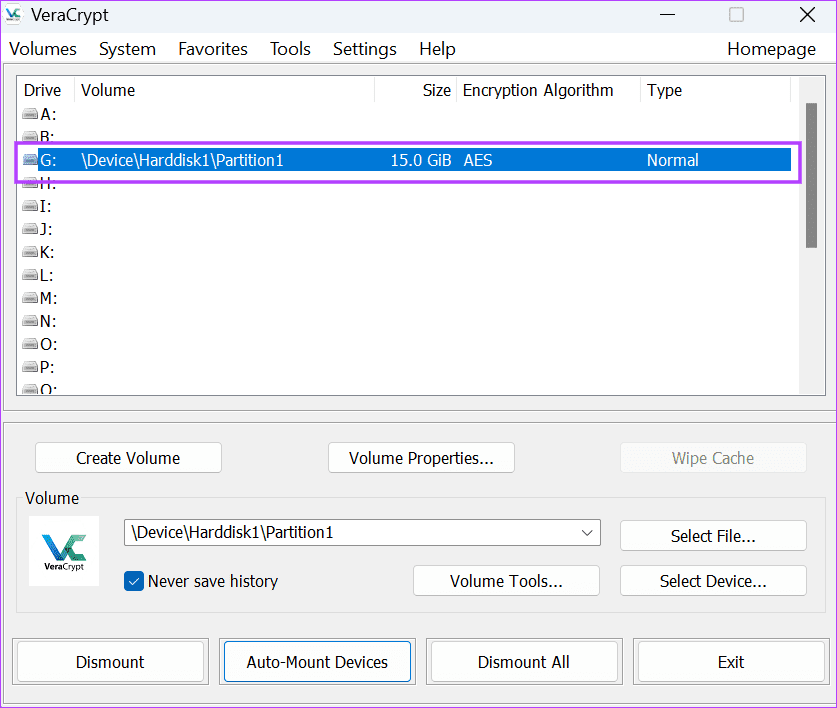
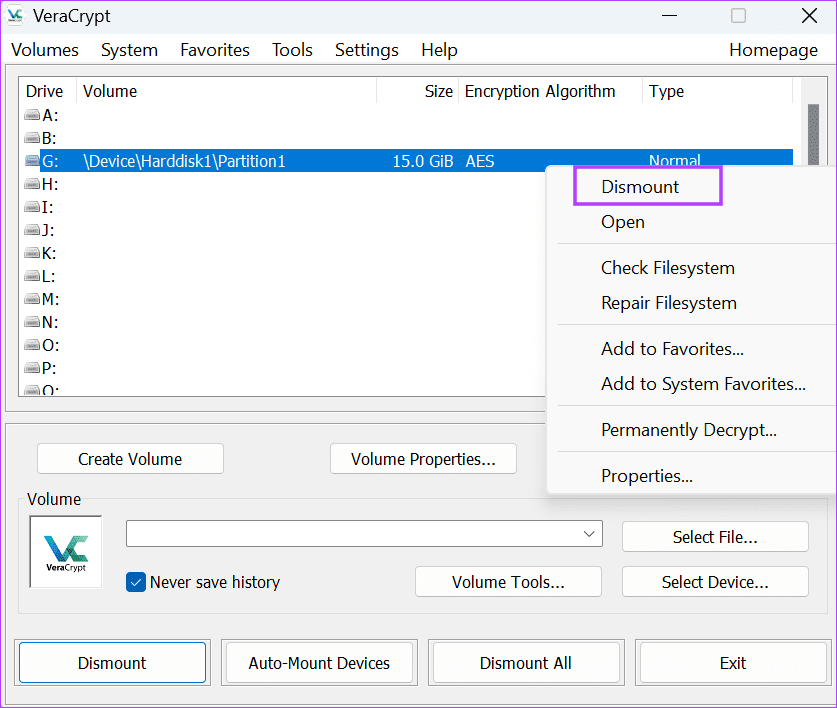
Step 6: Switch to VeraCrypt. Right-click on the volume and select the Dismount option.
How to Decrypt a USB Flash
Using Built-in BitLocker (Windows 11 Pro, Enterprise, and Education editions)
Repeat the following steps to remove the BitLocker encryption from the USB drive:
Step 1: Press the Windows key + E to open the File Explorer.
Step 2: Right-click on the USB drive. Click on the Show more options.

Step 3: Select the Manage BitLocker option.

Step 4: Click on the Turn off BitLocker option.

Step 5: Click on the Turn off BitLocker button.

Step 6: Wait for the decryption to complete. Click on the Close button.

Once done, both BitLocker encryption and password protection will be disabled on the USB drive.
Using VeraCrypt
If you don’t want to use encryption, you must decrypt the USB drive. Here’s how:
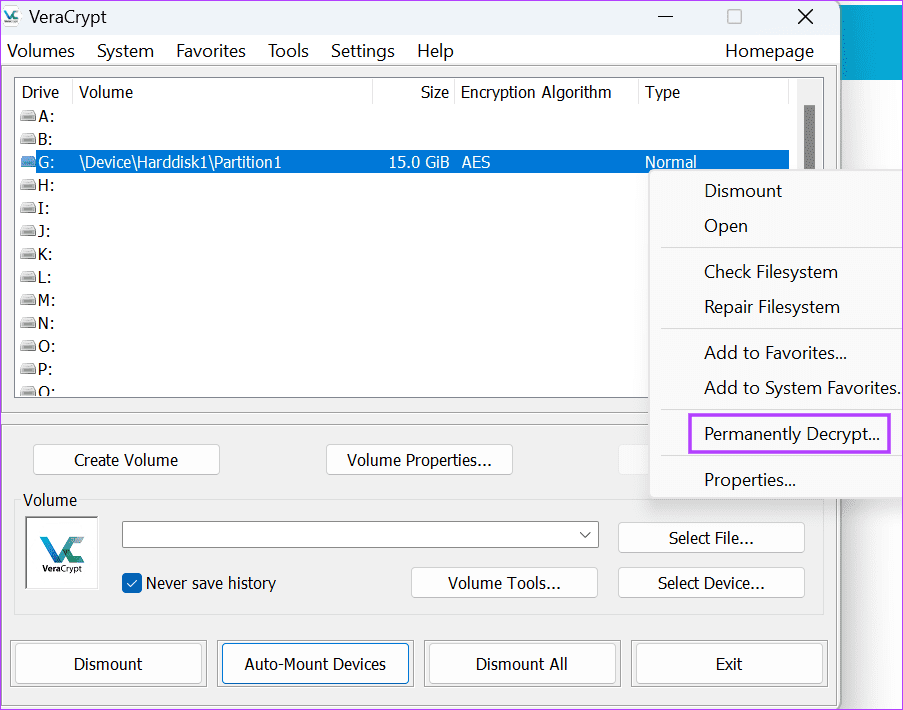
Step 1: Mount the USB drive in VeraCrypt, as explained previously.
Step 2: Right-click on the mounted drive and select the Permanently Decrypt option.
Step 3: Click on the Yes button.

Step 4: Enter the password and click on Next.
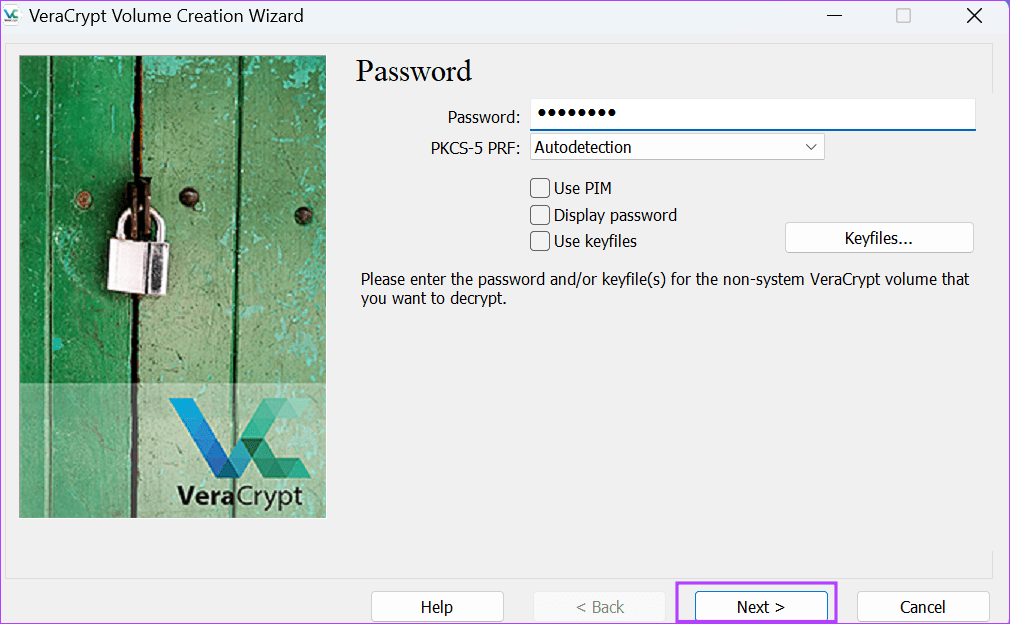
Step 5: Click on the Decrypt button.
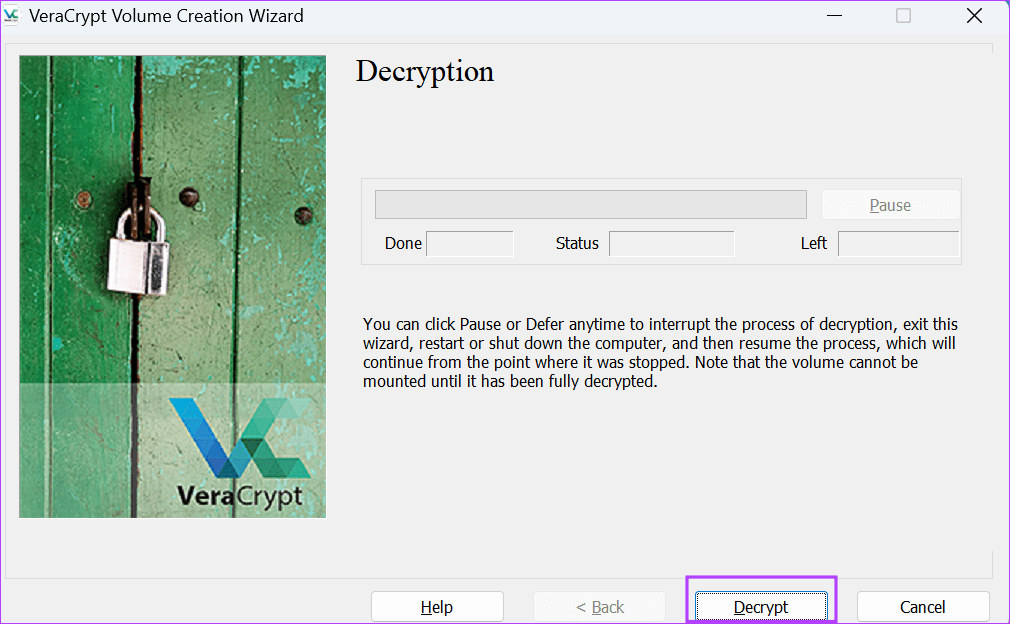
Step 6: Follow the on-screen instructions to finish the decryption process.
Was this helpful?
Last updated on 30 August, 2024
Read Next
 5 Best USB 3 Flash Drives for the iPhone 15 Series
The iPhone 15 series smartphones ship with a USB-C port.
5 Best USB 3 Flash Drives for the iPhone 15 Series
The iPhone 15 series smartphones ship with a USB-C port.
 How to Encrypt Your Android Phone and Why
Encryption on Android devices was introduced by Google way back with the launch of Android Gingerbread (2.3), and it’s a pretty useful feature if you’re concerned about the security of
How to Encrypt Your Android Phone and Why
Encryption on Android devices was introduced by Google way back with the launch of Android Gingerbread (2.3), and it’s a pretty useful feature if you’re concerned about the security of
 How to Encrypt Emails in Microsoft Outlook
How to Encrypt Email in Microsoft Outlook on Windows 11 With a Microsoft 365 subscription, you can send encrypted emails to your contacts.
How to Encrypt Emails in Microsoft Outlook
How to Encrypt Email in Microsoft Outlook on Windows 11 With a Microsoft 365 subscription, you can send encrypted emails to your contacts.
 4 Ways to Fix Snapchat Camera or Flash Lag on Your Phone
Basic Fixes: Restart the Snapchat app: Restarting the Snapchat app will close all app functions and start them afresh.
4 Ways to Fix Snapchat Camera or Flash Lag on Your Phone
Basic Fixes: Restart the Snapchat app: Restarting the Snapchat app will close all app functions and start them afresh.
 6 Best USB-C (USB 3) Cables for iPhone 15 Pro and iPhone 15 Pro Max
The iPhone 15 Pro series has received significant enhancements.
6 Best USB-C (USB 3) Cables for iPhone 15 Pro and iPhone 15 Pro Max
The iPhone 15 Pro series has received significant enhancements.
 5 Ways to Fix Unable to Eject a USB Drive on Windows 11
Fix 1: Eject Drive Using the Settings App Windows provides several options for removing a USB drive.
5 Ways to Fix Unable to Eject a USB Drive on Windows 11
Fix 1: Eject Drive Using the Settings App Windows provides several options for removing a USB drive.
 3 Ways to Fix USB Drive Not Showing Files and Folders on Windows 11
Try These Basic Fixes Configure File Explorer to show hidden items: If some of your files and folders are missing from the USB drive but the storage space is still
3 Ways to Fix USB Drive Not Showing Files and Folders on Windows 11
Try These Basic Fixes Configure File Explorer to show hidden items: If some of your files and folders are missing from the USB drive but the storage space is still
The article above may contain affiliate links which help support Guiding Tech. The content remains unbiased and authentic and will never affect our editorial integrity.

