Microsoft Outlook app for Mac and Windows lets you manage email conversations and calendar events. If you are accessing your Outlook account from a different time zone or getting in touch with someone in a different country, you can always change the time zone for your Outlook account.

However, if you have signed in to multiple email accounts using Outlook, it can get hard to get up to speed with all your conversations. That’s why creating folders and automatically moving emails in your Outlook account is recommended. This post will explain creating folders and moving emails in Outlook on Mac and Windows.
How to Create Folders and Move Email in Outlook on Windows
The Outlook app is the default email client for Windows PC users. Let us start by showing you the steps to create a folder and move your emails into it. Ensure you use the latest version of the Outlook app on your Windows 11 PC. We are using a Microsoft Office 360 account for Outlook.
For Classic Outlook Users on Windows 11
If you prefer using the Classic Outlook version, here’s how to create a separate folder for specific emails or senders.
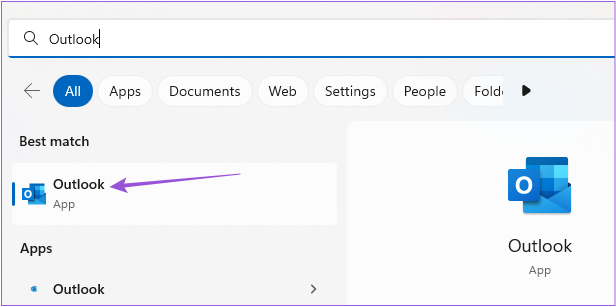
Step 1: Click the Start icon on Windows 11, type Outlook in the Search bar, and press Enter to open the Outlook app.
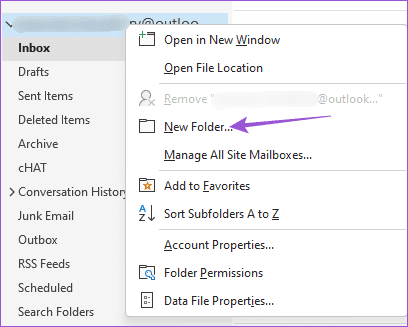
Step 2: Right-click on your email account from the left menu.

Step 3: Select New Folder.
Step 4: Assign a name to your new folder on the left menu.

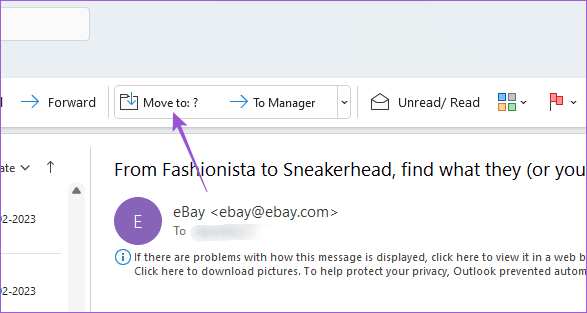
Step 5: Select the email conversation that you want to move to the folder.
Step 6: Click on ‘Move To: ?’ from the top Menu bar.
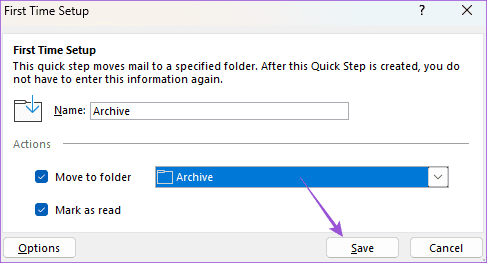
Step 7: In the First Time Setup window, click on Choose folder.

Step 8: Select the folder name and click on Save.
Here’s how to move emails automatically to folders.
Step 1: In the Outlook app on your Windows 11 PC, right-click on the email that you want to move.
Step 2: Select Rules.
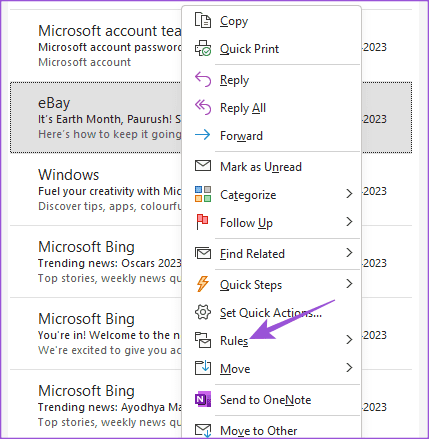
Step 3: Click on Create Rule.

Step 4: Click the checkbox next to From (Sender Name) to select all emails you receive from that sender.
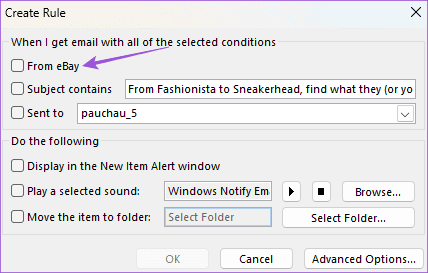
Step 5: Click the checkbox next to Move The Item To Folder.

Step 6: Click on Select Folder.

Step 7: Select the folder name and click Ok.

Step 8: Click Ok again to save your preference.

For New Outlook Users on Windows 11
Step 1: Click the Start icon on Windows 11, type Outlook in the Search, and press Enter to open the Outlook app.
Step 2: Right-click on your email account from the left menu.

Step 3: Click on Create New Folder. Then assign the folder name.

Step 4: After that, select the email that you want to move to your folder.
Step 5: Click on Move To drop-down at the top Menu Bar.

Step 6: Search the name of your folder and select it.

For transferring emails automatically to folders, here’s what to do.
Step 1: In the Outlook app on your Windows 11 PC, right-click on the email that you want to move.
Step 2: Click on Advanced Options.

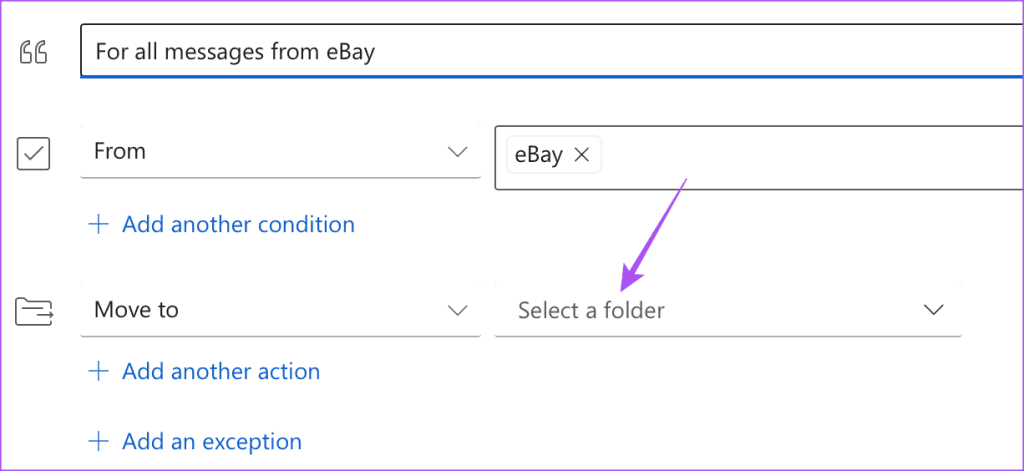
Step 3: Select Create Rule.

Step 4: Select the folder from the dropdown menu and click on Save.

You can also add subfolders in Outlook and follow the same steps.
How to Create Folders and Move Email in Outlook on Mac
If you are using the Outlook app on your Mac, here’s how to create folders and move your emails.
Step 1: Press Command + Spacebar keyboard shortcut to open Spotlight Search, type Outlook, and press Return.

Step 2: Right-click on your email account name from the left menu and select New Folder.

Step 3: Assign the folder name on the left side. Then select the email that you want to move to your folder.
Step 4: Click on Move at the top Menu Bar.

Step 5: Select Choose Folder.

Step 6: Type the folder’s name, select it, and click on Move.

If you wish to automatically move emails to a folder in Outlook on your Mac, here’s how to do it.
Step 1: In the Outlook app, right-click the email you want to move.
Step 2: Select Rules from the list of options.

Step 3: Click on Create Rule.

Step 4: In the Rules window, click the drop-down menu to select your folder.
Step 5: After you select it, click on Save.

All your emails from that respective sender will automatically move to your selected folder.
Organize Outlook Using Folders
You can create folders and automatically move emails in Outlook to organize your mailbox efficiently. You can also read our post on how to add reminders to your Outlook calendar.
Was this helpful?
Last updated on 14 July, 2023
Read Next
 Google Drive: How to Copy and Move Your Files and Folders
How to Make a Copy of Your Files or Folder Google Drive has a Make a Copy feature that duplicates your document or files.
Google Drive: How to Copy and Move Your Files and Folders
How to Make a Copy of Your Files or Folder Google Drive has a Make a Copy feature that duplicates your document or files.
 6 Ways to Fix “The Set of Folders Cannot Be Opened” Error in Outlook for Windows
Fix 1: Reset the Navigation Pane Sometimes, Outlook may fail to load the navigation pane entirely and throw an error message that reads, "Cannot start Microsoft Outlook.
6 Ways to Fix “The Set of Folders Cannot Be Opened” Error in Outlook for Windows
Fix 1: Reset the Navigation Pane Sometimes, Outlook may fail to load the navigation pane entirely and throw an error message that reads, "Cannot start Microsoft Outlook.
 Top 4 Ways to Change New Outlook Back to Old (Classic View) Outlook on Windows and Mac
The new Outlook app for desktop boasts a modern and simplified design, aligning it more closely with the web version of Microsoft Outlook.
Top 4 Ways to Change New Outlook Back to Old (Classic View) Outlook on Windows and Mac
The new Outlook app for desktop boasts a modern and simplified design, aligning it more closely with the web version of Microsoft Outlook.
 How to Fix Outlook for Mac Not Receiving Emails Automatically
Basic Fixes Check email storage: If your email inbox storage is full, you won’t receive new messages in any app or on the web Switch between new and classic Outlook
How to Fix Outlook for Mac Not Receiving Emails Automatically
Basic Fixes Check email storage: If your email inbox storage is full, you won’t receive new messages in any app or on the web Switch between new and classic Outlook
 4 Fixes When Outlook Is Not Receiving Emails From Gmail on Windows
Basic Fixes: Free up Mailbox Storage: If your mailbox storage is full, you will not receive new emails, and deleting or creating extra storage is the only option.
4 Fixes When Outlook Is Not Receiving Emails From Gmail on Windows
Basic Fixes: Free up Mailbox Storage: If your mailbox storage is full, you will not receive new emails, and deleting or creating extra storage is the only option.
 2 Ways to Fix Outlook Receiving Late Emails on Windows 11
Basic Fixes: Check the Internet connection and Outlook server status: If you work with a sketchy Internet connection on your laptop, you may face delays in receiving emails on Outlook.
2 Ways to Fix Outlook Receiving Late Emails on Windows 11
Basic Fixes: Check the Internet connection and Outlook server status: If you work with a sketchy Internet connection on your laptop, you may face delays in receiving emails on Outlook.
 How to Create and Manage Chat Folders in Telegram
In most messaging apps, managing chats has to be the most complicated task at hand.
How to Create and Manage Chat Folders in Telegram
In most messaging apps, managing chats has to be the most complicated task at hand.
 How to Color Code Emails in Outlook By Sender
How to Color Code Emails in Outlook by Sender We will show you how to color code your emails in Outlook.
How to Color Code Emails in Outlook By Sender
How to Color Code Emails in Outlook by Sender We will show you how to color code your emails in Outlook.
The article above may contain affiliate links which help support Guiding Tech. The content remains unbiased and authentic and will never affect our editorial integrity.

