How to Create a WhatsApp Community
While similar, there are minor differences when creating WhatsApp communities on different platforms. We walk you through how it is done on iOS, Android, and Desktop.
On iPhone
First, install the latest WhatsApp app version from the App Store. Then, follow the steps below.
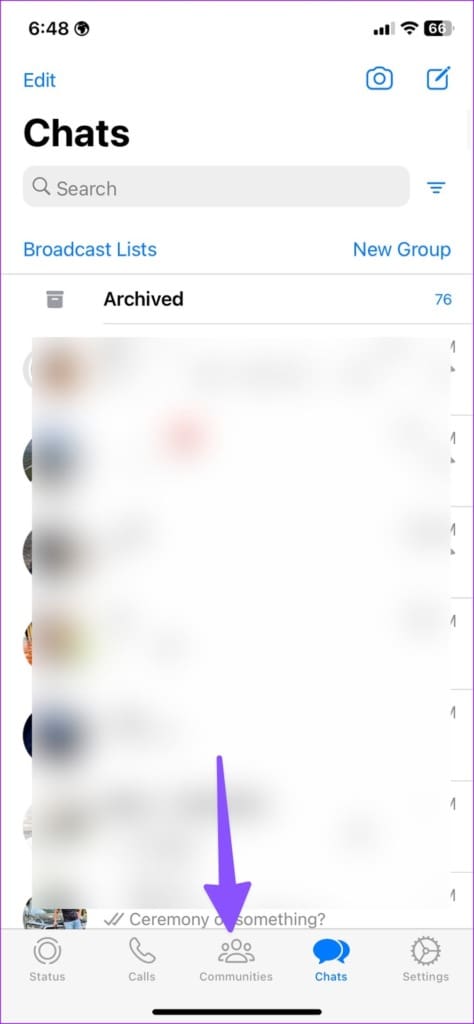
Step 1: Launch WhatsApp on your iPhone.
Step 2: Tap the Communities tab at the bottom > New Community.

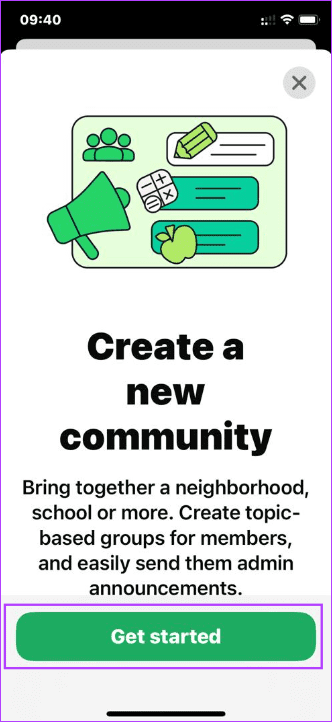
Step 3: Tap Get Started. Give it a relevant name and description, and set a profile picture. You can also use an emoji or sticker as a community picture. Hit Create community.

On Android
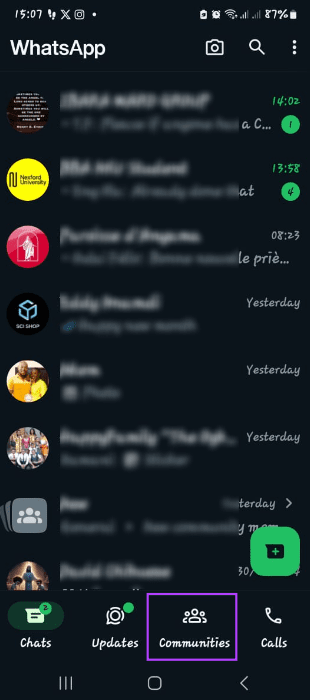
Step 1: Launch WhatsApp on Android.
Step 2: Tap the Communities tab at the bottom > select New community.

Step 3: Tap the Get started button and give it a relevant name, description, and profile picture. You can also use an emoji or sticker as a community picture. Hit the arrow button to proceed.

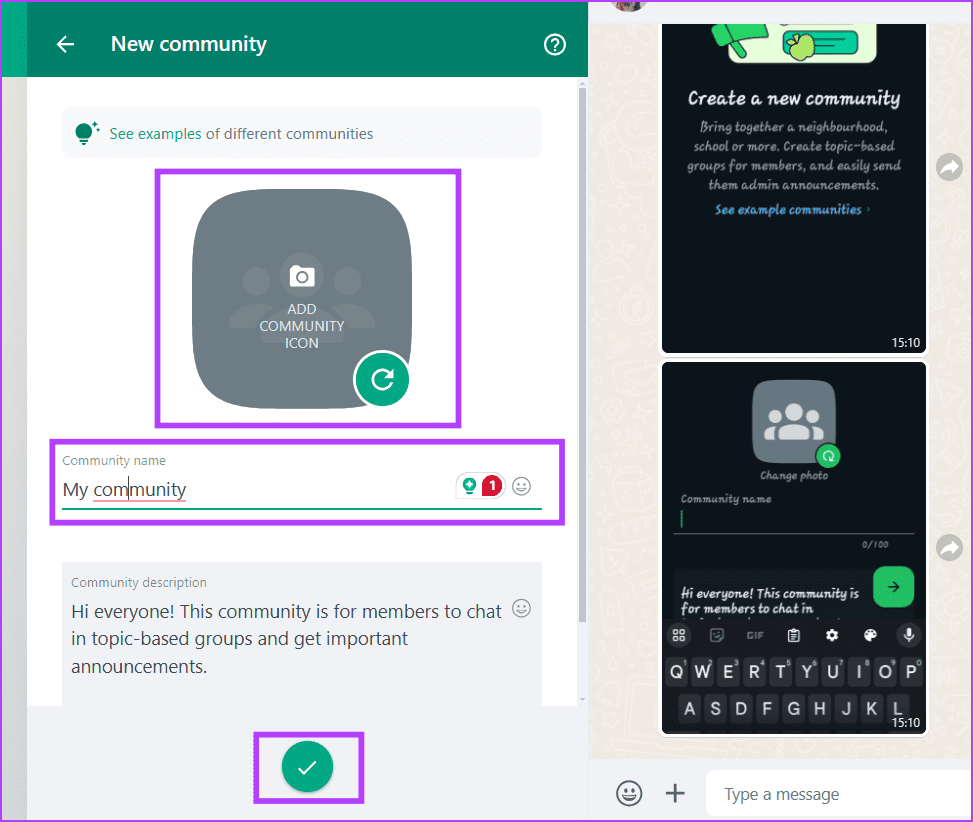
On Desktop
Step 1: Launch WhatsApp or use Whatsapp Web.
Step 2: Click the Communities icon beside your profile picture.

Step 3: Click New Community.

Step 4: Click the arrow to proceed > name the community > add an image if needed > click the Check button.
Add Groups to a WhatsApp Community
Note: The process for adding a group to a WhatsApp community is the same across operating systems.
Step 1: Tap or click the Communities icon on WhatsApp. This icon is at the bottom of the WhatsApp home on mobile devices or the top, beside your profile picture, on a desktop.
Step 2: Tab your newly created community.

Step 3: Tap the Add group button > Add existing group or Create a new group. The second option lets you create a group from the start.

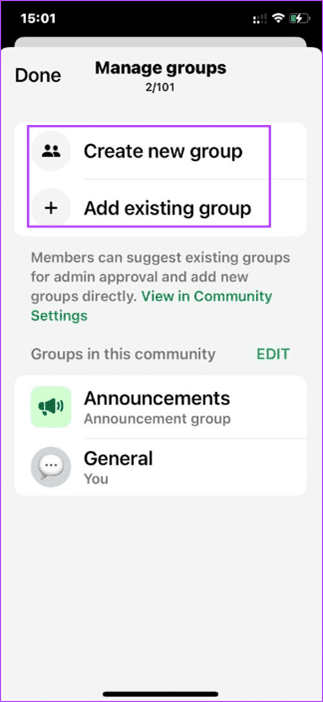
Step 4: Select your groups and tap Add.
Invite Contacts to Join a WhatsApp Community
Next, you may invite your friends or contacts to join your community. To do so on different platforms, follow the steps below.
On iPhone and Android
Step 1: Tap or click the Communities icon on WhatsApp.
Step 2: Tab your newly created community.
Step 3: Tap the three dots at the top > tap Invite members > select Send link via WhatsApp or Add members.
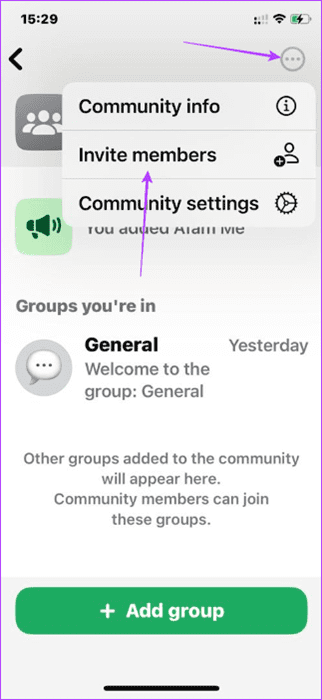

Step 4: If you choose Send link via WhatsApp, pick contacts and click Send. But if you chose Add members, select members and click Add.
On Desktop
Step 1: Launch WhatsApp or use Whatsapp Web.
Step 2: Click the Communities icon beside your profile picture.
Step 3: Click your community.
Step 4: Click the More option icon > View Members.

Step 5: Select Invite community via link or Add members. If you choose Invite community via link, you will generate a link you can share with people. But if you choose Add members, you will select members and click the Check button.

Make Someone Admin of the WhatsApp Community
After creating a community on WhatsApp, you become the community admin by default. You can always give other community members the same admin rights. Here are the steps on different devices.
On Mobile Devices
Step 1: Open a WhatsApp community on your phone > tap Communities > your community.


Step 2: Tap the three dots at the top right > Community info.

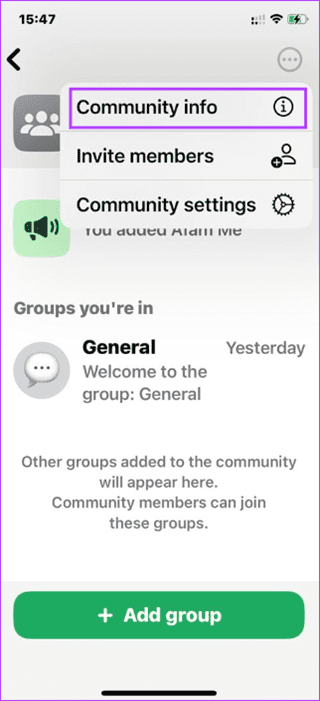
Step 3: Check the members’ list > select a contact > click Make admin.


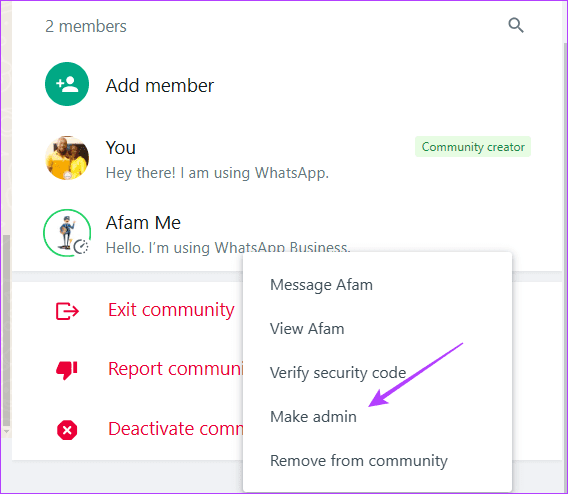
On Desktop
Step 1: Launch WhatsApp or use Whatsapp Web.
Step 2: Click the Communities icon beside your profile picture.
Step 3: Click your community.
Step 4: Click the More options icon and click Community info.

Step 5: Check the members’ list > select a contact > click Make admin.
Was this helpful?
Last updated on 29 August, 2024
Read Next
 WhatsApp Groups vs. Communities: Understand the Differences
What Is a WhatsApp Group?
WhatsApp Groups vs. Communities: Understand the Differences
What Is a WhatsApp Group?
 3 Ways to Create a WhatsApp Group or a Chat With Yourself
Method 1: Create a Group By Removing Another Member You can temporarily create a group with just one member, and remove them later.
3 Ways to Create a WhatsApp Group or a Chat With Yourself
Method 1: Create a Group By Removing Another Member You can temporarily create a group with just one member, and remove them later.
 How to Create WhatsApp Invitation Cards
One may think of WhatsApp as a regular chat app.
How to Create WhatsApp Invitation Cards
One may think of WhatsApp as a regular chat app.
 How to Create and Use Polls in WhatsApp
On Mobile You can create polls in both personal chats and groups.
How to Create and Use Polls in WhatsApp
On Mobile You can create polls in both personal chats and groups.
 How to Create WhatsApp Contact Shortcuts on iPhone
If your iPhone supports iOS 17 or newer software versions, you can create WhatsApp contact shortcuts.
How to Create WhatsApp Contact Shortcuts on iPhone
If your iPhone supports iOS 17 or newer software versions, you can create WhatsApp contact shortcuts.
 WhatsApp Proxy: How to Use WhatsApp Without Internet
What Is WhatsApp Proxy You may have experienced several times that WhatsApp is not working on Wi-Fi or a mobile data connection.
WhatsApp Proxy: How to Use WhatsApp Without Internet
What Is WhatsApp Proxy You may have experienced several times that WhatsApp is not working on Wi-Fi or a mobile data connection.
 WhatsApp Web vs WhatsApp Desktop App: Which Should You Use
Currently ranked as the world's most popular instant messaging app, WhatsApp needs no introduction.
WhatsApp Web vs WhatsApp Desktop App: Which Should You Use
Currently ranked as the world's most popular instant messaging app, WhatsApp needs no introduction.
 How to Create, Edit, and Delete Dropdown Lists in Google Sheets
How to Create a Dropdown List on Google Sheets Here's how to create a dropdown list on Google Sheets by manually adding the options.
How to Create, Edit, and Delete Dropdown Lists in Google Sheets
How to Create a Dropdown List on Google Sheets Here's how to create a dropdown list on Google Sheets by manually adding the options.
The article above may contain affiliate links which help support Guiding Tech. The content remains unbiased and authentic and will never affect our editorial integrity.