Microsoft Outlook provides a lot of features that make email management easy. You can also personalize certain features of Outlook to convey information to their contacts. An example is the electronic business card that you can quickly attach and send to someone.

The electronic business card works the same way as physical cards provide your contact details to intended recipients. The business card can be used as an email signature and placed within an outgoing email. To create your personalized business card on Microsoft Outlook, here are the steps to follow.
How to Create a Business Card in Microsoft Outlook
Creating a business card on Outlook ensures that your email recipients always have your contact information handy. The business card can also take the place of your signature in your emails. In creating the business card, you can either use existing information in your Microsoft Outlook or provide new information. Here’s how to do so:
Step 1: Launch Microsoft Outlook.

Step 2: On the Navigation Bar, select People.
Note: Outlook can either display the People icon or write People depending on the version of Outlook you are working with.
Step 3: At the top-left of the Ribbon, select New Contact.

Step 4: Fill in your details (Full Name, Email Address, Phone Number, and Business Location).
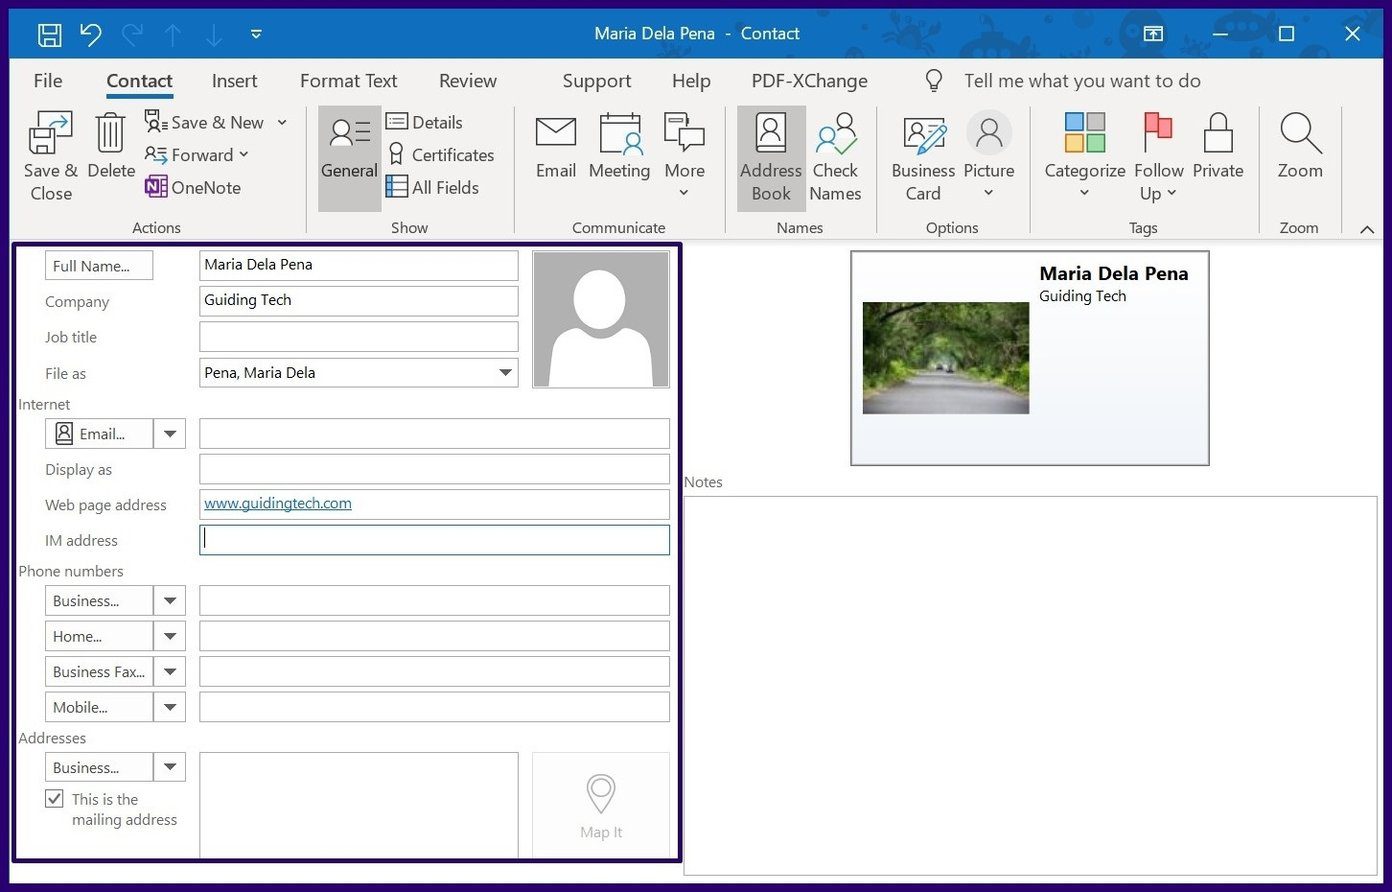
Step 5: Double-click on the rectangle which represents the business card within the contact form. Taking this action launches the Edit Business Card box.

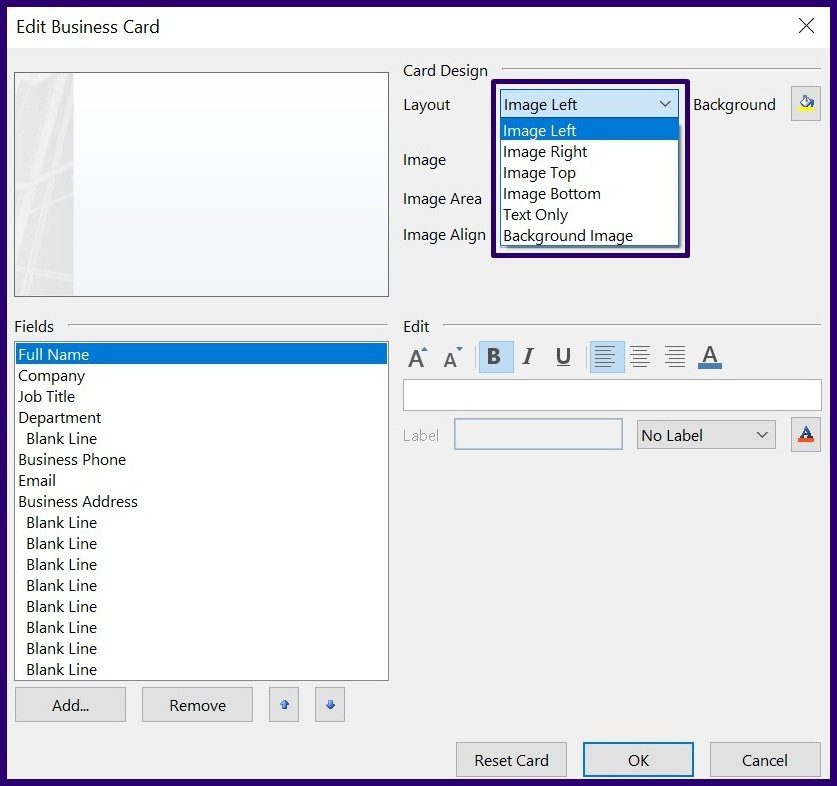
Step 6: Under Card Design, click on the drop-down beside Layout.

Step 7: Select your preferred layout from the list.
Note: If you do not want any pictures or logos on the business card, you can select the Text Only layout.
Step 8: To choose a background color for the business card, click on the paint icon beside Background and select your preferred color.

Step 9: To insert a logo or a picture in the card, click on the Change label beside Image.

Step 10: To alter the image size in the business card, place your cursor in the field beside Image Area and include the preferred percentage.
Note: You can restart the process of creating a business card by clicking on Reset Card.
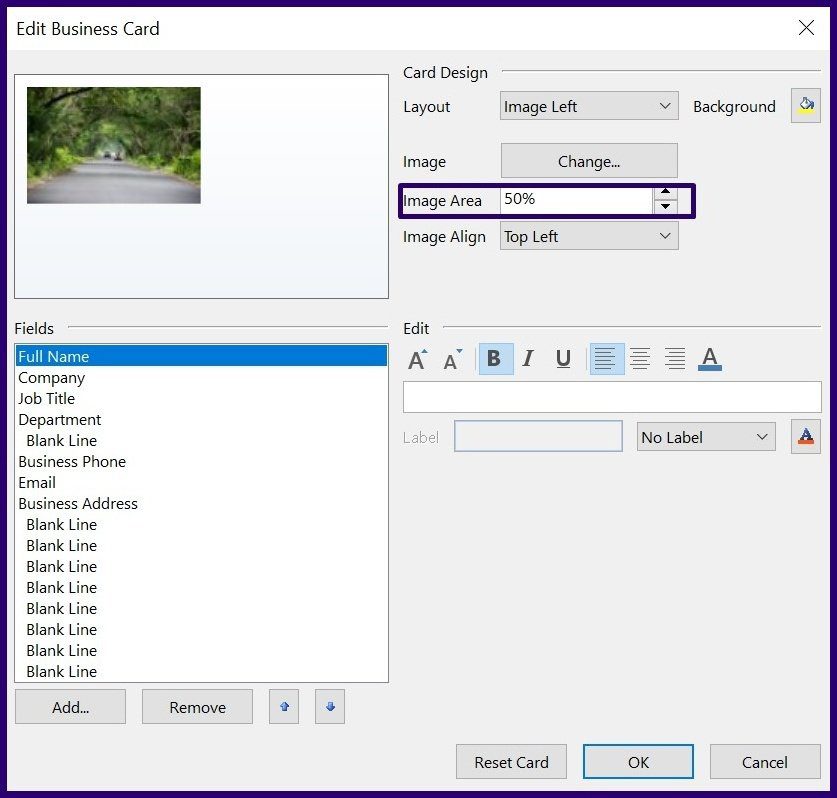
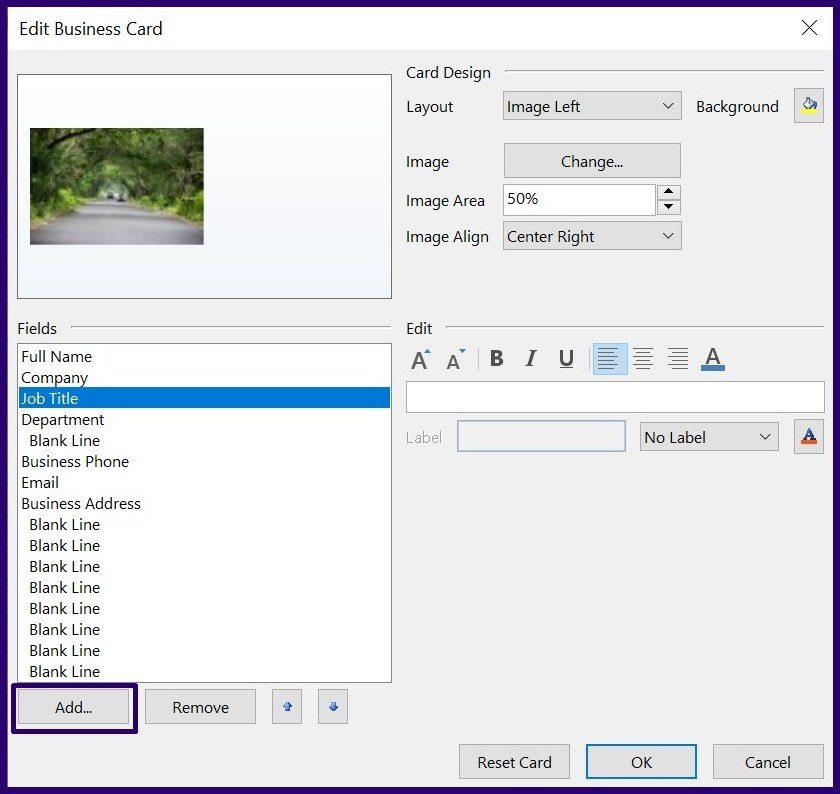
Step 11: To align the image in the business card, select the drop-down beside Image Align and select your preferred option.

Step 12: To add a new contact field, in the business card, go to Fields and select the label Add.
Note: You can delete a field by selecting it and clicking on Remove.
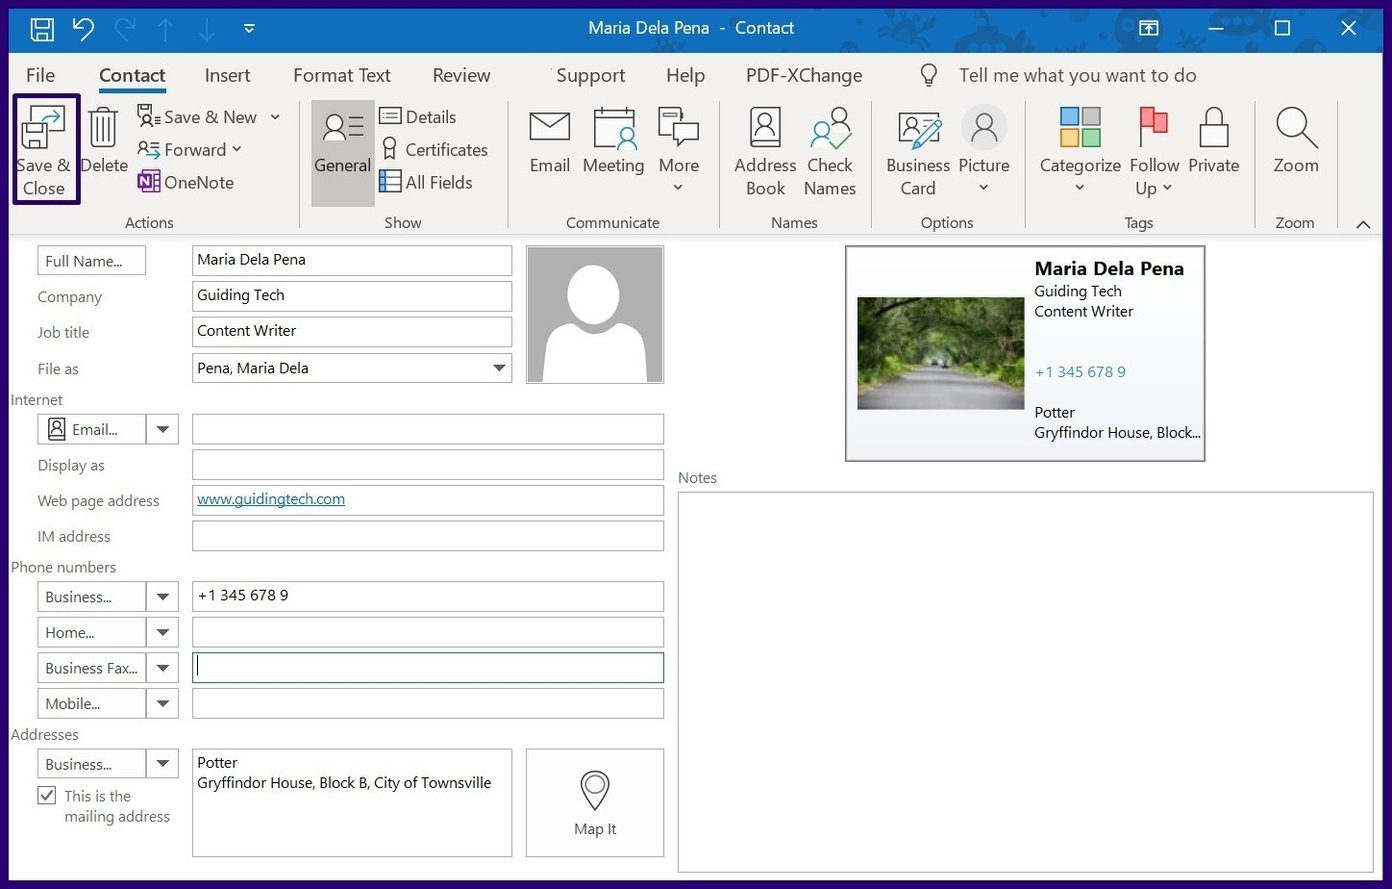
Step 13: Once you are done formatting the new business card, click on OK to close the dialog box.

Step 14: Click on Save and Close to save the new card.
After customizing the look of your business card, the next thing to do is to insert the business card into your email and send it to your recipients.
How to Insert a Business Card in an Outgoing Outlook Mail
When a business card is inserted in an outgoing mail, your recipients only need to right-click on the business card to save your information to their contacts list. Here’s how to insert a business card in an outgoing Outlook email.
Step 1: Launch Outlook, then create a new email or select to reply to a previously received email.

Step 2: On the Ribbon, click on Insert.
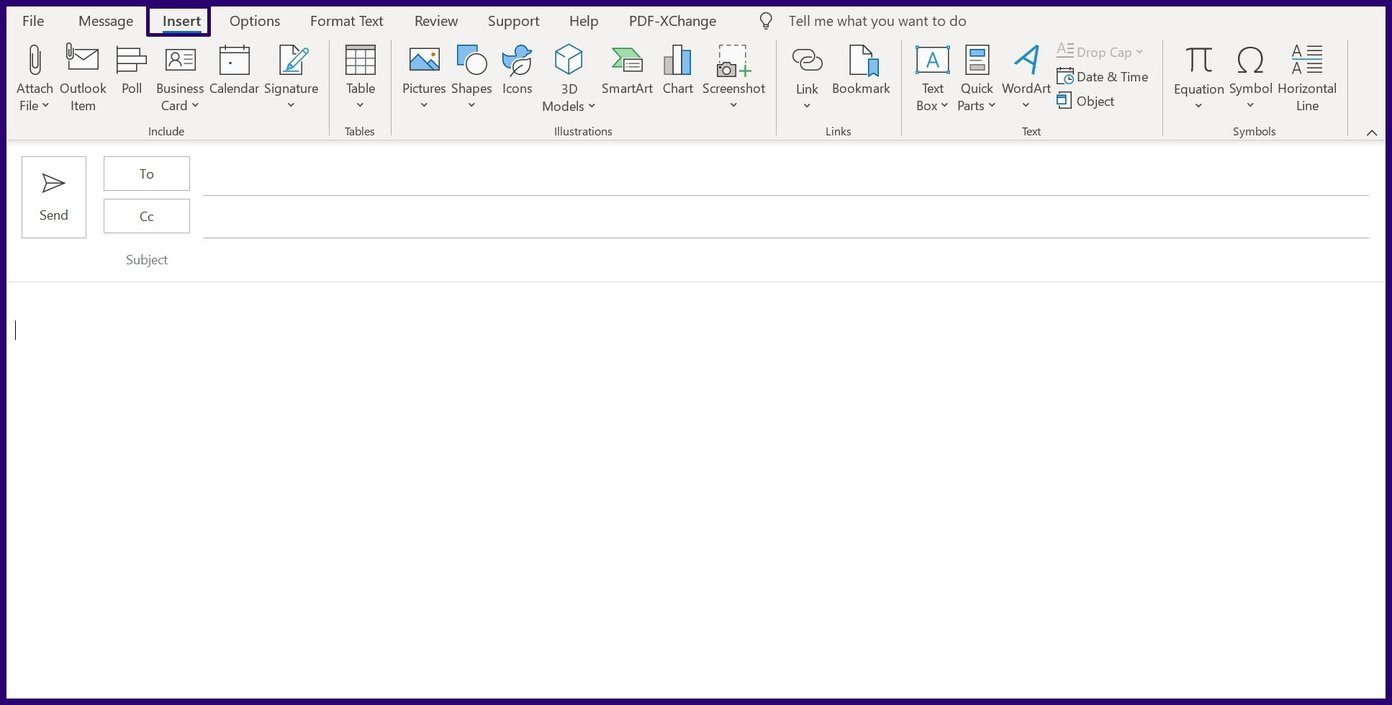
Step 3: Within the Include group, click on the dropdown under Business Card.
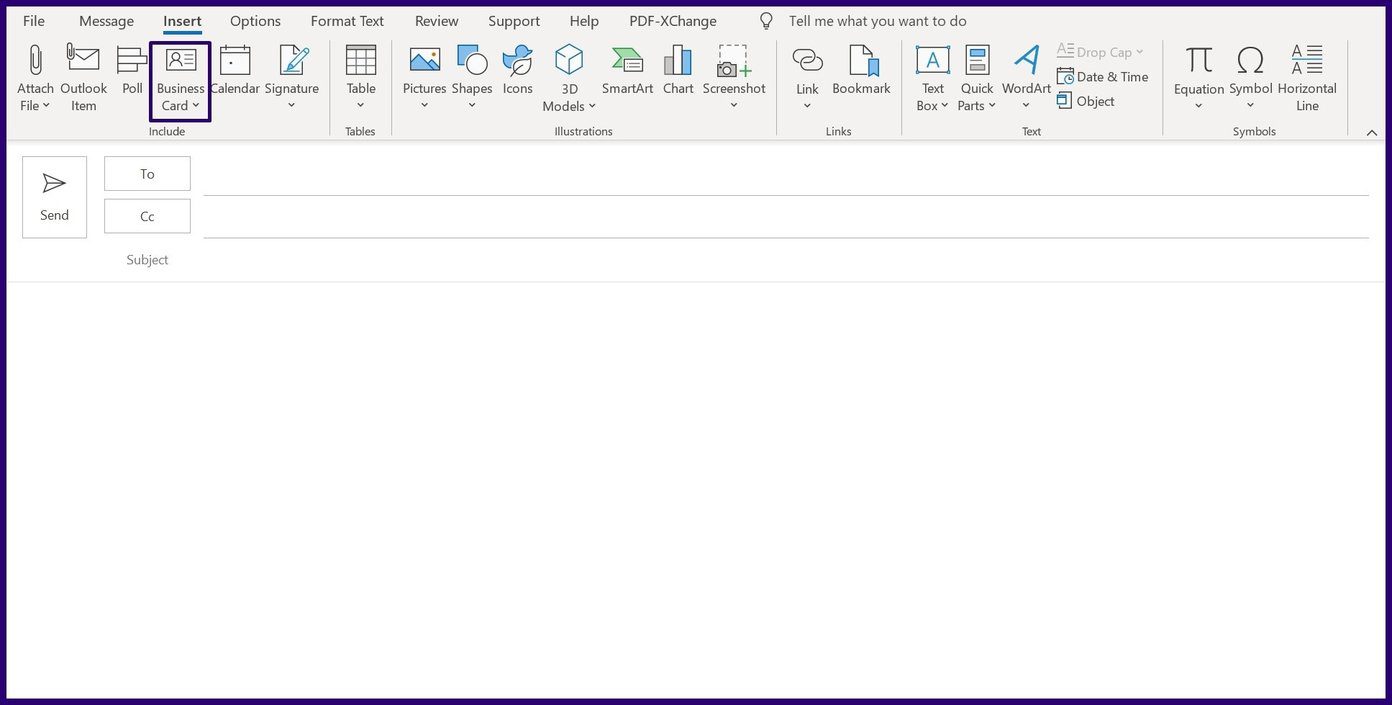
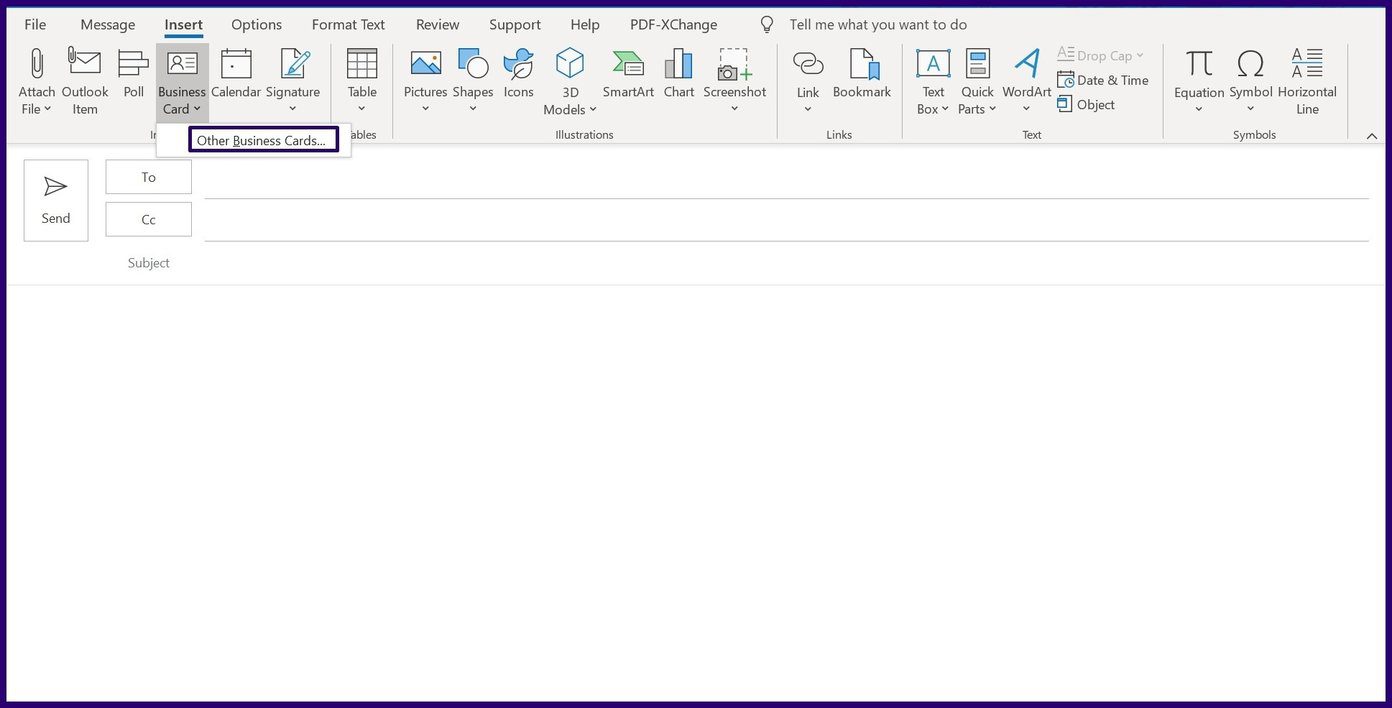
Step 4: Select Other Business Cards.
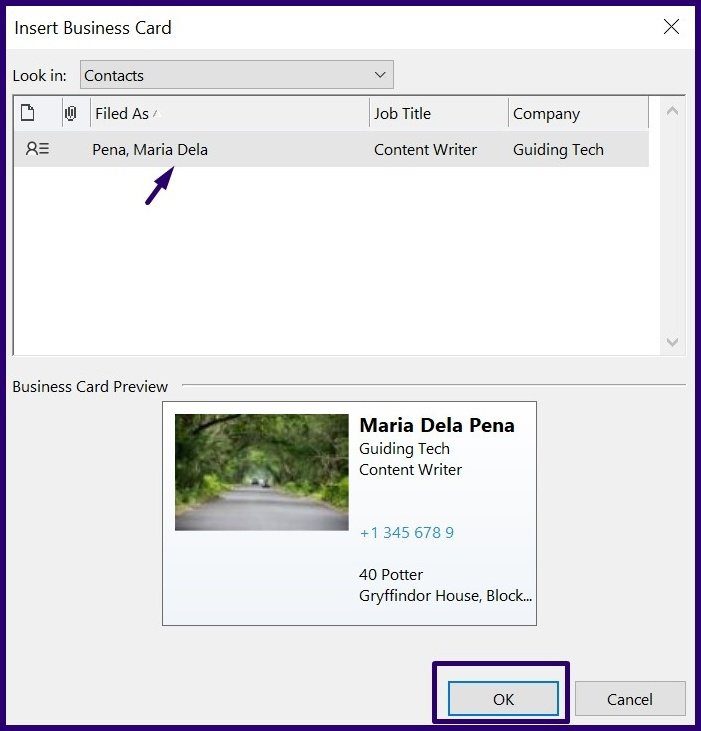
Step 5: On the new dialog box, select the drop-down beside Look in and select Contacts.

Step 6: Choose the business card that you need to insert into the email and embed it by clicking OK.
There you have it, you have just inserted your business card into your Outlook email.
Using Different Signatures on Microsoft Outlook
By creating an e-business card, you save yourself the expense of creating a physical one and contribute to the reduction of paper waste in the environment. You can also forward the card as many times as you want without worrying about running out. Interested in learning more ways you can personalize your Microsoft Outlook emails? You can use different signatures in your Microsoft Outlook.
Was this helpful?
Last updated on 07 February, 2022
Read Next
 How to Create WhatsApp Invitation Cards
One may think of WhatsApp as a regular chat app.
How to Create WhatsApp Invitation Cards
One may think of WhatsApp as a regular chat app.
 How To Fix Instagram Not Posting To Facebook Business Page Issue
Both Facebook and Instagram have features that make them easy to use together.
How To Fix Instagram Not Posting To Facebook Business Page Issue
Both Facebook and Instagram have features that make them easy to use together.
 Top 10 Things to Know About WhatsApp Business Catalog Feature
WhatsApp has been beneficial for small businesses that don’t have the resources to run a website or expensive marketing.
Top 10 Things to Know About WhatsApp Business Catalog Feature
WhatsApp has been beneficial for small businesses that don’t have the resources to run a website or expensive marketing.
 How to Turn off Business Account on Instagram
What Is a Business Account on Instagram An Instagram business account gives businesses access to certain features restricted to personal accounts that help grow their brands.
How to Turn off Business Account on Instagram
What Is a Business Account on Instagram An Instagram business account gives businesses access to certain features restricted to personal accounts that help grow their brands.
 30 Best Free AI Tools Online for Your Business or Personal Use
There has been a meteoric rise in the development of Artificial intelligence and Machine Learning in the last few years.
30 Best Free AI Tools Online for Your Business or Personal Use
There has been a meteoric rise in the development of Artificial intelligence and Machine Learning in the last few years.
 How to Create a Custom Form in Microsoft Outlook
Microsoft Outlook leats you create a Form.
How to Create a Custom Form in Microsoft Outlook
Microsoft Outlook leats you create a Form.
 5 Ways to Create a Task in Microsoft Outlook
For most people, a new day brings about a set of fresh tasks to complete.
5 Ways to Create a Task in Microsoft Outlook
For most people, a new day brings about a set of fresh tasks to complete.
 How to Remove Cards, Tickets, and Other Items From Apple Wallet
Basic Fixes Remove Expired Tokens: Some tickets also expire after use, so removing something from your Apple Wallet is useful to eliminate these expired tokens taking up space.
How to Remove Cards, Tickets, and Other Items From Apple Wallet
Basic Fixes Remove Expired Tokens: Some tickets also expire after use, so removing something from your Apple Wallet is useful to eliminate these expired tokens taking up space.
The article above may contain affiliate links which help support Guiding Tech. The content remains unbiased and authentic and will never affect our editorial integrity.