How to Crop, Trim, and Combine Videos in Canva
First, let’s see how you can upload your video to start editing it in Canva.
Step 1: Open a web browser and navigate to Canva’s video editor. Then, click the Make a Video button.

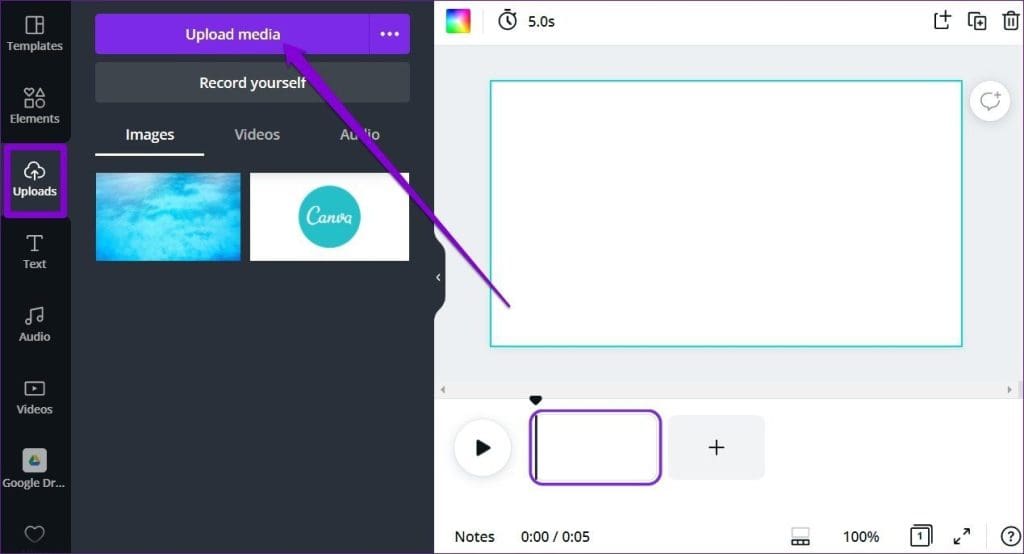
Step 2: Inside the video editor, switch to the Uploads tab and click the Upload media button to add a video from your PC.
Step 3: Once you’ve uploaded your video, you’re all set to edit in Canva’s video editor.
Split Clips
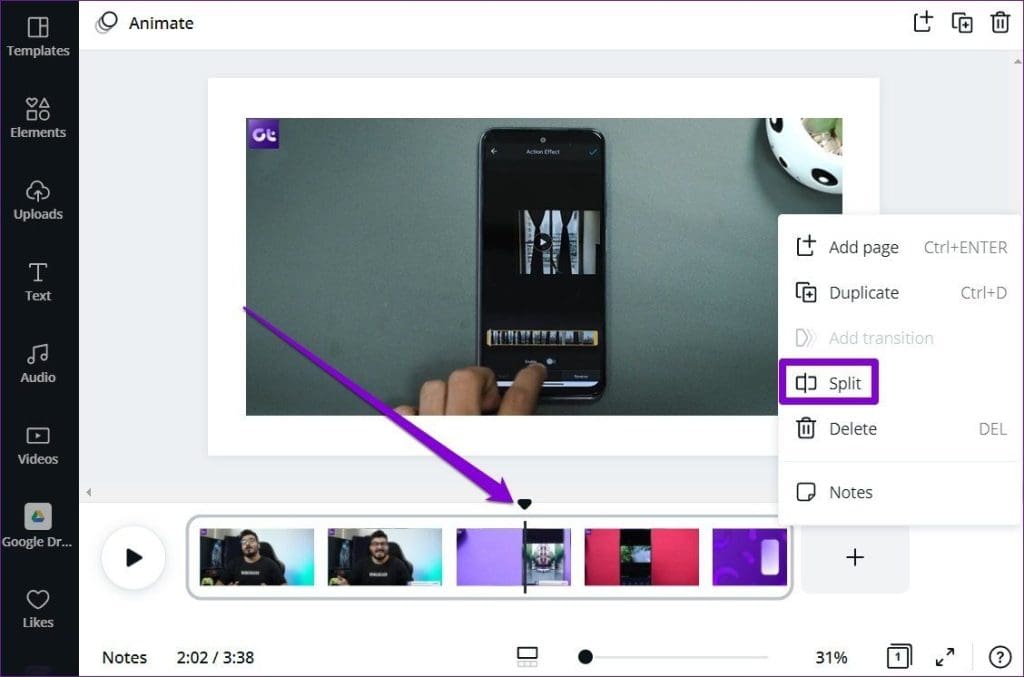
You’ll find that your entire video is shown as a single clip in the timeline. You can divide your video into various parts and edit each one of them separately. To split your video, move the cursor to the part from where you wish to split the video. Now, right-click anywhere on the timeline and choose Split.
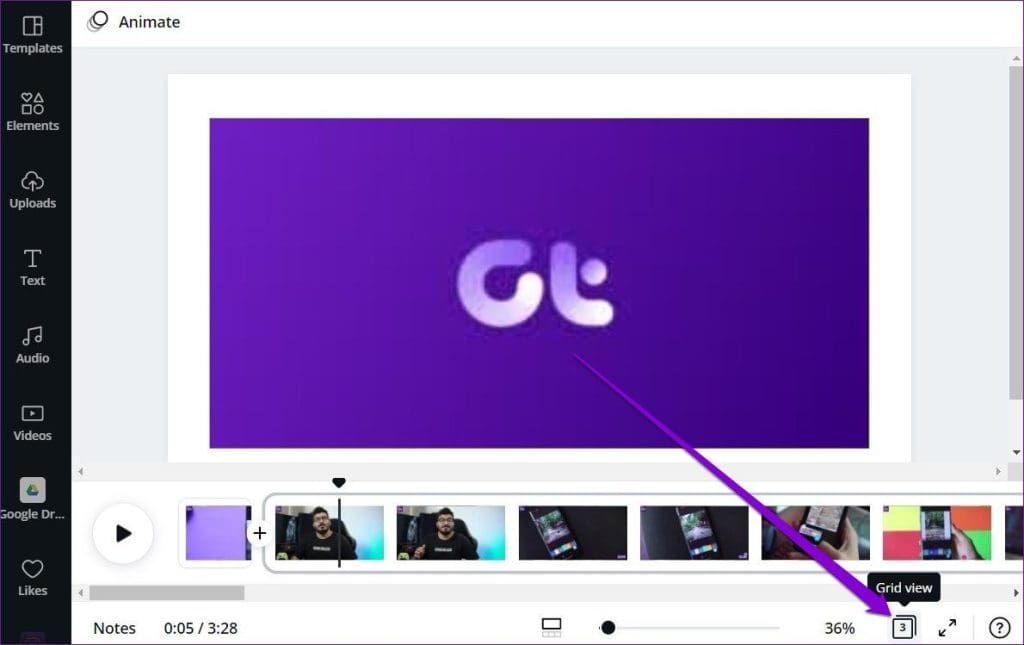
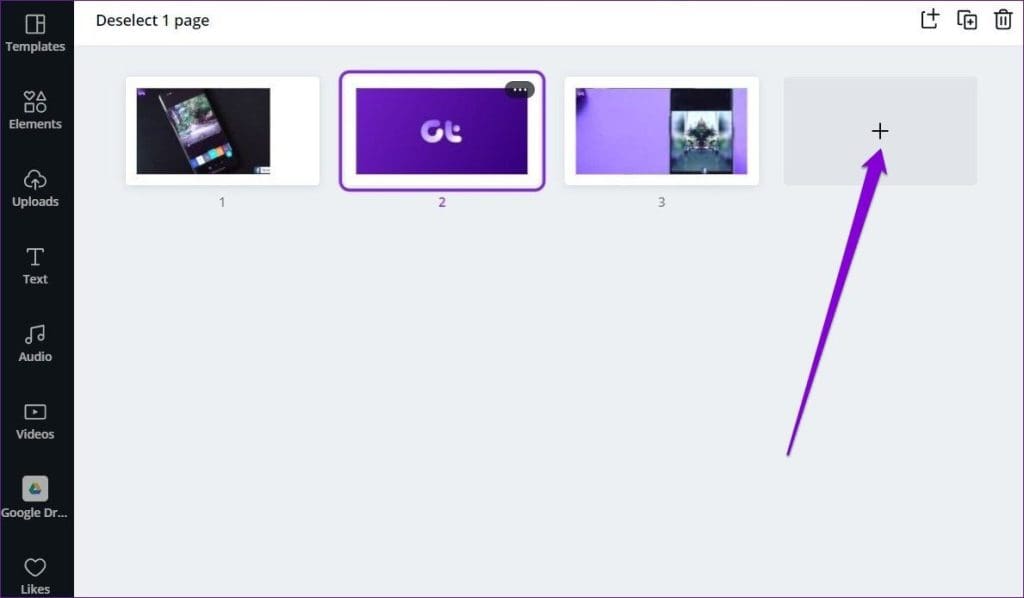
Splitting your video into parts also allows you to change the order of the clips. You can view all your clips by clicking the Grid view option and changing their order from there.
To add more clips and images to your video, click the + Add page button.
Trim Videos
Aside from splitting, you can also easily trim your clips in Canva. Here’s how:
Step 1: Select the video and click the scissor icon in the upper-left corner.
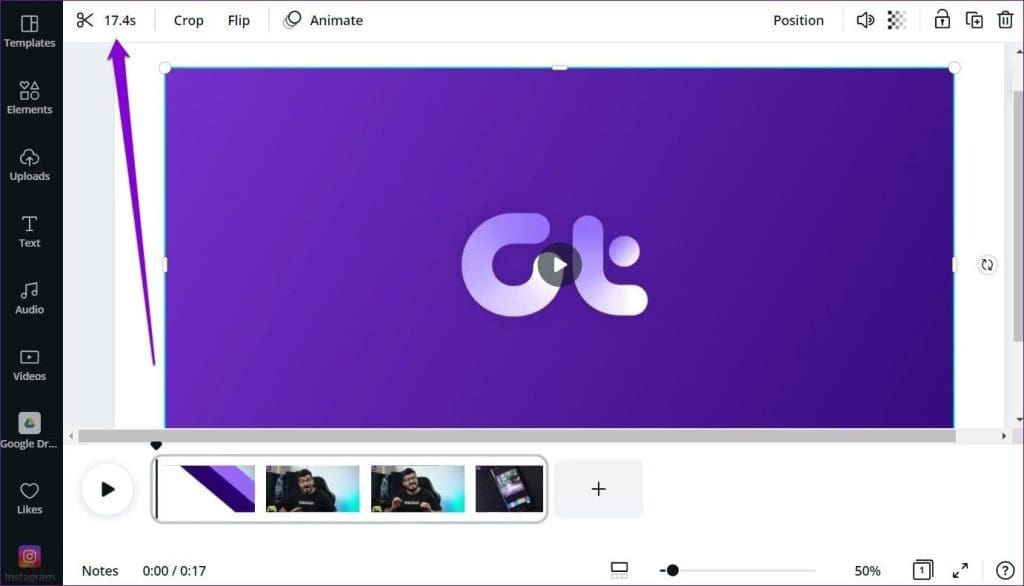
Step 2: Use the two sliders at the top to select a portion of the video. Then, click Done.

Crop Videos
You can also crop your video in Canva to your preferred aspect ratio. To do that, use these steps:
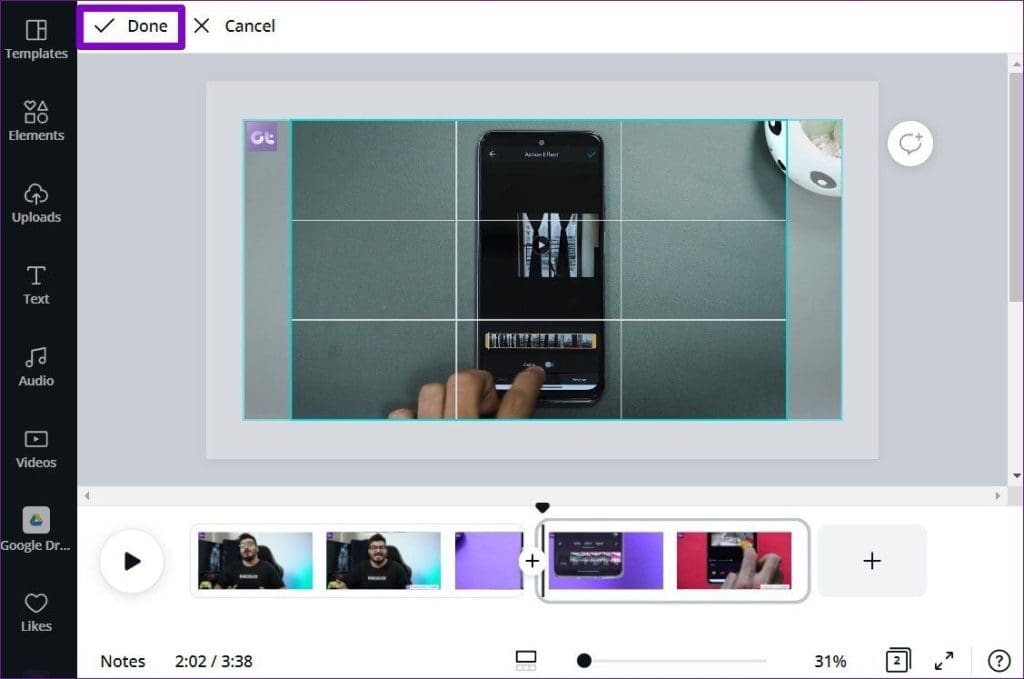
Step 1: Select the video in the preview and click the Crop button in the top left corner.
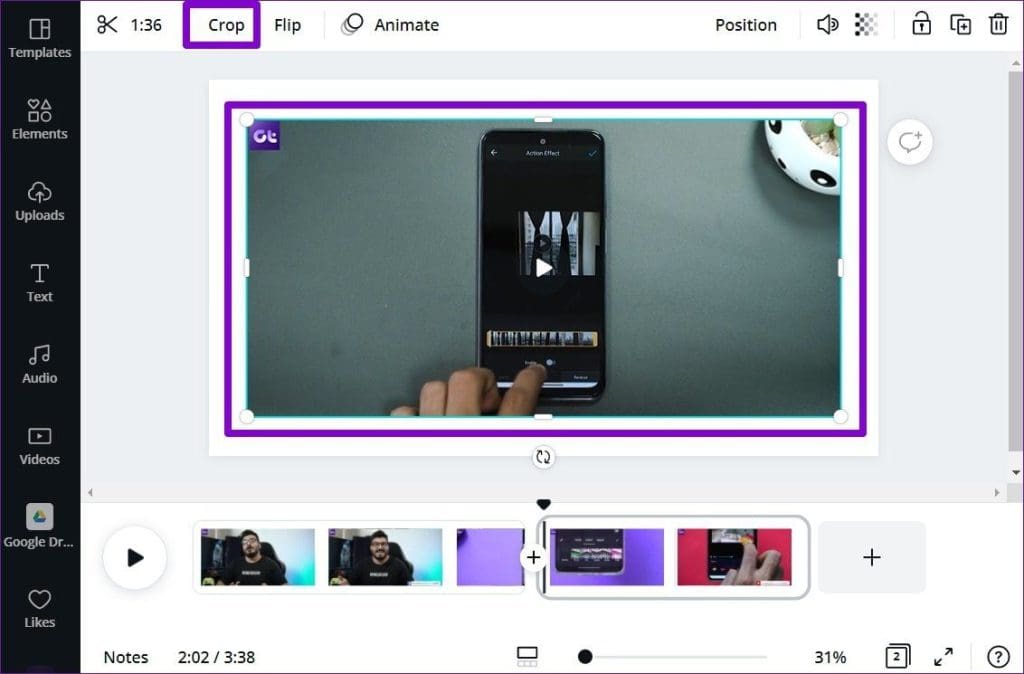
Step 2: Now, adjust the frame of the video and click Done.
How to Add Elements and Text in a Video
Apart from the basic editing stuff, you can also add elements and text to liven up your videos in Canva. Here’s how.
Use Elements
Step 1: Switch to the Elements tab on your left. You can explore Canva’s extensive library of various stickers, graphics, photos, charts, and more here.
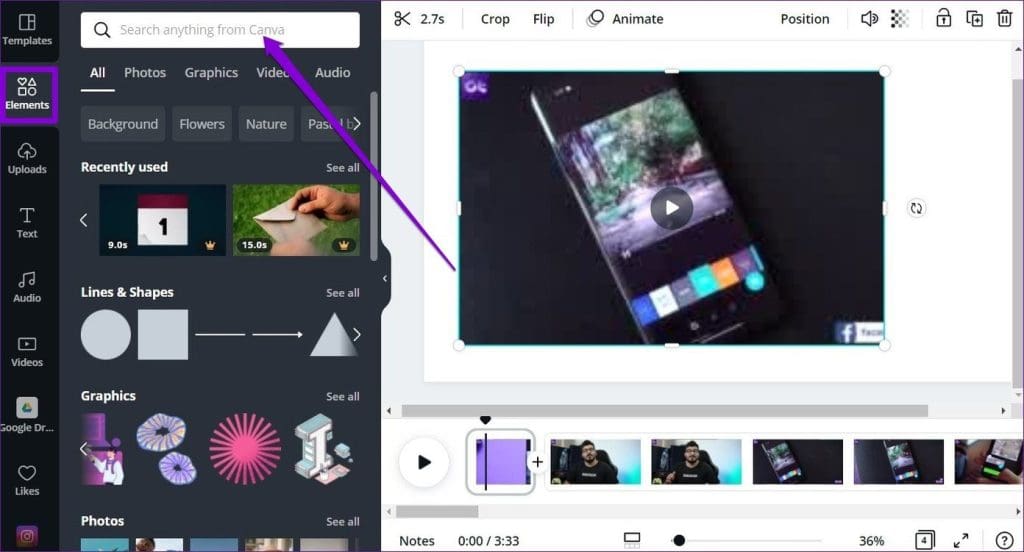
Step 2: Click on an element in the library to insert it. Once added, you can move, resize, crop, or animate it.
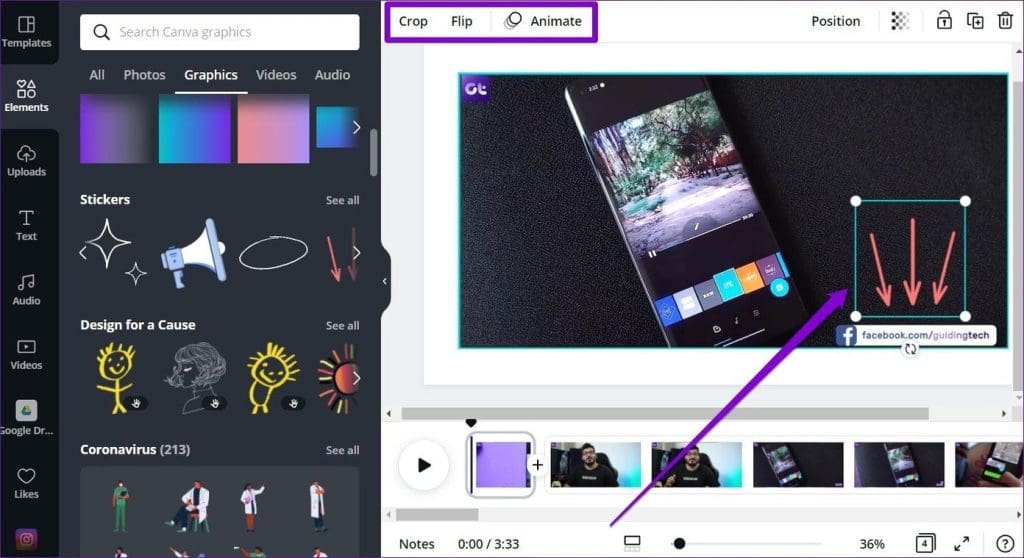
The element you add to your clip will appear throughout the video. To remove the element from the video, select it and hit the Delete key on your keyboard.
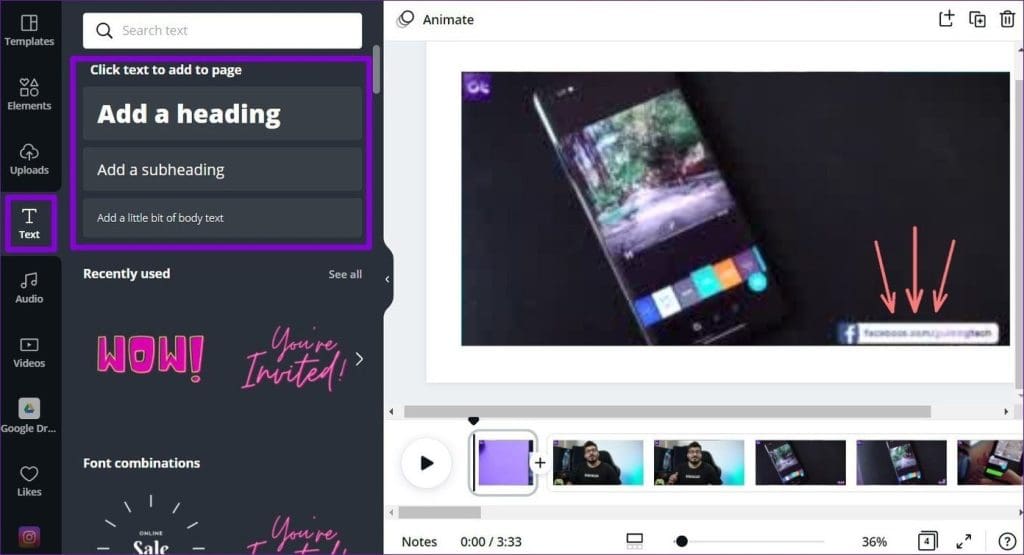
Add Text on Video
With Canva, you can also insert text over your video to make it more descriptive. Here’s how.
Step 1: Switch to the Text tab on your left. First, select the type of text you wish to add.
Step 2: Next, you’ll have to choose a text style for your video.
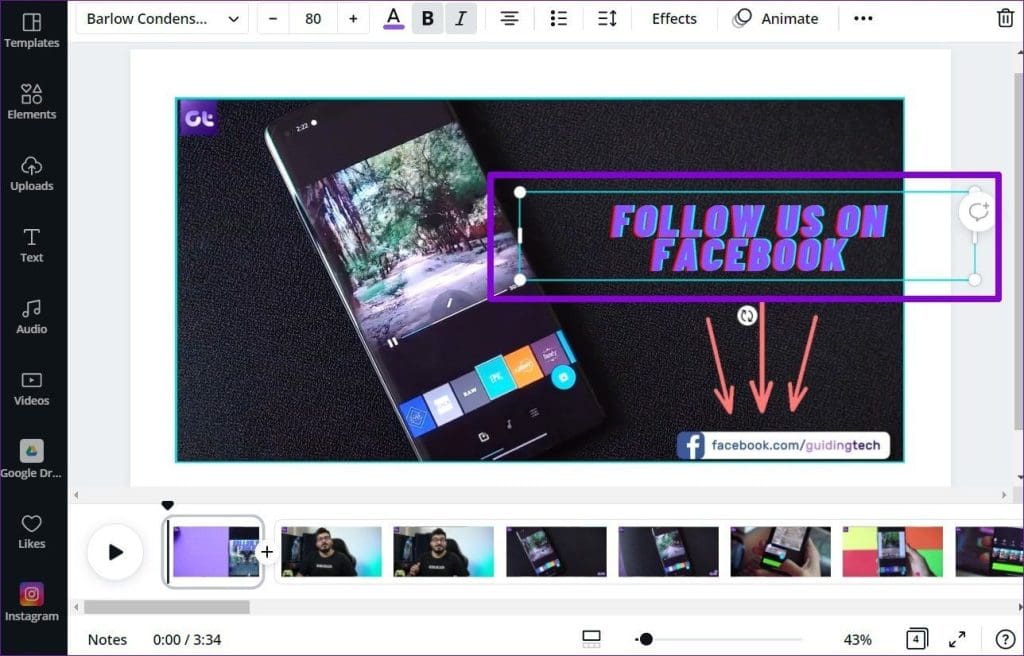
Step 3: Once added, you can edit the text inside the text box. Additionally, you can use the toolbar at the top to change font style, size, color, position, spacing, etc.
How to Add Effects and Transitions in a Video
Once you’re done with the basic editing, you can add some extra flair to your video by adding effects and joining your clips with smooth transitions in Canva. Here’s how.
Apply Effects
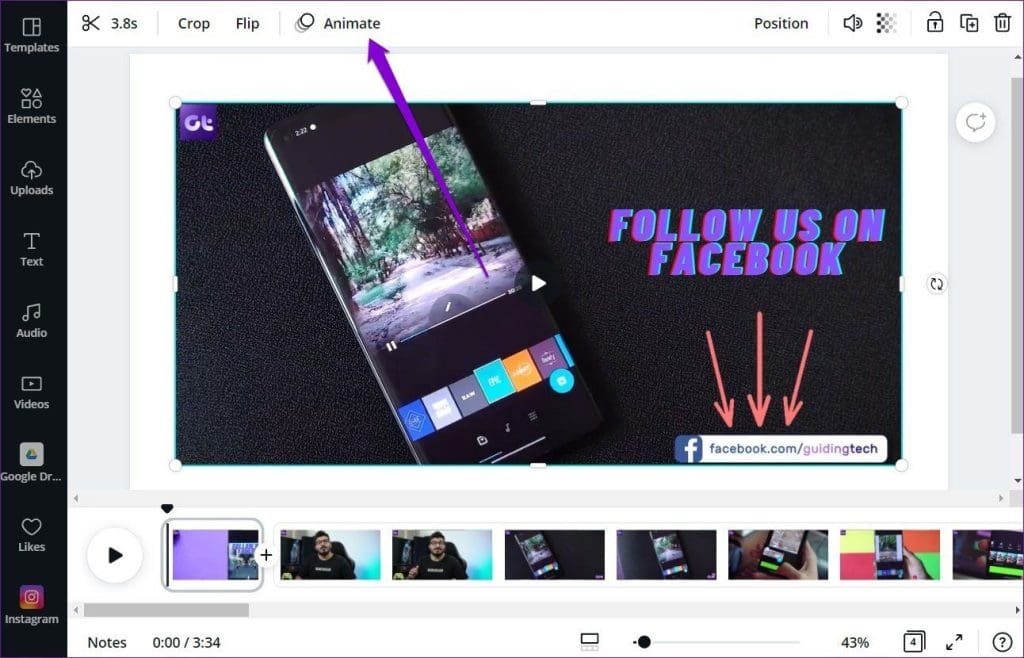
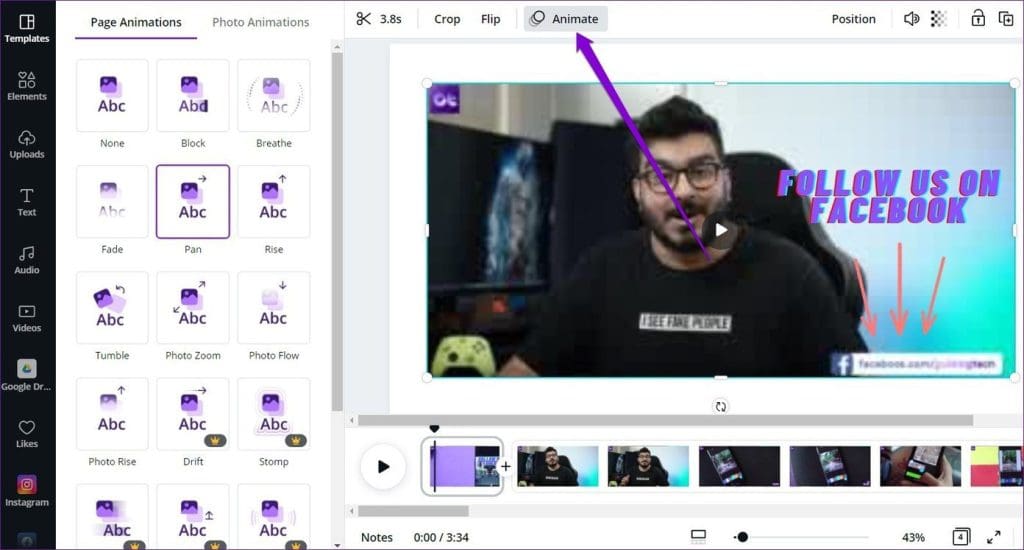
Step 1: Select the clip from the timeline that you wish to edit and click on Animate from the toolbar at the top.
Step 2: Here, you’ll find various types of page and photo animations. You can preview each of them by clicking them.
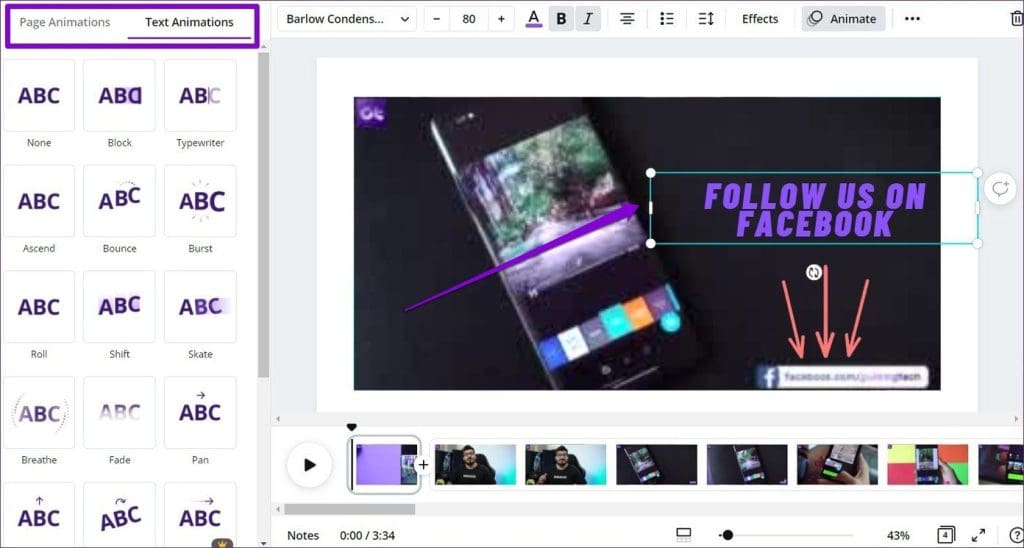
Likewise, you can also add such effects to a particular element or text. To do that, select the element and click on the Animate option from the toolbar above. Now on your left, you’ll find a few animations that you can apply.
Join Clips with Transitions
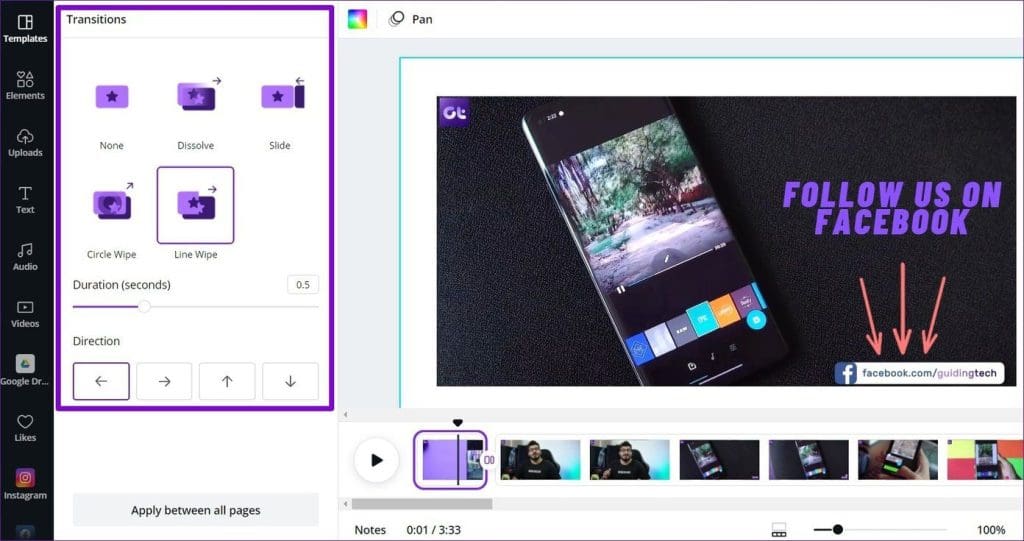
Step 1: Go to your video editing timeline, click the + (plus icon) between the two clips, and select Add transition.

Step 2: Select your preferred transition from the left pane and adjust its duration and direction. To add the same transitions to all of your clips, click the Apply between all pages button.
How to Add Background Music to Video in Canva
Apart from elements and effects, you can also insert background music of your choice into your video in Canva. Read on to learn how.
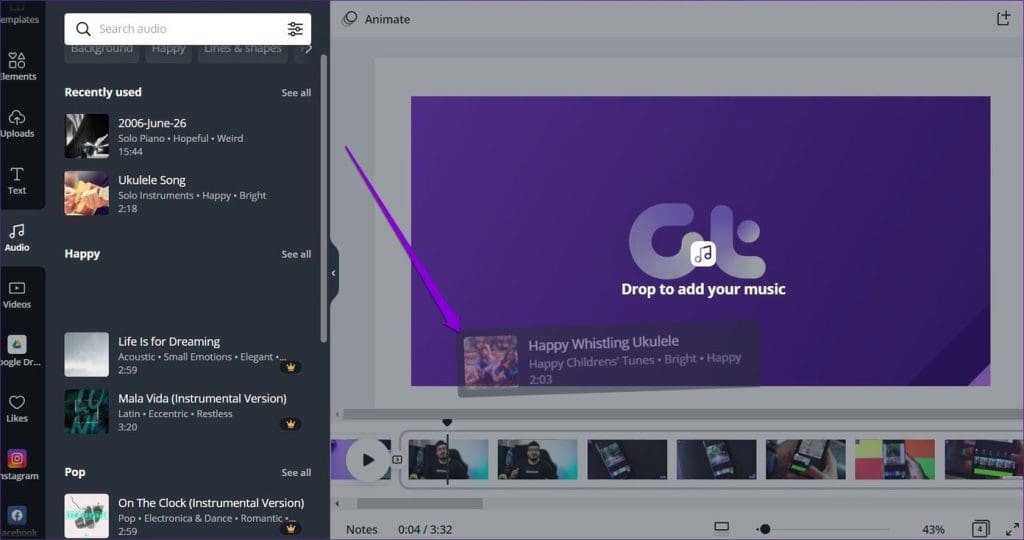
Step 1: Switch to the Audio tab on your left. Here, you’ll find a bunch of copyright-free audio files that you can use in your video.
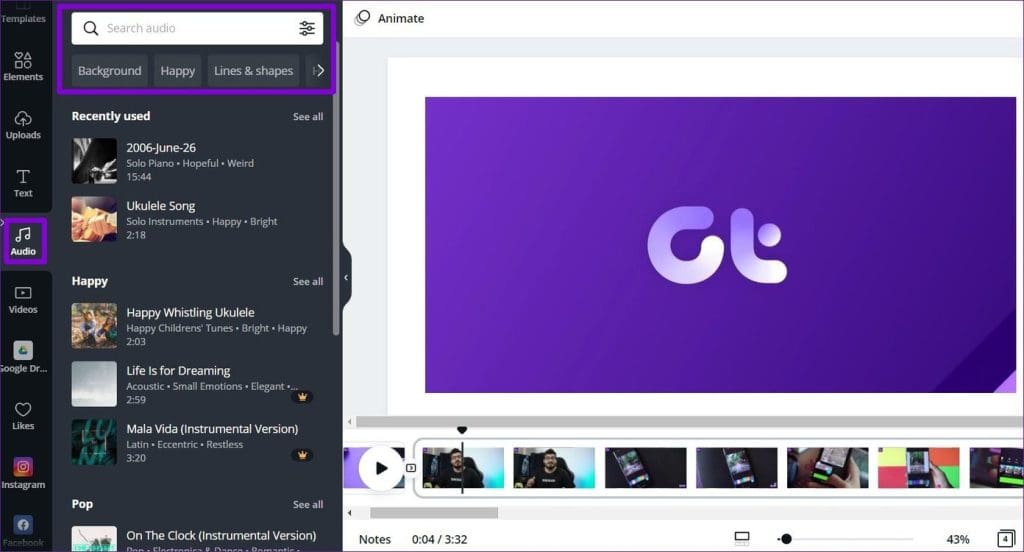
Step 2: To add a track to your video, simply drag and drop the audio to your video timeline.
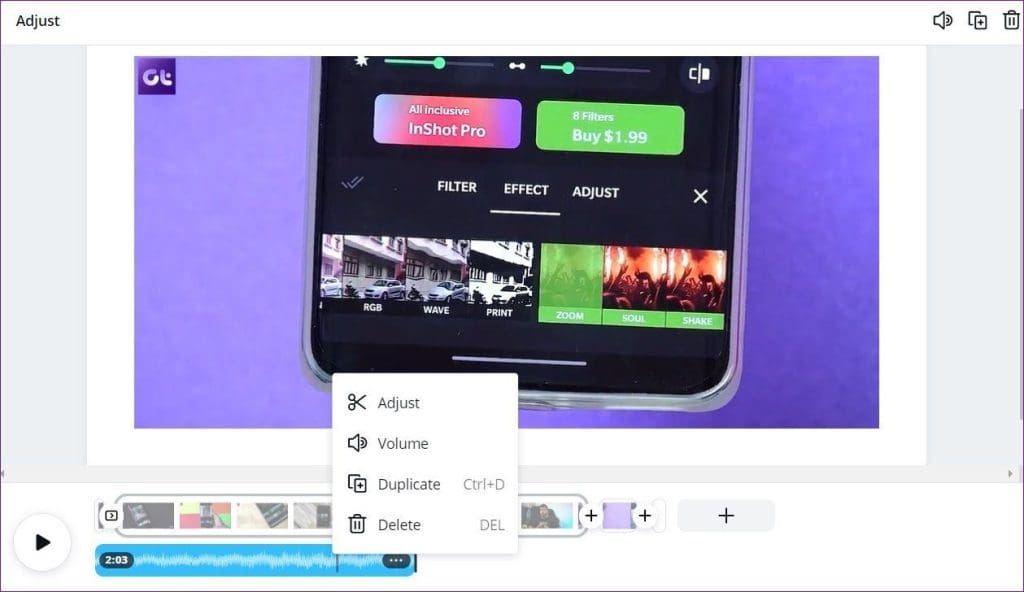
Step 3: Once added, right-click on the audio to trim it, adjust the volume, or delete it from there.
While Canva does offer copyright-free tracks, you can always choose a custom audio track that you’d like to use. To do that, simply drag and drop the audio from your PC into the Uploads tab.
How to Download and Share Video
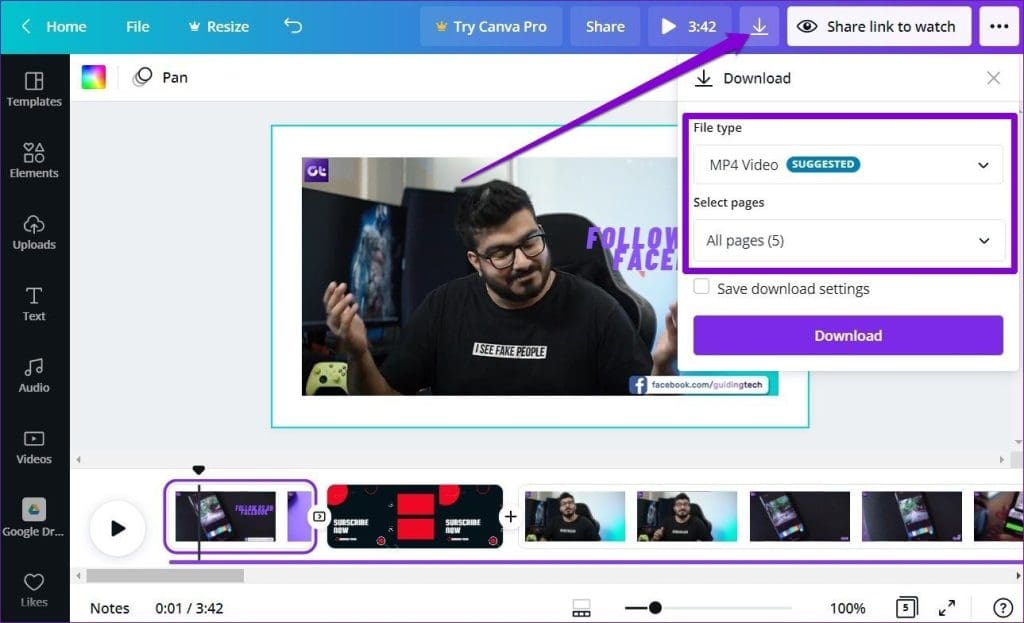
After editing the video, you can preview it by clicking on the play button in the timeline. Once you’re satisfied with your creation, click the download button in the upper right corner. Set the file type as MP4 Video and choose All pages. Then, click the Download button to get your video.
Was this helpful?
Last updated on 05 September, 2024
1 Comment
Leave a Reply
Read Next
 How to Edit Images in Canva
There are plenty of photo editing apps on your phone and PC.
How to Edit Images in Canva
There are plenty of photo editing apps on your phone and PC.
 How to Create and Customize Tables in Canva
How to Make a Table Using Elements in Canva Canva makes it easy to create a table with different cell sizes and customize it to suit your needs.
How to Create and Customize Tables in Canva
How to Make a Table Using Elements in Canva Canva makes it easy to create a table with different cell sizes and customize it to suit your needs.
 How to Create a Watermark in Canva
Create a Watermark Using Canva on Desktop While Canva’s mobile app gets the job done, it’s the desktop version where the real action happens.
How to Create a Watermark in Canva
Create a Watermark Using Canva on Desktop While Canva’s mobile app gets the job done, it’s the desktop version where the real action happens.
 How to Create Presentations in Canva
How to Create Canva Presentations To create Canva presentations, you must follow a few steps.
How to Create Presentations in Canva
How to Create Canva Presentations To create Canva presentations, you must follow a few steps.
 How to Edit Videos in WhatsApp (iPhone and Android)
Edit Videos in WhatsApp WhatsApp offers multiple options to edit your videos before sharing them with WhatsApp contacts.
How to Edit Videos in WhatsApp (iPhone and Android)
Edit Videos in WhatsApp WhatsApp offers multiple options to edit your videos before sharing them with WhatsApp contacts.
 How to Create, Edit, and Delete Dropdown Lists in Google Sheets
How to Create a Dropdown List on Google Sheets Here's how to create a dropdown list on Google Sheets by manually adding the options.
How to Create, Edit, and Delete Dropdown Lists in Google Sheets
How to Create a Dropdown List on Google Sheets Here's how to create a dropdown list on Google Sheets by manually adding the options.
 How to Edit Videos on Samsung Galaxy Phones
How to Edit Videos With the Samsung Gallery App To access the built-in video editor on your Samsung Galaxy phone, open the Gallery app and head to the video you
How to Edit Videos on Samsung Galaxy Phones
How to Edit Videos With the Samsung Gallery App To access the built-in video editor on your Samsung Galaxy phone, open the Gallery app and head to the video you
 How to Add Canva Email Signature to Gmail
Create a Gmail Signature Using Canva You can quickly create an email signature in Canva for free, as its intuitive user interface has drag-and-drop options.
How to Add Canva Email Signature to Gmail
Create a Gmail Signature Using Canva You can quickly create an email signature in Canva for free, as its intuitive user interface has drag-and-drop options.
The article above may contain affiliate links which help support Guiding Tech. The content remains unbiased and authentic and will never affect our editorial integrity.

Where does the name Canva come from