File Explorer on Windows 10 keeps track of all your searches to make it easy for you to search for the same files again. While the search toolbar can be handy to quickly look up for large files or view recent search entries, it can also reveal your searches for sensitive files if you share your computer with others.

You can quickly clear File Explorer search history using a few methods and keep that search box clean. In this guide, we’ll cover everything you need to know, from deleting specific search terms to disabling the search history function altogether in File Explorer.
How to Delete Specific Search Term in File Explorer
If you want to remove only a few search terms from the File Explorer, you can do this directly from the search bar in the File Explorer. Here’s how.
Open File Explorer and type in the term you’d like to remove from the history or click in the search box to view recent search terms.
Now use a mouse to navigate to the search term and click on the cross mark to remove the search term.

Alternatively, you can also use the down arrow key to highlight a specific search term, and press the Delete key to remove it from the File Explorer.
How to Delete the Entire Search History in File Explorer
While deleting specific search terms is easy enough, it’s also a bit time-consuming when you want to delete more than a handful number of search terms. Luckily, you can delete the entire File Explorer search history in Windows 10 in just a few clicks.
Method 1
Like deleting specific search terms, you can also delete the entire search history from the File Explorer itself.
Step 1: Open File Explorer and use the search box in the top right to run a search on anything.
Step 2: Now switch to the Search tab that appears. In the Options section, expand the Recent searches menu and select the ‘Clear search history’ option from the list.

After you delete the Search history, the Recent searches option will be greyed out.
Method 2
Alternatively, you can also use the Windows Registry to go through your previous searches to remove each search term individually or all of them at once.
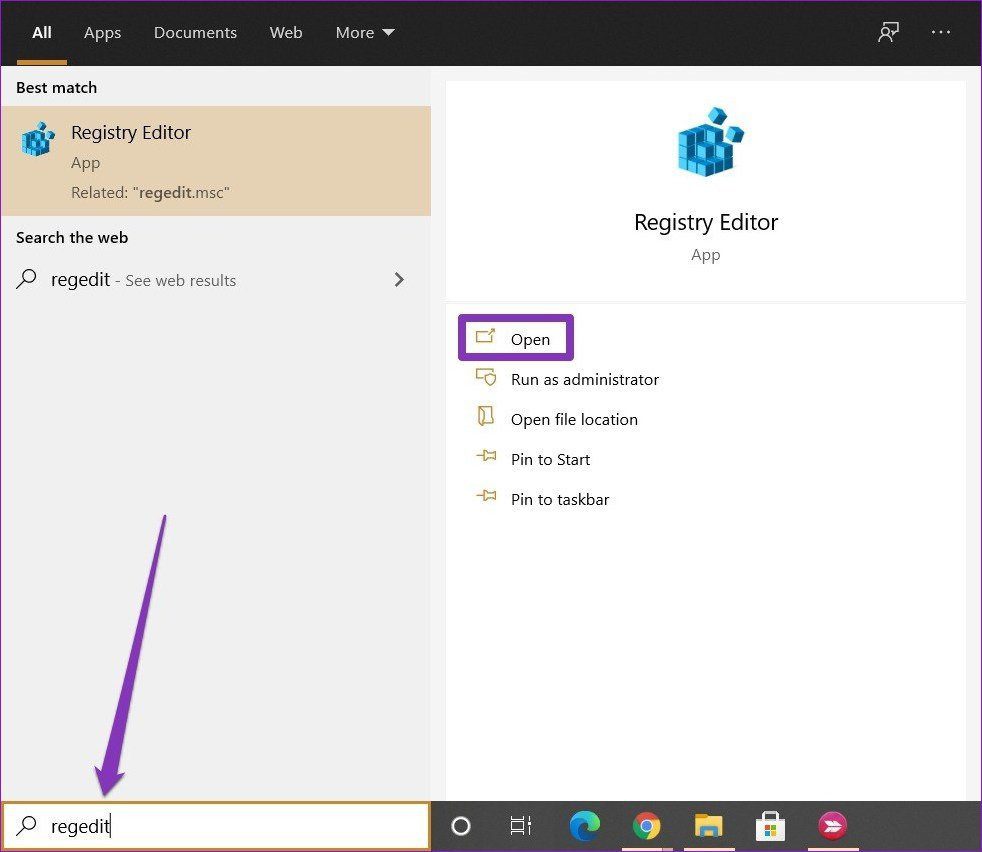
Step 1: Open the Start menu, type in regedit, and press Enter to open the Registry Editor.
Step 2: In the Registry Editor window, go to the address bar at the top. Paste the address below and navigate to the WorldWheelQuery quickly.
HKEY_CURRENT_USER\Software\Microsoft\Windows\CurrentVersion\Explorer\WordWheelQuery
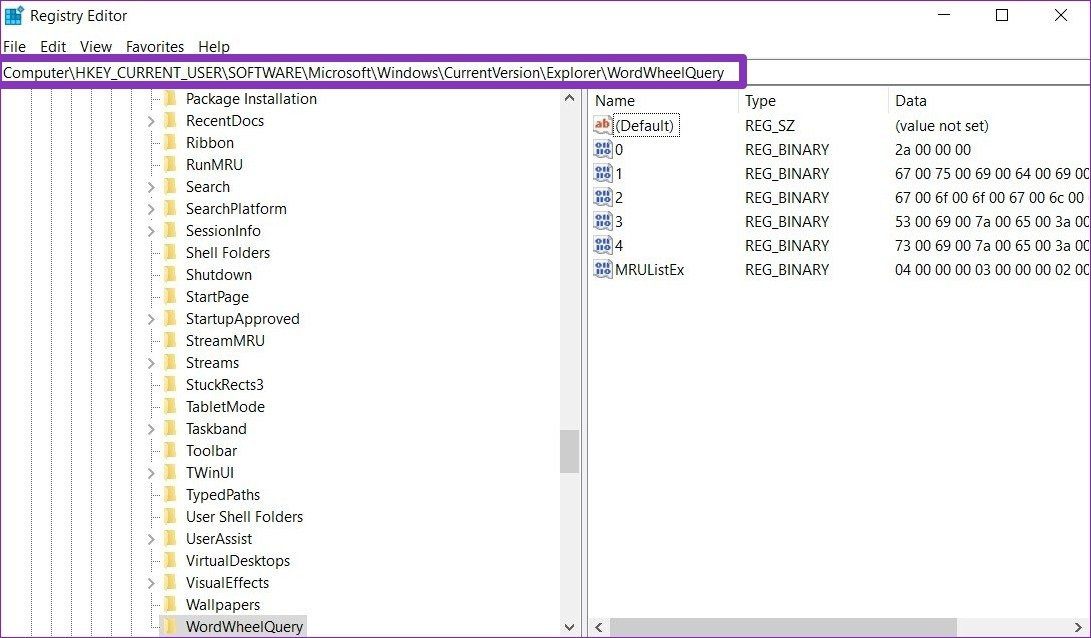
Step 3: You’ll find the DWORD keys storing the File Explorer search history value in the right pane. The keys are listed in numbers starting from 0. Here, 0 represents the oldest search term, whereas the highest number (in my case 4) indicates the most recent one. You can double-click on a DWORD key to identify the search entry.

Step 4: To delete a specific entry, right-click on that particular key and choose the Delete option. When prompted with the warning dialog box, click on Yes.
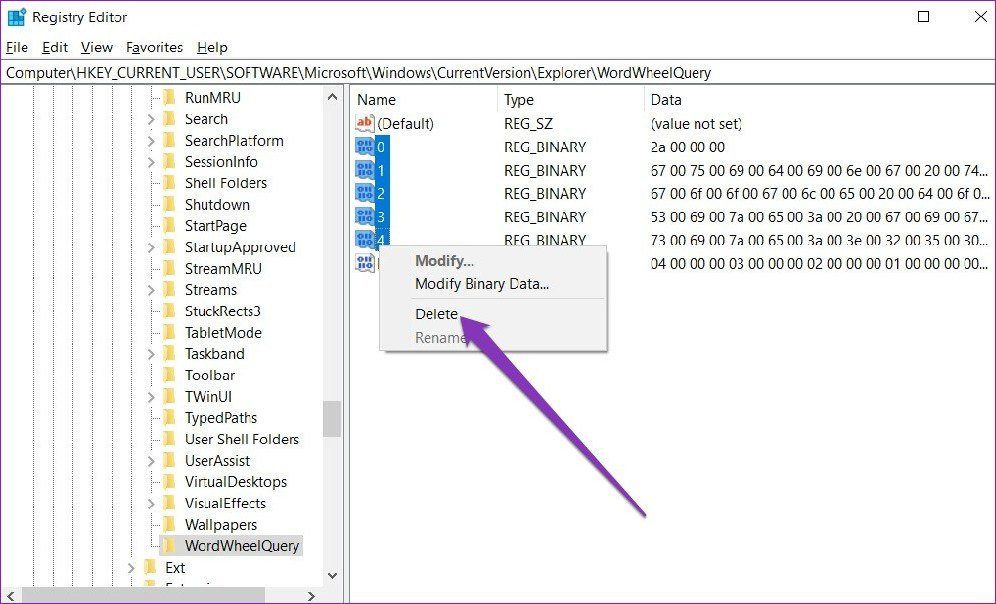
Similarly, you can also delete the entire search history by right-clicking the WorldWheelQuery entry and choosing the delete option.

Doing this will delete the entire search history stored in the File Explorer.
How to Disable File Explorer Search History in Windows 10
Although you can quickly delete the File Explorer search history using the above methods, if these search suggestions aren’t useful to you in any way, disabling them all together makes sense. Here’s how to do it.
Step 1: Open the Start menu, type in regedit and press Enter to open the Registry Editor.
Step 2: Now, in the address bar at the top, copy and paste the address given below to navigate to the following key.
HKEY_CURRENT_USER\Software\Policies\Microsoft\Windows\
Step 3: In the right pane, right-click anywhere in the empty area and navigate to New > Key. Name that Key ‘Explorer’.
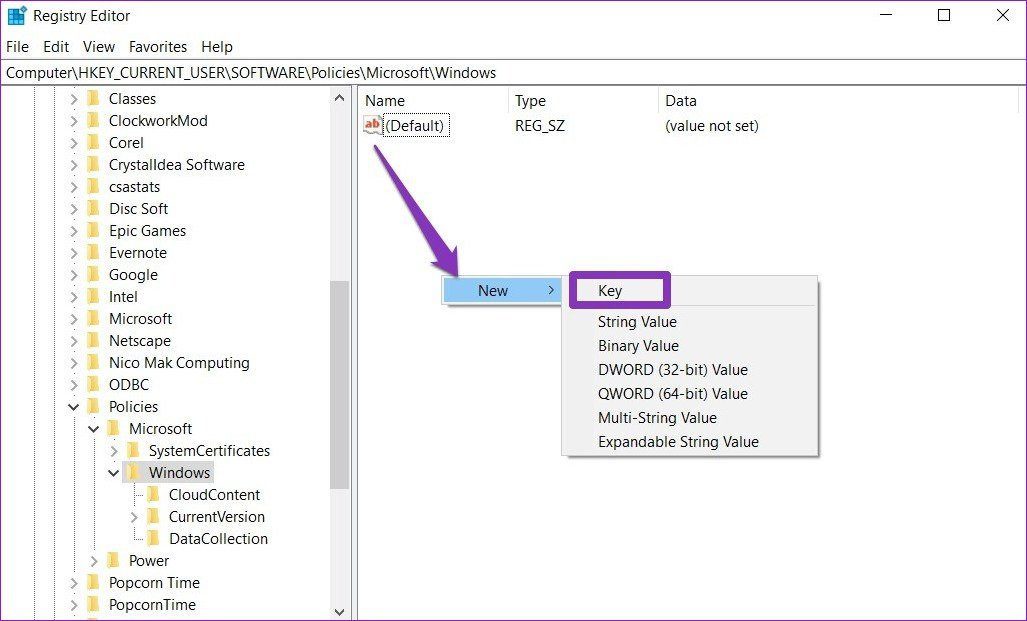
Step 5: Inside the new Key, right-click again in the empty part, go to new and select DWORD (32-bit) Value from the list.

Step 6: Name that DWORD entry as ‘DisableSearchBoxSuggestions’. After that, double click on the entry to change its value to 1 and click OK.

After this, Windows Explorer won’t show your search history. If you wish to revert these settings, follow the same steps and delete the ‘DisableSearchBoxSuggestions’ key.
Bonus: Clear Recent Files History from File Explorer
Even after removing your past searches, recently opened files are still visible under Recent files in the File Explorer. Luckily, you can quickly delete them right from the File Explorer itself. Read on to learn how.
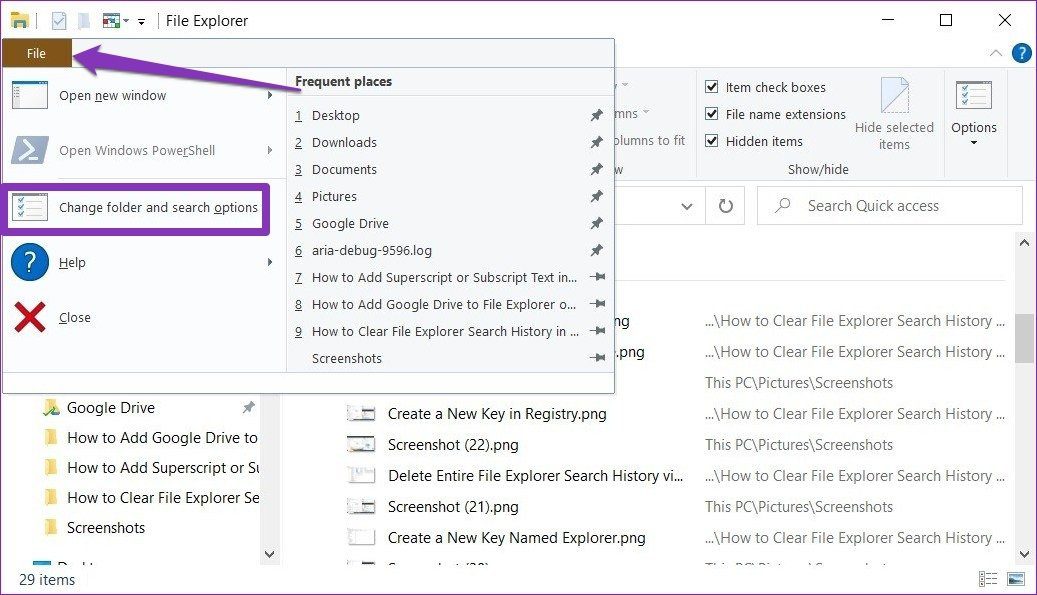
Step 1: Open File Explorer. Click on the File menu at the top and select ‘Change folder and search option’ from the list.
Step 2: In the General tab, tap on the Clear button in the Privacy section and then click on OK.

That’s it. Now all of your recent files history will be cleared from the File Explorer.
Leave No Traces Behind
Having File Explorer search suggestions can be both helpful or annoying, depending on how you see it. Either way, clearing or disabling the search history is a rather simple and easy thing to do.
If you’re looking to switch from the default File Explorer on Windows 10, here are the best File Explorer alternatives with tabs that you can try out.
Was this helpful?
Last updated on 12 April, 2024
The article above may contain affiliate links which help support Guiding Tech. The content remains unbiased and authentic and will never affect our editorial integrity.


