How to Use Control Panel to Make File Type Visible
Before we go about changing the file type on Windows 11, let’s first have a look at how you can make sure that all the file extensions are visible in Windows. There are multiple ways of enabling it, let’s show you the easiest one. Follow the below steps.
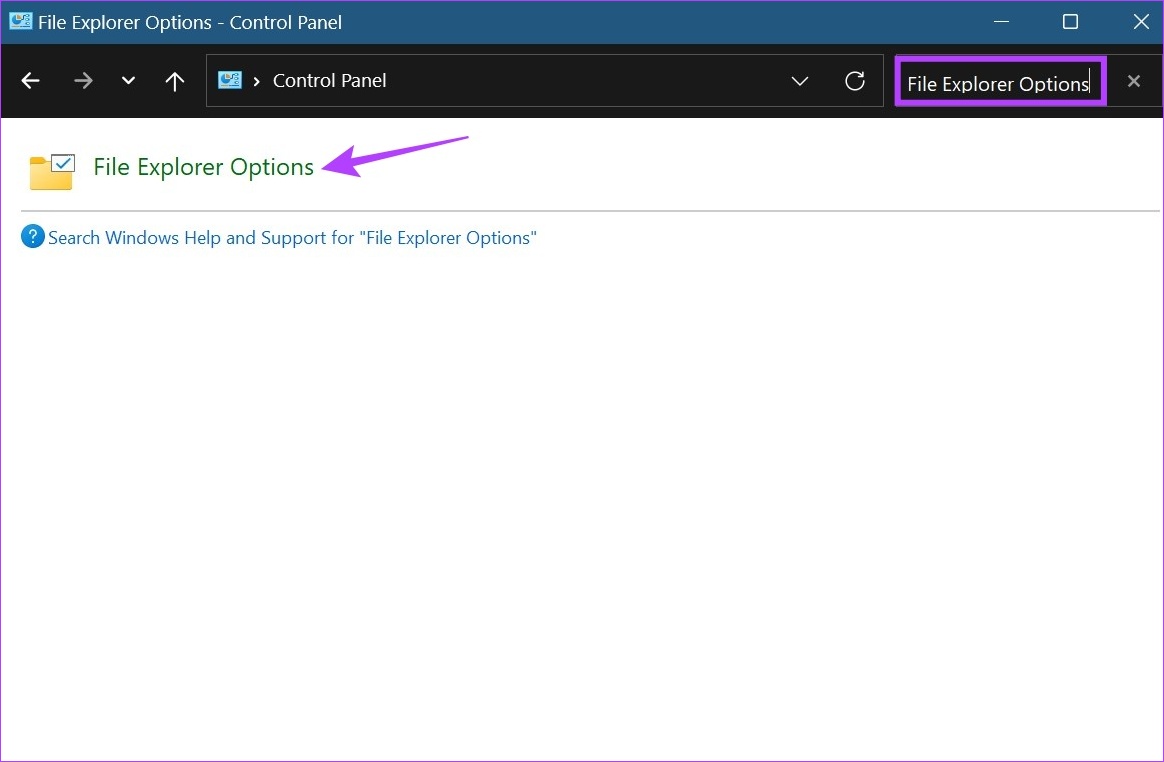
Step 1: Open the Control Panel, type File Explorer Options in the search bar, and click on File Explorer Options.
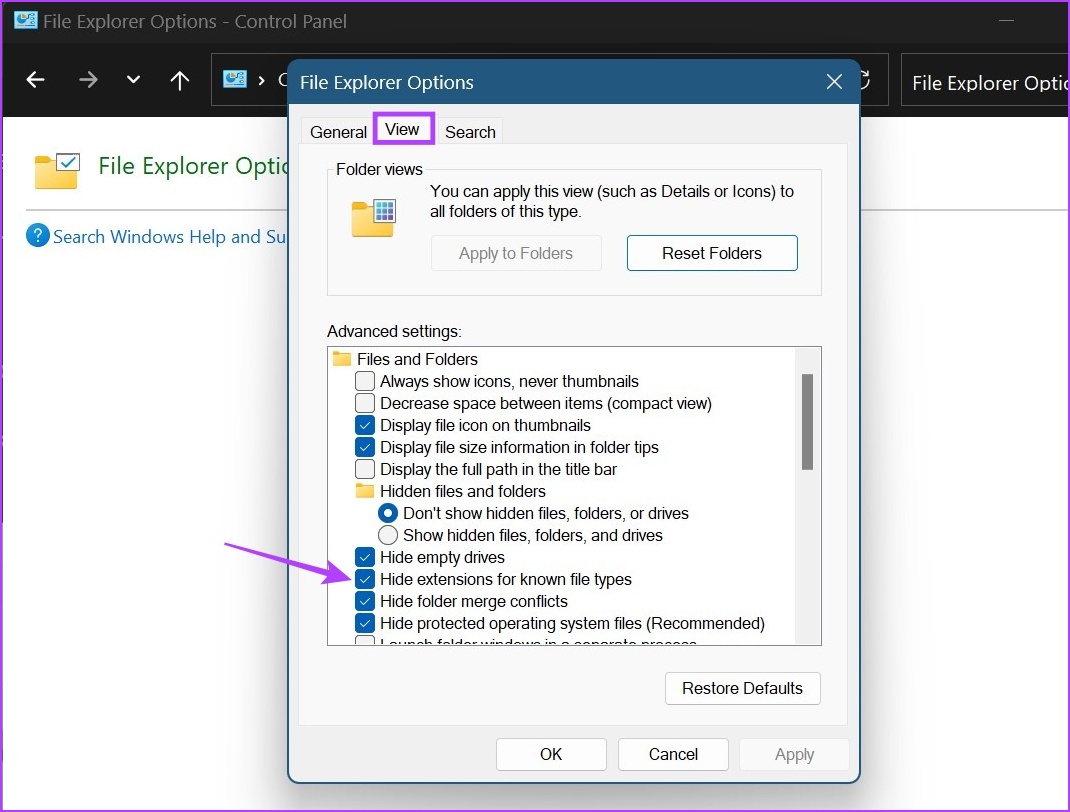
Step 2: Click on View and uncheck the Hide extensions for known file types option.
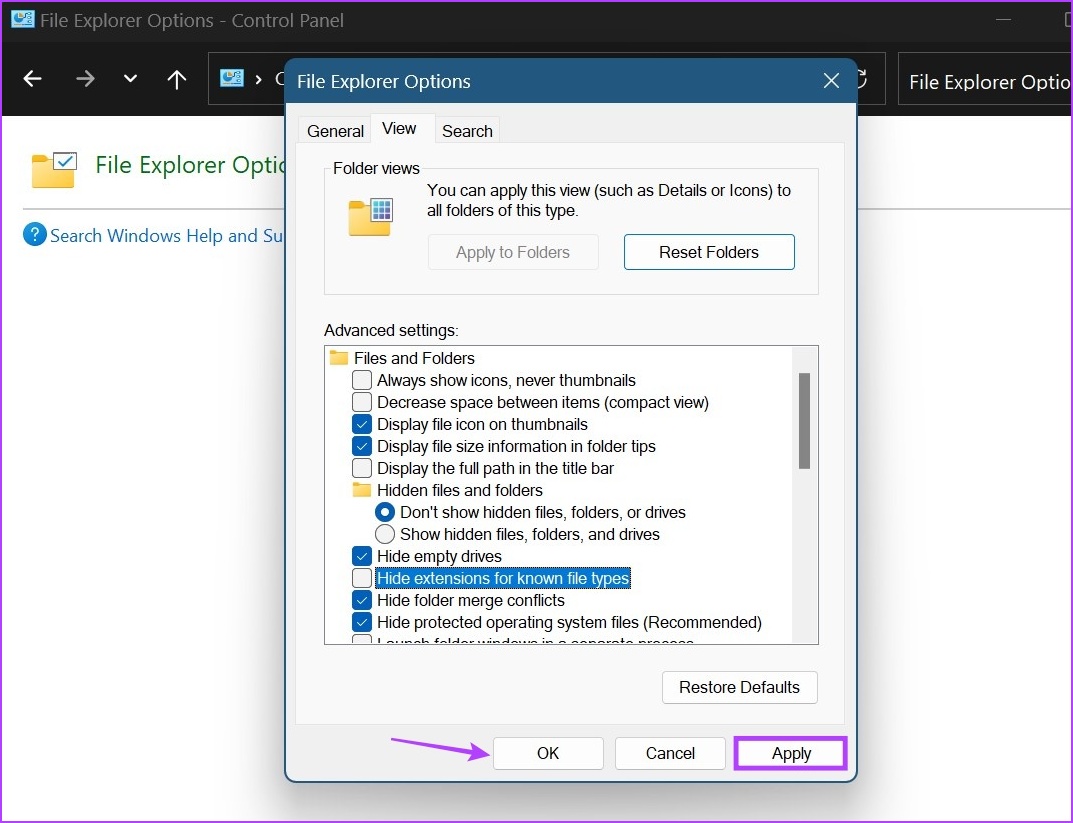
Step 3: Click on Apply followed by OK.
This will enable file extension names. Now, go ahead and change the file extension on Windows 11. Ensure you check the hidden folders if you’re unable to find the file.
How to Change File Type on Windows 11
Once the file extension is visible for all the files, we can now proceed with changing the file type. As mentioned above, there are three major ways you can convert file types in Windows 11. Let’s have a detailed look at them all.
Method 1: Rename the File
When changing the file type using the rename option, all you need to do is select the file and change the name of its extension. Follow the below steps to do it. Ensure the before and after file extensions are similar to each other or your file might get corrupted. Here’s how to do it.
Step 1: Open the relevant folder and click on the file. Click the Rename icon.

Step 2: Rename the extension.

Step 3: Then, click on Yes. This will change the file type.
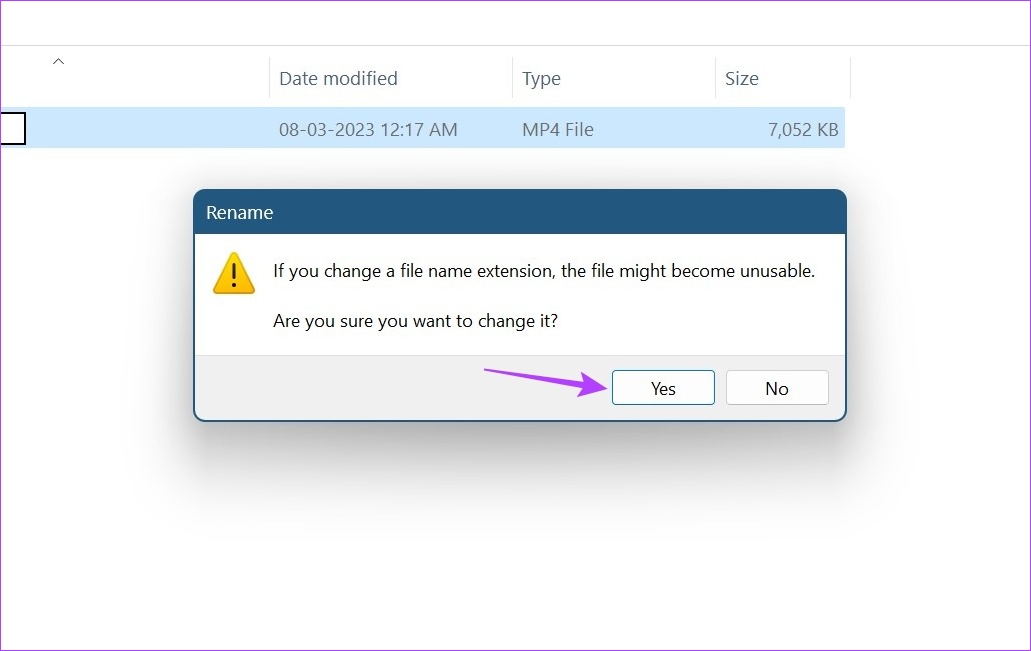
Once done, try opening the file again to check. This should especially be done when converting video files as they might change their file extension name while still retaining their original extension characteristics.
Method 2: Using the Save as Option to Convert File Extension
With the save as option, you can simply open the file extension in the relevant software. Then, using the Settings menu, save the file again, but this time in a different format. For demonstration purposes, we will be using a .pdf file with Adobe Acrobat PDF Reader. Here’s how to do it.
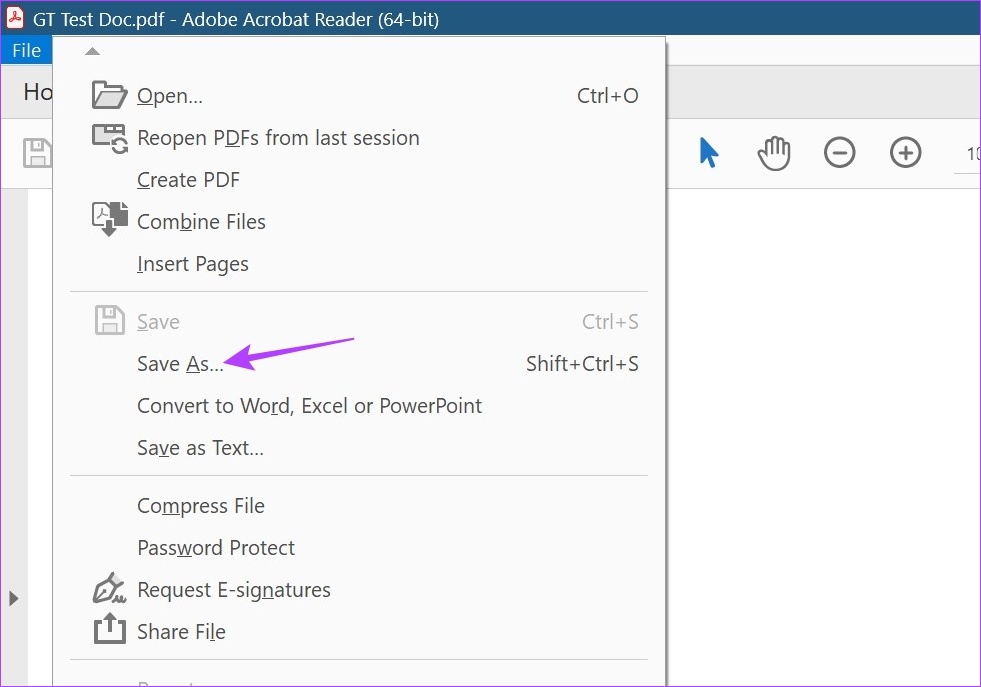
Step 1: Open the relevant file in Adobe Acrobat PDF Reader and click on File.

Step 2: Here, click on Save As.
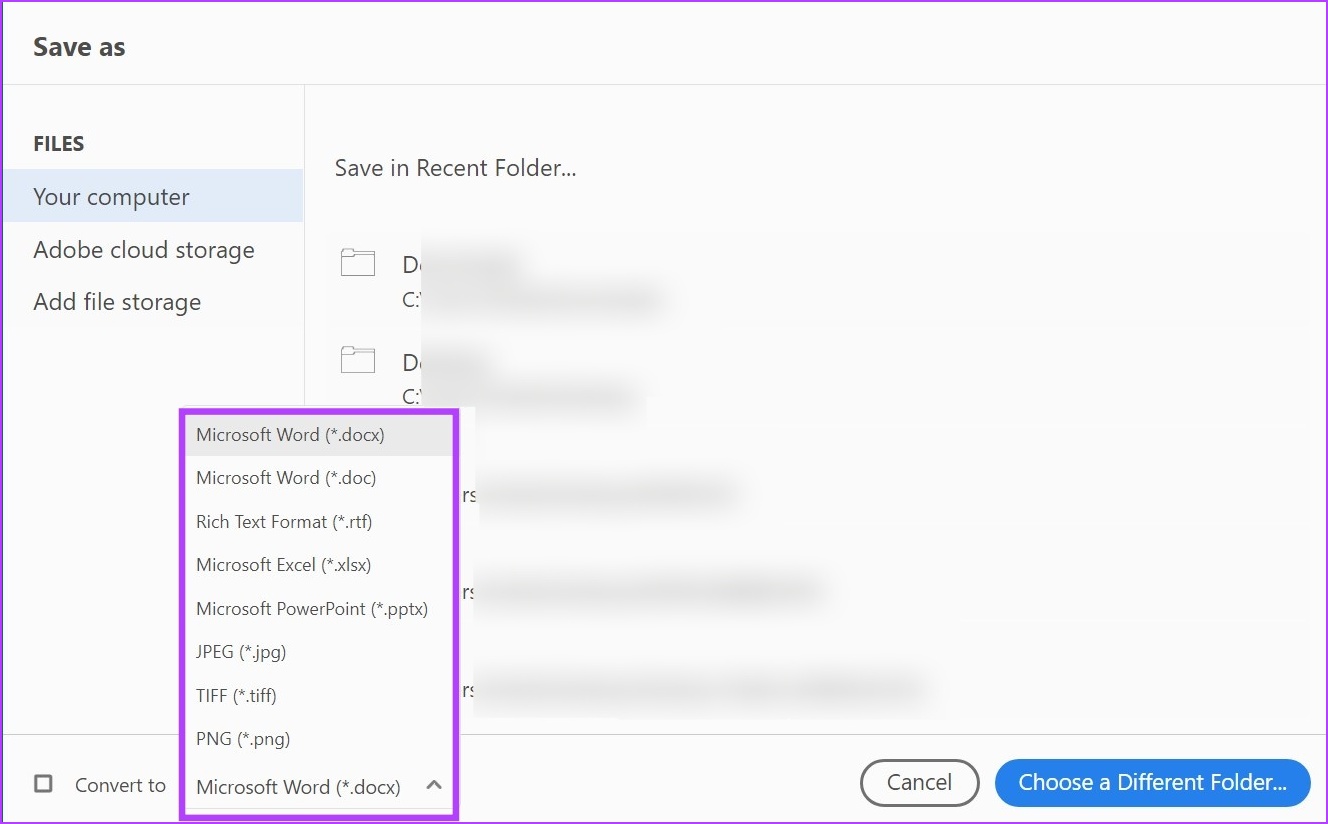
Step 3: Select the format you want to save the file as.
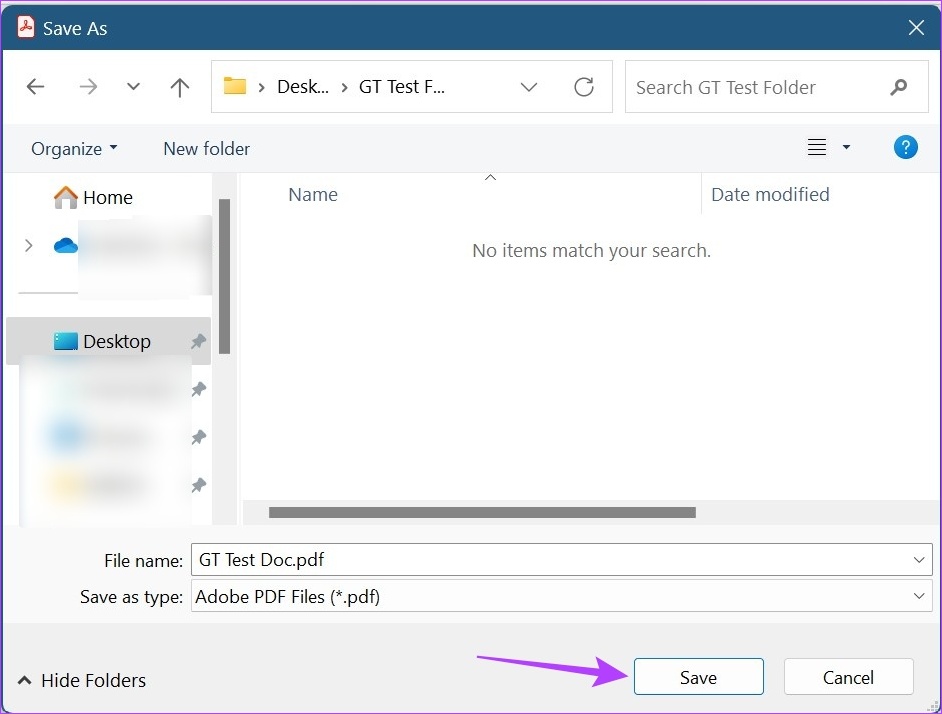
Step 4: Select the folder you want to save the file to and click on Save. This will convert and save the file.
Also Read: How to compare files in two folders on Windows 11
Method 3: Using Command Prompt
The third and last way to change the file type on Windows 11 is by using the Command Prompt. Here, you can either change the file extension for individual files one by one or change multiple file extensions at once. Here’s how to do it.
I. Change File Type for an Individual File
Step 1: Go to the relevant file and right-click on it. Click on Copy as path.

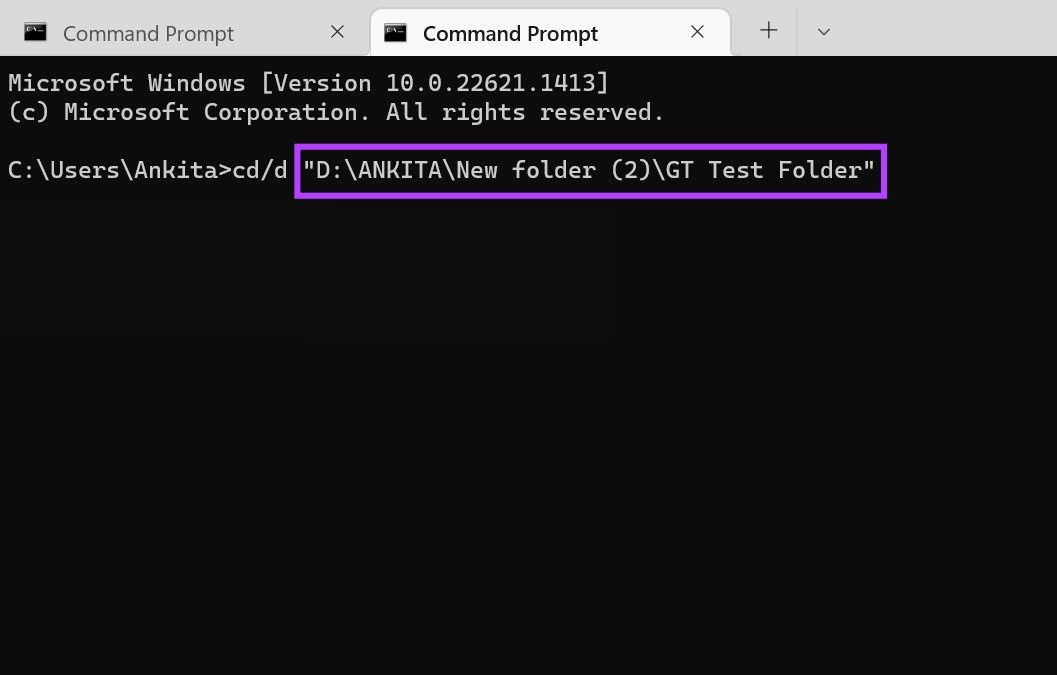
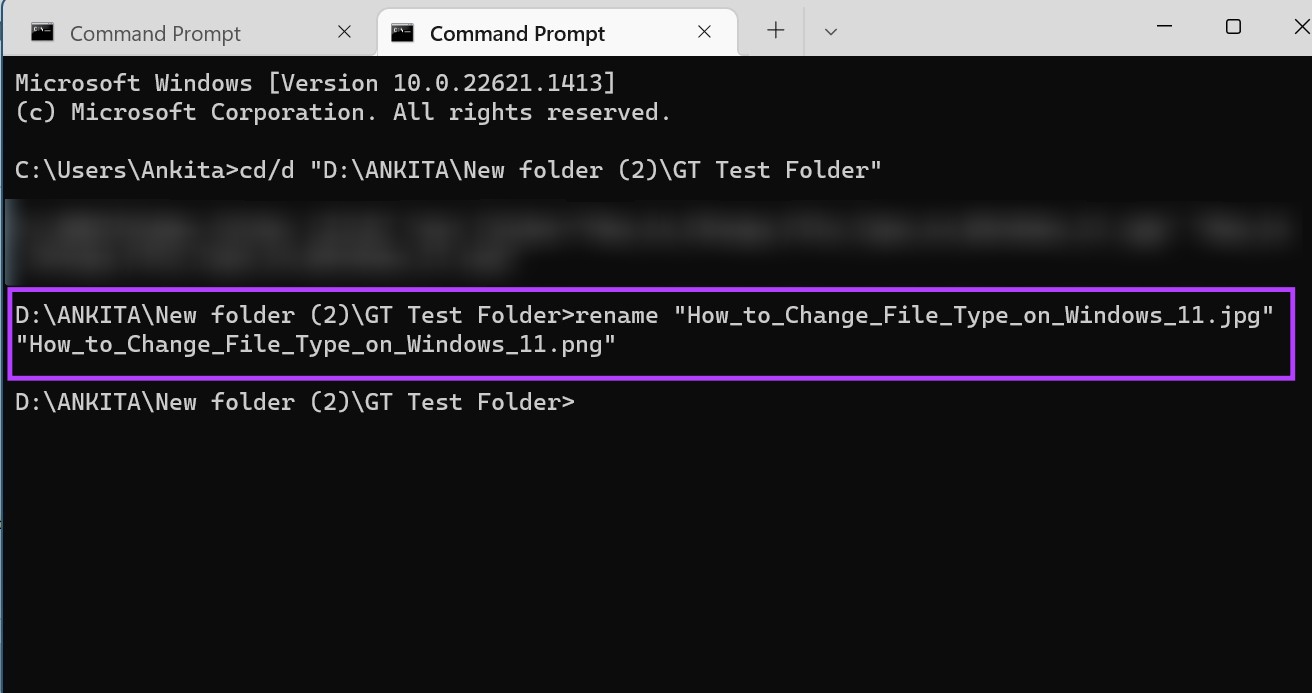
Step 2: Now, open Command Prompt, type the following command, and press enter.
cd /d "name of the folder path copied eariler"
Step 3: Here, type the following command and press enter. This will change the file format for the individual file.
rename "file-with-extension-1" "file-with-extension-2"
Note: Replace file-with-extension-1 with the file name and its original extension followed by the file name and the extension you want to convert it in.
II. Change Multiple File Extensions at Once
Step 1: Go to the relevant file and right-click on it. Click on Copy as path.
Step 2: Open Command Prompt, type the following command, and press enter. This will open a new line with the file name.
cd /d "name of the folder path copied eariler"
Step 3: According to your requirement, type any of the below-mentioned commands and press enter.
- For converting multiple files within that same folder:
rename *.fileextension1 *.fileextension2

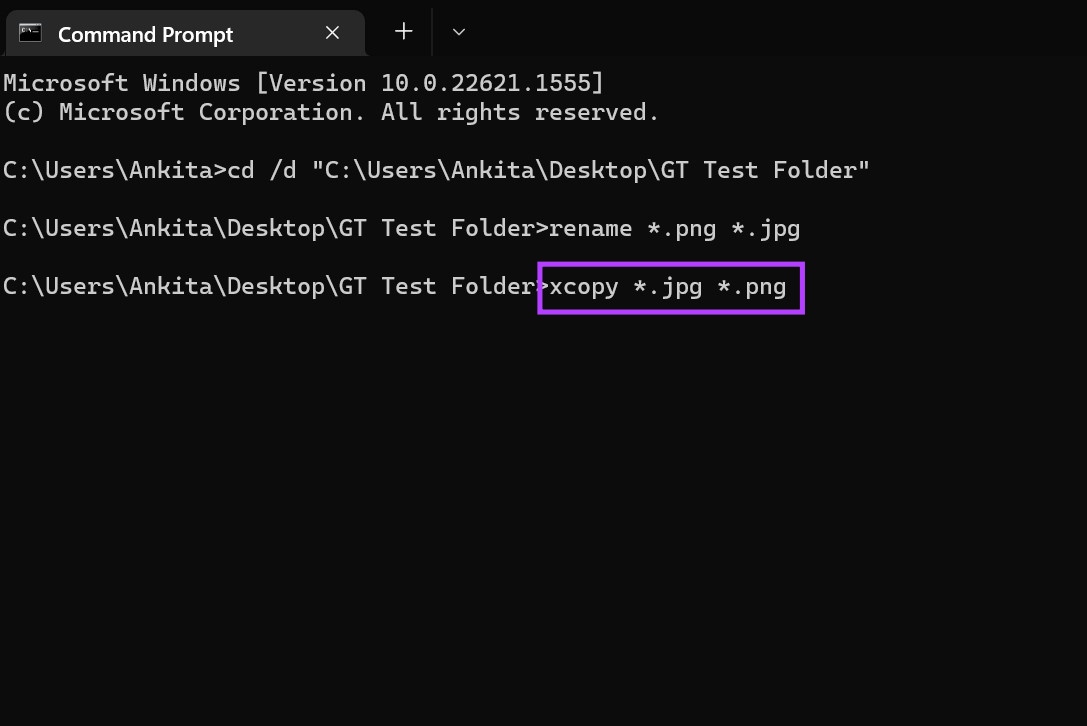
- For converting multiple files while saving a copy of the original:
xcopy *.fileextension1 *.fileextension2
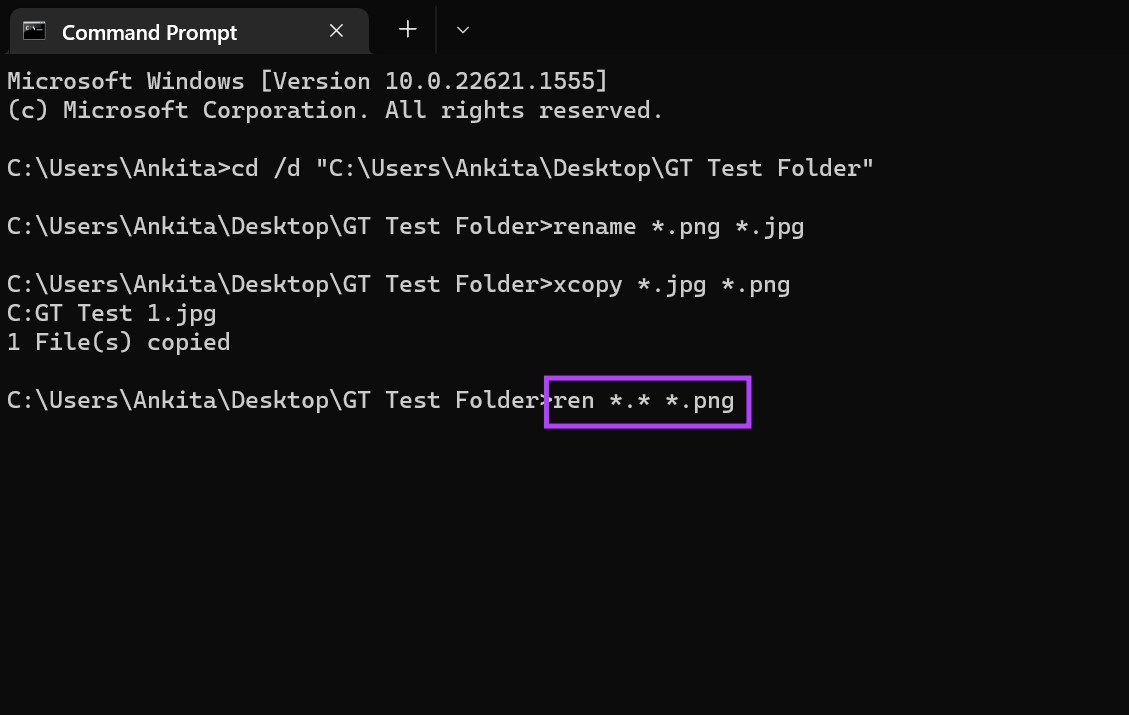
- For converting multiple files regardless of what their original extension is:
ren *.* *.newfileextension
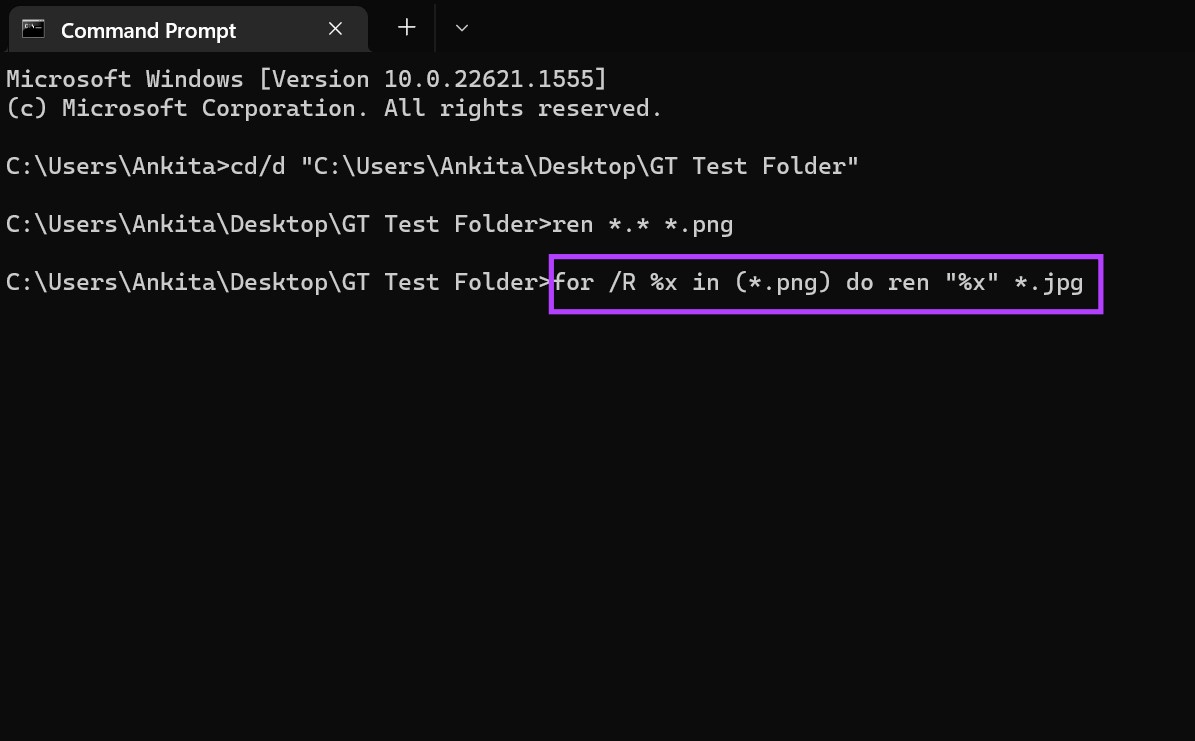
- For converting multiple files for all the sub-folders in that folder:
for /R %x in (*.extension1) do ren "%x" *.extension2
Once you press enter, the command will be executed accordingly. Now, go to the relevant folder and check if the changes have been made.
FAQ
Yes, you can set default file types in Windows 11. Open the Settings menu > click on Apps from the side menu > click on Default apps. Using the search bar, look for the app for which you wish to set the default file type > select the default app and click on OK.
Was this helpful?
Last updated on 27 August, 2024
2 Comments
Leave a Reply
Read Next
 How to Change File Type (Extension) on iPhone
Whatever files you currently have on your iPhone, all have an extension attached to them.
How to Change File Type (Extension) on iPhone
Whatever files you currently have on your iPhone, all have an extension attached to them.
 How to Change the File Extension on Android Devices
Method 1: Change File Extension Using the Files by Google App Most Android phones come with the Files by Google app as the default file manager, which offers several useful
How to Change the File Extension on Android Devices
Method 1: Change File Extension Using the Files by Google App Most Android phones come with the Files by Google app as the default file manager, which offers several useful
 5 Ways to Check RAM Type in PC on Windows 10 and Windows 11
Method 1: Check the PC or Laptop Model From the Manufacturer's Site If you use a pre-built rig from a PC maker or have a laptop, the first course of
5 Ways to Check RAM Type in PC on Windows 10 and Windows 11
Method 1: Check the PC or Laptop Model From the Manufacturer's Site If you use a pre-built rig from a PC maker or have a laptop, the first course of
 7 Best Ways to Fix OneNote Won’t Let Me Type Error in Windows 10
Microsoft OneNote is one of the oldest note-taking apps and a key component of Microsoft's Office Suite.
7 Best Ways to Fix OneNote Won’t Let Me Type Error in Windows 10
Microsoft OneNote is one of the oldest note-taking apps and a key component of Microsoft's Office Suite.
 7 Ways to Fix Can’t Type in Windows 11 Search Bar
Fix 1: Restart the Windows Explorer Process Windows Explorer is a system process that handles the graphical user interface (GUI) for several utilities, including the taskbar.
7 Ways to Fix Can’t Type in Windows 11 Search Bar
Fix 1: Restart the Windows Explorer Process Windows Explorer is a system process that handles the graphical user interface (GUI) for several utilities, including the taskbar.
 Can’t Type in CMD? Here Are 5 Ways to Solve It
A couple of days ago, I was trying to troubleshoot the 100% disk usage error on my Windows 10 PC.
Can’t Type in CMD? Here Are 5 Ways to Solve It
A couple of days ago, I was trying to troubleshoot the 100% disk usage error on my Windows 10 PC.
 4 Best Ways to Fix Can’t Type in Microsoft Word
Preliminary Fixes Keep Microsoft Word in Focus: Sometimes, the issue might be as simple as Word not being an active window.
4 Best Ways to Fix Can’t Type in Microsoft Word
Preliminary Fixes Keep Microsoft Word in Focus: Sometimes, the issue might be as simple as Word not being an active window.
 How to Check if Windows Laptop Has HDD or SSD and Its Type
Method 1: Using Task Manager Step 1: Right-click on the taskbar at the bottom and select Task Manager.
How to Check if Windows Laptop Has HDD or SSD and Its Type
Method 1: Using Task Manager Step 1: Right-click on the taskbar at the bottom and select Task Manager.
The article above may contain affiliate links which help support Guiding Tech. The content remains unbiased and authentic and will never affect our editorial integrity.


Why is this article so long?
1. right click the file
2. select ‘change name’
3. change the letters after the dot
4. agree to the warnings
DONE.
@Chris:
That method doesn’t always work. Extensions don’t always show even with folder view set to details if the extension is recognized.
I had a file I wanted to change, but the extension didn’t show. Hit F2, renamed to .txt, but Windows added .txt to the filename. I’m using a virtual desktop and I went to the command line to change it that way. Directory shows up empty for some reason.
The file explorer option worked for me.