How to Calibrate Google Maps on iPhone
Using the iOS Settings menu, you can ensure that your device’s compass is calibrated. You can also improve GPS accuracy by turning on the precise location. Here’s how to do it.
Method 1: Check Compass Calibration
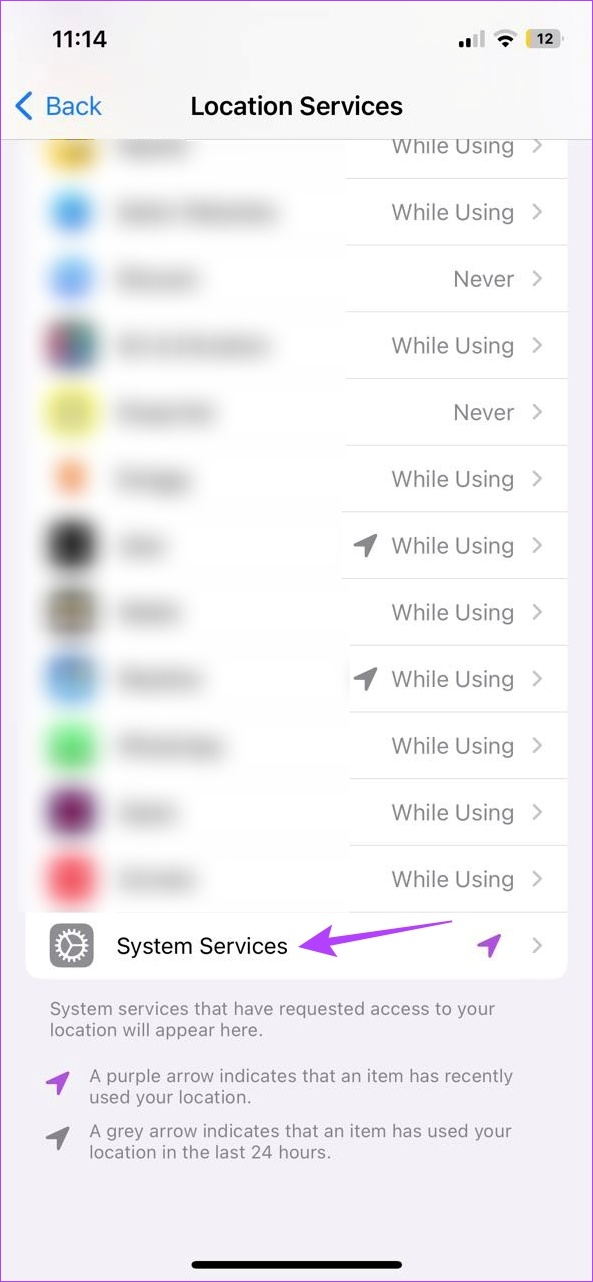
Step 1: Open Settings and tap on Privacy & Security. Tap on Location Services.


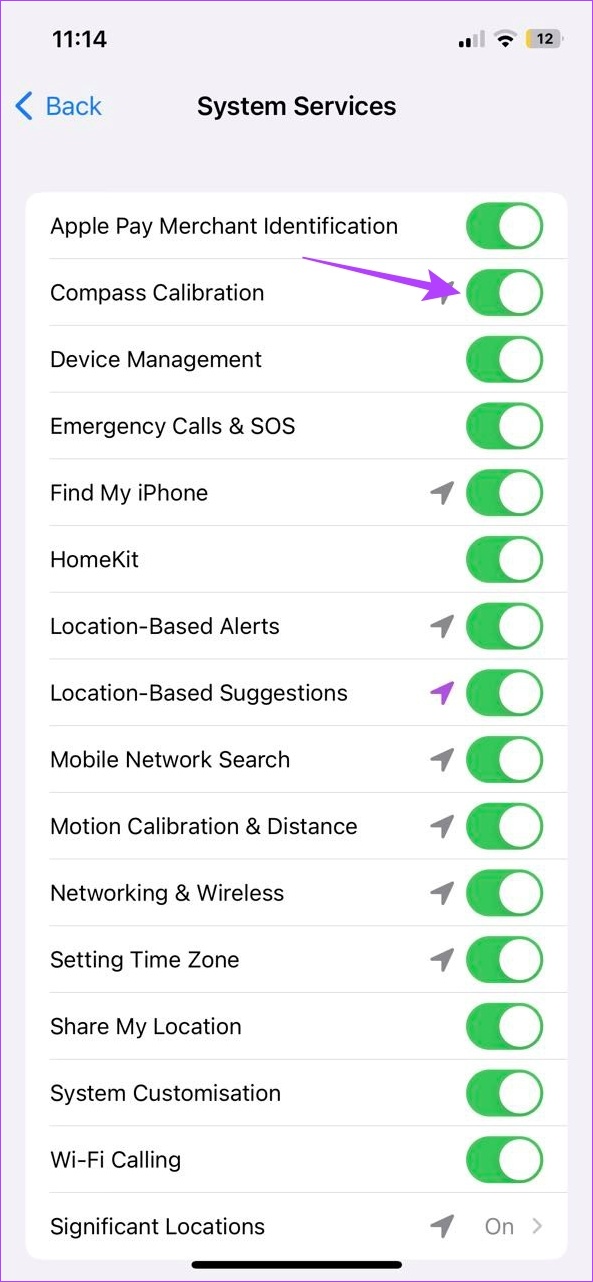
Step 2: Tap on System Services and enable the Compass Calibration toggle.
Also Read: How to use the Compass app on iPhone
Method 2: Enable High Accuracy Mode
Step 1: Open Settings and tap on Privacy & Security → Location Services.
Step 2: Tap on Google Maps. For the Allow Location Access section, select Always.
Step 3: Then, ensure the Precise Location toggle is turned on.


The Google Maps iOS app will now be able to access the precise location data at all times.
Also Read: How to get Live View on Google Maps
How to Calibrate Google Maps on Android
While it can be confusing to figure out which setting is misaligned, you can go about checking the directional accuracy in the Google Maps mobile app itself. If the results are less than stellar, proceed to calibrate Google Maps. Here’s how to do it.
Method 1: Check Direction Accuracy in Google Maps
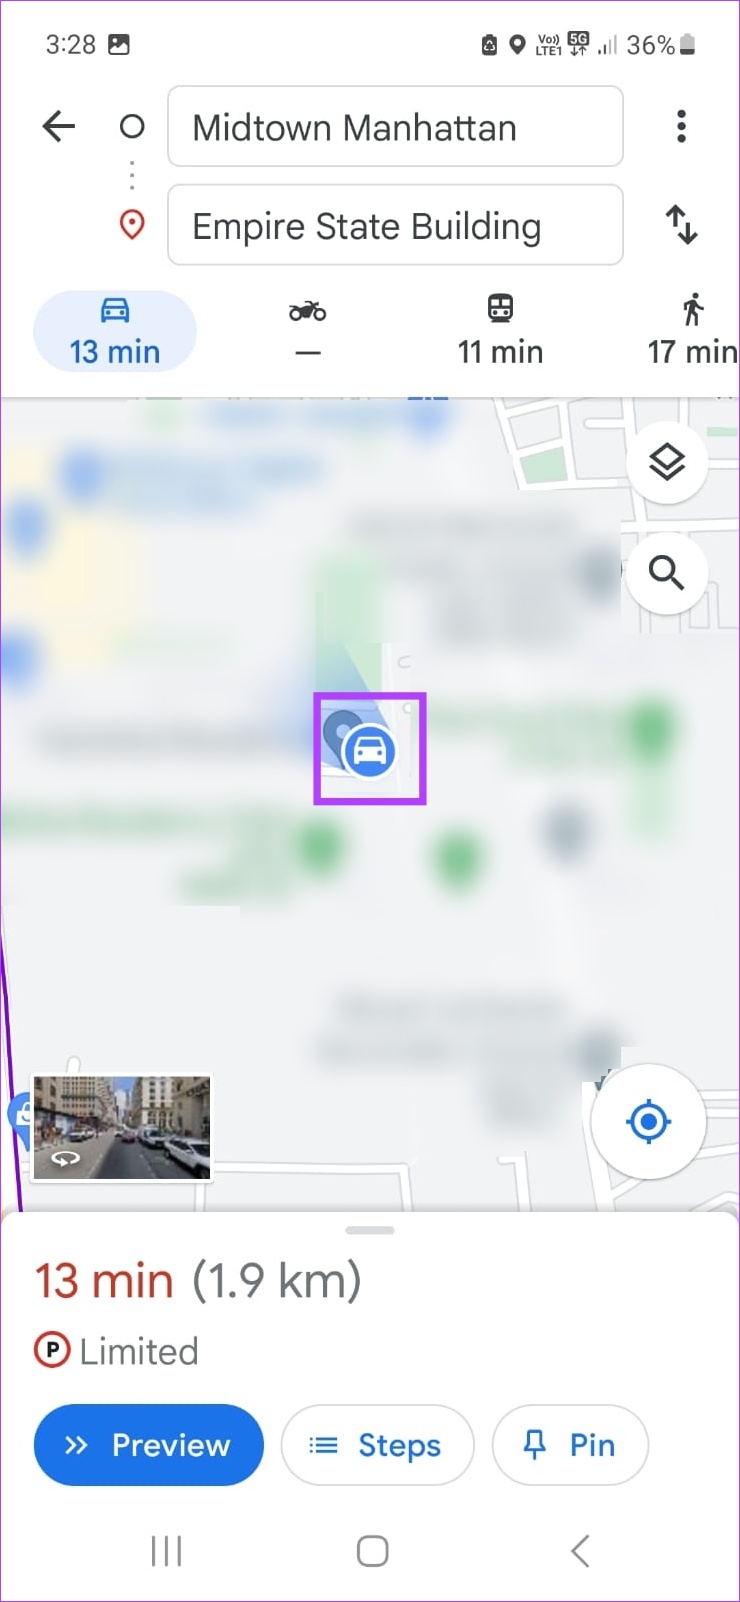
Step 1: Open the Google Maps app and open the directions page for the relevant destination.
Step 2: Tap the location icon on the map page.
Step 3: If you see the Tilt and move your phone box, move your phone at least 3 times in a figure-of-eight motion corresponding to the image shown.


Once this is done, it should change the Compass accuracy to high. If that doesn’t happen, you will need to calibrate the GPS on your Android device again. Here’s how.
Method 2: Recalibrate GPS
Step 1: On the directions page, tap on the blue dot (your location icon). Tap on Calibrate.
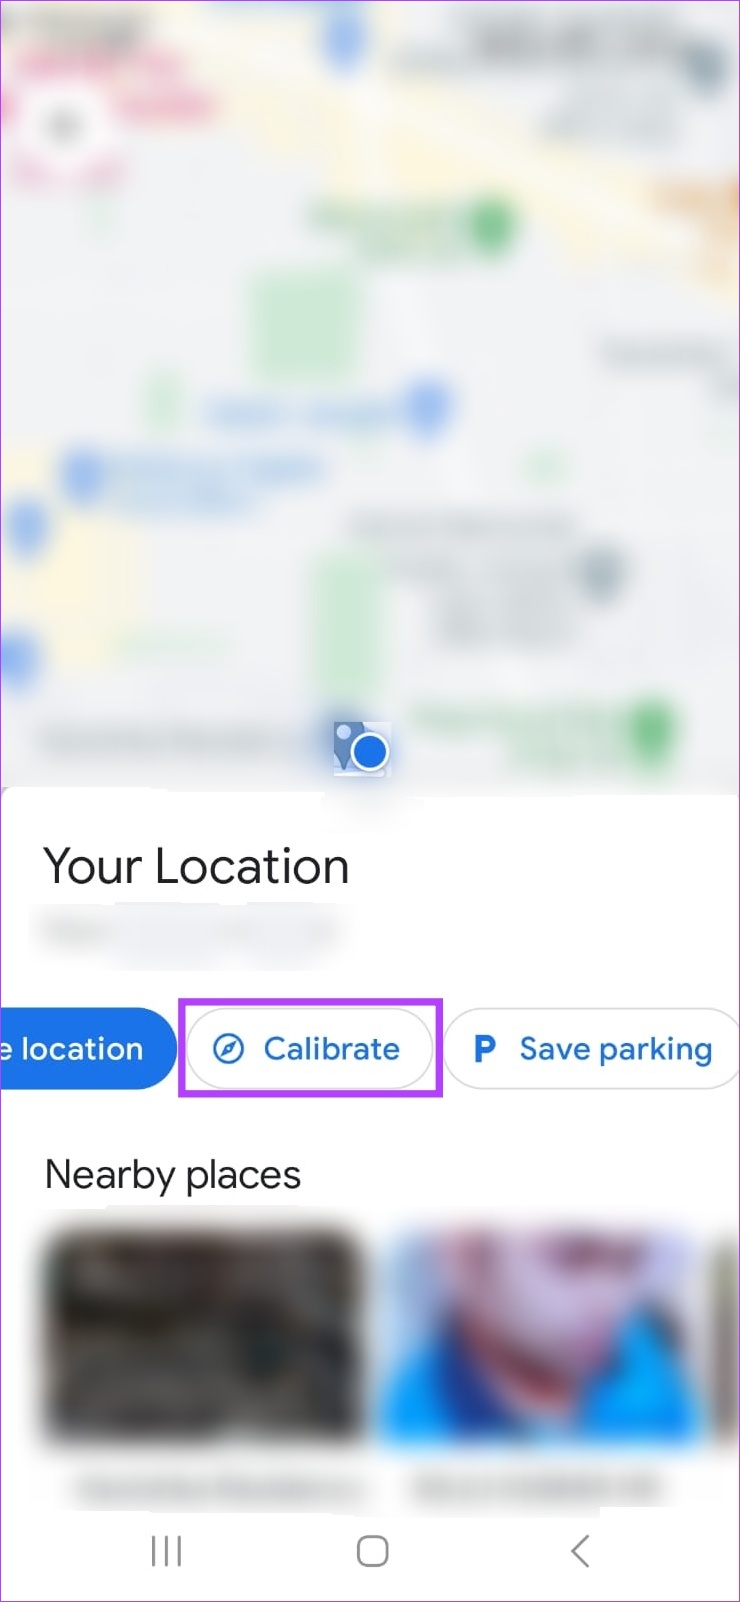
Step 2: Once again move your phone in a circular 8 motion at least 3-4 times.
Step 3: Stop once the Compass accuracy changes from medium to high.

This will again calibrate the compass in the Google Maps app on your Android device.
Method 3: Enable Improved Accuracy on Android
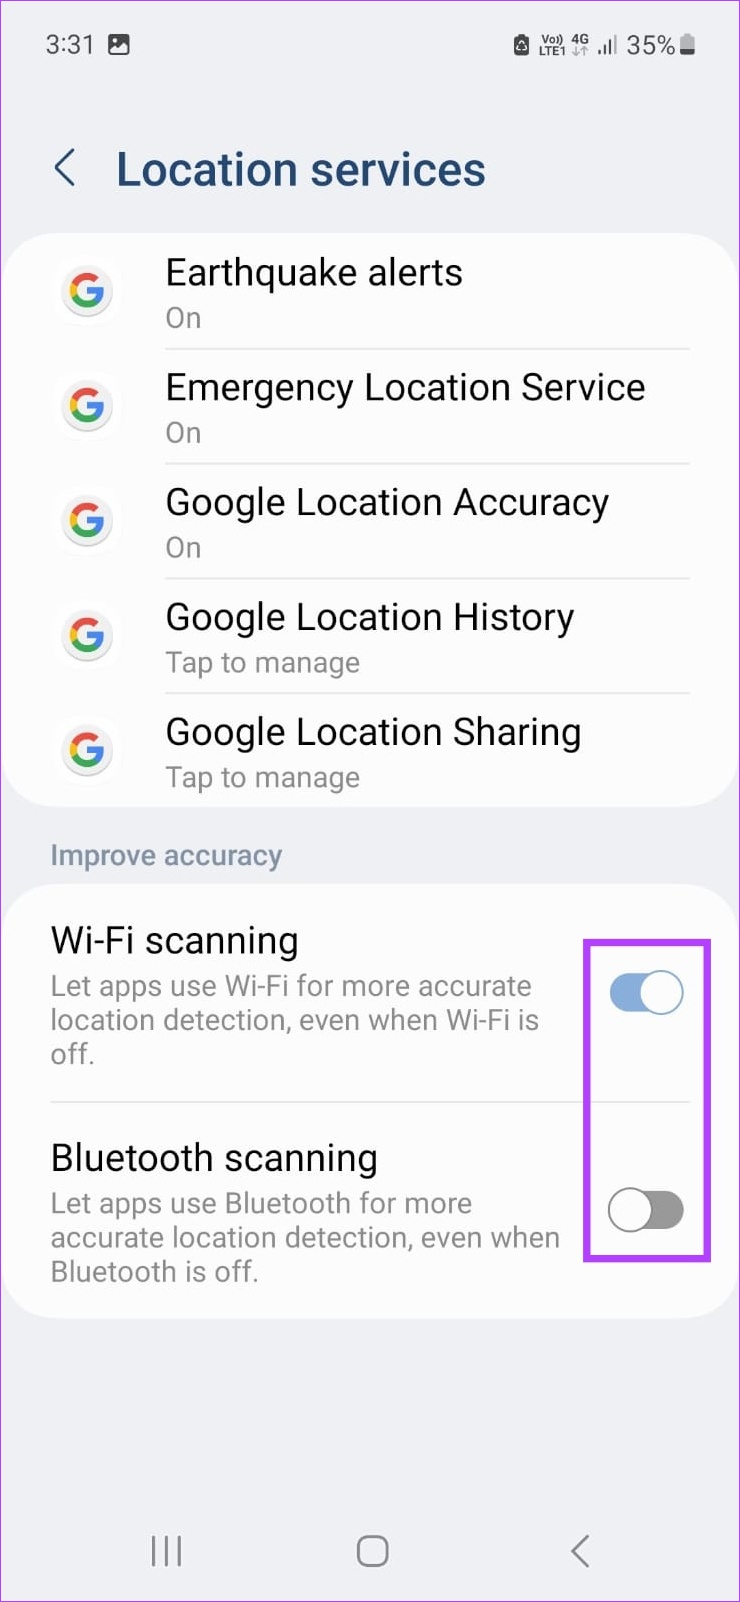
Step 1: Open Settings and tap on Location. Tap on Location services.


Step 2: Turn on the toggle for Wi-Fi scanning and Bluetooth scanning.
Step 3: Then, go back to the Location page and tap on App permissions.

Step 4: Tap on Maps and select Allow all the time. Enable the Use precise location toggle.


This will give Google Maps complete access to location data while ensuring precise location data is available.
Tips for Improving Location Accuracy on Google Maps
While the abovementioned ways will help you in calibrating GPS on your Android and iOS devices, there are other ways to help improve the accuracy of Google Maps. Let’s check out a few of them.
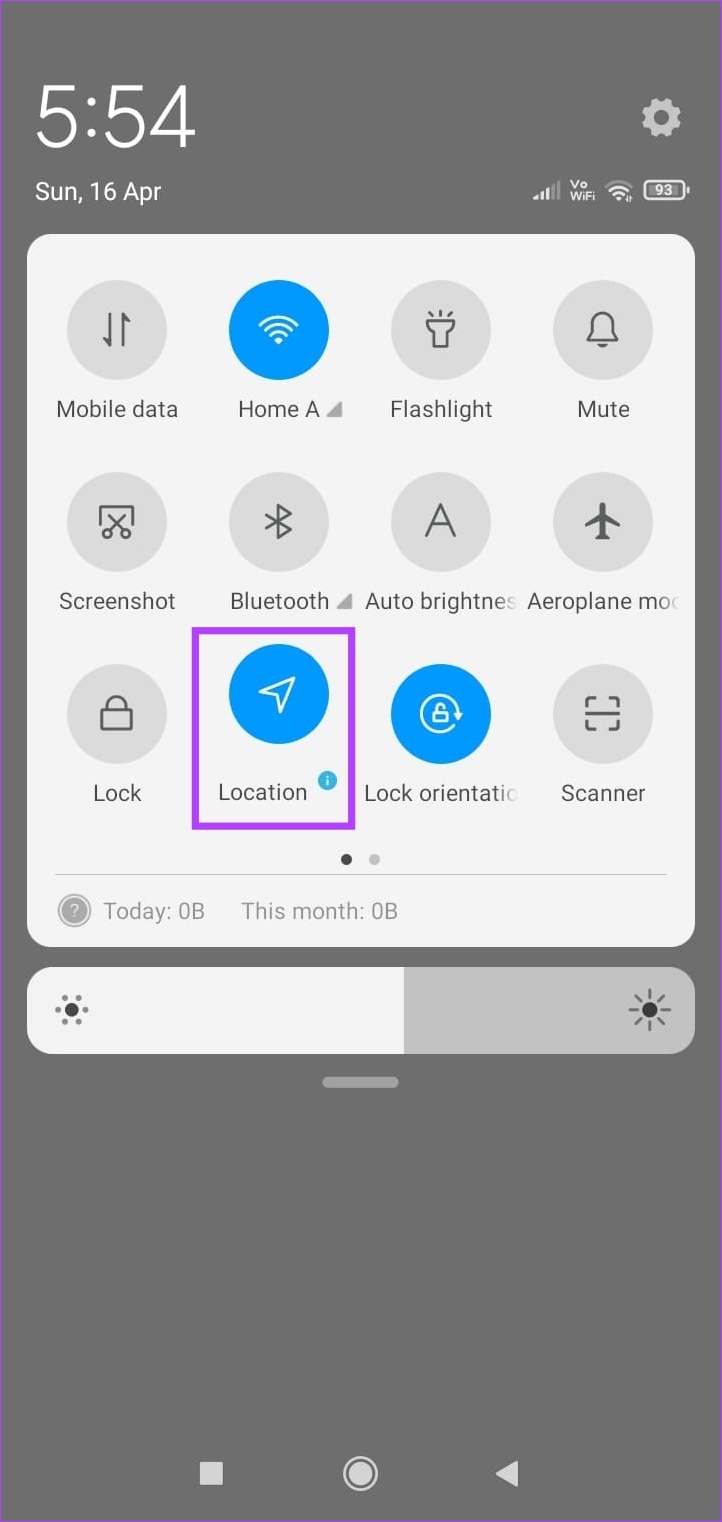
Method 1: Turn on Location Services
As mentioned above, before using the Google Maps mobile app, location services must be turned on. This will allow Google Maps to know exactly where you are, helping in setting a starting point and other directional features for your trip.
Tip: In case your location services are not working on Android and iOS, try restarting your device. Once done, turn on location services again from the quick settings menu.
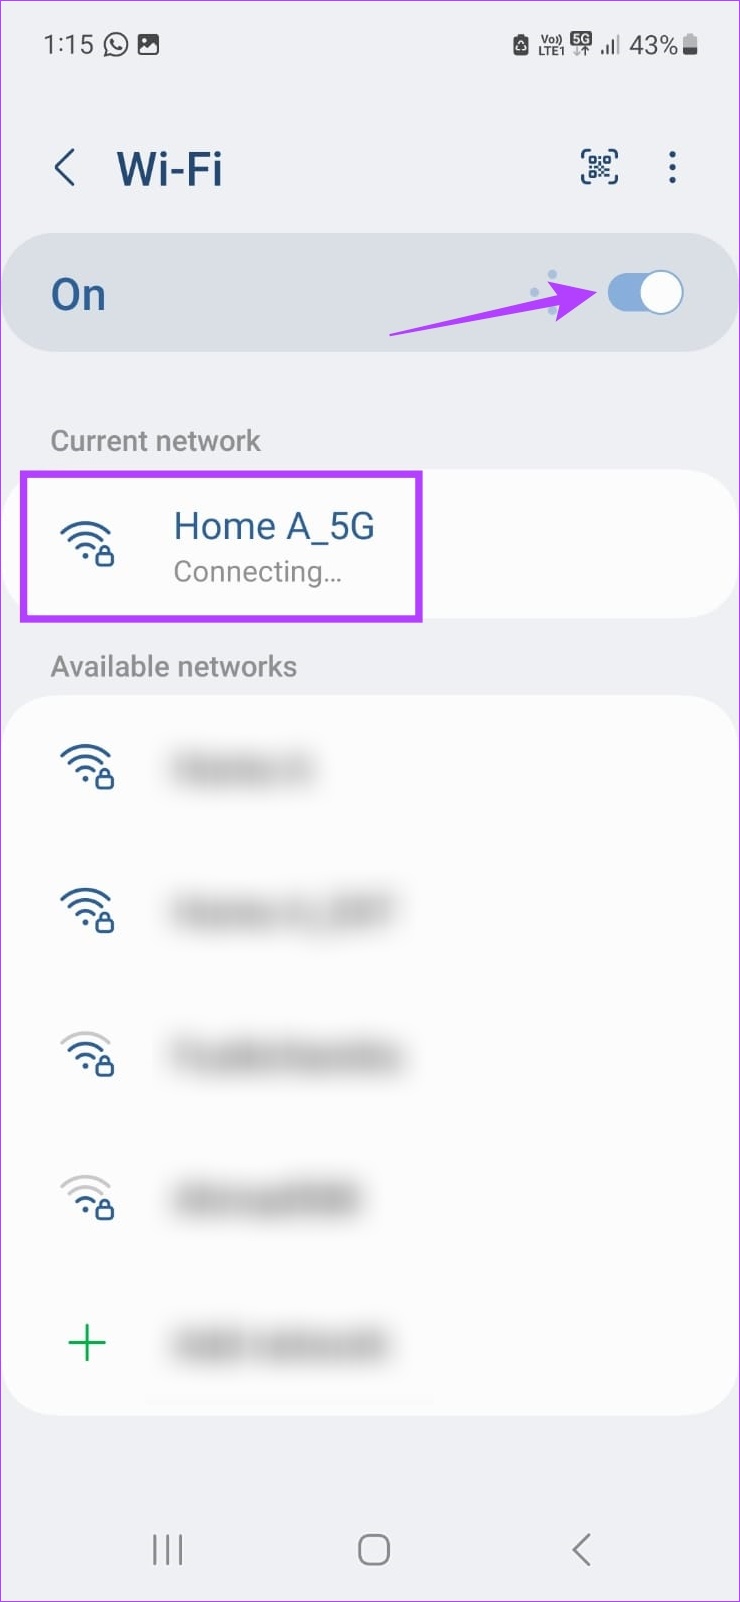
Method 2: Connect to Wi-Fi
Our devices make use of nearby Wi-Fi networks and other hotspot points to try and pinpoint the device’s location. Also known as the Wi-Fi positioning system, this can help improve GPS accuracy when using Google Maps. So, turn on Wi-Fi whenever possible and ensure your device is connected.
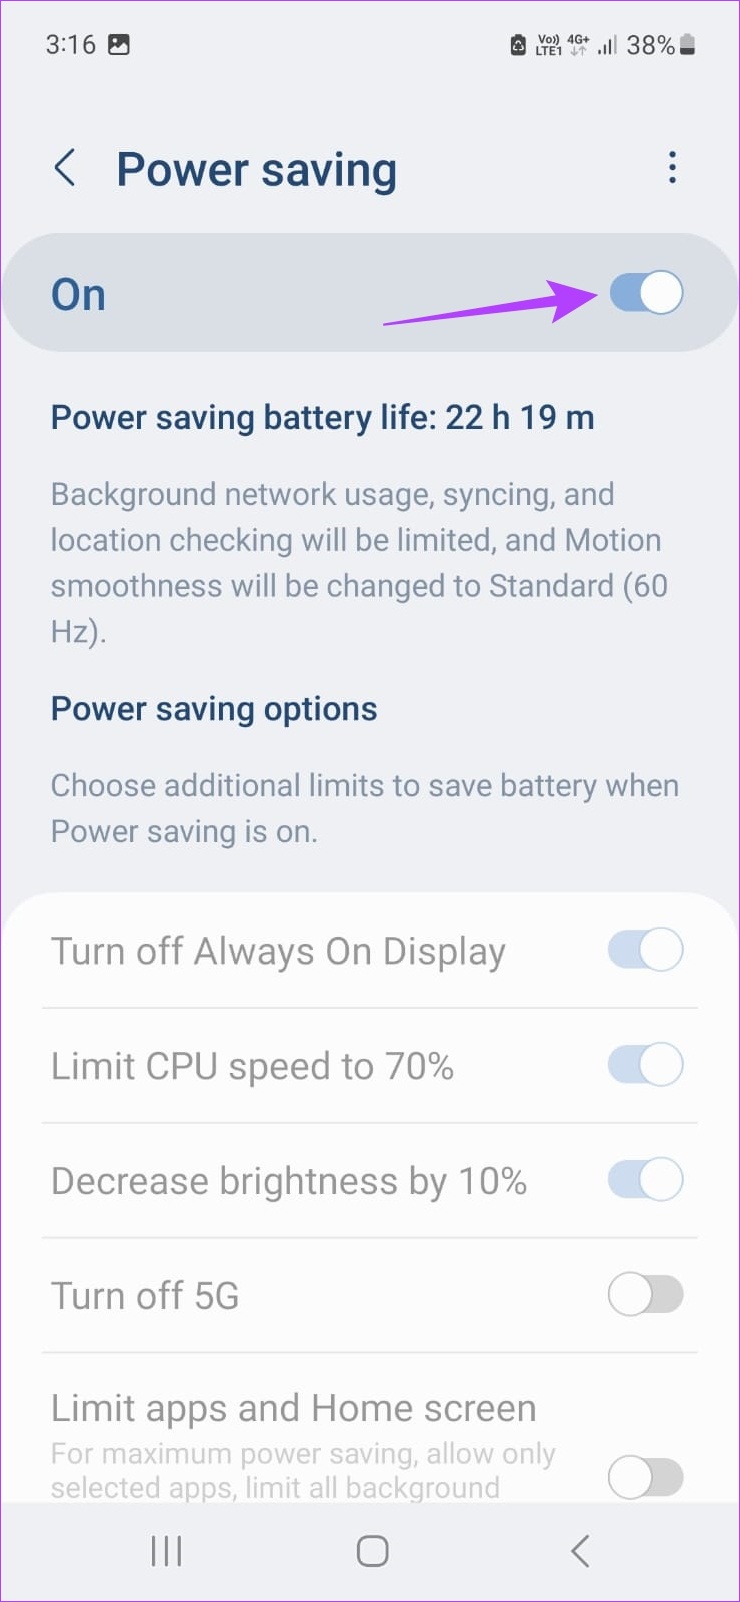
Method 3: Turn off Low Power Mode or Battery Saver
Battery Saver on Android and Low Power Mode on iPhone are great ways to prolong battery life. However, this can impact location and calibration services on your device. So, if you’re facing issues with Google Maps, turning off Low Power Mode or Battery Saver might help fix them.

Method 4: Check for Software Updates
Every software update brings about its fair share of bug fixes, security patches, and introductory new features. This means that if your Google Maps issues are software-based, downloading and installing the latest software update for your Android or iOS device might help fix them.
Was this helpful?
Last updated on 12 July, 2024
Read Next
 How to Check, Calibrate, and Disable the Gyro on Steam Deck
If you're the proud owner of a Steam Deck, you're already well-versed in the joys of portable gaming.
How to Check, Calibrate, and Disable the Gyro on Steam Deck
If you're the proud owner of a Steam Deck, you're already well-versed in the joys of portable gaming.
 How to Switch Between KM and Miles in Google Maps and Apple Maps
How to Change Kilometers to Miles in Apple Maps To change KM to Miles (or vice versa) on iPhone, iPad, and Mac, all you need to do is change your
How to Switch Between KM and Miles in Google Maps and Apple Maps
How to Change Kilometers to Miles in Apple Maps To change KM to Miles (or vice versa) on iPhone, iPad, and Mac, all you need to do is change your
 Google Maps vs Maps Go Comparison: Explaining the Difference
Last year, Google announced the optimized version of Android Oreo operating system, Android Go.
Google Maps vs Maps Go Comparison: Explaining the Difference
Last year, Google announced the optimized version of Android Oreo operating system, Android Go.
 3 Fixes for Google Maps Voice Navigation Not Working on Android and iPhone
Basic Fixes Check volume: Check the volume level on your smartphone, and ensure it isn't low.
3 Fixes for Google Maps Voice Navigation Not Working on Android and iPhone
Basic Fixes Check volume: Check the volume level on your smartphone, and ensure it isn't low.
 3 Ways to Fix Google Maps Not Auto Rotating on iPhone and Android
Before you begin, try to restart the Google Maps app and your smartphone.
3 Ways to Fix Google Maps Not Auto Rotating on iPhone and Android
Before you begin, try to restart the Google Maps app and your smartphone.
 How to Share Custom Route or Directions on Google Maps For PC and Android
Google Maps is quite helpful to navigate your way in an unknown area or city.
How to Share Custom Route or Directions on Google Maps For PC and Android
Google Maps is quite helpful to navigate your way in an unknown area or city.
 4 Ways to Fix Google Maps Draining Battery on Android and iPhone
https://youtu.be/HEEhE2uFRfw Try Basic Fixes Remove the Google Maps widget from home screen: If you use Google Maps' live traffic widget to get traffic information on your home screen, the app’s
4 Ways to Fix Google Maps Draining Battery on Android and iPhone
https://youtu.be/HEEhE2uFRfw Try Basic Fixes Remove the Google Maps widget from home screen: If you use Google Maps' live traffic widget to get traffic information on your home screen, the app’s
 How to Turn Off Voice Navigation in Google Maps for Android and iPhone
How to Turn Off Google Maps Voice Navigation From In-App Settings The most straightforward way to turn off or mute voice directions in Google Maps is from the in-app settings
How to Turn Off Voice Navigation in Google Maps for Android and iPhone
How to Turn Off Google Maps Voice Navigation From In-App Settings The most straightforward way to turn off or mute voice directions in Google Maps is from the in-app settings
The article above may contain affiliate links which help support Guiding Tech. The content remains unbiased and authentic and will never affect our editorial integrity.