Android phones offer an Emergency SOS feature to get in touch with your trusted contacts during unfavorable situations quickly. You can use it to send your location details to your trusted contacts and your respective authorities.

In the case of emergencies, storing your Medical Info is also helpful as it lets other individuals aid you well. This post will share the steps to add and manage your Medical Info on your Samsung Galaxy phone. We will also cover steps for Stock Android phones.
Add Medical Info on Your Samsung Galaxy Phone
Adding your Medical Info helps first responders and medical personnel attend to your needs quickly. We recommend you enable this feature on your loved ones’ Android smartphones, too. Here’s how to add your details on your Samsung Galaxy phone.
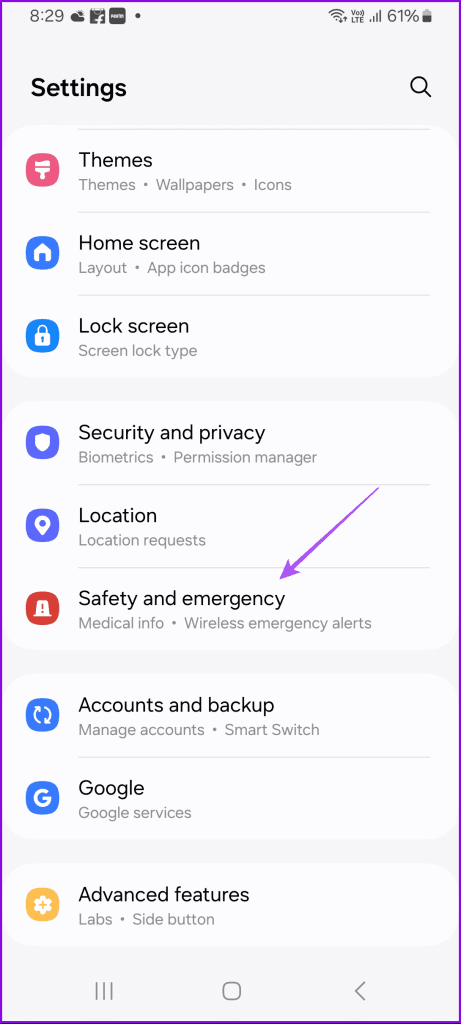
Step 1: Open Settings and tap on Safety and Emergency.
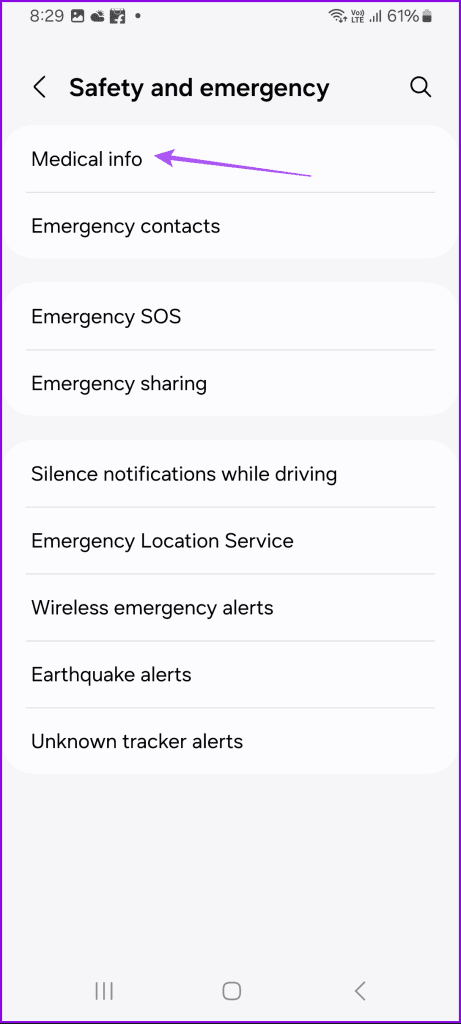
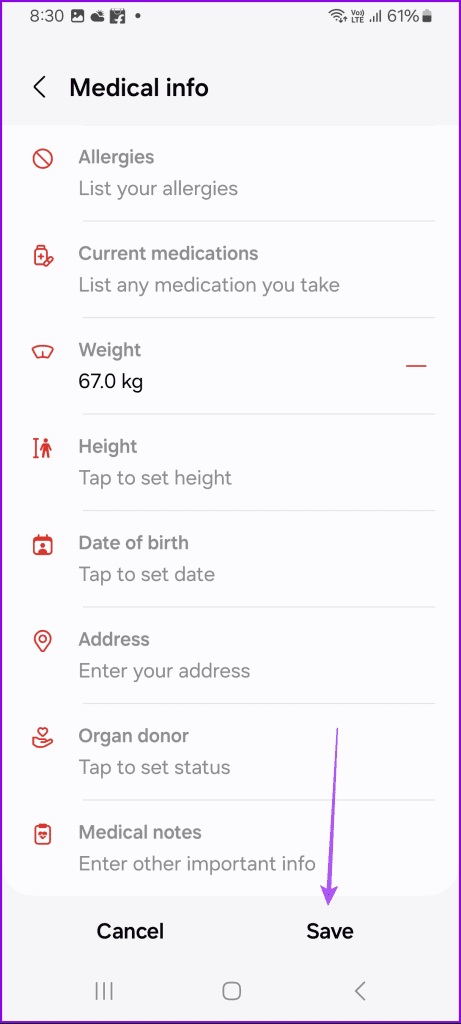
Step 2: Tap on Medical Info at the top.
Step 3: Add your details like medical conditions, blood type, allergies, medications, etc.

Step 4: Once done, tap on Save at the bottom.
You will now be asked to show or hide your medical information on the lock screen.

Add Emergency Contacts on Your Samsung Galaxy Phone
Just like your medical info, adding your emergency contact details is also advised. These contacts can be reached in the case of an emergency, even when your phone screen is locked.
Step 1: Open Settings and tap on Safety and Emergency.
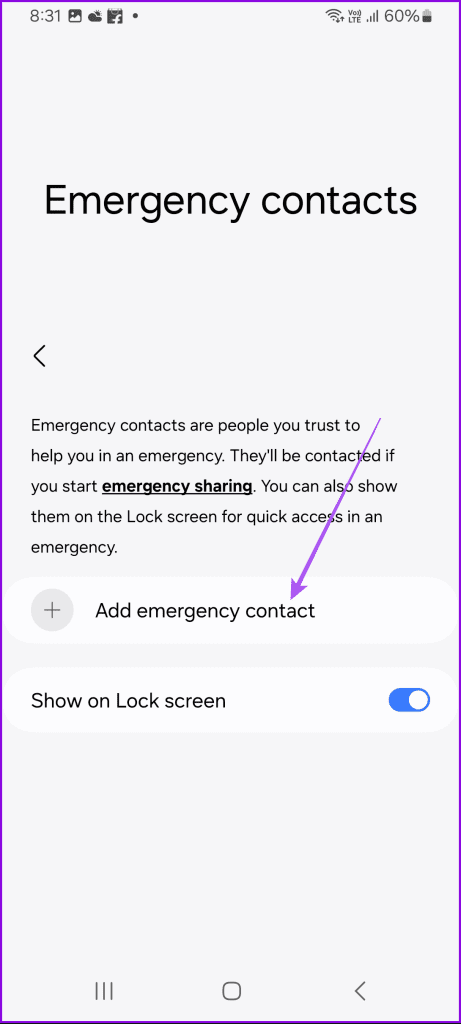
Step 2: Tap on Emergency Contacts.

Step 3: Tap on Add Emergency Contact.
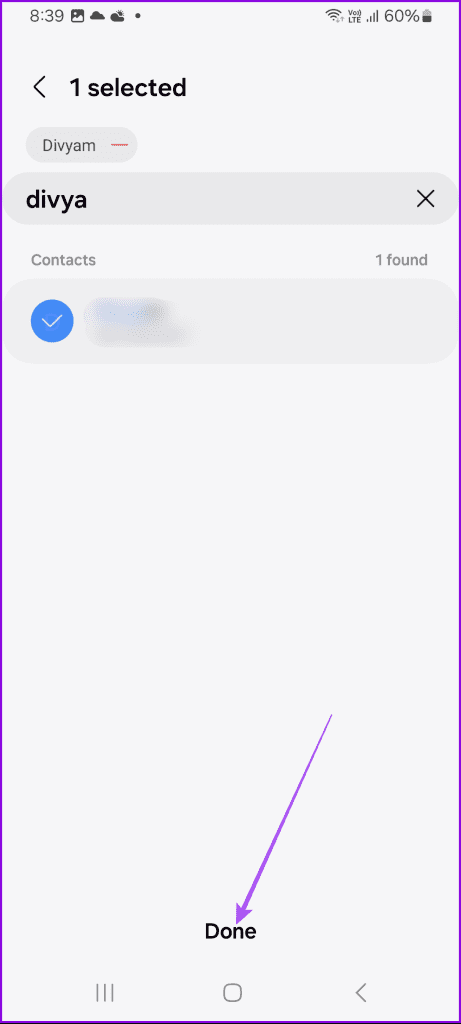
Step 4: Select your contacts and tap on Done at the bottom to confirm.
We also suggest enabling the prompt to show your emergency contacts on your lock screen as well. You can go back to the same options to edit your information as and when required.

Access Medical ID on Samsung Galaxy Phone
Once you have added your details, here’s how to access them in case of emergencies. Do note that one can access the Medical Info only if you have a screen lock on your Android phone.
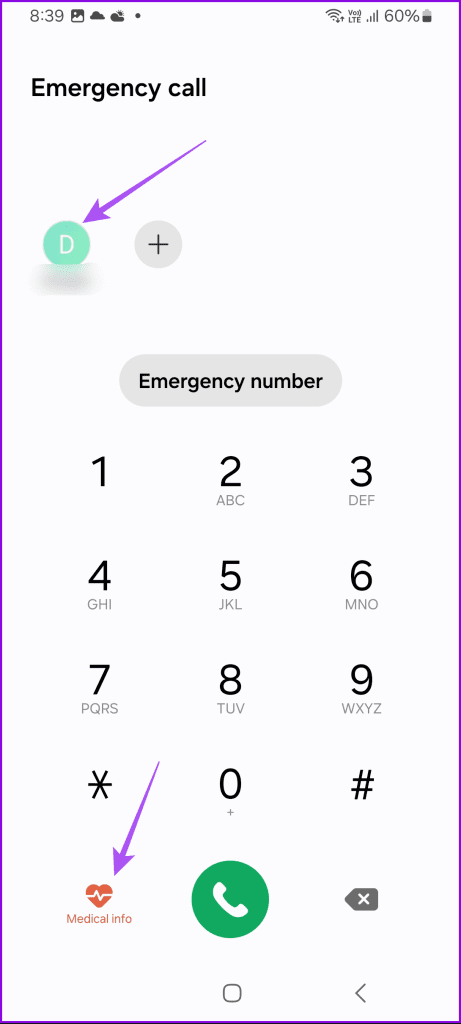
Step 1: Swipe up on the lock screen of the Samsung Galaxy phone and tap on Emergency Call.
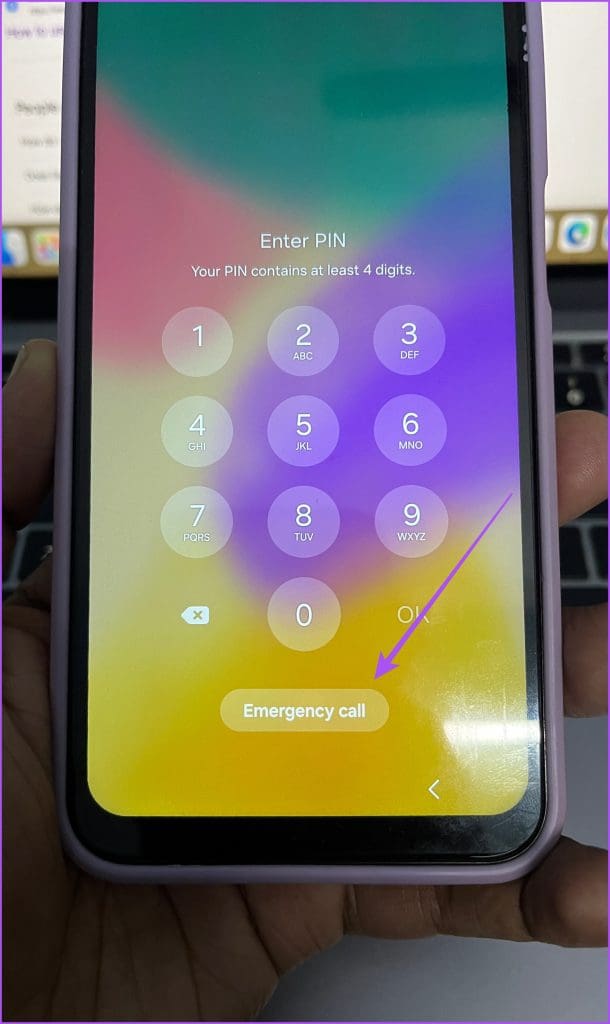
Step 2: Tap on the emergency contact name to start the call or tap on Medical Info at the bottom-left corner.
Add Medical Info on Stock Android Phone
For those using Stock Android, here’s how you can add your medical information and emergency contacts using the Personal Safety app. This was earlier available for Google Pixel phones. But now, every Stock Android phone supports this feature.
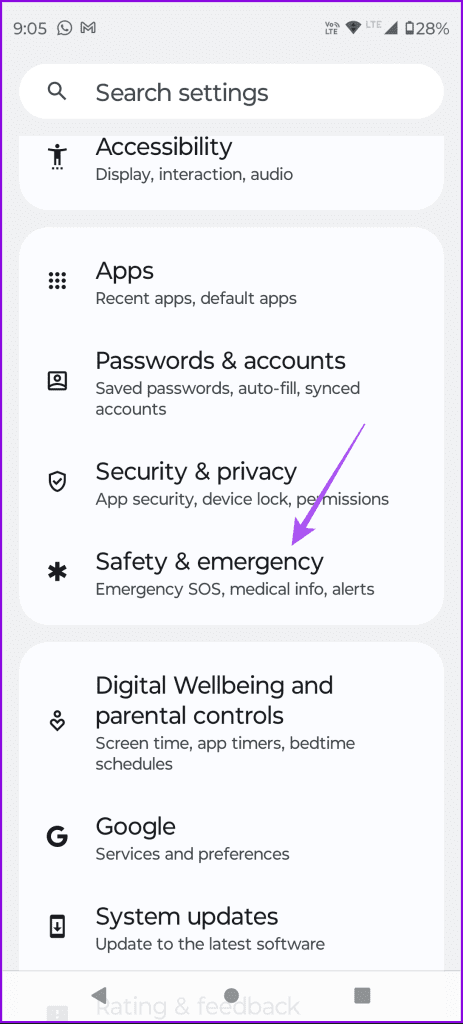
Step 1: Open Settings and tap on Safety and Emergency.
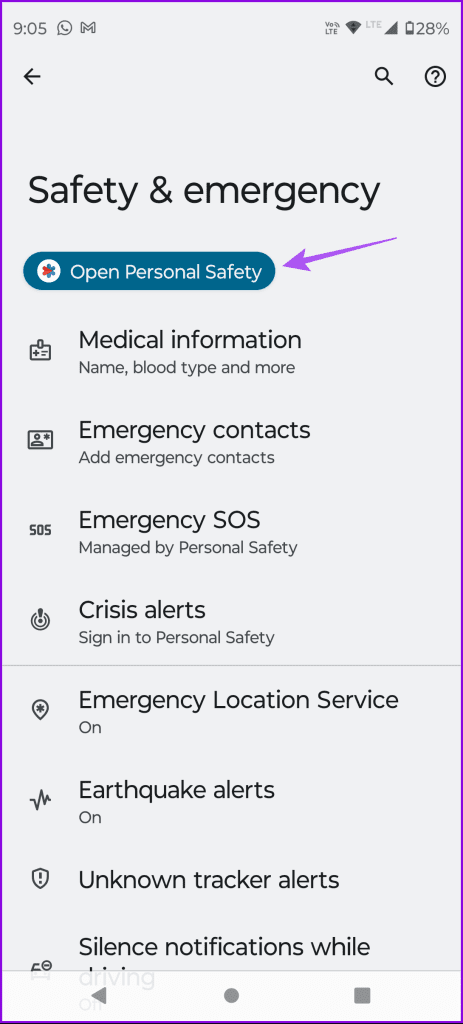
Step 2: Tap on Open Personal Safety and log in with your Google account.
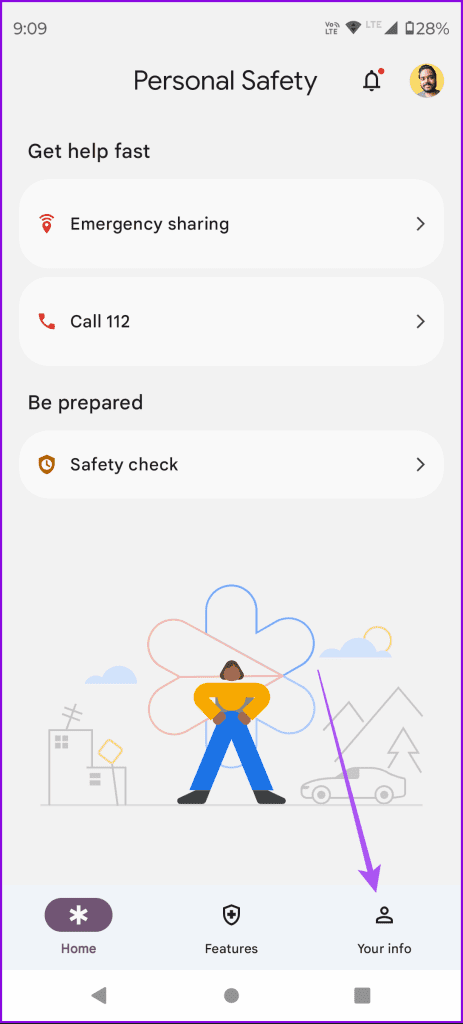
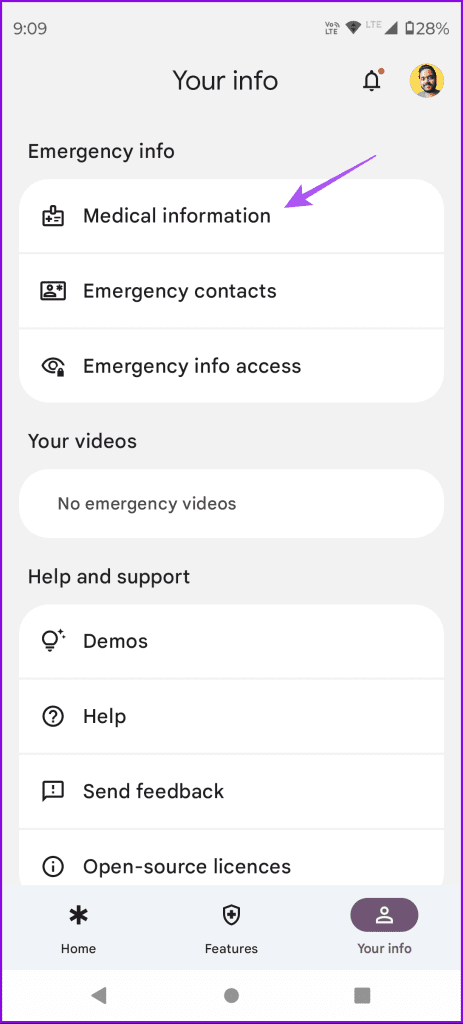
Step 3: In the Personal Safety app, tap on Your Info at the bottom-right corner.
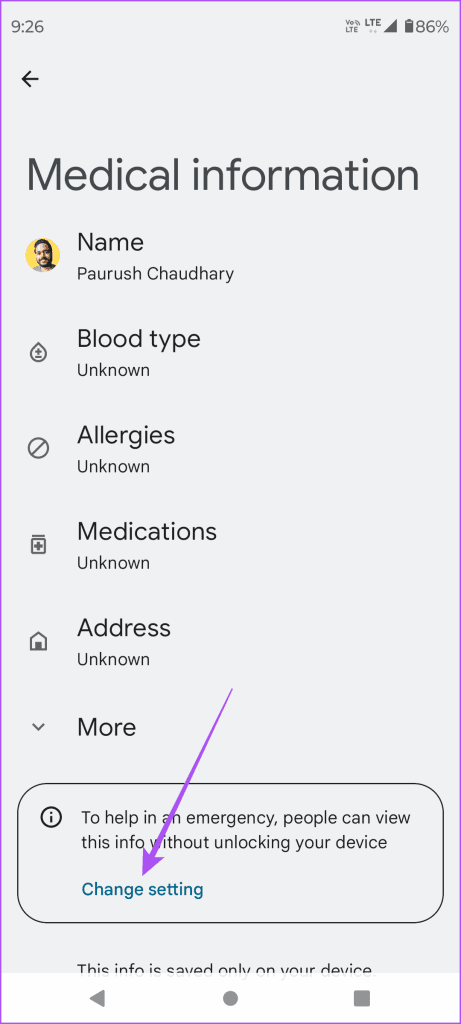
Step 4: Tap on Medical Infomation and enter your details.
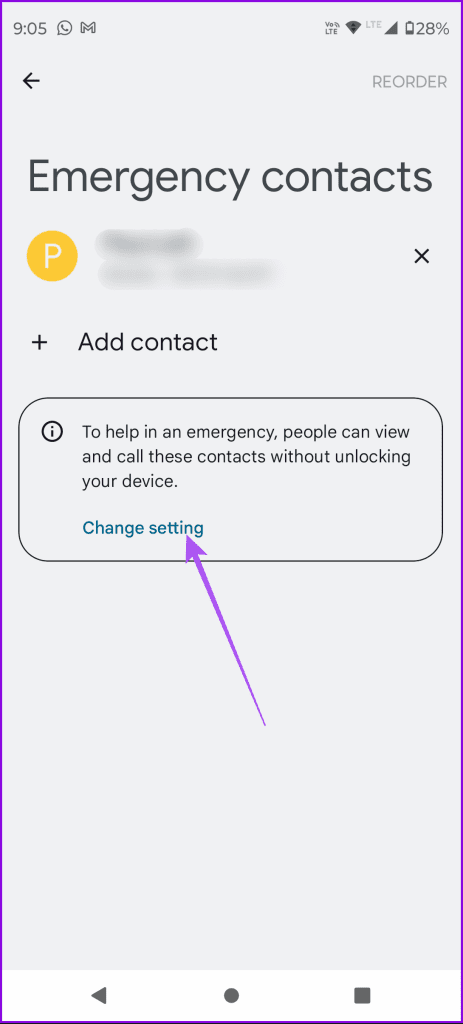
Step 5: Once done, tap on Change Settings at the bottom.
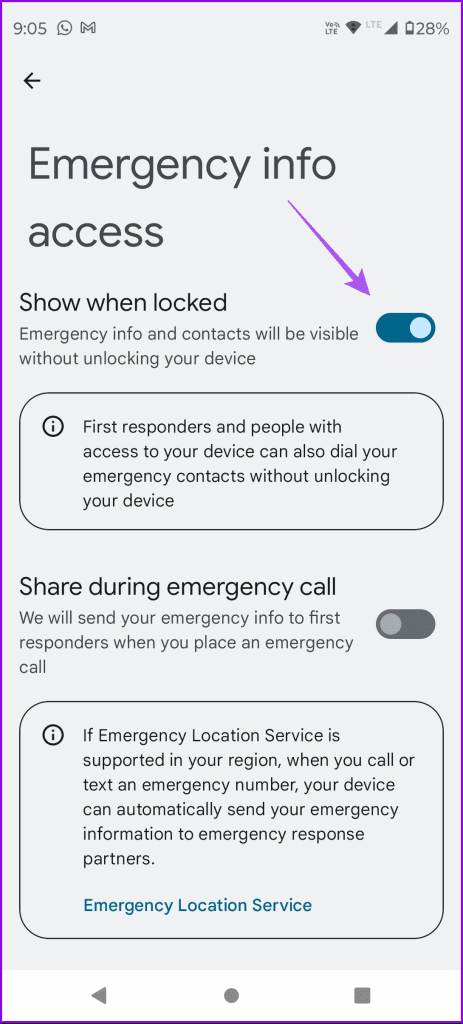
Step 6: Ensure that you have enabled the prompt to show your medical info on the lock screen.
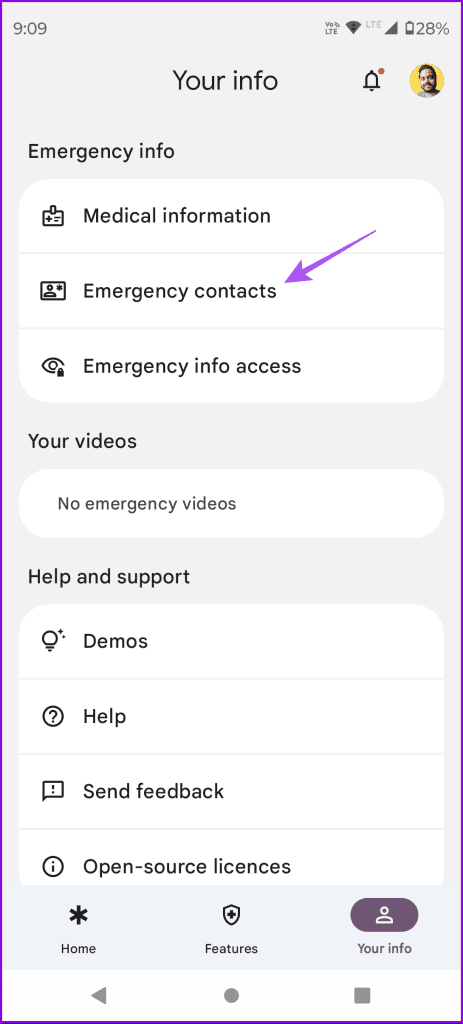
Step 7: Go back to Personal Safety and tap on Emergency Contacts.
Step 8: Tap on Add Contact and select from your list of contacts.

Step 9: Tap on Change Settings and ensure that the contact info can be viewed on your lock screen.
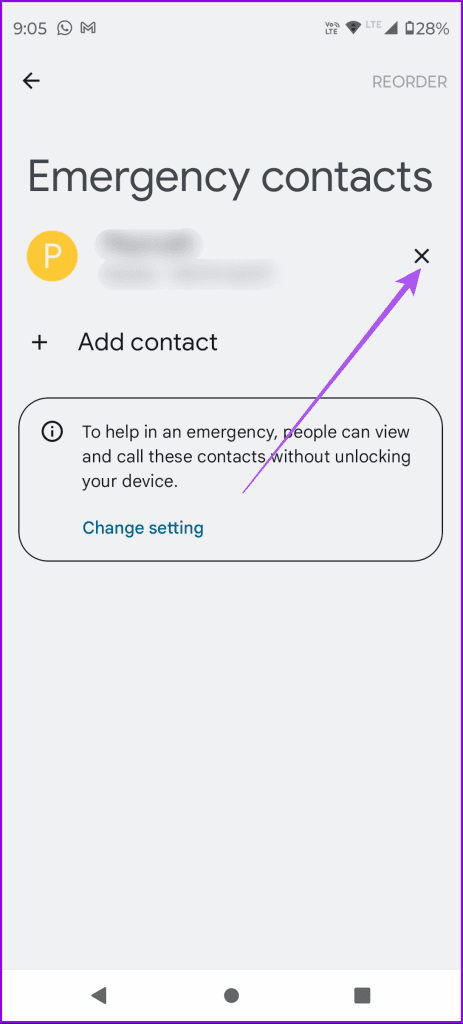
You can always remove your contacts by tapping the X icon and selecting Remove.

Access Medical Info on Android Phone
Note that one can access the Medical Info only if your Android phone has a screen lock.
Step 1: Swipe up on the Android phone home screen and tap on Emergency Call.
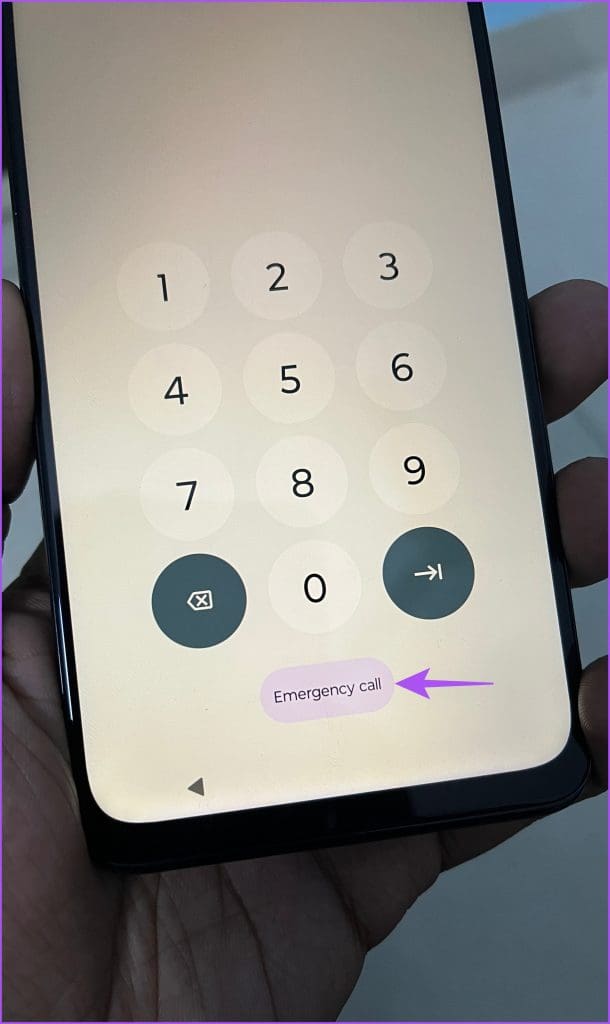
Step 2: Tap on View Emergency Info.

You will now see the Medical Info and Emergency Contact name.
Be Prepared For Emergencies
You can add and manage your Medical Info on your Samsung Galaxy phones and Stock Android phones to help others and vice versa in the case of an emergency. You can also enable Unknown Tracker Alerts on your Android phone for your safety. This feature is designed to protect your personal belongings from being tracked by unknown devices such as AirTags, Tile, or Samsung Galaxy SmartTags. If a Bluetooth tracker is placed in your handbag or other belongings, you will receive a notification on your Android phone when the tracker is nearby. This will help prevent any intentional or unintentional tracking of your personal property.
Was this helpful?
Last updated on 19 February, 2024
Read Next
 How to Manage OneDrive on Samsung Galaxy Phones
Because of a long-standing partnership between Samsung and Microsoft, all Galaxy phones come pre-installed with Microsoft apps like Outlook, OneDrive, OneNote, Office, and more.
How to Manage OneDrive on Samsung Galaxy Phones
Because of a long-standing partnership between Samsung and Microsoft, all Galaxy phones come pre-installed with Microsoft apps like Outlook, OneDrive, OneNote, Office, and more.
 How to Add Custom Camera Widget on Samsung Galaxy Phones
One UI 6 introduced a revamped design and loads of new features for Samsung Galaxy users.
How to Add Custom Camera Widget on Samsung Galaxy Phones
One UI 6 introduced a revamped design and loads of new features for Samsung Galaxy users.
 How to Disable the Samsung Pay Swipe Up Gesture on Samsung Galaxy Phones
Samsung Pay is one of the best Google Pay alternatives out there.
How to Disable the Samsung Pay Swipe Up Gesture on Samsung Galaxy Phones
Samsung Pay is one of the best Google Pay alternatives out there.
 9 Best Fixes for Samsung Galaxy Store Not Downloading Apps on Samsung Phones
If the Google Play Store stops working on your Samsung phone, you can switch to downloading apps from the Samsung Galaxy Store.
9 Best Fixes for Samsung Galaxy Store Not Downloading Apps on Samsung Phones
If the Google Play Store stops working on your Samsung phone, you can switch to downloading apps from the Samsung Galaxy Store.
 Samsung My Files vs Google Files: Which File Manager Is Better on Galaxy Phones
Samsung apps are bundled to replace the official Google Apps in the One UI.
Samsung My Files vs Google Files: Which File Manager Is Better on Galaxy Phones
Samsung apps are bundled to replace the official Google Apps in the One UI.
 7 Ways to Fix Camera Failed Error on Samsung Galaxy Phones
Fix 1: Check Internal Storage and Phone Temperature You must have sufficient internal storage on your Samsung Galaxy phone for the Camera app to store new photos and videos.
7 Ways to Fix Camera Failed Error on Samsung Galaxy Phones
Fix 1: Check Internal Storage and Phone Temperature You must have sufficient internal storage on your Samsung Galaxy phone for the Camera app to store new photos and videos.
 How to Use Modes and Routines on Samsung Galaxy Phones
Modes and Routines are neat features in One UI for the Samsung Galaxy phone.
How to Use Modes and Routines on Samsung Galaxy Phones
Modes and Routines are neat features in One UI for the Samsung Galaxy phone.
The article above may contain affiliate links which help support Guiding Tech. The content remains unbiased and authentic and will never affect our editorial integrity.