Google Slides makes it easy to create, manage, and collaborate on presentations anywhere. While fairly easy to use, there are still some Google Slides tips and tricks to boost your productivity. That’s why we have compiled a list of best Google Slides tricks to help you use it like a pro.

These tips will help you get more stuff done faster, make you more productive, and allow you to get more from Slides.
Let’s begin.
Note: I’ve used a dark theme extension for Google Chrome and that’s why the screenshots have a dark background.
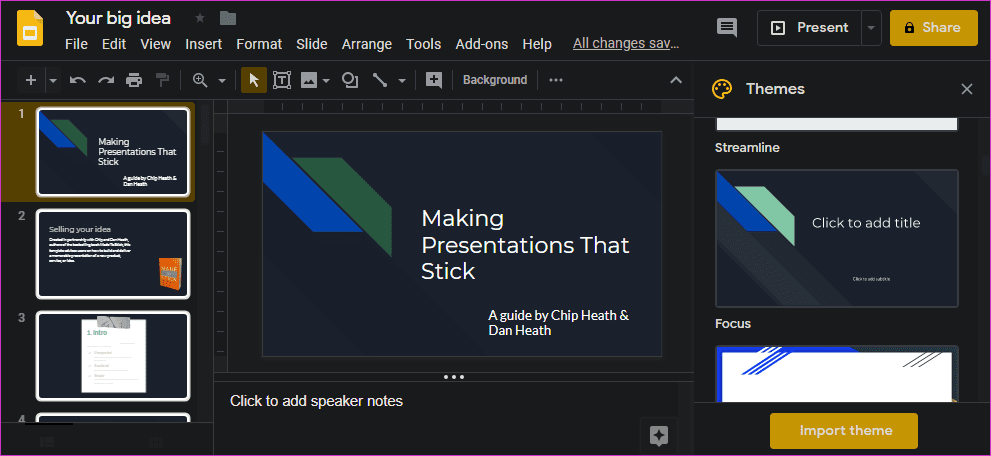
1. How to Change Theme in Google Slides
You can change both background and themes in Google Slides. The later comes with a preconfigured set of background images, fonts, layout, and colors. Open a slide in your favorite browser and click on the Theme button in the toolbar above.

You will now notice a set of themes available to apply in the right sidebar. Scroll to choose the one you like and click on it to apply the theme.

There is no confirmation dialogue. Changes will be applied the moment you select a theme.
2. How to Change Google Slide Size
Click on the File menu and scroll a little to select Page setup.

You can now choose from the drop-down menu in the pop-up that follows.

You can set a custom value as well.

Click on Apply when done.
3. How to Print Notes in Google Slides
A lot of presenters, especially beginners, like to keep notes for each slide. Here is how to print notes for each slide. Open the slide, click on the File menu and select Print settings and preview.

Select the ‘1 slide with notes’ option here. You can choose any other option in the toolbar menu as per your needs.

When done, give the print command.
4. How to Loop Google Slides
Looping will allow you to play the entire Google Slide automatically on repeat mode. The presentation will begin playing from the first slide when the last one is done playing.
Open the Google Slide that you want to play on a loop and click on Present to begin the presentation.

Click on the gear icon at the bottom of the screen and select Loop under Auto-advance (when played) option.
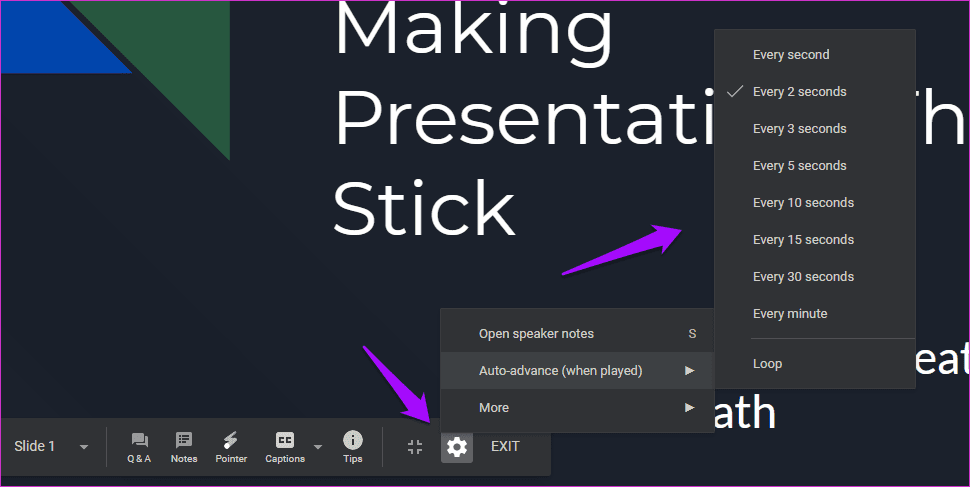
You can now select the timer, which begins from 1 second and goes up to 1 minute.
5. How to Add Animation in Google Slides
You can add animations and transitions in Google Slides in no time. Just make sure not to go overboard with it. Keep it subtle.
6. How to Hide a Slide in Google Slides
You can hide or skip a slide in Google Slides so that it is not visible when giving a presentation. Right-click on the slide you want to hide/skip in the left window-pane and select Skip slide.

The slide should now have a canceled eye icon, which is not clearly visible in my case because I am using a dark mode in my browser.

7. How to Time Slides in Google Slides
The timing between each slide will be the same. You can’t time one slide after 5 seconds and the next one after 10. It can be limiting for some people, but that’s how it is for now.
Click on the File menu and select Publish to the web option.

Click on the drop-down menu below Auto-advance slides to select a timer.

There are a few other options for when you want to give a presentation, and they are all self-explanatory.
8. How to Add Music to Google Slides
There is no direct way to add music to slides in Google Slides. That’s a shame because a lot of presenters use music to showcase their work. There is a workaround to this problem, so you don’t have to worry.
9. How to Wrap Text in Google Slides
There is no way to wrap text in Google Slides. Period. That’s unacceptable because this is a basic feature that you would find on any decent word editor, including Google Docs. You can try resizing the image and moving it around, but that’s all. That sounds like too much trouble.
10. How to Change Text Color in Google Slides
That’s easy. Select the text you want to change the color of and click on the color icon denoted by A.
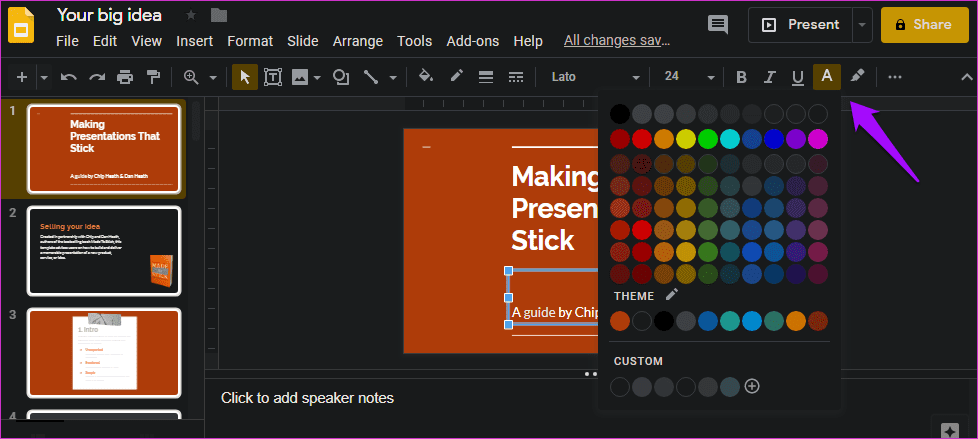
You can choose any color here or even select custom colors. Close the menu once done and deselect the text to see the effect.
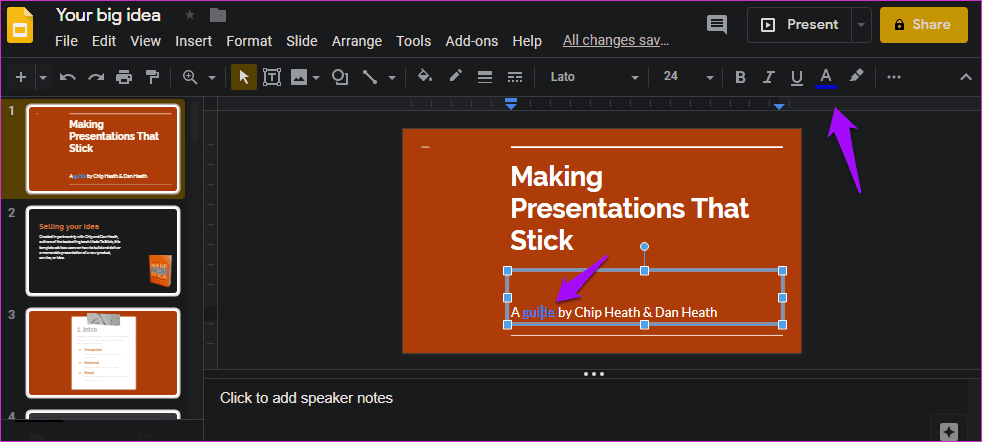
The line below the color icon will change when you move the cursor there. You can use the same method to format the text any way you want, like bold, italic, underline, change color, and so on.
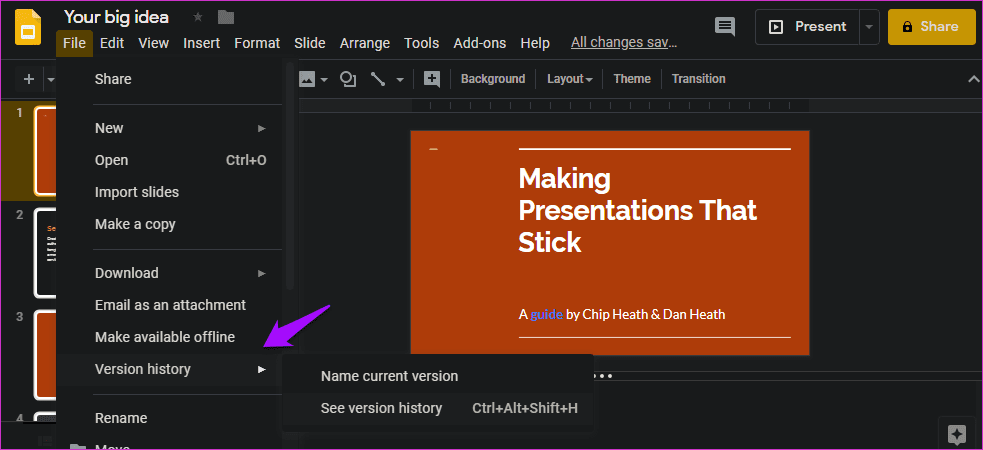
11. How to View Version History in Google Slides
Click on the File menu and select See version history under Version history. There is also an option to name the current version so you could find it quickly later.
You can now choose an older version of the presentation from the sidebar menu in the right. The versions are named by date and time by default.
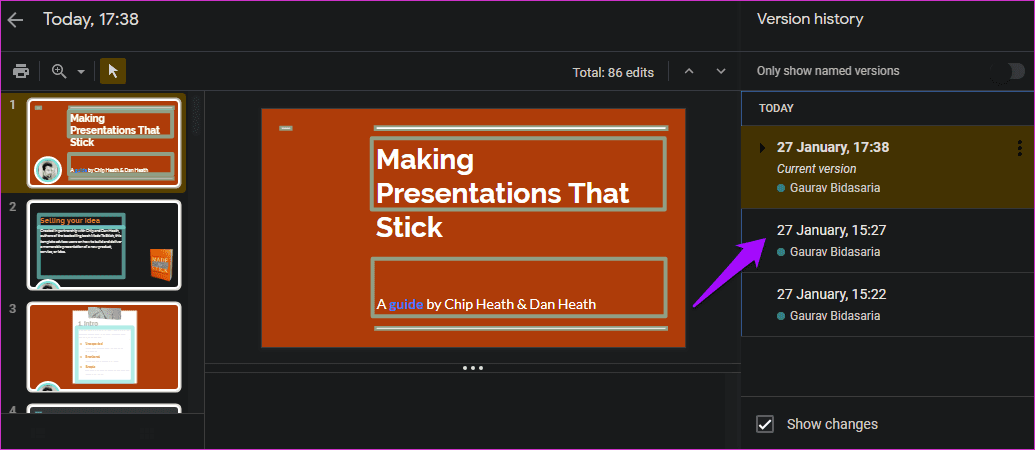
As I noted earlier, you can name versions too.
Slide It
Google Slides is super easy to use and comes with a lot of features. Some of these features are not so obvious. At the same time, it also lacks some basic ones like the ability to wrap text around an image. But you don’t get everything in life. Google Slides is free for life with no strings attached. That’s got to count for something.
Next up: Wondering how Google Slides stacks up against Microsoft PowerPoint? Click on the link below to learn more in our in-depth comparison between the two.
Was this helpful?
Last updated on 03 February, 2022
Read Next
 Top 11 Google Slides Animation Tips and Tricks to Use It Like a Pro
Presentations offer you a space to get creative.
Top 11 Google Slides Animation Tips and Tricks to Use It Like a Pro
Presentations offer you a space to get creative.
 Top 15 Tips to Edit Images in Google Slides
What would a presentation be without any images?
Top 15 Tips to Edit Images in Google Slides
What would a presentation be without any images?
 22 Best Google Docs Tips and Tricks to Use It Like a Pro
Google Docs is a great tool to have in your arsenal, whether you're writing a project report, book, or journaling.
22 Best Google Docs Tips and Tricks to Use It Like a Pro
Google Docs is a great tool to have in your arsenal, whether you're writing a project report, book, or journaling.
 How to Fit an Image in Shape on Google Slides on Mobile and PC
Most Google Drive services like Google Docs, Slides, etc., offer built-in image editing capabilities.
How to Fit an Image in Shape on Google Slides on Mobile and PC
Most Google Drive services like Google Docs, Slides, etc., offer built-in image editing capabilities.
 How to Make Images Circular in Google Slides
The beauty of a presentation lies in how well it is presented pictorially.
How to Make Images Circular in Google Slides
The beauty of a presentation lies in how well it is presented pictorially.
 How to Create Images with Duet AI in Google Slides
With the advent of AI, your everyday tasks like writing, photo editing, image search, and more have become a breeze.
How to Create Images with Duet AI in Google Slides
With the advent of AI, your everyday tasks like writing, photo editing, image search, and more have become a breeze.
The article above may contain affiliate links which help support Guiding Tech. The content remains unbiased and authentic and will never affect our editorial integrity.